2018 Peugeot 308 door lock
[x] Cancel search: door lockPage 52 of 324
50
Electric windows
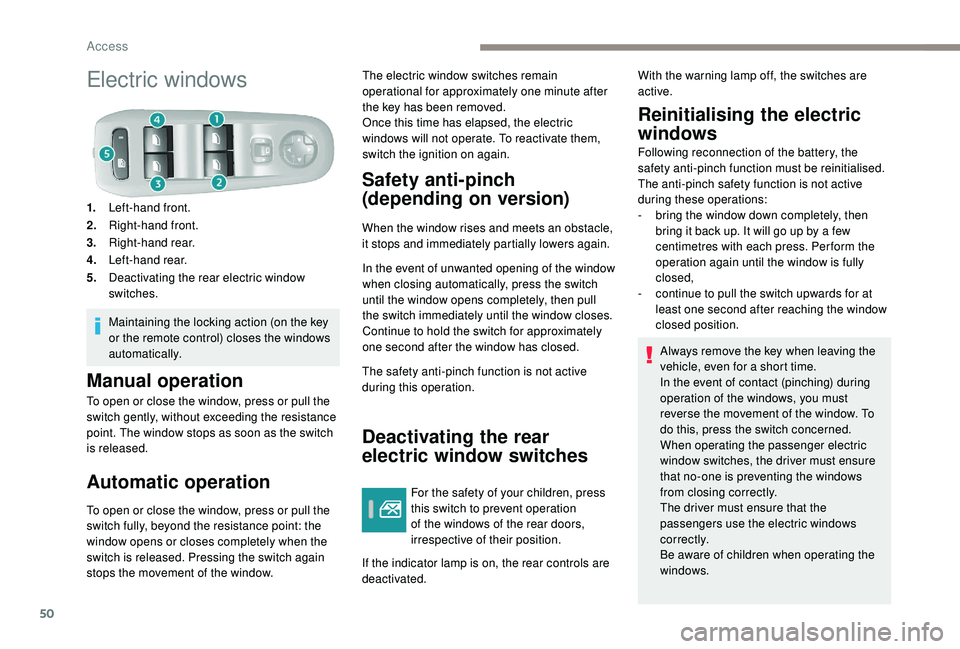
1.Left-hand front.
2. Right-hand front.
3. Right-hand rear.
4. Left-hand rear.
5. Deactivating the rear electric window
switches.
Maintaining the locking action (on the key
or the remote control) closes the windows
automatically.
Manual operation
To open or close the window, press or pull the
switch gently, without exceeding the resistance
point. The window stops as soon as the switch
is released.
Automatic operation
To open or close the window, press or pull the
switch fully, beyond the resistance point: the
window opens or closes completely when the
switch is released. Pressing the switch again
stops the movement of the window. The electric window switches remain
operational for approximately one minute after
the key has been removed.
Once this time has elapsed, the electric
windows will not operate. To reactivate them,
switch the ignition on again.
Safety anti-pinch
(depending on version)
When the window rises and meets an obstacle,
it stops and immediately partially lowers again.
In the event of unwanted opening of the window
when closing automatically, press the switch
until the window opens completely, then pull
the switch immediately until the window closes.
Continue to hold the switch for approximately
one second after the window has closed.
The safety anti-pinch function is not active
during this operation.
Deactivating the rear
electric window switches
For the safety of your children, press
this switch to prevent operation
of the windows of the rear doors,
irrespective of their position.
If the indicator lamp is on, the rear controls are
deactivated.
Reinitialising the electric
windows
Following reconnection of the battery, the
safety anti-pinch function must be reinitialised.
The anti-pinch safety function is not active
during these operations:
-
b
ring the window down completely, then
bring it back up. It will go up by a few
centimetres with each press. Per form the
operation again until the window is fully
closed,
-
c
ontinue to pull the switch upwards for at
least one second after reaching the window
closed position.
Always remove the key when leaving the
vehicle, even for a short time.
In the event of contact (pinching) during
operation of the windows, you must
reverse the movement of the window. To
do this, press the switch concerned.
When operating the passenger electric
window switches, the driver must ensure
that no-one is preventing the windows
from closing correctly.
The driver must ensure that the
passengers use the electric windows
c o r r e c t l y.
Be aware of children when operating the
windows.
With the warning lamp off, the switches are
active.
Access
Page 57 of 324
55
Steering wheel adjustment
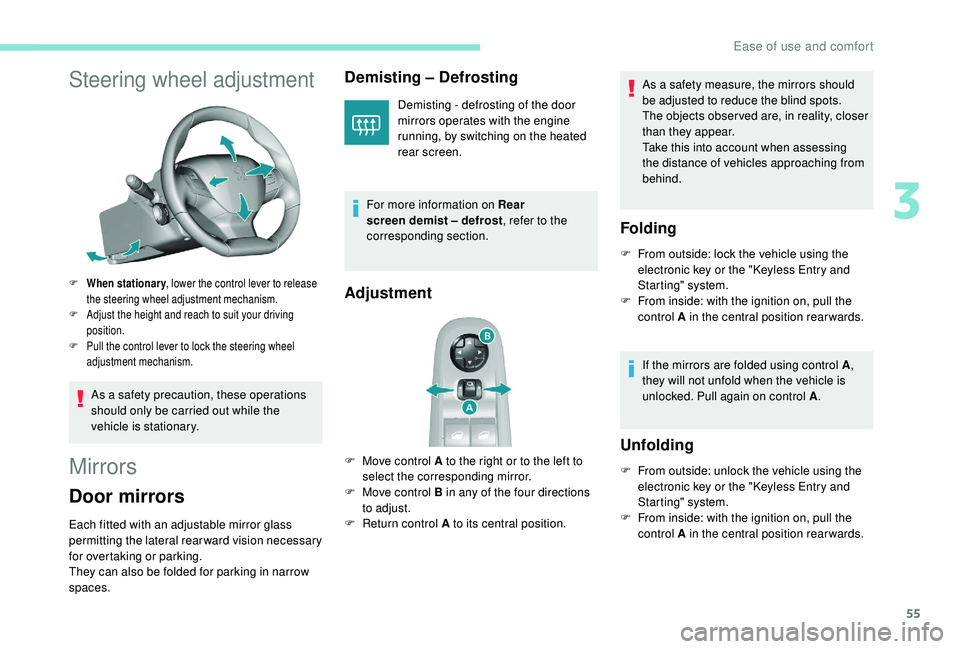
F When stationary, lower the control lever to release
the steering wheel adjustment mechanism.
F
A
djust the height and reach to suit your driving
position.
F
P
ull the control lever to lock the steering wheel
adjustment mechanism.
As a safety precaution, these operations
should only be carried out while the
vehicle is stationary.
Mirrors
Door mirrors
Each fitted with an adjustable mirror glass
permitting the lateral rearward vision necessary
for overtaking or parking.
They can also be folded for parking in narrow
spaces.
Demisting – Defrosting
Demisting - defrosting of the door
mirrors operates with the engine
running, by switching on the heated
rear screen.
For more information on Rear
screen demist – defrost , refer to the
corresponding section.
Adjustment
F Move control A to the right or to the left to select the corresponding mirror.
F
M
ove control B in any of the four directions
to adjust.
F
R
eturn control A to its central position. As a safety measure, the mirrors should
be adjusted to reduce the blind spots.
The objects obser ved are, in reality, closer
than they appear.
Take this into account when assessing
the distance of vehicles approaching from
behind.
Folding
F From outside: lock the vehicle using the
electronic key or the " K eyless Entry and
Starting" system.
F
F
rom inside: with the ignition on, pull the
control A in the central position rearwards.
If the mirrors are folded using control A ,
they will not unfold when the vehicle is
unlocked. Pull again on control A .
Unfolding
F From outside: unlock the vehicle using the
electronic key or the " K eyless Entry and
Starting" system.
F
F
rom inside: with the ignition on, pull the
control A in the central position rearwards.
3
Ease of use and comfort
Page 74 of 324

72
Courtesy lamps
1.Front courtesy lamp
2. Front map reading lamps
3. Rear courtesy lamp
4. Rear map reading lamps
Front – rear courtesy lamps
In this position, the courtesy lamp
comes on gradually:
-
w
hen you unlock the vehicle,
-
w
hen the electronic key is removed from the
reader,
-
o
n opening a door,
-
w
hen the remote control locking button is
activated, in order to locate your vehicle.
It switches off gradually:
-
w
hen the vehicle is locked,
-
w
hen the ignition is switched on,
-
3
0
seconds after the last door is closed. Permanently off.
Permanent lighting.
Depending on version, you can also
switch the courtesy lamp on or off by
pressing this button.
Front – rear map reading
lamps
F With the ignition on, operate the corresponding switch.
Take care not to put anything in contact
with the courtesy lamps.
In "permanent lighting" mode, the lighting
time varies according to the circumstances:
-
w
hen the ignition is off, approximately
ten minutes,
-
i
n energy saving mode, approximately
thirty seconds,
-
w
ith the engine running, unlimited.
Ease of use and comfort
Page 80 of 324
78
The system may suffer inter ference or not
work correctly:
-
u
nder poor visibility conditions (snow,
heavy rain, etc.),
-
i
f the windscreen is dirty, misted or
obscured (by a sticker, etc.) in front of
the camera,
-
i
f the vehicle is facing highly reflective
signs.
When the system detects thick fog, it
temporarily deactivates the function.
The system is not able to detect:
-
r
oad users that do not have their own
lighting, such as pedestrians,
-
v
ehicles whose lighting is obscured
(for example: vehicles running behind a
safety barrier on a motor way),
-
v
ehicles at the top or bottom of a
steep slope, on winding roads, on
crossroads. Clean the windscreen regularly,
particularly the area in front of the camera.
The internal sur face of the windscreen can
also become misted around the camera.
In humid and cold weather, demist the
windscreen regularly.
Do not allow snow to accumulate on the
bonnet or roof of the vehicle as this could
conceal the detection camera.
Guide-me-home lighting
Manual
Switching on
F
W ith the ignition off, "flash" the headlamps
using the lighting control stalk.
F
A f
urther "headlamp flash" switches the
function off.
Switching off
The manual guide-me lighting goes off
automatically at the end of a given period of time.
Automatic
When the automatic illumination of headlamps
function is activated (lighting control stalk
in the " AUTO" position), under low ambient
light the dipped beams headlamps come on
automatically when the ignition is switched off.
Activation or deactivation, as well as
the duration of the guide-me-home
lighting, is set in the Vehicle/Driving
menu, then Comfort lighting and
Guide-me-home lighting .
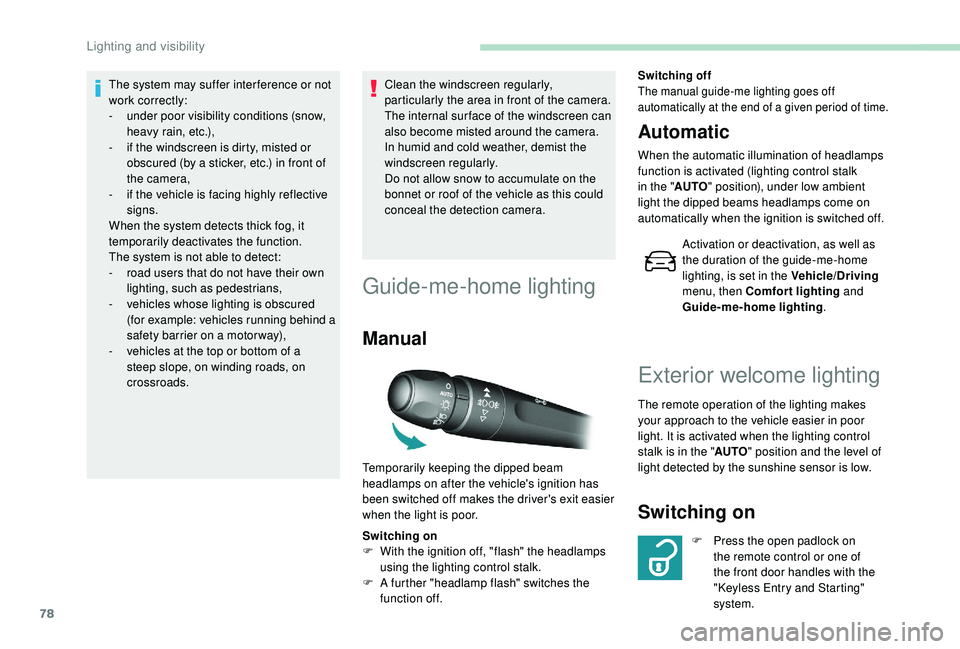
Temporarily keeping the dipped beam
headlamps on after the vehicle's ignition has
been switched off makes the driver's exit easier
when the light is poor.
Exterior welcome lighting
The remote operation of the lighting makes
your approach to the vehicle easier in poor
light. It is activated when the lighting control
stalk is in the " AUTO" position and the level of
light detected by the sunshine sensor is low.
Switching on
F Press the open padlock on the remote control or one of
the front door handles with the
"Keyless Entry and Starting"
system.
Lighting and visibility
Page 81 of 324
79
Switching off
The exterior welcome lighting switches off
automatically after a set time, when the ignition
is switched on or on locking the vehicle.
Programming
The activation, deactivation and
choice of welcome lighting duration
are done in the Vehicle/Driving menu,
then Guide-me-home lighting and
Welcome lighting .
The dipped beam headlamps and the
sidelamps come on; your vehicle is also
unlocked.
Direction indicators
Three flashes
F Press briefly upwards or downwards,
without going beyond the point of
resistance; the direction indicators will flash
3 times.
F
L
eft: lower the lighting control stalk passing
the point of resistance.
F
R
ight: raise the lighting control stalk passing
the point of resistance.
Door mirror spotlamps
Switching on
When the courtesy lamp is in this
position, the spotlamps come on
automatically:
-
w
hen you unlock the vehicle,
-
o
n switching off the ignition,
-
o
n opening a door,
-
w
hen a request to locate the vehicle is
received from the remote control.
Switching off
They are timed to go off automatically.
Headlamp adjustment
Manual adjustment of the
halogen headlamps
To avoid causing a nuisance to other road
users, the height of the halogen headlamps
should be adjusted according to the load in the
vehicle.
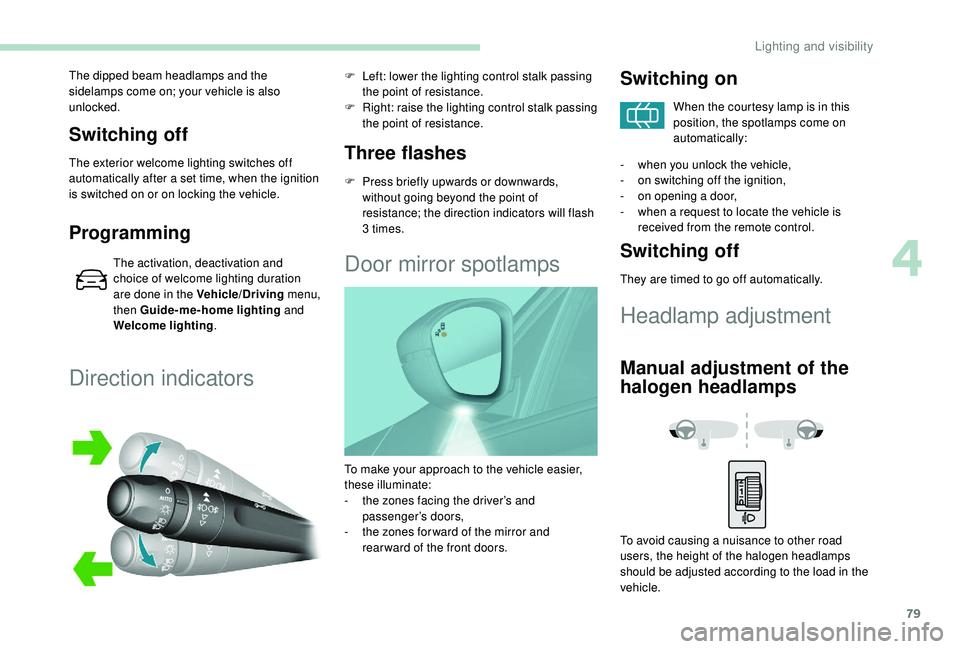
To make your approach to the vehicle easier,
these illuminate:
-
t
he zones facing the driver’s and
passenger’s doors,
-
t
he zones for ward of the mirror and
rear ward of the front doors.
4
Lighting and visibility
Page 109 of 324
107
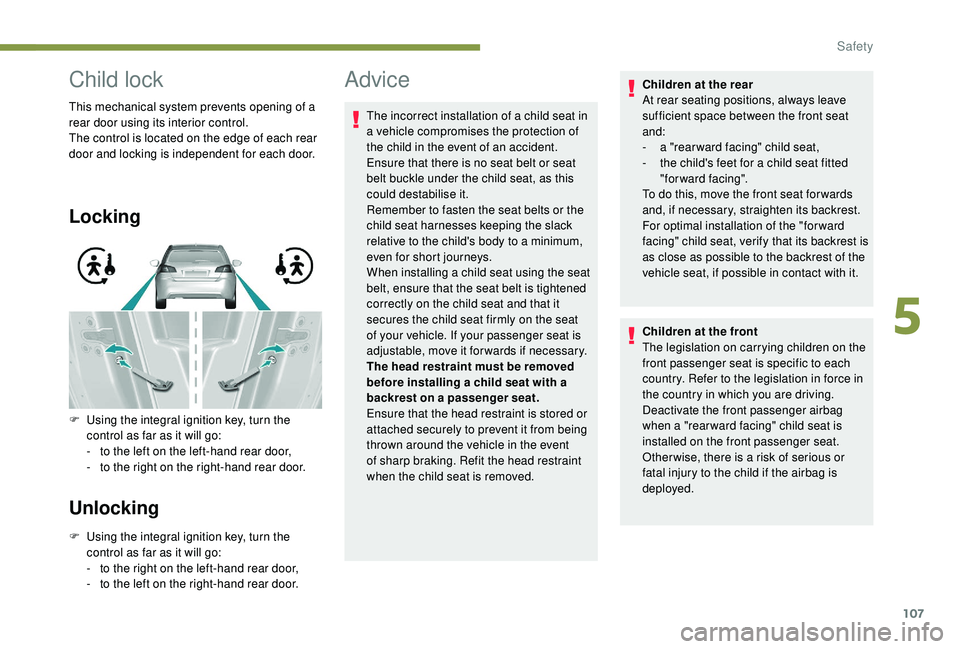
Child lock
This mechanical system prevents opening of a
rear door using its interior control.
The control is located on the edge of each rear
door and locking is independent for each door.
Locking
Unlocking
F Using the integral ignition key, turn the control as far as it will go:
-
t
o the right on the left-hand rear door,
-
t
o the left on the right-hand rear door.
F
U
sing the integral ignition key, turn the
control as far as it will go:
-
t
o the left on the left-hand rear door,
-
t
o the right on the right-hand rear door.
Advice
The incorrect installation of a child seat in
a vehicle compromises the protection of
the child in the event of an accident.
Ensure that there is no seat belt or seat
belt buckle under the child seat, as this
could destabilise it.
Remember to fasten the seat belts or the
child seat harnesses keeping the slack
relative to the child's body to a minimum,
even for short journeys.
When installing a child seat using the seat
belt, ensure that the seat belt is tightened
correctly on the child seat and that it
secures the child seat firmly on the seat
of your vehicle. If your passenger seat is
adjustable, move it forwards if necessary.
The head restraint must be removed
before installing a child seat with a
backrest on a passenger seat.
Ensure that the head restraint is stored or
attached securely to prevent it from being
thrown around the vehicle in the event
of sharp braking. Refit the head restraint
when the child seat is removed. Children at the rear
At rear seating positions, always leave
sufficient space between the front seat
and:
-
a "
rear ward facing" child seat,
-
t
he child's feet for a child seat fitted
"forward facing".
To do this, move the front seat for wards
and, if necessary, straighten its backrest.
For optimal installation of the "forward
facing" child seat, verify that its backrest is
as close as possible to the backrest of the
vehicle seat, if possible in contact with it.
Children at the front
The legislation on carrying children on the
front passenger seat is specific to each
country. Refer to the legislation in force in
the country in which you are driving.
Deactivate the front passenger airbag
when a "rear ward facing" child seat is
installed on the front passenger seat.
Other wise, there is a risk of serious or
fatal injury to the child if the airbag is
deployed.
5
Safety
Page 110 of 324
108
Installing a height-adjustable (booster)
seat
The chest part of the seat belt must be
positioned on the child's shoulder without
touching the neck.
Ensure that the lap part of the seat belt
passes correctly over the child's thighs.
We recommend using a height-adjustable
(booster) seat with a backrest, equipped
with a belt guide at shoulder level.
Additional protections
To prevent accidental opening of the doors
and rear windows, use the child lock.
Take care not to open the rear windows by
more than one third.
To protect young children from the rays
of the sun, fit side blinds on the rear
windows.
As a safety precaution, do not leave:
-
a c
hild or children alone and
unattended in a vehicle,
-
a c
hild or an animal in a vehicle
which is exposed to the sun, with the
windows closed,
-
t
he keys within reach of children inside
the vehicle.
Safety
Page 113 of 324
111
F Insert the key in the ignition switch.The system recognises the starting code.
F
U
nlock the steering column by
simultaneously turning the steering wheel
and the key.
In some situations, you may have to apply
some force to turn the wheels (if the
wheels are turned towards the pavement,
for example).
F
W
ith a petrol engine, operate the starter
motor by turning the key to position 3
without pressing the accelerator pedal,
until the engine starts. Once the engine is
running, release the key.
F
W
ith a Diesel engine, turn the key to
position 2 , ignition on, to operate the engine
pre-heating system.
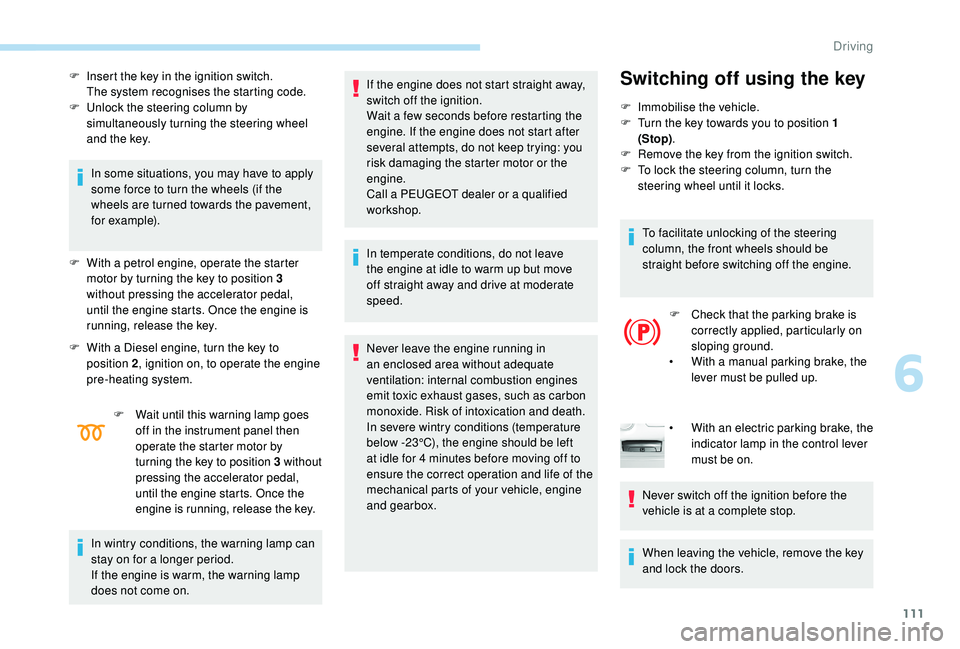
F Wait until this warning lamp goes off in the instrument panel then
operate the starter motor by
turning the key to position 3 without
pressing the accelerator pedal,
until the engine starts. Once the
engine is running, release the key.
In wintry conditions, the warning lamp can
stay on for a longer period.
If the engine is warm, the warning lamp
does not come on. If the engine does not start straight away,
switch off the ignition.
Wait a few seconds before restarting the
engine. If the engine does not start after
several attempts, do not keep trying: you
risk damaging the starter motor or the
engine.
Call a PEUGEOT dealer or a qualified
workshop.
In temperate conditions, do not leave
the engine at idle to warm up but move
off straight away and drive at moderate
speed.
Never leave the engine running in
an enclosed area without adequate
ventilation: internal combustion engines
emit toxic exhaust gases, such as carbon
monoxide. Risk of intoxication and death.
In severe wintry conditions (temperature
below -23°C), the engine should be left
at idle for 4
minutes before moving off to
ensure the correct operation and life of the
mechanical parts of your vehicle, engine
and gearbox.
Switching off using the key
F Immobilise the vehicle.
F T urn the key towards you to position 1
(Stop) .
F
R
emove the key from the ignition switch.
F
T
o lock the steering column, turn the
steering wheel until it locks.
To facilitate unlocking of the steering
column, the front wheels should be
straight before switching off the engine.
F
C
heck that the parking brake is
correctly applied, particularly on
sloping ground.
•
W
ith a manual parking brake, the
lever must be pulled up.
•
W
ith an electric parking brake, the
indicator lamp in the control lever
must be on.
Never switch off the ignition before the
vehicle is at a complete stop.
When leaving the vehicle, remove the key
and lock the doors.
6
Driving