2018 Peugeot 308 remote control
[x] Cancel search: remote controlPage 50 of 324

48
For vehicles that are fitted with it, interior
volumetric monitoring is incompatible with
programmed thermal preconditioning.
Anti-tilt monitoring
(On GT and GTi versions)
The system checks for any change in the
attitude of the vehicle.Self-protection function
The system checks for the putting out of
ser vice of its components.
The alarm is triggered if the siren's
battery, button or wiring is disconnected or
damaged.
For all work on the alarm system, contact
a PEUGEOT dealer or a qualified
workshop.
Locking the vehicle with full
alarm system
Activation
F Switch off the ignition and get out of the vehicle.
F Lock the vehicle using the remote
control.
or
F
L
ock the vehicle using the "
K
eyless Entry
and Starting" system. interior volumetric monitoring after 45
seconds.
If an access (door, boot, bonnet, etc.) is not
properly closed, the vehicle is not locked but
monitoring will be activated after 45 seconds.
Deactivation
F Press this unlocking button on the
remote control.
or
F
U
nlock the vehicle using the "
K
eyless Entry
and Starting" system.
The monitoring system is deactivated: the
indicator lamp in the button goes off and the
direction indicators flash for about 2
seconds.
Where the vehicle locks itself again
automatically (occurs 30
seconds after
unlocking, if a door or the boot is not
opened), the monitoring system is not
reactivated automatically.
To reactivate it, the vehicle must be
unlocked and locked again, using the
remote control key or the "
K
eyless Entry
and Starting" system.
Alarm
This system protects and provides a deterrent
against theft and break-ins.
It provides the following types of monitoring:
Exterior perimeter
The system checks for opening of the vehicle.
The alarm is triggered if anyone tries to open a
door, the boot or the bonnet.
Interior volumetric
The system checks for any variation in the
volume of the passenger compartment.
The alarm is triggered if anyone breaks a
window, enters the passenger compartment or
moves inside the vehicle.
The monitoring system is active: the indicator
lamp in this button flashes once per second
and the direction indicators come on for about
2
seconds.
After an instruction to lock the vehicle using
the remote control or the "
K
eyless Entry
and Starting" system, the exterior perimeter
monitoring is activated after 5
seconds, the
The alarm is triggered if the vehicle is lifted,
moved or knocked.
Access
Page 51 of 324

49
Locking the vehicle
with exterior perimeter
monitoring only
* Only cases that apply to GT/GTi vehicles equipped with the anti-tilt alarm only.
Deactivate the interior volumetric monitoring
(and anti-tilt monitoring if your vehicle has it)
to avoid unwanted triggering of the alarm in
certain cases such as:
-
p
assengers on board the vehicle,
-
l
eaving a window partially open,
-
w
ashing your vehicle,
-
c
hanging a wheel*,
-
h
aving your vehicle towed*,
-
t
ransport on a ship or ferry*.
Deactivating the interior
volumetric and anti-tilt
monitoring
F Switch off the ignition and within
ten seconds, press this button
until the indicator lamp is lit
continuously.
F
G
et out of the vehicle. F
I
mmediately lock the vehicle using
the remote control or the "
K
eyless
Entry and Starting" system. The exterior perimeter monitoring alone is
activated: the indicator lamp in the button
flashes once per second.
To take effect, this deactivation must be carried
out each time the ignition is switched off.
Reactivating the interior
volumetric monitoring
The anti-tilt alarm is also reactivated, if your
vehicle has one.
F
D
eactivate the exterior perimeter
monitoring by unlocking the
vehicle using the remote control
or the
" K
eyless Entry and
Starting" system.
The indicator lamp in the button goes off.
F
R
eactivate the full alarm system by locking
the vehicle using the remote control or the
"
K
eyless Entry and Starting" system.
The indicator lamp in the button flashes once
per second again.
Triggering of the alarm
This results in sounding the siren and flashing
the direction indicators for thirty seconds.
The monitoring functions remain active until
the alarm has been triggered eleven times in
succession. When the vehicle is unlocked using
the remote control or the "
K
eyless
Entry and Starting" system, rapid
flashing of the indicator lamp in the
button informs you that the alarm was
triggered during your absence.
When the ignition is switched on, this
flashing stops immediately.
Failure of the remote control
To deactivate the monitoring functions:
F u nlock the vehicle using the key (integral to
the remote control) in the driver's door lock,
F
o
pen the door; the alarm is triggered,
F
s
witch on the ignition; the alarm stops. The
indicator lamp in the button goes off.
Locking the vehicle without
activating the alarm
F Lock or deadlock the vehicle using the key (integral to the remote control) in the driver's
door lock.
Malfunction
When the ignition is switched on,
fixed illumination of the indicator
lamp in the button indicates a fault
with the system.
Have it checked by a PEUGEOT dealer or a
qualified workshop.
2
Access
Page 52 of 324

50
Electric windows
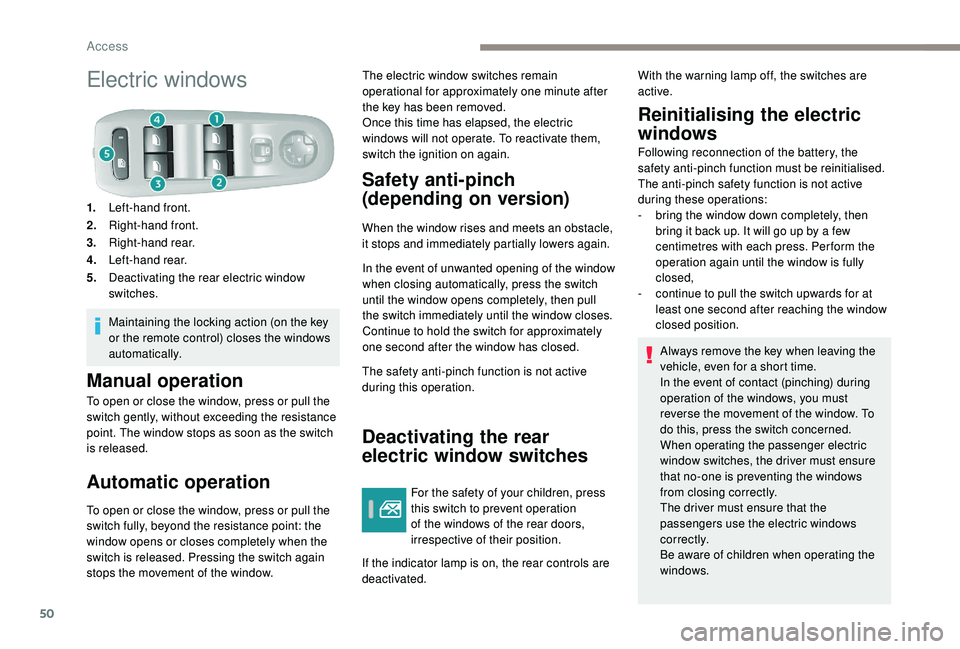
1.Left-hand front.
2. Right-hand front.
3. Right-hand rear.
4. Left-hand rear.
5. Deactivating the rear electric window
switches.
Maintaining the locking action (on the key
or the remote control) closes the windows
automatically.
Manual operation
To open or close the window, press or pull the
switch gently, without exceeding the resistance
point. The window stops as soon as the switch
is released.
Automatic operation
To open or close the window, press or pull the
switch fully, beyond the resistance point: the
window opens or closes completely when the
switch is released. Pressing the switch again
stops the movement of the window. The electric window switches remain
operational for approximately one minute after
the key has been removed.
Once this time has elapsed, the electric
windows will not operate. To reactivate them,
switch the ignition on again.
Safety anti-pinch
(depending on version)
When the window rises and meets an obstacle,
it stops and immediately partially lowers again.
In the event of unwanted opening of the window
when closing automatically, press the switch
until the window opens completely, then pull
the switch immediately until the window closes.
Continue to hold the switch for approximately
one second after the window has closed.
The safety anti-pinch function is not active
during this operation.
Deactivating the rear
electric window switches
For the safety of your children, press
this switch to prevent operation
of the windows of the rear doors,
irrespective of their position.
If the indicator lamp is on, the rear controls are
deactivated.
Reinitialising the electric
windows
Following reconnection of the battery, the
safety anti-pinch function must be reinitialised.
The anti-pinch safety function is not active
during these operations:
-
b
ring the window down completely, then
bring it back up. It will go up by a few
centimetres with each press. Per form the
operation again until the window is fully
closed,
-
c
ontinue to pull the switch upwards for at
least one second after reaching the window
closed position.
Always remove the key when leaving the
vehicle, even for a short time.
In the event of contact (pinching) during
operation of the windows, you must
reverse the movement of the window. To
do this, press the switch concerned.
When operating the passenger electric
window switches, the driver must ensure
that no-one is preventing the windows
from closing correctly.
The driver must ensure that the
passengers use the electric windows
c o r r e c t l y.
Be aware of children when operating the
windows.
With the warning lamp off, the switches are
active.
Access
Page 58 of 324

56
The folding and unfolding of the door
mirrors using the remote control can be
deactivated by a PEUGEOT dealer or a
qualified workshop.
If necessary, the mirrors can be folded
manually.
Rear view mirror
Equipped with an anti-dazzle system, which
darkens the mirror glass and reduces the
nuisance to the driver caused by the sun, the
headlamps of other vehicles, etc.
Manual model
Adjustment
F A djust the mirror so that the mirror is
directed correctly in the "day" position.
Day/night position
Automatic "electrochrome"
model
This system automatically and progressively
changes between day and night use by means
of a sensor measuring the light coming from the
rear of the vehicle.
In order to ensure optimum visibility during
your manoeuvres, the mirror lightens
automatically when reverse gear is
engaged.
Rear seats (hatchback)
Bench seat with fixed one-piece cushion and
folding backrest (1/3 – 2/3), which can be
folded to adapt the loading space in the boot.
Folding the backrest
When folding the seat, the centre seat belt
should not be buckled but laid out flat on
the seat.
The rear seat cushion does not fold:, to
increase the load volume in the boot, only
the backrest folds.
F
P
ull the lever to change to the "night" anti-
dazzle position.
F
P
ush the lever to change to the normal
"day" position. F
M
ove the corresponding front seat for wards
if necessary. F
P
osition the corresponding outer seat belt
against the backrest and buckle it.
F
P
lace the head restraints in the low position.
F
P
ress control 1 to release seat backrest 2
.
F
F
old seat backrest 2 onto cushion 3
.
Ease of use and comfort
Page 74 of 324

72
Courtesy lamps
1.Front courtesy lamp
2. Front map reading lamps
3. Rear courtesy lamp
4. Rear map reading lamps
Front – rear courtesy lamps
In this position, the courtesy lamp
comes on gradually:
-
w
hen you unlock the vehicle,
-
w
hen the electronic key is removed from the
reader,
-
o
n opening a door,
-
w
hen the remote control locking button is
activated, in order to locate your vehicle.
It switches off gradually:
-
w
hen the vehicle is locked,
-
w
hen the ignition is switched on,
-
3
0
seconds after the last door is closed. Permanently off.
Permanent lighting.
Depending on version, you can also
switch the courtesy lamp on or off by
pressing this button.
Front – rear map reading
lamps
F With the ignition on, operate the corresponding switch.
Take care not to put anything in contact
with the courtesy lamps.
In "permanent lighting" mode, the lighting
time varies according to the circumstances:
-
w
hen the ignition is off, approximately
ten minutes,
-
i
n energy saving mode, approximately
thirty seconds,
-
w
ith the engine running, unlimited.
Ease of use and comfort
Page 80 of 324

78
The system may suffer inter ference or not
work correctly:
-
u
nder poor visibility conditions (snow,
heavy rain, etc.),
-
i
f the windscreen is dirty, misted or
obscured (by a sticker, etc.) in front of
the camera,
-
i
f the vehicle is facing highly reflective
signs.
When the system detects thick fog, it
temporarily deactivates the function.
The system is not able to detect:
-
r
oad users that do not have their own
lighting, such as pedestrians,
-
v
ehicles whose lighting is obscured
(for example: vehicles running behind a
safety barrier on a motor way),
-
v
ehicles at the top or bottom of a
steep slope, on winding roads, on
crossroads. Clean the windscreen regularly,
particularly the area in front of the camera.
The internal sur face of the windscreen can
also become misted around the camera.
In humid and cold weather, demist the
windscreen regularly.
Do not allow snow to accumulate on the
bonnet or roof of the vehicle as this could
conceal the detection camera.
Guide-me-home lighting
Manual
Switching on
F
W ith the ignition off, "flash" the headlamps
using the lighting control stalk.
F
A f
urther "headlamp flash" switches the
function off.
Switching off
The manual guide-me lighting goes off
automatically at the end of a given period of time.
Automatic
When the automatic illumination of headlamps
function is activated (lighting control stalk
in the " AUTO" position), under low ambient
light the dipped beams headlamps come on
automatically when the ignition is switched off.
Activation or deactivation, as well as
the duration of the guide-me-home
lighting, is set in the Vehicle/Driving
menu, then Comfort lighting and
Guide-me-home lighting .
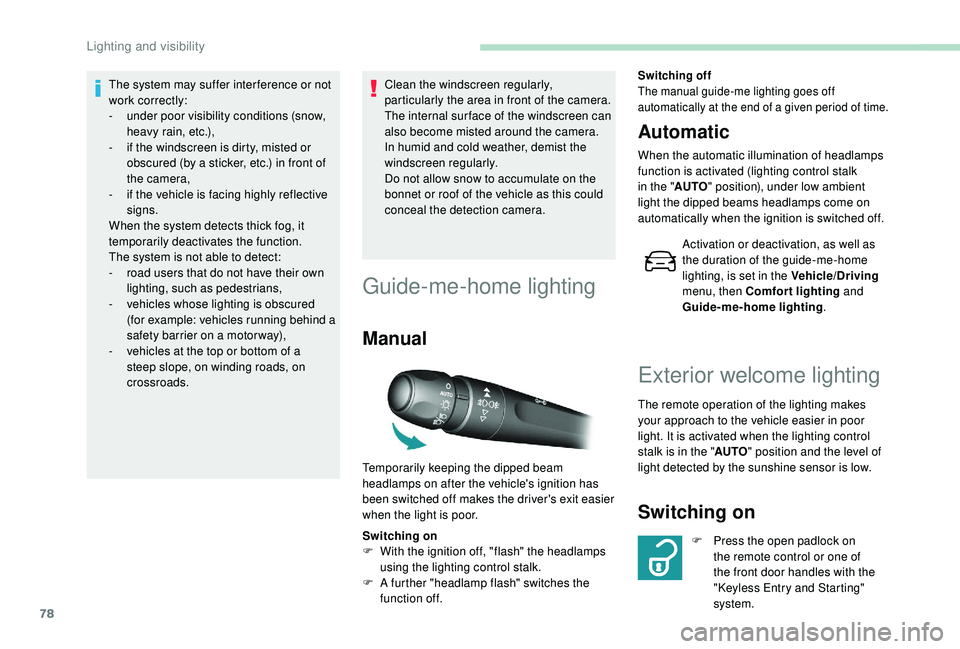
Temporarily keeping the dipped beam
headlamps on after the vehicle's ignition has
been switched off makes the driver's exit easier
when the light is poor.
Exterior welcome lighting
The remote operation of the lighting makes
your approach to the vehicle easier in poor
light. It is activated when the lighting control
stalk is in the " AUTO" position and the level of
light detected by the sunshine sensor is low.
Switching on
F Press the open padlock on the remote control or one of
the front door handles with the
"Keyless Entry and Starting"
system.
Lighting and visibility
Page 81 of 324

79
Switching off
The exterior welcome lighting switches off
automatically after a set time, when the ignition
is switched on or on locking the vehicle.
Programming
The activation, deactivation and
choice of welcome lighting duration
are done in the Vehicle/Driving menu,
then Guide-me-home lighting and
Welcome lighting .
The dipped beam headlamps and the
sidelamps come on; your vehicle is also
unlocked.
Direction indicators
Three flashes
F Press briefly upwards or downwards,
without going beyond the point of
resistance; the direction indicators will flash
3 times.
F
L
eft: lower the lighting control stalk passing
the point of resistance.
F
R
ight: raise the lighting control stalk passing
the point of resistance.
Door mirror spotlamps
Switching on
When the courtesy lamp is in this
position, the spotlamps come on
automatically:
-
w
hen you unlock the vehicle,
-
o
n switching off the ignition,
-
o
n opening a door,
-
w
hen a request to locate the vehicle is
received from the remote control.
Switching off
They are timed to go off automatically.
Headlamp adjustment
Manual adjustment of the
halogen headlamps
To avoid causing a nuisance to other road
users, the height of the halogen headlamps
should be adjusted according to the load in the
vehicle.
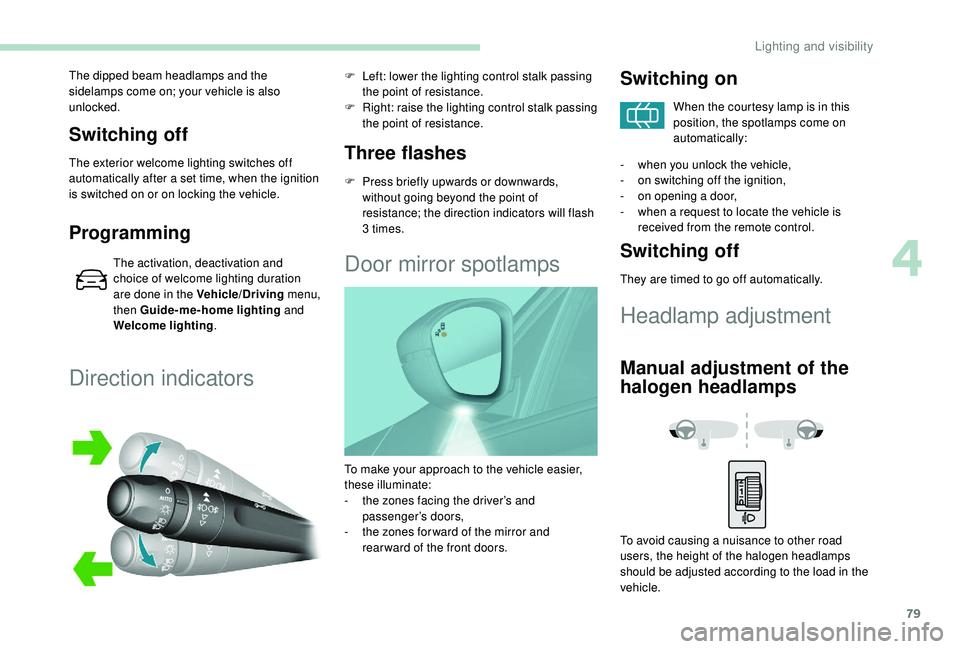
To make your approach to the vehicle easier,
these illuminate:
-
t
he zones facing the driver’s and
passenger’s doors,
-
t
he zones for ward of the mirror and
rear ward of the front doors.
4
Lighting and visibility
Page 112 of 324

110
F If this warning lamp and the STOP warning lamp come on,
stop the vehicle and switch off
the engine as soon as possible.
New vehicle
Do not pull a trailer before having driven at least
approximately 620
miles (1,000
kilometres).
Braking
Towing a trailer increases the braking distance.
To avoid overheating of the brakes, the use of
engine braking is recommended.
Ty r e s
F Check the tyre pressures of the towing vehicle and of the trailer, observing the
recommended pressures.
Lighting
F Check the electrical lighting and signalling on the trailer and the headlamp beam height
of your vehicle.
For more information on Headlamp
adjustment , refer to the corresponding
section. Certain driving or manoeuvring aid
functions are automatically disabled if an
approved towing system is used.
Anti-theft protection
Electronic immobiliser
The key contains an electronic chip which has
a special code. When the ignition is switched
on, this code must be recognised in order for
starting to be possible.
This electronic engine immobiliser locks the
engine management system a few minutes
after the ignition is switched off, and prevents
the engine being started by anyone who does
not have the key.
In the event of a fault, you are informed
by illumination of this warning lamp, an
audible signal and a message in the
screen.
In this case, your vehicle will not start; contact
a PEUGEOT dealer as soon as possible.
Keep safely, away from your vehicle, the
label attached to the keys given to you
when you purchased your vehicle.
Starting/Switching off the
engine, remote control
key
Place the gear lever into neutral.
Ignition switch
1.Stop position.
2. Ignition on position.
3. Starting position.
Starting with the key
The parking brake must be applied.
F
W
ith a manual gearbox, in neutral, fully
depress the clutch pedal.
F
W
ith an automatic gearbox, in mode P or N ,
fully depress the brake pedal.
Driving