2018 Peugeot 308 fuel
[x] Cancel search: fuelPage 31 of 324

29
F Press this button, located on the end of the wiper control stalk , to display the different
tabs in turn.
-
T
he current information tab with:
•
t
he range,
•
t
he current fuel consumption,
•
t
he Stop & Start time counter.-
Trip 1 with:
•
t
he average speed,
•
t
he average fuel consumption,
•
t
he distance travelled,
for the first trip.
-
Trip 2 with:
•
t
he average speed,
•
t
he average fuel consumption,
•
t
he distance travelled,
for the second trip.
Reset trip
For example, trip 1 can be used for daily figures
and trip 2 for monthly figures.
F
W
hen the required trip is displayed, press
the button on the end of the wiper control
stalk for more than two seconds.
Tr i p s 1 and 2 are independent but their use is
identical. With display screen
1 and the touch screen:
Information is accessible from the " Vehicle/
Driving " menu.
Permanent display:
F
Sel
ect the " Vehicle/Driving " menu.
F
I
n this menu, select the " Driving functions"
tab.
The information of the trip computer is
displayed in the primary page of the menu.
F
P
ress one of the buttons to display the
desired tab.
Temporary display in a specific window:
F
P
ress the end of the wiper control stalk for
access to the information and to display the
different tabs. The current information tab with:
-
t he range,
-
t
he current fuel consumption,
-
t
he Stop & Start time counter.
The trip 1 tab with:
-
t
he distance travelled,
-
t
he average fuel consumption,
-
t
he average speed for the first
trip.
The trip 2 tab with:
-
t
he distance travelled,
-
t
he average fuel consumption,
-
t
he average speed for the
second trip.
Reset trip
F When the desired trip is displayed, press the reset button or the end of the wiper
control stalk.
1
Instruments
Page 32 of 324

30
Tr i p s 1 and 2 are independent but their use is
identical.
For example, trip 1 can be used for daily figures
and trip 2 for monthly figures.
Trip computer, some
definitions
Range
(miles or km)
The distance which can still be
travelled with the fuel remaining in
the tank (related to the average fuel
consumption over the last few miles
(kilometres) travelled).
This value may fluctuate if a change
of driving style or terrain results in a
significant change in the current fuel
consumption.
Dashes are displayed when the range falls
below 19
miles (30 km). After filling with at least
5
litres of fuel, the range is recalculated and is
displayed if it exceeds 62
miles (100 km).
If dashes are displayed continuously while
driving in place of the digits, contact a
PEUGEOT dealer or a qualified workshop.
Current fuel consumption
(mpg or km/l or l/100 km)
C alculated during the last few
seconds.
This function is only displayed from
19
mph (30 km/h).
Average fuel consumption
(mpg or km/l or l/100 km)
C alculated since the last time the
trip recorder was reset to zero.
Average speed
(mph or km/h)
Calculated since the last time the
trip recorder was reset to zero.
Distance travelled
(miles or km)
Calculated since the last time the
trip recorder was reset to zero.
Stop & Start time counter
(minutes/seconds or hours/
minutes)
A time counter calculates the time
spent in STOP mode during a
j o u r n ey.
It resets to zero every time the
ignition is switched on.
Monochrome screen C
Displays in the screen
This displays the following information:
- t he time,
-
t
he date,
-
t
he exterior temperature (this flashes if
there is a risk of ice),
-
par
king sensor information,
-
t
he audio source being listened to,
-
t
elephone or hands-free kit information,
-
t
he trip computer,
-
a
lert messages,
-
s
ettings menus for the screen and the
vehicle equipment.
Controls
From the control panel of your audio system,
you can press:
F
button A to chooses between the display
of audio information in full screen or the
shared display of audio and trip computer
information,
Instruments
Page 39 of 324
37
ButtonsComments
Choice of units:
-
t
emperature (°Celsius or
°Fahrenheit),
-
d
istances and fuel
consumption (l/100
km, mpg
or km/l).
Choice of display language used
for the touch screen and the
digital instrument panel.
Setting the date and time.
Option of synchronisation with
GPS.
Adjustment of the display
parameters (text scrolling,
animations, etc.) and brightness.
Choice and settings for three
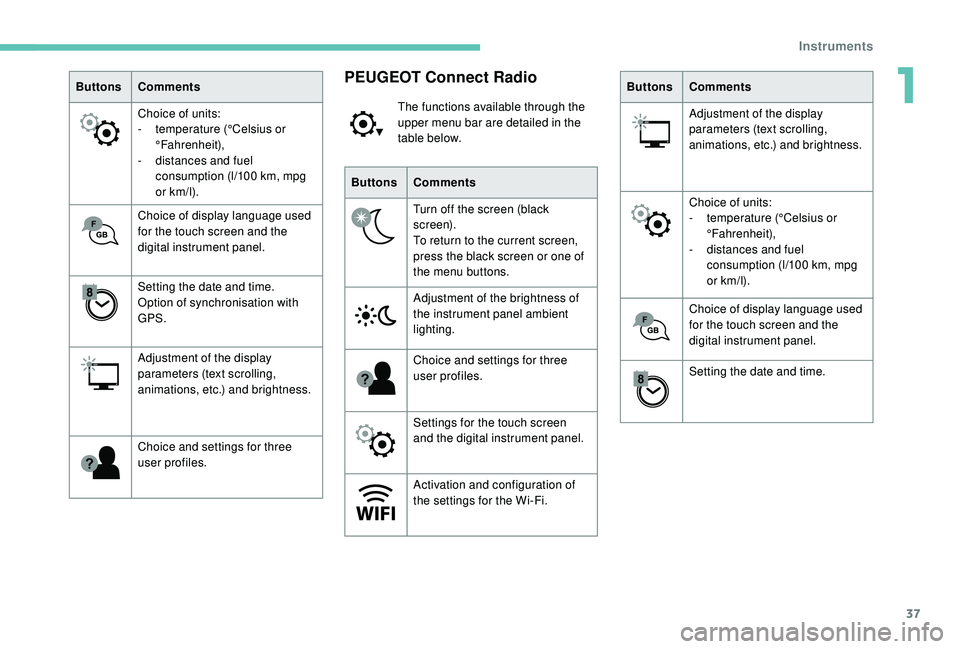
user profiles.PEUGEOT Connect Radio
The functions available through the
upper menu bar are detailed in the
table below.
Buttons Comments
Turn off the screen (black
screen).
To return to the current screen,
press the black screen or one of
the menu buttons.
Adjustment of the brightness of
the instrument panel ambient
lighting.
Choice and settings for three
user profiles.
Settings for the touch screen
and the digital instrument panel.
Activation and configuration of
the settings for the Wi-Fi. Buttons
Comments
Adjustment of the display
parameters (text scrolling,
animations, etc.) and brightness.
Choice of units:
-
t
emperature (°Celsius or
°Fahrenheit),
-
d
istances and fuel
consumption (l/100
km, mpg
or km/l).
Choice of display language used
for the touch screen and the
digital instrument panel.
Setting the date and time.
1
Instruments
Page 55 of 324
53
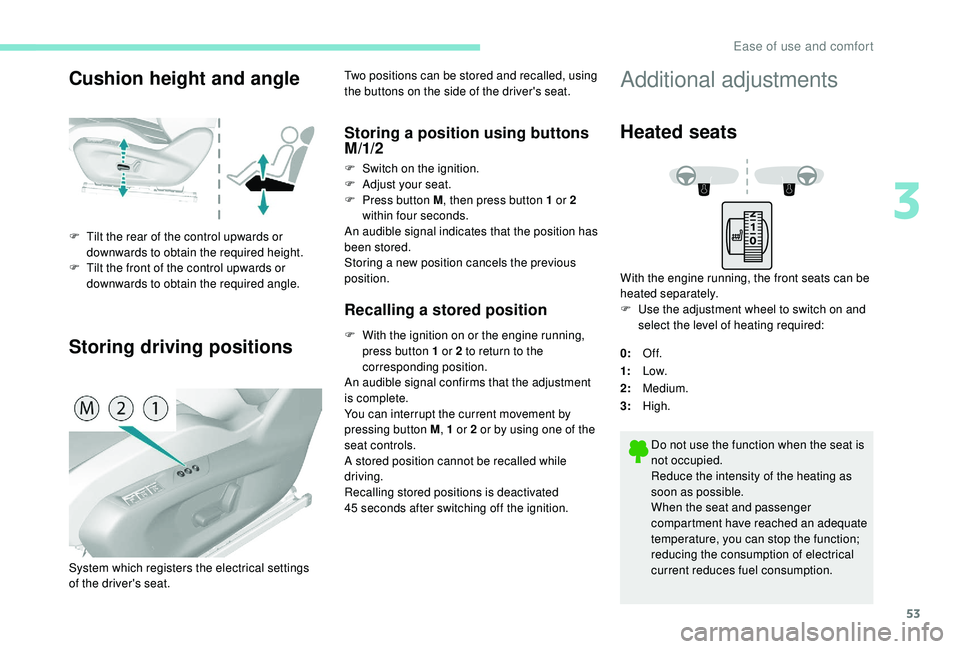
Cushion height and angle
Storing driving positions
F Tilt the rear of the control upwards or downwards to obtain the required height.
F
T
ilt the front of the control upwards or
downwards to obtain the required angle. Two positions can be stored and recalled, using
the buttons on the side of the driver's seat.
Storing a position using buttons
M/1/2
F Switch on the ignition.
F
Adj ust your seat.
F
P
ress button M , then press button 1 or 2
within four seconds.
An audible signal indicates that the position has
been stored.
Storing a new position cancels the previous
position.
Recalling a stored position
F With the ignition on or the engine running, press button 1 or 2 to return to the
corresponding position.
An audible signal confirms that the adjustment
is complete.
You can interrupt the current movement by
pressing button M , 1 or 2 or by using one of the
seat controls.
A stored position cannot be recalled while
driving.
Recalling stored positions is deactivated
45
seconds after switching off the ignition.
System which registers the electrical settings
of the driver's seat.
Additional adjustments
Heated seats
With the engine running, the front seats can be
heated separately.
F
U
se the adjustment wheel to switch on and
select the level of heating required:
0: Of f.
1: Low.
2: Medium.
3: High.
Do not use the function when the seat is
not occupied.
Reduce the intensity of the heating as
soon as possible.
When the seat and passenger
compartment have reached an adequate
temperature, you can stop the function;
reducing the consumption of electrical
current reduces fuel consumption.
3
Ease of use and comfort
Page 73 of 324
71
On/Off
F Press this button to demist /defrost the rear screen and, depending on version, the door
mirrors. The indicator lamp in the button
comes on.
Demisting/defrosting switches off automatically
to prevent excessive electrical consumption.
F
I
t is possible to stop the demisting/
defrosting operation before it is switched off
automatically by pressing this button again.
The indicator lamp in the button goes off.
Switch off the demisting/defrosting of
the rear screen and door mirrors as
soon as appropriate, as lower current
consumption results in reduced fuel
consumption.
Rear screen demisting – defrosting can
only be operated when the engine is
running.
Panoramic roof
Its electric blind improves thermal and acoustic
comfort.
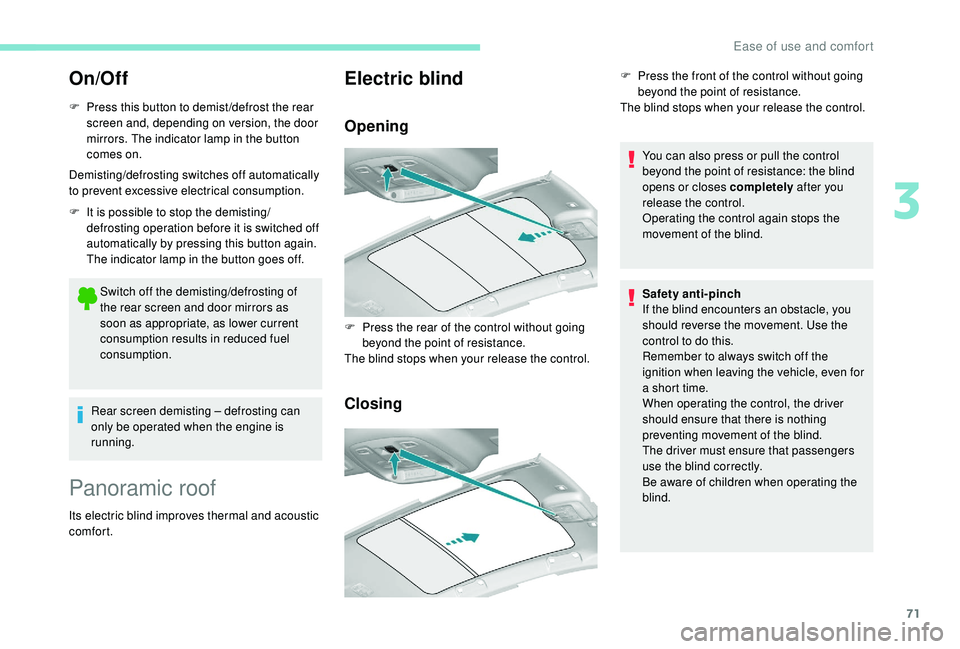
Electric blind
Opening
Closing
You can also press or pull the control
beyond the point of resistance: the blind
opens or closes completely after you
release the control.
Operating the control again stops the
movement of the blind.
F
P
ress the rear of the control without going
beyond the point of resistance.
The blind stops when your release the control. F
P
ress the front of the control without going
beyond the point of resistance.
The blind stops when your release the control.
Safety anti-pinch
If the blind encounters an obstacle, you
should reverse the movement. Use the
control to do this.
Remember to always switch off the
ignition when leaving the vehicle, even for
a short time.
When operating the control, the driver
should ensure that there is nothing
preventing movement of the blind.
The driver must ensure that passengers
use the blind correctly.
Be aware of children when operating the
blind.
3
Ease of use and comfort
Page 123 of 324
121
"Sport" and "Snow"
programmes
These two special programmes supplement
the automatic operation in specific conditions
of use.
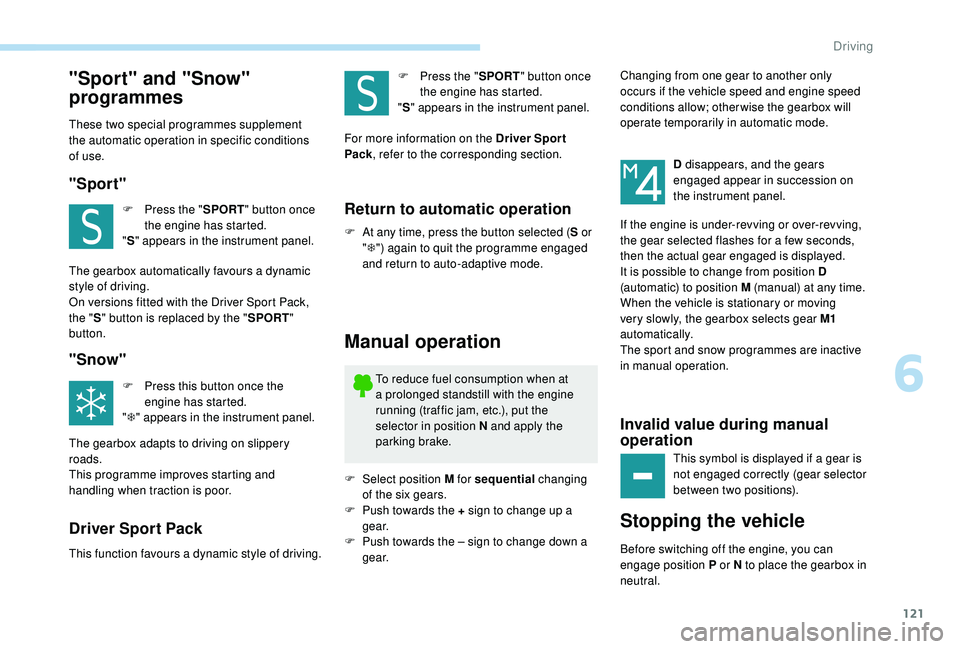
"Sport"
F Press the "SPORT" button once
the engine has started.
" S " appears in the instrument panel.
The gearbox automatically favours a dynamic
style of driving.
On versions fitted with the Driver Sport Pack,
the " S" button is replaced by the " SPORT"
button.
"Snow"
F Press this button once the engine has started.
" T " appears in the instrument panel.
The gearbox adapts to driving on slippery
roads.
This programme improves starting and
handling when traction is poor.
Driver Sport Pack
This function favours a dynamic style of driving. F
P
ress the "
SPORT" button once
the engine has started.
" S " appears in the instrument panel.
For more information on the Driver Spor t
Pack , refer to the corresponding section.
Return to automatic operation
F At any time, press the button selected ( S or
" T ") again to quit the programme engaged
and return to auto-adaptive mode.
Manual operation
To reduce fuel consumption when at
a prolonged standstill with the engine
running (traffic jam, etc.), put the
selector in position N and apply the
parking brake.
F
Sel
ect position M for sequential changing
of the six gears.
F
P
ush towards the + sign to change up a
g e a r.
F
P
ush towards the – sign to change down a
g e a r. D disappears, and the gears
engaged appear in succession on
the instrument panel.
If the engine is under-revving or over-revving,
the gear selected flashes for a few seconds,
then the actual gear engaged is displayed.
It is possible to change from position D
(automatic) to position M (manual) at any time.
When the vehicle is stationary or moving
very slowly, the gearbox selects gear M1
automatically.
The sport and snow programmes are inactive
in manual operation.
Invalid value during manual
operation
This symbol is displayed if a gear is
not engaged correctly (gear selector
between two positions).
Stopping the vehicle
Before switching off the engine, you can
engage position P or N to place the gearbox in
neutral. Changing from one gear to another only
occurs if the vehicle speed and engine speed
conditions allow; other wise the gearbox will
operate temporarily in automatic mode.
6
Driving
Page 127 of 324
125
Starting the vehicle
From mode P:
F P ress the brake pedal down fully.
F
S
tart the engine.
F
M
aintaining pressure on the brake pedal,
press the Unlock button.
F
P
ush once or twice rear ward to select the
automatic mode D , or for ward to engage
reverse R .
From neutral N :
F
P
ress the brake pedal down fully.
F
S
tart the engine.
F
M
aintaining pressure on the brake pedal,
push rear ward to select the automatic
mode D , or for ward, while pressing the
Unlock
button to engage reverse R .
Then, from D or R :
F
R
elease the brake pedal.
F
A
ccelerate progressively to automatically
release the electric parking brake.
F
W
ith the parking brake released, the vehicle
then moves off.
In severe wintry conditions (temperature
below -23°C), it is recommended that the
engine be allowed to run for a few minutes
before moving off, to ensure the correct
operation and durability of the engine and
gearbox. If your vehicle has an automatic gearbox,
never try to start the engine by pushing
the vehicle.
Stopping the vehicle
Whatever the state of the gearbox when the
ignition is switched off, mode P is engaged
automatically, with the exception of mode N
,
in which case mode P will be engaged after
a delay of 5
seconds (allowing the change to
free-wheel).
Check that mode P has been engaged and that
the electric parking brake has been applied
automatically; if not, apply it manually.
The corresponding indicator lamps for
the selector and the electric parking
brake control lever must be on, as well
as the ones in the instrument panel.
SPORT/ECO control
Driver Sport Pack
With the engine running, when the Driver
Spor t Pack is activated, the gearbox delays
changing up for a more dynamic driving style.
The programme is automatically deactivated
when the ignition is switched off.Eco mode
Activating this mode reduces fuel consumption
by optimising the operation of the heating and
air conditioning and, depending on version, the
pedals, the automatic gearbox and the gear
shift indicator. Activating the Driver Spor t Pack is not
recommended in the following situations:
-
A
SR system deactivated,
-
l
ow fuel level reached,
-
l
ow AdBlue level reached.
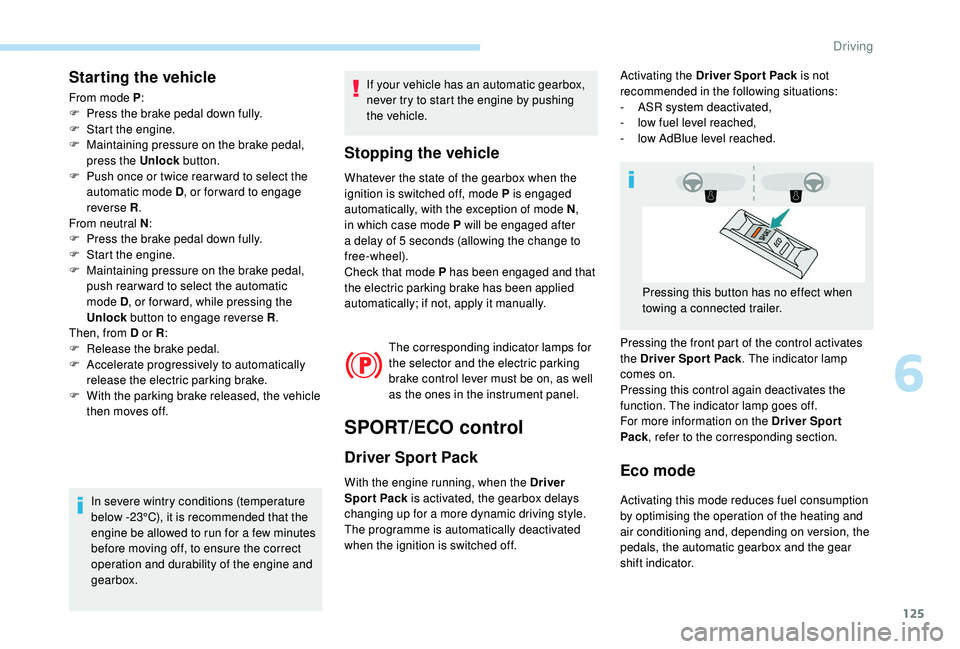
Pressing the front part of the control activates
the Driver Spor t Pack . The indicator lamp
comes on.
Pressing this control again deactivates the
function. The indicator lamp goes off.
For more information on the Driver Spor t
Pack , refer to the corresponding section.
Pressing this button has no effect when
towing a connected trailer.
6
Driving
Page 129 of 324
127
Activation
F Press and hold the Sport button until
the ambience of the back-lighting in the
instrument panel changes.
The indicator lamp for the button comes on.
If the LED flashes, activation is not
possible (for example if Park Assist or
snow mode is selected) and so the back-
lighting returns to its normal mode.
If the flashing of the LED persists,
contact a PEUGEOT dealer or a qualified
workshop.
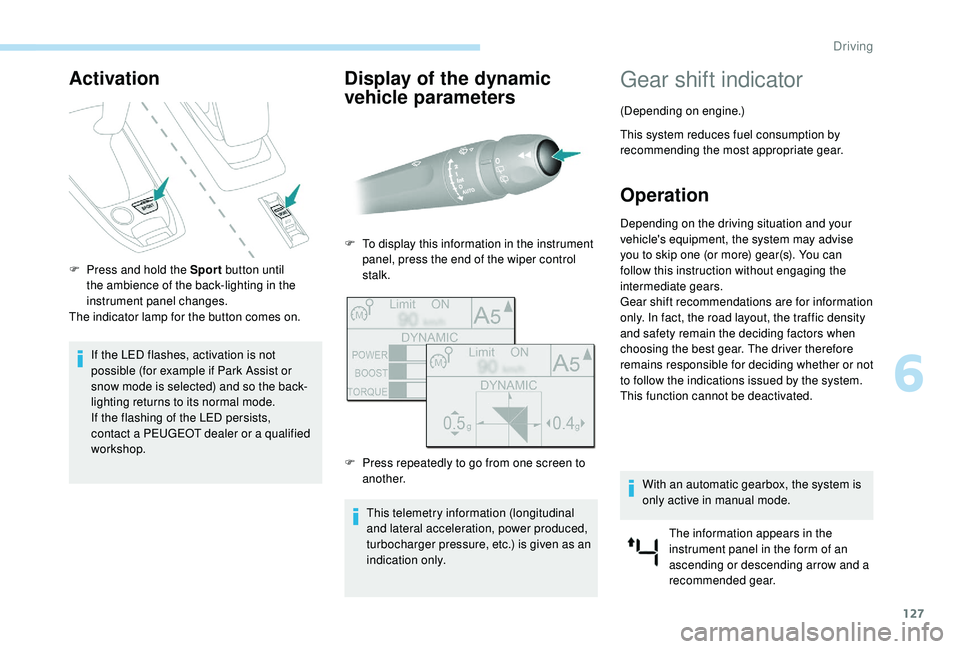
Display of the dynamic
vehicle parameters
This telemetry information (longitudinal
and lateral acceleration, power produced,
turbocharger pressure, etc.) is given as an
indication only.
F
T
o display this information in the instrument
panel, press the end of the wiper control
stalk.
F
P
ress repeatedly to go from one screen to
another.
Gear shift indicator
(Depending on engine.)
This system reduces fuel consumption by
recommending the most appropriate gear.
Operation
Depending on the driving situation and your
vehicle's equipment, the system may advise
you to skip one (or more) gear(s). You can
follow this instruction without engaging the
intermediate gears.
Gear shift recommendations are for information
only. In fact, the road layout, the traffic density
and safety remain the deciding factors when
choosing the best gear. The driver therefore
remains responsible for deciding whether or not
to follow the indications issued by the system.
This function cannot be deactivated.
With an automatic gearbox, the system is
only active in manual mode. The information appears in the
instrument panel in the form of an
ascending or descending arrow and a
recommended gear.
6
Driving