2018 Peugeot 308 open bonnet
[x] Cancel search: open bonnetPage 26 of 324

24
Retrieving the service information
(Only with display screen 2.)
You can access the ser vice information at any
time.
F
P
ress the trip distance recorder reset
button.
The ser vice information is displayed for a few
seconds, then disappears.
Engine coolant temperature
gauge
- in zone B , the temperature is too high;
the maximum temperature and the
central STOP warning lamps come on,
accompanied by an audible signal and a
warning message in the screen.
You MUST stop as soon as it is safe to do
so.
Wait a few minutes before switching off the
engine.
After first switching off the ignition, open
the bonnet cautiously and check the
coolant level.
For more information on Checking levels ,
refer to the corresponding section.
With the engine running, when the needle is:
-
i
n zone A , the temperature is correct,
Engine oil level indicator
With an electric oil level indicator, the state
of the engine oil level is displayed in the
instrument panel for a few seconds when the
ignition is switched on, at the same time as the
servicing information.
The level read will only be correct if the
vehicle is on level ground and the engine
has been off for more than 30
minutes.
Oil level correct
Oil level insufficient
This is indicated by the flashing of " OIL" or the
display of the " Oil level incorrect " message,
accompanied by the Ser vice warning lamp and
an audible signal.
If the low oil level is confirmed by a check using
the dipstick, the level must be topped up to
avoid damage to the engine.
For more information on Checking levels ,
refer to the corresponding section.
Instruments
Page 50 of 324

48
For vehicles that are fitted with it, interior
volumetric monitoring is incompatible with
programmed thermal preconditioning.
Anti-tilt monitoring
(On GT and GTi versions)
The system checks for any change in the
attitude of the vehicle.Self-protection function
The system checks for the putting out of
ser vice of its components.
The alarm is triggered if the siren's
battery, button or wiring is disconnected or
damaged.
For all work on the alarm system, contact
a PEUGEOT dealer or a qualified
workshop.
Locking the vehicle with full
alarm system
Activation
F Switch off the ignition and get out of the vehicle.
F Lock the vehicle using the remote
control.
or
F
L
ock the vehicle using the "
K
eyless Entry
and Starting" system. interior volumetric monitoring after 45
seconds.
If an access (door, boot, bonnet, etc.) is not
properly closed, the vehicle is not locked but
monitoring will be activated after 45 seconds.
Deactivation
F Press this unlocking button on the
remote control.
or
F
U
nlock the vehicle using the "
K
eyless Entry
and Starting" system.
The monitoring system is deactivated: the
indicator lamp in the button goes off and the
direction indicators flash for about 2
seconds.
Where the vehicle locks itself again
automatically (occurs 30
seconds after
unlocking, if a door or the boot is not
opened), the monitoring system is not
reactivated automatically.
To reactivate it, the vehicle must be
unlocked and locked again, using the
remote control key or the "
K
eyless Entry
and Starting" system.
Alarm
This system protects and provides a deterrent
against theft and break-ins.
It provides the following types of monitoring:
Exterior perimeter
The system checks for opening of the vehicle.
The alarm is triggered if anyone tries to open a
door, the boot or the bonnet.
Interior volumetric
The system checks for any variation in the
volume of the passenger compartment.
The alarm is triggered if anyone breaks a
window, enters the passenger compartment or
moves inside the vehicle.
The monitoring system is active: the indicator
lamp in this button flashes once per second
and the direction indicators come on for about
2
seconds.
After an instruction to lock the vehicle using
the remote control or the "
K
eyless Entry
and Starting" system, the exterior perimeter
monitoring is activated after 5
seconds, the
The alarm is triggered if the vehicle is lifted,
moved or knocked.
Access
Page 80 of 324
78
The system may suffer inter ference or not
work correctly:
-
u
nder poor visibility conditions (snow,
heavy rain, etc.),
-
i
f the windscreen is dirty, misted or
obscured (by a sticker, etc.) in front of
the camera,
-
i
f the vehicle is facing highly reflective
signs.
When the system detects thick fog, it
temporarily deactivates the function.
The system is not able to detect:
-
r
oad users that do not have their own
lighting, such as pedestrians,
-
v
ehicles whose lighting is obscured
(for example: vehicles running behind a
safety barrier on a motor way),
-
v
ehicles at the top or bottom of a
steep slope, on winding roads, on
crossroads. Clean the windscreen regularly,
particularly the area in front of the camera.
The internal sur face of the windscreen can
also become misted around the camera.
In humid and cold weather, demist the
windscreen regularly.
Do not allow snow to accumulate on the
bonnet or roof of the vehicle as this could
conceal the detection camera.
Guide-me-home lighting
Manual
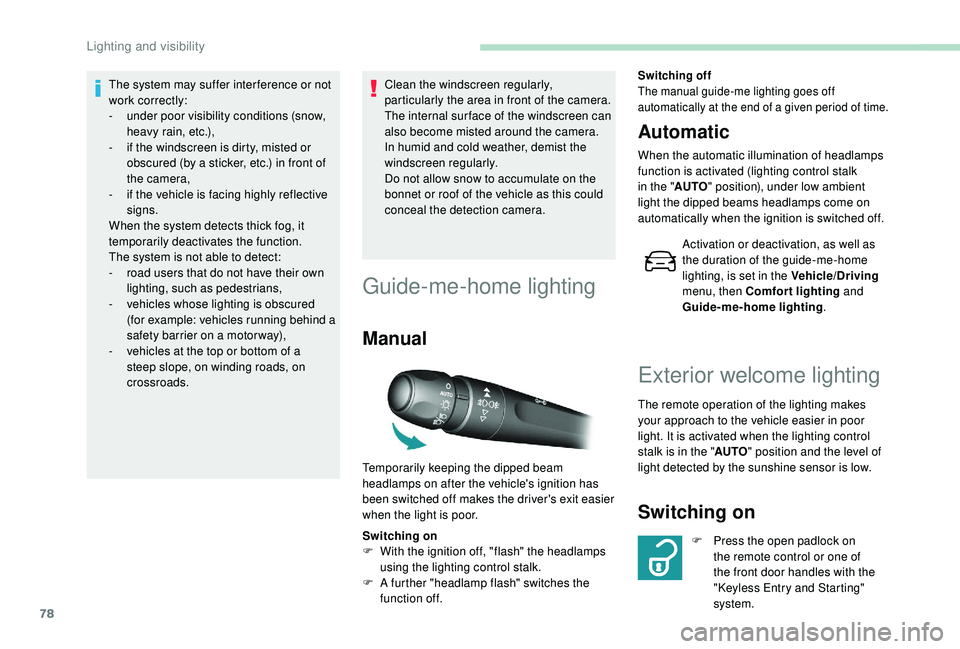
Switching on
F
W ith the ignition off, "flash" the headlamps
using the lighting control stalk.
F
A f
urther "headlamp flash" switches the
function off.
Switching off
The manual guide-me lighting goes off
automatically at the end of a given period of time.
Automatic
When the automatic illumination of headlamps
function is activated (lighting control stalk
in the " AUTO" position), under low ambient
light the dipped beams headlamps come on
automatically when the ignition is switched off.
Activation or deactivation, as well as
the duration of the guide-me-home
lighting, is set in the Vehicle/Driving
menu, then Comfort lighting and
Guide-me-home lighting .
Temporarily keeping the dipped beam
headlamps on after the vehicle's ignition has
been switched off makes the driver's exit easier
when the light is poor.
Exterior welcome lighting
The remote operation of the lighting makes
your approach to the vehicle easier in poor
light. It is activated when the lighting control
stalk is in the " AUTO" position and the level of
light detected by the sunshine sensor is low.
Switching on
F Press the open padlock on the remote control or one of
the front door handles with the
"Keyless Entry and Starting"
system.
Lighting and visibility
Page 131 of 324
129
- With a manual gearbox, when you fully
depress the clutch pedal.
-
W
ith an automatic gearbox :
•
g
ear selector in position D or M , when
you release the brake pedal,
•
o
r gear selector in position N and brake
pedal released, when you place the gear
selector in position D or M ,
•
o
r when you engage reverse.
Special cases: START mode
activated automatically
START mode is activated automatically if:
- you open the driver's door,
-
y
ou unfasten the driver's seat belt,
-
t
he speed of the vehicle exceeds 2 mph
(3
km/h),
-
t
he electric parking brake is being
applied,
-
s
ome temporary conditions (battery
charge, engine temperature, braking
assistance, air conditioning setting,
etc.) require the engine to be running to
control the system or the vehicle.
In this case, this indicator lamp flashes
for a few seconds, then goes off.
This operation is perfectly normal.
Deactivation/Reactivation
In certain cases, such as the need to maintain
a comfortable temperature in the passenger
compartment, it may be useful to deactivate the
Stop & Start system.
The system can be deactivated at any time, once
the ignition is switched on.
If the engine is in STOP mode, it restarts
immediately.
The Stop & Start system is reactivated
automatically every time the ignition is switched on.
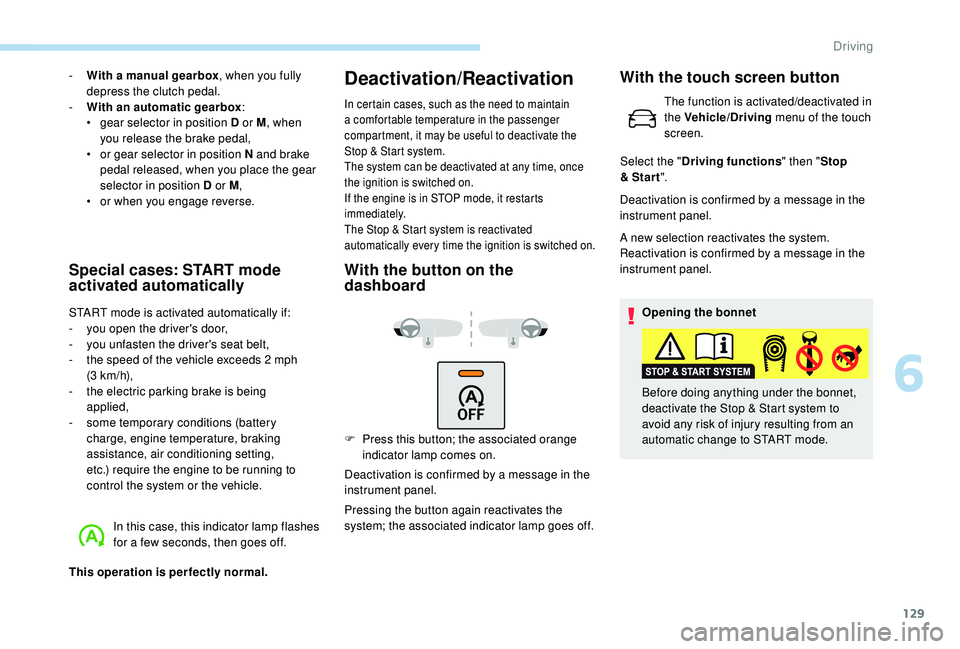
With the button on the
dashboard
F Press this button; the associated orange indicator lamp comes on.
Deactivation is confirmed by a message in the
instrument panel.
Pressing the button again reactivates the
system; the associated indicator lamp goes off. Deactivation is confirmed by a message in the
instrument panel.
A new selection reactivates the system.
Reactivation is confirmed by a message in the
instrument panel.
Opening the bonnet
Before doing anything under the bonnet,
deactivate the Stop & Start system to
avoid any risk of injury resulting from an
automatic change to START mode.
With the touch screen button
The function is activated/deactivated in
the Vehicle/Driving menu of the touch
screen.
Select the " Driving functions " then "Stop
& Star t ".
6
Driving
Page 185 of 324
183
Bonnet
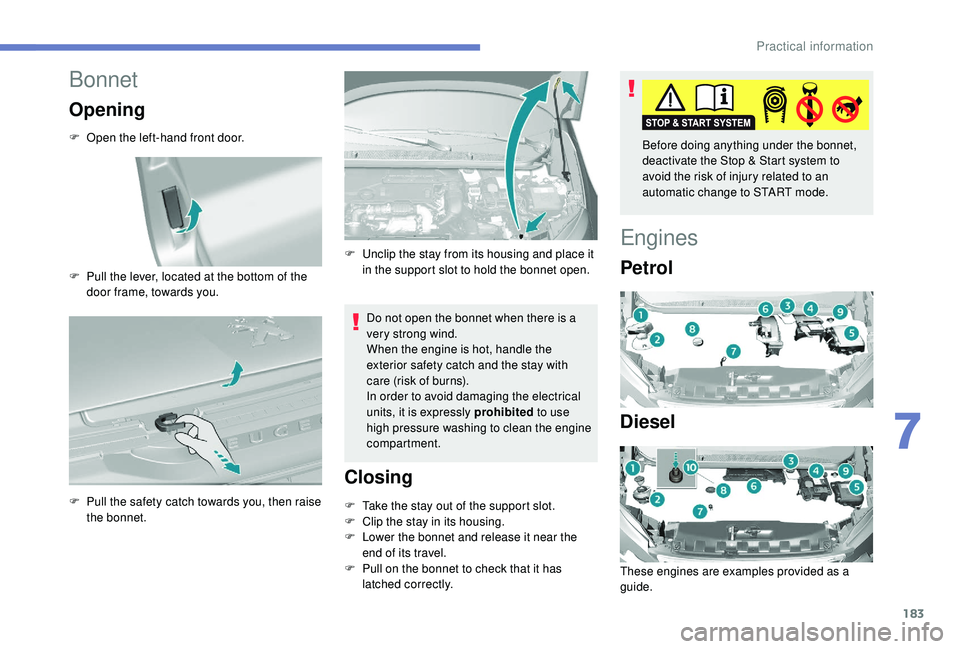
Opening
F Open the left-hand front door.
F
P
ull the lever, located at the bottom of the
door frame, towards you.
F
P
ull the safety catch towards you, then raise
the bonnet. Do not open the bonnet when there is a
very strong wind.
When the engine is hot, handle the
exterior safety catch and the stay with
care (risk of burns).
In order to avoid damaging the electrical
units, it is expressly prohibited
to use
high pressure washing to clean the engine
compartment.
Closing
F Take the stay out of the support slot.
F C lip the stay in its housing.
F
L
ower the bonnet and release it near the
end of its travel.
F
P
ull on the bonnet to check that it has
latched correctly.
Engines
Petrol
Diesel
These engines are examples provided as a
guide.
F
U
nclip the stay from its housing and place it
in the support slot to hold the bonnet open. Before doing anything under the bonnet,
deactivate the Stop & Start system to
avoid the risk of injury related to an
automatic change to START mode.
7
Practical information
Page 187 of 324

185
A = MA X
B = MIN
If you find that the level is above the A mark or
below the B mark, do not star t the engine .
-
I
f the level is above the MAX mark (risk of
damage to the engine), contact a PEUGEOT
dealer or a qualified workshop.
-
I
f the level is below the MIN mark, you must
top up the engine oil.
Oil grade
Before topping up the oil or changing the oil,
check that the oil is the correct grade for your
engine and conforms to the manufacturer's
recommendations.
The location of the oil filler cap is shown in the
corresponding underbonnet layout view.
F
U
nscrew the oil filler cap to access the filler
opening.
Topping up the engine oil level
After topping up the oil, the check when
switching on the ignition with the oil level
indicator in the instrument panel is not
valid during the 30
minutes after topping
up.
Engine oil change
In order to maintain the reliability of the engine
and emissions control system, never use
additives in the engine oil.
Brake fluid level
The brake fluid level must be between
the marking " A" (MA X located on the
remote reservoir) and the marking " B"
(MIN located on the main reser voir). If
it is not, check the brake pad wear.
Changing the fluid
Refer to the personalised ser vice schedule for
your vehicle.
Fluid specification
This fluid must conform to the manufacturer's
recommendations.
Coolant level
Check the coolant level regularly.
It is normal to top up this fluid
between two services.
The check and top-up must only be done with
the engine cold.
A low coolant level presents a risk of serious
damage to your engine.
The coolant level should be close to the "MA X"
mark but should never exceed it.
If the level is close to or below the "MIN" mark,
it is essential to top up.
F
A
dd oil in small quantities, avoiding any
spills on engine components (risk of fire).
F
W
ait a few minutes before checking the
level again using the dipstick.
F
A
dd more oil if necessary.
F
A
fter checking the level, carefully refit the oil
filler cap and the dipstick in its tube.
7
Practical information
Page 208 of 324
206
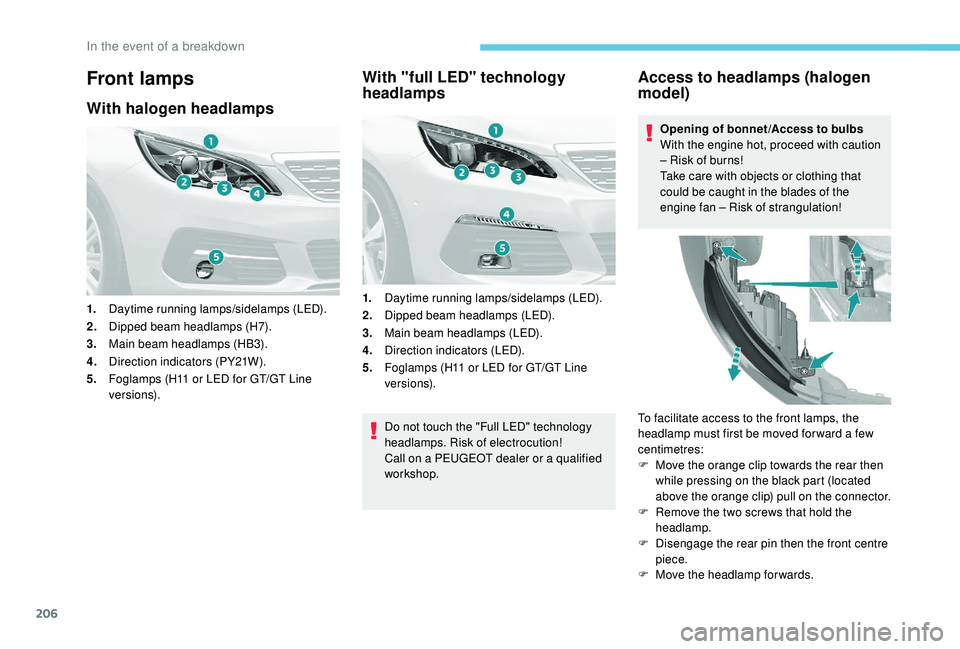
Front lamps
With halogen headlamps
1.Daytime running lamps/sidelamps (LED).
2. Dipped beam headlamps (H7).
3. Main beam headlamps (HB3).
4. Direction indicators (PY21W).
5. Foglamps (H11 or LED for GT/GT Line
ve r s i o n s).
With "full LED" technology
headlamps
1.Daytime running lamps/sidelamps (LED).
2. Dipped beam headlamps (LED).
3. Main beam headlamps (LED).
4. Direction indicators (LED).
5. Foglamps (H11 or LED for GT/GT Line
ve r s i o n s).
Do not touch the "Full LED" technology
headlamps. Risk of electrocution!
Call on a PEUGEOT dealer or a qualified
workshop.
Access to headlamps (halogen
model)
Opening of bonnet /Access to bulbs
With the engine hot, proceed with caution
– Risk of burns!
Take care with objects or clothing that
could be caught in the blades of the
engine fan – Risk of strangulation!
To facilitate access to the front lamps, the
headlamp must first be moved for ward a few
centimetres:
F
M
ove the orange clip towards the rear then
while pressing on the black part (located
above the orange clip) pull on the connector.
F
R
emove the two screws that hold the
headlamp.
F
D
isengage the rear pin then the front centre
piece.
F
M
ove the headlamp for wards.
In the event of a breakdown
Page 313 of 324
235
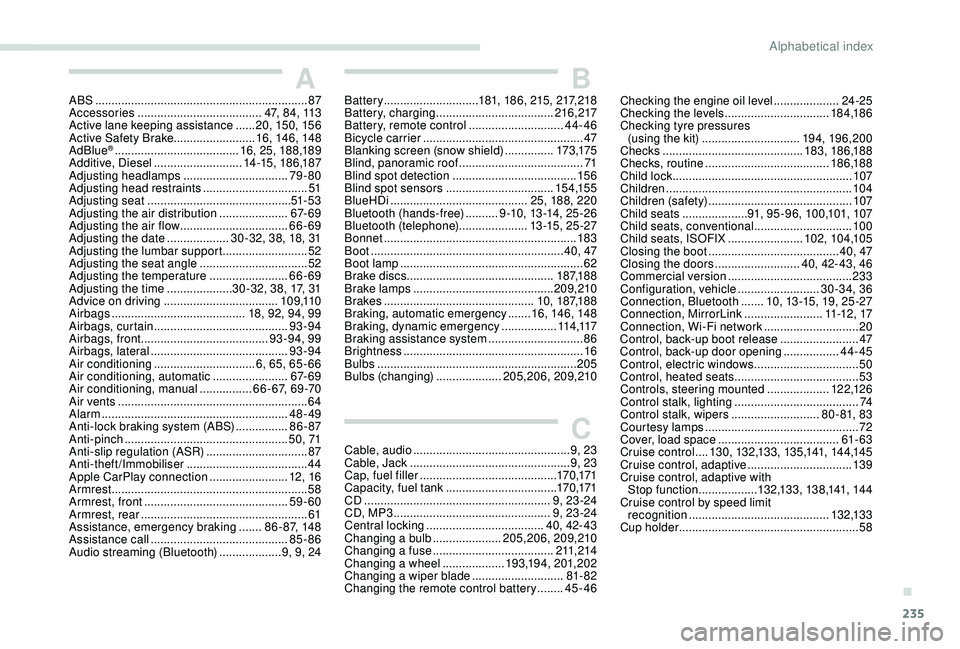
AABS .................................................................87
Accessories ...................................... 47, 84, 113
Active lane keeping assistance
......20, 15 0, 15 6
Active Safety Brake......................... 16, 14 6, 148
AdBlue
® ...................................... 1 6, 25, 188,189
Additive, Diesel ........................... 14 -15, 18 6,187
Adjusting headlamps
................................ 79-80
Adjusting head restraints
................................ 51
Adjusting seat
............................................ 51- 5 3
Adjusting the air distribution
.....................67- 6 9
Adjusting the air flow
................................. 6
6-69
Adjusting the date
................... 30 -32, 38, 18, 31
Adjusting the lumbar support
.......................... 52
A
djusting the seat angle
................................. 52
Adjusting the temperature
........................66-69
Adjusting the time
.................... 30 -32, 38, 17, 31
Advice on driving
................................... 109,110
Airbags
...............................
..........18, 92, 94, 99
Airbags, curtain
......................................... 93-94
Airbags, front ....................................... 93 -94, 99
Airbags, lateral
.......................................... 93-94
Air conditioning
............................... 6, 65, 65 - 66
Air conditioning, automatic
.......................67- 6 9
Air conditioning, manual
................ 6
6-67, 69-70
Air vents
.......................................................... 64
Alarm
......................................................... 48-49
Anti-lock braking system (ABS)
................86 - 87
Anti-pinch
.................................................. 5
0, 71
Anti-slip regulation (ASR)
............................... 87
Anti-theft/Immobiliser
..................................... 44
Apple CarPlay connection
........................12, 16
Armrest
................
............................................ 58
Armrest, front
............................................ 59-60
Armrest, rear
...............................
....................61
Assistance, emergency braking
.......86 - 87, 148
Assistance call
...............................
...........85-86
Audio streaming (Bluetooth)
...................9, 9, 24
BBattery ............................. 181, 18 6, 215, 217, 218
Battery, charging .................................... 216,217
Battery, remote control
.............................44-46
Bicycle carrier
...............................
..................47
Blanking screen (snow shield)
...............173 ,175
Blind, panoramic roof
...................................... 71
Blind spot detection
...................................... 15 6
Blind spot sensors
................................. 15 4,15 5
BlueHDi
.......................................... 25, 188, 220
Bluetooth (hands-free)
.......... 9
-10, 13 -14, 25 -2 6
Bluetooth (telephone)
..................... 1
3 -15, 25 -27
Bonnet
........................................................... 183
Boot
........................................................... 40, 47
Boot lamp
........................................................ 62
Brake discs
............................................. 187,188
Brake lamps
...............................
............209,210
Brakes
.............................................. 10, 187,188
Braking, automatic emergency
.......16, 14 6, 148
Braking, dynamic emergency
.................114 ,117
Braking assistance system
.............................86
Brightness
....................................................... 16
Bulbs
............................................................. 205
Bulbs (changing)
....................205,206, 209,210
CCable, audio ................................................ 9, 23
Cable, Jack ................................................. 9, 23
Cap, fuel filler
...............................
...........170,171
Capacity, fuel tank
.................................. 170,171
CD
......................................................... 9, 23 -24
CD, MP3
................................................ 9, 23 -24
Central locking
.................................... 4
0, 42- 43
Changing a bulb
..................... 20
5,206, 209,210
Changing a fuse
..................................... 21
1,214
Changing a wheel
................... 19
3,19 4, 201, 202
Changing a wiper blade
............................ 81
- 82
Changing the remote control battery
........45-46 Checking the engine oil level
....................
24-25
Checking the levels
................................
18 4,18 6
Checking tyre pressures (using the kit)
..............................
19 4, 19 6, 20 0
Checks
...........................................
183, 18 6,188
Checks, routine
......................................
18 6,188
Child lock
.......................................................
107
Children
.........................................................
104
Children (safety)
............................................
107
Child seats
.................... 9
1, 95 - 9 6, 10 0,101, 107
Child seats, conventional
..............................
10 0
Child seats, ISOFIX .......................
102, 104,105
Closing the boot
........................................
4
0, 47
Closing the doors
..........................
40, 42- 43, 46
Commercial version
......................................
233
Configuration, vehicle
......................... 3
0-34, 36
Connection, Bluetooth
....... 1
0, 13 -15, 19, 25 -27
Connection, MirrorLink
........................
11 -12 , 17
Connection, Wi-Fi network
.............................
20
Control, back-up boot release ........................
47
Control, back-up door opening .................
44-45
Control, electric windows
................................
50
Control, heated seats
......................................
53
Controls, steering mounted
...................
12 2,126
Control stalk, lighting
......................................
74
Control stalk, wipers
...........................
8
0 - 81, 8 3
Courtesy lamps ...............................................
72
Cover, load space .....................................
61- 63
Cruise control ....13 0, 132,13 3, 13 5,141, 14 4,14 5
Cruise control, adaptive
................................13 9
Cruise control, adaptive with Stop function
..................132,13 3, 13 8,141, 14 4
Cruise control by speed limit recognition
...............................
............132,13 3
Cup holder
.......................................................58
.
Alphabetical index