2018 Peugeot 308 change wheel
[x] Cancel search: change wheelPage 142 of 324
140
When the cruise control is paused, it
can only be reactivated when all of the
safety conditions are met. The "Activation
denied, conditions unsuitable" message is
displayed if reactivation is not possible.
Reactivating the function
With a manual gearbox
To reactivate the function, the driver must
accelerate to reach at least 19 mph (30 km/h),
then press one of the buttons 2 , 3 or 4.
With the EAT8 gearbox or with the BlueHDi
150 S&S EAT6 engine
Following braking of the vehicle bringing it to
a complete stop, the system holds the vehicle
stationary; the cruise control is paused.
The driver should press the accelerator pedal
to move off, then reactivate the system above
19
mph (30 km/h) by pressing button 2 , 3 or 4.
If the driver takes no action following this
immobilisation, the electric parking brake is
applied automatically after a while (approx. five
minutes).
As a safety measure, wait until the current
speed approaches the speed setting to
reactivate the function by pressing button 4 .
Modification of the speed
setting
With the engine running and cruise control on
(green), you can modify the speed setting.
Modification from the current
speed
F By successive short presses on button 2
or 3 , to lower or raise the setting in steps of
1
mph (km/h),
F
B
y a maintained press on button 2 or 3 , to
lower or raise the setting in steps of 5
mph
(km/h).
Take care: pressing and holding button 2
or 3
results in a rapid change in the speed
of your vehicle.
Modification from the speed Limit
recognition and recommendation
system
F The suggested speed is displayed in the instrument panel.
F
M
ake an initial press on button 5 ; a
message is displayed to confirm the
memorisation request.
F
P
ress button 5 again to save the suggested
speed.
The speed displays immediately in the
instrument panel as the new speed setting. For more information on the Speed Limit
recognition and recommendation
, refer to
the corresponding section.
As a precaution, it is recommended
that you select a cruise speed close to
the current speed of your vehicle, so
as to avoid any sudden acceleration or
deceleration of the vehicle.
Modification of the programmed
inter-vehicle distance
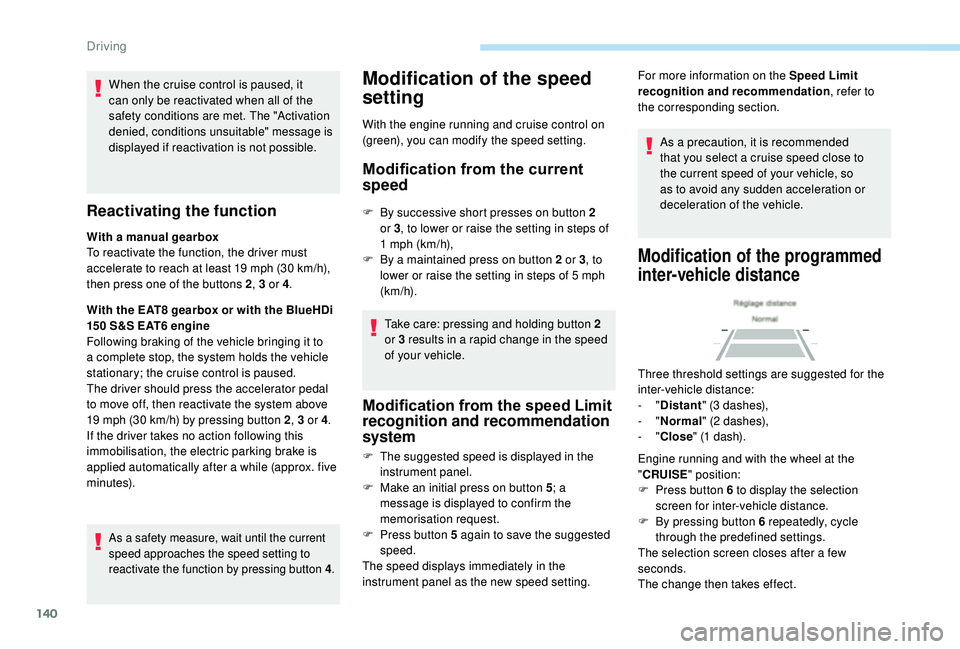
Three threshold settings are suggested for the
inter-vehicle distance:
- "Distant " (3 dashes),
-
"Normal " (2 dashes),
-
"Close " (1 dash).
Engine running and with the wheel at the
" CRUISE " position:
F
P
ress button 6 to display the selection
screen for inter-vehicle distance.
F
B
y pressing button 6 repeatedly, cycle
through the predefined settings.
The selection screen closes after a few
seconds.
The change then takes effect.
Driving
Page 152 of 324
150
After three first level alerts, the system triggers
a new alert with the message "Take a break!",
accompanied by a more pronounced audible
signal.
In certain driving conditions (poor road
sur face or strong winds), the system may
give alerts independent of the driver's
level of vigilance.
The following situations may interfere with
the operation of the system or prevent it
working:
-
p
oor visibility (inadequate lighting of
the roadway, falling snow, heavy rain,
dense fog, etc.),
-
d
azzle (headlamps of an oncoming
vehicle, low sun, reflections on a damp
road, leaving a tunnel, alternating
shade and light, etc.),
-
w
indscreen area located in front of the
camera: dirty, misted up, frost-covered,
snow-covered, damaged or covered by
a s t i c ke r,
-
l
ane markings absent, worn, hidden
(snow, mud) or multiple (roadworks,
e t c .),
-
c
lose to the vehicle ahead (lane
markings not detected),
-
r
oads that are narrow, winding, etc. Clean the windscreen regularly,
particularly the area in front of the camera.
The internal sur face of the windscreen can
also become misted around the camera.
In humid and cold weather, demist the
windscreen regularly.
Do not allow snow to accumulate on the
bonnet or roof of the vehicle as this could
conceal the detection camera.
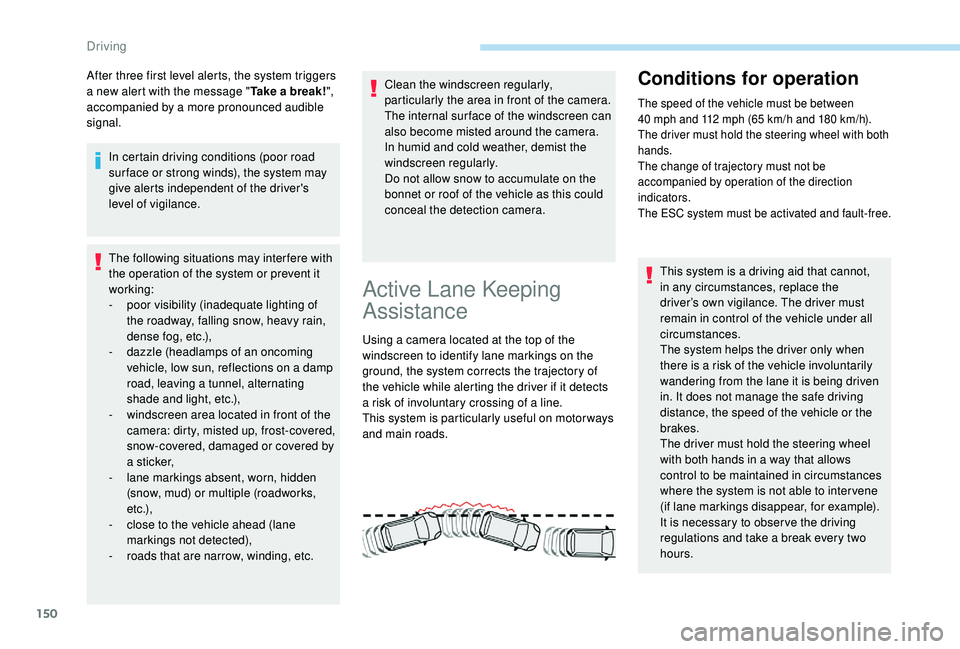
Active Lane Keeping
Assistance
Using a camera located at the top of the
windscreen to identify lane markings on the
ground, the system corrects the trajectory of
the vehicle while alerting the driver if it detects
a risk of involuntary crossing of a line.
This system is particularly useful on motor ways
and main roads.
Conditions for operation
The speed of the vehicle must be between
40
mph and 112 mph (65 km/h and 180 km/h).
The driver must hold the steering wheel with both
hands.
The change of trajectory must not be
accompanied by operation of the direction
indicators.
The ESC system must be activated and fault-free.
This system is a driving aid that cannot,
in any circumstances, replace the
driver’s own vigilance. The driver must
remain in control of the vehicle under all
circumstances.
The system helps the driver only when
there is a risk of the vehicle involuntarily
wandering from the lane it is being driven
in. It does not manage the safe driving
distance, the speed of the vehicle or the
brakes.
The driver must hold the steering wheel
with both hands in a way that allows
control to be maintained in circumstances
where the system is not able to inter vene
(if lane markings disappear, for example).
It is necessary to obser ve the driving
regulations and take a break every two
hours.
Driving
Page 153 of 324
151
Operation
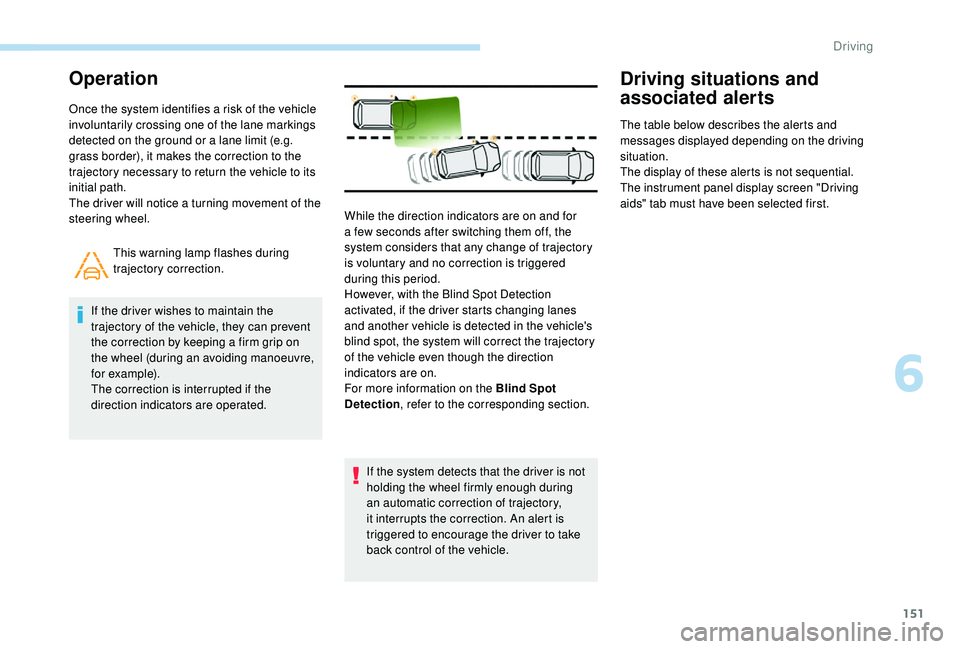
Once the system identifies a risk of the vehicle
involuntarily crossing one of the lane markings
detected on the ground or a lane limit (e.g.
grass border), it makes the correction to the
trajectory necessary to return the vehicle to its
initial path.
The driver will notice a turning movement of the
steering wheel.This warning lamp flashes during
trajectory correction.
If the driver wishes to maintain the
trajectory of the vehicle, they can prevent
the correction by keeping a firm grip on
the wheel (during an avoiding manoeuvre,
for example).
The correction is interrupted if the
direction indicators are operated.
If the system detects that the driver is not
holding the wheel firmly enough during
an automatic correction of trajectory,
it interrupts the correction. An alert is
triggered to encourage the driver to take
back control of the vehicle.
Driving situations and
associated alerts
The table below describes the alerts and
messages displayed depending on the driving
situation.
The display of these alerts is not sequential.
The instrument panel display screen "Driving
aids" tab must have been selected first.
While the direction indicators are on and for
a few seconds after switching them off, the
system considers that any change of trajectory
is voluntary and no correction is triggered
during this period.
However, with the Blind Spot Detection
activated, if the driver starts changing lanes
and another vehicle is detected in the vehicle's
blind spot, the system will correct the trajectory
of the vehicle even though the direction
indicators are on.
For more information on the Blind Spot
Detection , refer to the corresponding section.
6
Driving
Page 161 of 324

159
Different contextual views can be displayed in
the left-hand part:
-
s
tandard view,
-
1
80° view,
-
z
oom view.
The blue lines 1 represent the width of your
vehicle, with the mirrors unfolded; their
direction changes depending on the position of
the steering wheel.
The red line 2 represents a distance of 30
cm
from the bumper; the two blue lines 3 and 4
represent 1
m and 2 m, respectively.
AUTO mode is activated by default.
In this mode, the system chooses the best view
to display (standard or zoom) according to the
information from the parking sensors.
You can change the type of view at any time
during a manoeuvre.
The state of the system is not kept in memory
when the ignition is switched off.Principle of operation
Using the rear camera, the vehicle's
surroundings are recorded during manoeuvres
at low speed.
An image from above your vehicle in its close
surroundings is created in real time, as the
vehicle manoeuvre progresses.
This representation facilitates the alignment of
your vehicle when parking and allows obstacles
close to the vehicle to be seen.
This image is automatically deleted if the
vehicle remains stationary for too long.
This system is a visual aid that cannot in
any circumstances replace the need for
vigilance on the part of the driver. The images provided by the camera may
be distorted by the relief.
In the presence of areas in shade, or in
conditions of bright sunlight or inadequate
lighting, the image may be darkened and
with lower contrast.
Activation
Activation is automatic on engaging reverse at
a speed lower than 6
mph (10 km/h).
You can choose the display mode at any time
by pressing on this area.
When the sub-menu is displayed, select one of
the four views: "Standard view".
"180° view".
6
Driving
Page 162 of 324

160
The function will be deactivated:
- I f a trailer is attached or a bicycle
carrier is fitted on a towbar (vehicle
fitted with a towbar installed in line with
the manufacturer's recommendations).
-
A
bove about 6 mph (10 km/h).
-
O
n opening the tailgate.
-
W
hen shifting out of reverse (the image
remains displayed for 7
seconds).
-
B
y pressing the red cross in the top
left-hand corner of the touch screen.
Check the cleanliness of the camera lens
regularly.
Clean the reversing camera regularly
using a soft, dry cloth.
AUTO mode
Standard view Zoom view"Zoom view".
"AUTO m o de".
This mode is activated by default.
Using sensors in the rear bumper, the
automatic view changes from a rear view
(standard) to a view from above (zoom), as an
obstacle is approached at the level of the red
line (less than 30
cm) during a manoeuvre.The blue lines 1 represent the width of your
vehicle, with the mirrors unfolded; the direction
changes depending on the position of the
steering wheel.
The red line 2 represents a distance of 30
cm
from the rear bumper; the two blue lines 3 and
4 represent 1
m and 2 m, respectively.
This view is available with AUTO mode or in the
view selection menu.
The area behind the vehicle is displayed on the
screen. The camera records the vehicle's surroundings
during the manoeuvre in order to create a
view from above the rear of the vehicle in its
near surroundings, allowing the vehicle to be
manoeuvred around obstacles nearby.
This view is available with AUTO mode or in the
view selection menu.
Driving
Page 169 of 324
167
The tyre under-inflation detection system
does not replace the need for vigilance on
the part of the driver.
This system still requires you to check
the tyre inflation pressures (including
the spare wheel) every month as well as
before a long journey.
Driving with under-inflated tyres impairs
handling, extends braking distances and
causes early tyre wear, particularly in
adverse conditions (heavy loads, high
speeds, long journeys).Driving with under-inflated tyres
increases fuel consumption. The tyre pressure specifications for your
vehicle can be found on the tyre pressure
label.
For more information on the
Identification markings
, refer to the
corresponding section.
Tyre pressures should be checked when
the tyres are "cold" (vehicle stopped for
1 hour or after a journey of less than
6 miles (10 km) at moderate speeds).
Other wise (when hot), add 0.3 bar to the
pressures shown on the label.
Snow chains
The system does not have to be
reinitialised after fitting or removing snow
chains.
Under-inflation alert
This warning is indicated by fixed
illumination of this warning lamp, an
audible signal and, depending on
the equipment installed, a message
displayed on the screen.
It compares the information given by the
wheel speed sensors with reference values,
which must be reinitialised after ever y tyre
pressure adjustment or wheel change
.
The system triggers an alert as soon as it
detects a drop in the pressure of one or more
tyres.
F
R
educe speed immediately, avoid excessive
steering movements and sudden braking.
F
S
top the vehicle as soon as it is safe to do
so. The loss of pressure detected does not
always cause visible bulging of the tyre.
Do not satisfy yourself with just a visual
check.
F
I
n the event of a puncture, use the
temporary puncture repair kit or the spare
wheel (depending on equipment),
or
F
i
f you have a compressor, such as the one
in the temporary puncture repair kit, check
the pressures of the four tyres when cold,
or
F
i
f it is not possible to carry out this check
immediately, drive carefully at reduced
speed.
The alert is kept active until the system is
reinitialised.
Reinitialisation
The system must be reinitialised after any
adjustment to the pressure of one or more
tyres, and after changing one or more wheels.
6
Driving
Page 195 of 324
193
Tool kit
This is a set of tools provided with the vehicle.
Its content depends on your vehicle's
equipment:
-
t
emporary puncture repair kit,
-
spar
e wheel.
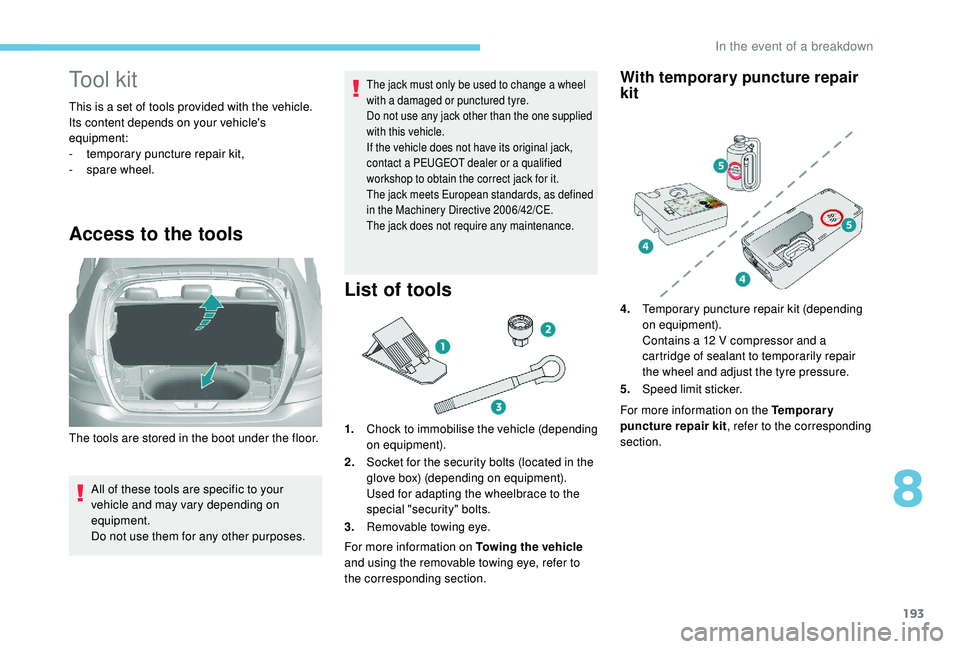
Access to the tools
All of these tools are specific to your
vehicle and may vary depending on
equipment.
Do not use them for any other purposes.
The jack must only be used to change a wheel
with a damaged or punctured tyre.
Do not use any jack other than the one supplied
with this vehicle.
If the vehicle does not have its original jack,
contact a PEUGEOT dealer or a qualified
workshop to obtain the correct jack for it.
The jack meets European standards, as defined
in the Machinery Directive 2006/42/CE.
The jack does not require any maintenance.
List of tools
1.Chock to immobilise the vehicle (depending
on equipment).
2. Socket for the security bolts (located in the
glove box) (depending on equipment).
Used for adapting the wheelbrace to the
special "security" bolts.
3. Removable towing eye.
For more information on Towing the vehicle
and using the removable towing eye, refer to
the corresponding section.
With temporary puncture repair
kit
The tools are stored in the boot under the floor. For more information on the Temporary
puncture repair kit
, refer to the corresponding
section. 4. Temporary puncture repair kit (depending
on equipment).
Contains a 12 V compressor and a
cartridge of sealant to temporarily repair
the wheel and adjust the tyre pressure.
5. Speed limit sticker.
8
In the event of a breakdown
Page 203 of 324
201
F Adjust the pressure using the compressor (to inflate: switch B in position " I"; to deflate:
switch B in position " O" and press button
C ), according to the vehicle's tyre pressure
label.
If after approximately seven minutes this
pressure is not reached, this indicates
that the tyre is not repairable; contact a
PEUGEOT dealer or a qualified workshop
for assistance.
F
R
emove the kit then stow it.
Do not drive more than 125
miles (200 km)
with the repaired tyre; see a PEUGEOT
dealer or a qualified workshop to change
the tyre.
Should the pressure of one or more tyres
be adjusted, it is necessary to reinitialise
the under-inflation detection system.
For more information on Tyre under-
inflation detection , refer to the
corresponding section.Spare wheel
Scan the QR code on page 3 to view
explanatory videos.
Procedure for changing a damaged wheel with
the spare wheel using the tools provided with
the vehicle. For more information on the Tool kit , refer
to the corresponding section.
The jack must only be used to change
a wheel with a damaged or punctured tyre.
The jack does not require any
maintenance.
The jack meets European standards,
as defined in the Machinery Directive
2006/42/EC.
Wheel with wheel trim
When refitting the wheel , refit the wheel
trim, starting by placing its aperture in
line with the valve and then pushing it into
place all round its edge with the palm of
your hand. F
P
ark the vehicle without obstructing any
traffic and apply the parking brake.
F F ollow the safety instructions (hazard
warning lamps, warning triangle, wearing
high visibility vest, etc.) according to the
legislation in force in the country where you
are driving.
F
S
witch off the ignition.
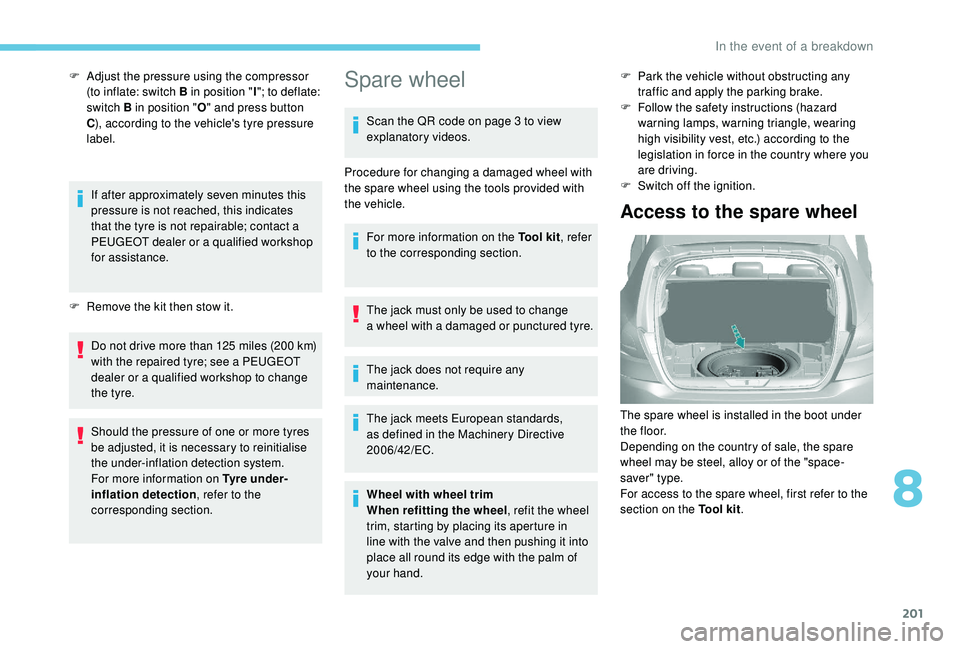
Access to the spare wheel
The spare wheel is installed in the boot under
t h e f l o o r.
Depending on the country of sale, the spare
wheel may be steel, alloy or of the "space-
saver" type.
For access to the spare wheel, first refer to the
section on the Tool kit.
8
In the event of a breakdown