2018 MITSUBISHI OUTLANDER III back light
[x] Cancel search: back lightPage 10 of 441

Outside (Rear)
Overview 1-8
1
N00100602737
Outside (Rear)
Keyless entry system (if so equipped) P.5-7, 5-30F.A.S.T.-key (Free-hand Advanced Se
curity Transmitter) (if so equipped)
P.5-13Locking and unlocking P.5-34
Tires P.9-15Tire pressure monitoring system P.5-137Tire inflation pressures P.9-19Changing tires P.8-6Tire rotation P.9-20Tire chains P.9-22Size of tires and wheels P.11-7
Stop lights P.5-207, 9-32, 9-37
Rear turn signal lights P.5-217, 9-32, 9-37
Spare tire P.8-7
Back-up lights P.9-32, 9-38
License plate lights P.5-207, 9-32, 9-39Rear-view cameraP.5-142, 5-144Rear window wiper P.5-223High-mounted stop light P.9-32
Antenna
Liftgate (if so equipped) P.5-38Power liftgate (if so equipped) P.5-39
Rear side-marker lights P.5-207, 9-32
Tail lights P.5-207, 9-32, 9-37
BK0249100US.book 8 ページ 2017年5月10日 水曜日 午前8時49分
Page 19 of 441

If this problem occurs...2-8 Quick index
2
If your vehicle becomes stuck in sand, mud or snow
1. Slowly press down on the accelerator pedal to
get your vehicle moving again. For an all-
wheel drive vehicle, set the drive mode-sel
ector to the “4WD AUTO” or “4WD LOCK”
position (Electronically cont
rolled 4WD), “SNOW” or “L
then slowly press down on the accelera
tor pedal to get your vehicle moving.
2. If there is nothing to stop your tires from sli
pping, rock your vehicle out of the stuck posi-
tion.
P. 8-15
WA R N I N GWhen attempting to rock your vehi
cle out of a stuck position, be su
re that no one is near the ve
hicle. The rocking motion may c
ause the vehicle to
suddenly lurch forward or backward, possibly injuring bystanders.Avoid revving the engine or spinning the wh
eels. Prolonged efforts to free a stuck ve
hicle may result in
overheating and transa
xle failure.
If the vehicle remains stuck after
several rocking attempts
, have a towing service pull the vehicle out.
Problem
Do this
Ref. Page
The brakes are not functioning properly after crossing a puddle or stream.
Dry out the brakes by driving slowly
while lightly pressing the brake pedal.
P. 5-90,6-5
The automatic transaxle makes no gear change when accelerat-ing. The initial movement of the vehicle is slow when the vehicle starts moving.(for vehicles with automatic transaxle)
There may be a problem in the automatic transaxle.Have the system inspected by your
authorized Mitsubishi Motors de
aler or a repair facility of
your choice.
P. 5-74
Problem
Do this
Ref. Page
BK0249100US.book 8 ページ 2017年5月10日 水曜日 午前8時49分
Page 35 of 441

Front seats4-6 Seat and restraint systems
4
N00402001379
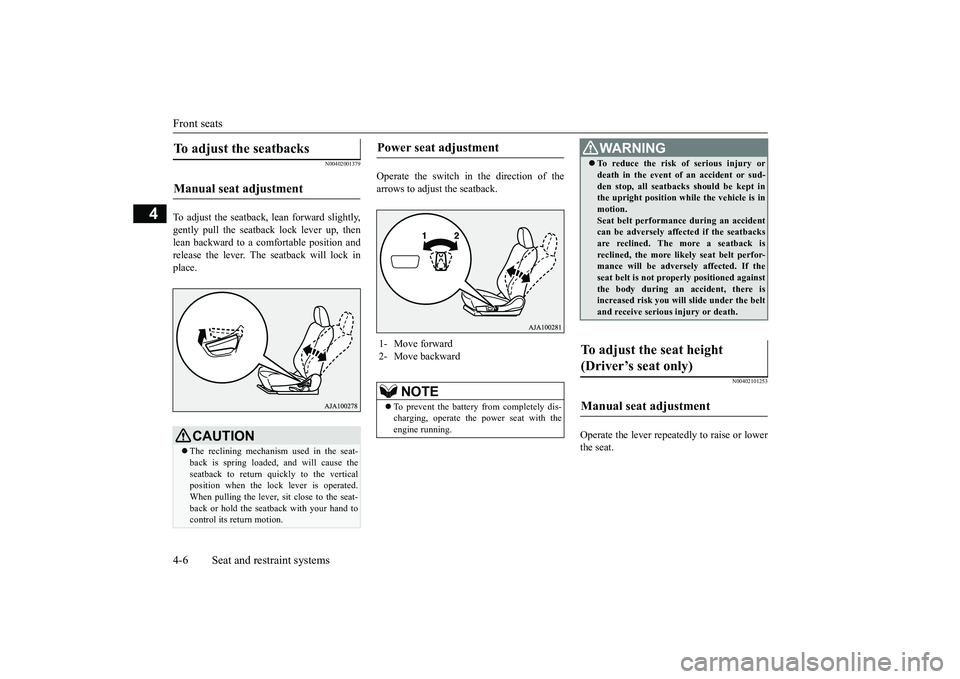
To adjust the seatback, lean forward slightly,gently pull the seatback lock lever up, thenlean backward to a comfortable position andrelease the lever. The seatback will lock inplace.
Operate the switch in the direction of thearrows to adjust the seatback.
N00402101253
Operate the lever repeatedly to raise or lowerthe seat.
To adjust the seatbacks Manual seat adjustment
CAUTIONThe reclining mechanism used in the seat-back is spring loaded, and will cause theseatback to return quickly to the verticalposition when the lock lever is operated.When pulling the lever, sit close to the seat-back or hold the seatback with your hand tocontrol its return motion.
Power seat adjustment 1- Move forward2- Move backward
NOTE
To prevent the battery from completely dis-charging, operate the
power seat with the
engine running.
WA R N I N GTo reduce the risk of serious injury ordeath in the event of
an accident or sud-
den stop, all seatbacks should be kept inthe upright position while the vehicle is inmotion.Seat belt performance during an accidentcan be adversely affect
ed if the seatbacks
are reclined. The more a seatback isreclined, the more likely seat belt perfor-mance will be adversely affected. If theseat belt is not proper
ly positioned against
the body during an accident, there isincreased risk you will slide under the beltand receive serious
injury or death.
To adjust the seat height (Driver’s seat only) Manual seat adjustment
BK0249100US.book 6 ページ 2017年5月10日 水曜日 午前8時49分
Page 37 of 441

Second row seats4-8 Seat and restraint systems
4
N00435601463
The heated seats can
be operated by pushing
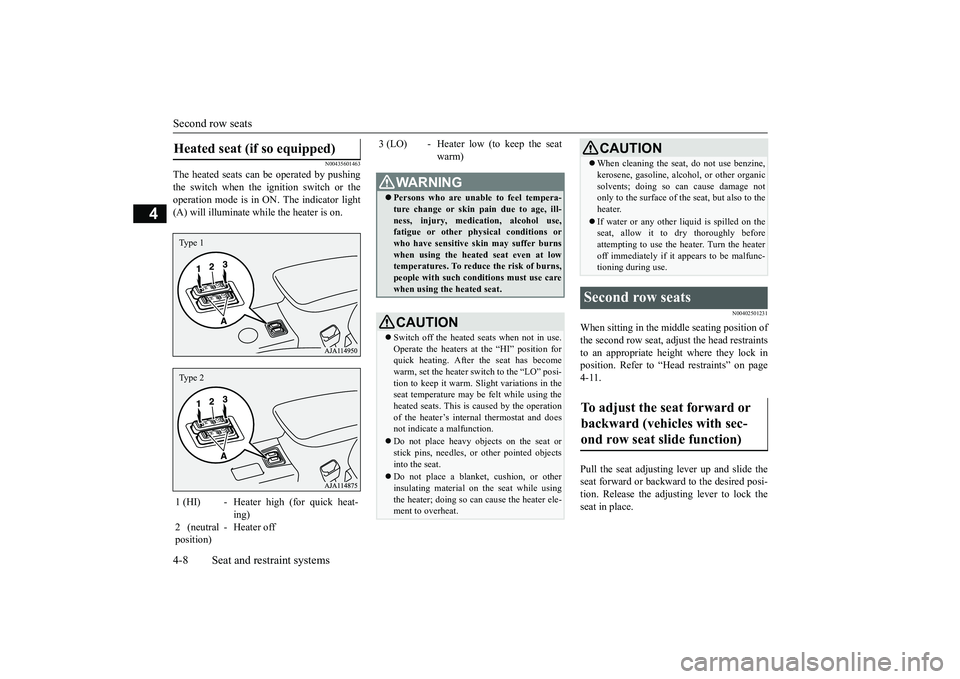
the switch when the ignition switch or theoperation mode is in ON. The indicator light(A) will illuminate while the heater is on.
N00402501231
When sitting in the mi
ddle seating position of
the second row seat, adjust the head restraintsto an appropriate height where they lock inposition. Refer to “Hea
d restraints” on page
4-11. Pull the seat adjusting lever up and slide theseat forward or backward to the desired posi-tion. Release the adjusting lever to lock theseat in place.
Heated seat (if so equipped) 1 (HI) - Heater high (for quick heat-
ing)
2 (neutralposition)
- Heater off
Type 1Type 2
3 (LO) - Heater low (to keep the seat
warm)
WA R N I N GPersons who are unable to feel tempera-ture change or skin
pain due to age, ill-
ness, injury, medication, alcohol use,fatigue or other phys
ical conditions or
who have sensitive sk
in may suffer burns
when using the heated seat even at lowtemperatures. To reduce the risk of burns,people with such conditions must use carewhen using the heated seat.CAUTIONSwitch off the heated seats when not in use.Operate the heaters at the “HI” position forquick heating. After the seat has becomewarm, set the heater switch to the “LO” posi-tion to keep it warm. Sl
ight variations in the
seat temperature may be felt while using theheated seats. This is caused by the operationof the heater’s internal thermostat and doesnot indicate a malfunction.Do not place heavy obj
ects on the seat or
stick pins, needles, or
other pointed objects
into the seat.Do not place a blanket,
cushion, or other
insulating material on the seat while usingthe heater; doing so can
cause the heater ele-
ment to overheat.
When cleaning the seat, do not use benzine,kerosene, gasoline, alc
ohol, or other organic
solvents; doing so can cause damage notonly to the surface of the seat, but also to theheater.If water or any other li
quid is spilled on the
seat, allow it to dry thoroughly beforeattempting to use the heater. Turn the heateroff immediately if it
appears to be malfunc-
tioning during use.
Second row seats To adjust the seat forward or backward (vehicles with sec-ond row seat slide function)
CAUTION
BK0249100US.book 8 ページ 2017年5月10日 水曜日 午前8時49分
Page 45 of 441

Making a flat seat4-16 Seat and restraint systems
4
N00409800021
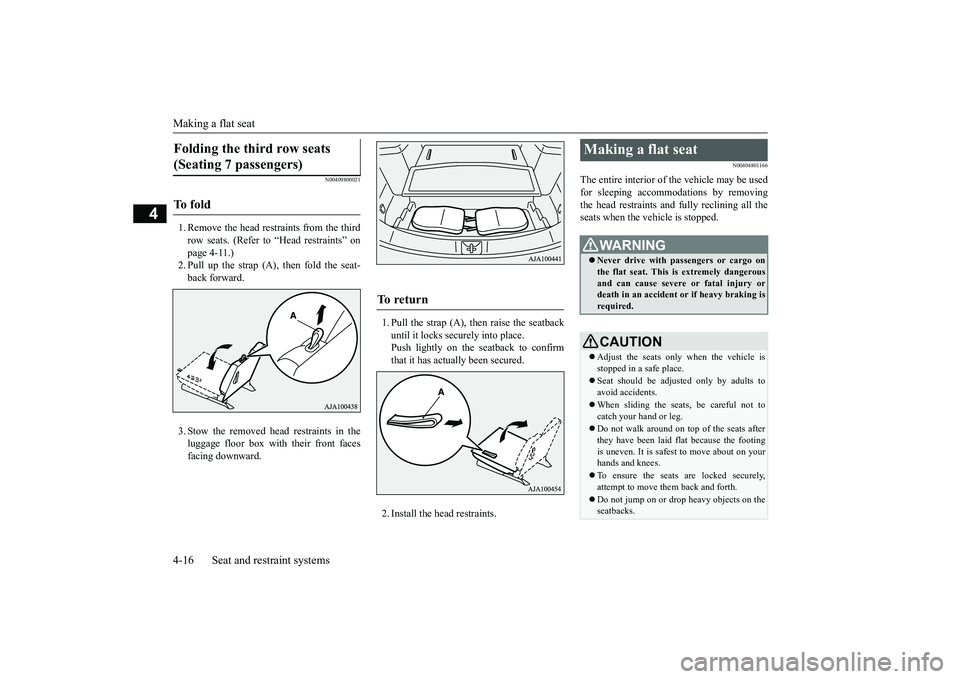
1. Remove the head restraints from the thirdrow seats. (Refer to “Head restraints” onpage 4-11.)2. Pull up the strap (A), then fold the seat-back forward.3. Stow the removed head restraints in theluggage floor box with their front facesfacing downward.
1. Pull the strap (A), then raise the seatbackuntil it locks securely into place.Push lightly on the seatback to confirmthat it has actually been secured.2. Install the head restraints.
N00404801166
The entire interior of the vehicle may be usedfor sleeping accommoda
tions by removing
the head restraints and fully reclining all theseats when the vehicle is stopped.
Folding the third row seats (Seating 7 passengers) To f o l d
To r e t u r n
Making a flat seat
WA R N I N GNever drive with passengers or cargo onthe flat seat. This is extremely dangerousand can cause severe or fatal injury ordeath in an accident
or if heavy braking is
required.CAUTIONAdjust the seats only when the vehicle isstopped in a safe place.Seat should be adjusted only by adults toavoid accidents.When sliding the seat
s, be careful not to
catch your hand or leg.Do not walk around on top of the seats afterthey have been laid flat because the footingis uneven. It is safest to move about on yourhands and knees.To ensure the seats are locked securely,attempt to move them back and forth.Do not jump on or drop heavy objects on theseatbacks.
BK0249100US.book 16 ページ 2017年5月10日 水曜日 午前8時49分
Page 55 of 441

Seat belt pre-tensioner
and force limiter systems
4-26 Seat and restraint systems
4
The driver and front pa
ssenger seat belts are
equipped with a seat belt pre-tensioner sys-tem. In a moderate-to-severe frontal or sidecollision or when a rollover or overturning ofthe vehicle is detected, the pre-tensioner sys-tem operates simultaneous
ly with the deploy-
ment of the front airb
ags, side airbags or
curtain airbags.The seat belt pre-tensi
oners are located in the
driver’s and front passenger’s seat belt retrac-tors (A) and in the front
passenger se
at’s final
anchor (B). When activated, the pre-tension-ers quickly draw back seat belt webbing andincrease seat belt performance.The seat belt pre-tens
ioner system includes
the following components:
The airbag control unit monitors the readinessof the electronic parts of the system wheneverthe ignition switch or the operation mode isunder the following conditions. These includeall of the items listed
above and all related
wiring.[Except for vehicles
equipped with the
F. A . S . T. - k e y ]The ignition switch is in the “ON” or“START” position. [Vehicles equipped with the F.A.S.T.-key]The operation mode is in ON.
The seat belt pre-tens
ioners will operate
under the same conditions
as the airbag con-
trol unit.When the seat belt pre-tensioners activate,some smoke is released
and a loud noise will
be heard. The smoke is
not harmful, but care
should be taken not to in
tentionally inhale it,
as it may cause some
temporary irritation to
people with respiratory problems.Even in the event of a severe impact, the pre-tensioners will
not operate if the seat belts are
not fastened. The seat be
lt pre-tensioners may
not activate in certai
n collisions, even though
the vehicle may appear
to be severely dam-
aged. Such non-activation does not mean thatsomething is wrong with
the seat belt pre-ten-
sioner system, but rather that the collisionforces were not severe
enough to activate the
system.
Pre-tensioner system
1- SRS warning light2- Front impact sensors3- Seat belt
pre-tensioner
4- Airbag control unit5- Side impact sensors6- Seat belt
buckle switches
WA R N I N GThe seat belt pre-tensioner system isdesigned to work only
once. After the seat
belt pre-tensioners have been activated,they will not work again. They mustpromptly be replaced and the entire seatbelt pre-tensioner system inspected by anauthorized Mitsubis
hi Motors dealer.
BK0249100US.book 26 ページ 2017年5月10日 水曜日 午前8時49分
Page 68 of 441

Supplemental Restraint System (SRS) - airbag
Seat and restraint systems 4-39
4
The main purpose of an EDR is to record, incertain crash or near
crash-like situations,
such as an airbag deployment or hitting aroad obstacle, data that
will assist in under-
standing how a vehicl
e’s systems performed.
The EDR is designed to record data related tovehicle dynamics and safety systems for ashort period of time,
typically 30 seconds or
less.The EDR in this vehicle is designed to recordsuch data as:How various systems
in your vehicle were
operating;Whether or not the driver and front pas-senger safety belts we
re buckled/fastened;
How far (if at all) the driver was depress-ing the accelerator and/or brake pedal;and,How fast the vehicle was traveling.
These data can help provide a better under-standing of the circumstances in whichcrashes and injuries occur.
To read data recorded by an EDR, specialequipment is required, and access to the vehi-cle or the EDR is needed. In addition to thevehicle manufacturer, ot
her parties, such as
law enforcement, that have the special equip-ment, can read the information if they haveaccess to the vehicle or the EDR.
N00417900177
The driver’s seat position sensor is attachedto the seat rail and provides the airbag controlunit with information on the seat’s fore-aftposition. The airbag control unit controlsdeployment of the driver’s front airbag inaccordance with the information it receivesfrom this sensor.If there is a problem involving the driver’sseat position sensor, the SRS warning light in
the instrument panel will come on. Refer to“SRS warning light/dis
play” on page 4-41.
N00418001374
The passenger’s seat oc
cupant classification
sensor system is attach
ed to the front passen-
ger seat cushion and provides the airbag con-trol unit with information regarding theoccupant on the front passenger seat. The air-
NOTE
EDR data are recorded by your vehicle onlyif a non-trivial crash si
tuation occurs; no data
are recorded by the EDR under normal driv-ing conditions and no personal data (e.g.,name, gender, age, a
nd crash location) are
recorded. However, ot
her parties, such as
law enforcement, could combine the EDRdata with the type of
personally identifying
data routinely acquire
d during a crash inves-
tigation.
Driver’s seat position sensor
WA R N I N GIf the SRS warning light or warning dis-play comes on, have the vehicle inspectedby an authorized Mitsubishi Motorsdealer as soon as possible.Please observe the following instructionsto ensure that the driver’s seat positionsensor can operate correctly.• Adjust the seat to the correct position,and sit well back
against the seatback.
Refer to “Front seats” on page 4-4.• Do not recline the seatback more thannecessary when driving.• Do not place metallic objects or luggageunder the front seat.
If the vehicle is involved in a severeimpact, have the SRS sensors inspected byan authorized
Mitsubishi Motors dealer as
soon as possible.
Passenger’s seat occupant clas-sification sensor system
BK0249100US.book 39 ページ 2017年5月10日 水曜日 午前8時49分
Page 69 of 441

Supplemental Restraint System (SRS) - airbag4-40 Seat and restraint systems
4
bag control unit controls deployment of thepassenger’s front airbag in accordance withthe information it receives from this system.The passenger’s front airbag will not deployin an impact when the system senses no occu-pant on the front passenger’s seat or a child ina child restraint system. In this case, the pas-senger airbag off indi
cator will come on.
Refer to “Passenger’s ai
rbag off indicator” on
page 4-40.If there is a problem involving the passen-ger’s seat occupant cl
assification sensor sys-
tem, the SRS warning light in the instrumentpanel will come on. Refer to “SRS warninglight/display” on page 4-41.
N00418101346
The passenger’s airbag off indicator islocated in the instrument panel.The indicator normally comes on when theignition switch is turned to the “ON” positionor the operation mode is put in ON, and goesout a few seconds later.
In the following situ-
ations, the indicator will stay on to show thatthe passenger front airb
ag is not operational.
The front passenger’s seat is not occupied.
WA R N I N GIf any of the follow
ing conditions occur,
you should immediatel
y have your vehicle
inspected by an au
thorized Mitsubishi
Motors dealer as soon as possible:• The SRS warning light does not initiallycome on when the ignition switch or theoperation mode is under the followingconditions.[Except for vehicles equipped with theF. A . S . T. - k e y ]The ignition switch is in the “ON” or“START” position.[Vehicles equipped with the F.A.S.T.-key]The operation mode is in ON.• The SRS warning light does not go outafter several seconds.
• The SRS warning li
ght comes on while
you are driving.
To ensure that the passenger’s seat occu-pant classification sensor system can sensecorrectly, observe the following instruc-tions. Failure to follow these instructionscan adversely affect
the performance of
the passenger’s airbag system.• Adjust the seat to the correct position,and sit well back
against the seatback.
Refer to “Front seats” on page 4-4.• Do not recline the seatback more thannecessary.• Never have more th
an one person (adult
or child) sitting on the seat.• Do not place anything between the seatand the floor console.• When attaching a child restraint system,secure it firmly.• Do not place luggage or other objects onthe seat.• Do not use a seat cover or a cushion.• Do not modify or re
place the seat and
seat belt.• Do not place luggage or other objectsunder the seat.• Do not place and use
an electronic device
such as a computer on the seat.• Do not place heavy obje
cts on the seat or
stick pins, needles, or other objects intoit.• Do not remove the seat cushion skin.WA R N I N G
• If any liquid is spilled on the seat, wipe itand dry the seat immediately.
If the vehicle is involved in a severeimpact, have the SRS sensors inspected byan authorized
Mitsubishi Motors dealer as
soon as possible.
Passenger’s airbag off indicator
WA R N I N G
BK0249100US.book 40 ページ 2017年5月10日 水曜日 午前8時49分