2018 MERCEDES-BENZ SLC ROADSTER tire type
[x] Cancel search: tire typePage 20 of 298
System .......................................... 224
VehicleHealth Check .................... 227
Telephone
Accepting acall( multifunction
steering wheel ).............................. 170
Authorizing amobilephone (con-
necting )......................................... 215
Authorizing amobil ephone via the
device manager (connecting )......... 216
Connecting amobilephone
(device manager )........................... 216
Connecting amobilephone (gen-
erali nformation) ............................ 215
Displa ymessage ............................ 200
Menu (on-board computer) ............ 169
Numbe rfrom the phone boo k........ 170
Redialing ........................................ 170
Rejecting/ending acall. ................ 170
see also Digital Operator's Man-
ua l.................................................. 211
Temperature
Coolant .......................................... 164
Coolant (on-board computer,
Mercedes-AMGS LC 43) ................ 175
Engine oil( on-board computer,
Mercedes-AMGS LC 43) ................ 175
Outsid etemperature ...................... 163
Setting (climate control )................ 109
Transmission oil( on-board com-
puter, Mercedes-AMGS LC 43) ...... 175
Timing (RACETIMER) ......................... 175
Tire pressure
Calling up (on-board computer) ..... 267
Checking manually ........................ 266
Displa ymessage ............................ 196
Maximu m....................................... 266
Not reached (TIREFIT) .................... 249
Notes. ............................................ 265
Reached (TIREFIT) .......................... 249
Recommended ............................... 263
Tire pressure loss warnin gsystem
Generaln otes ................................ 266
Important safety notes .................. 267
Restarting ...................................... 267
Tire pressure monitor
Checking the tire pressure elec-
tronically ........................................ 269
Function/note s............................. 267 Generaln
otes ................................ 267
Important safety notes .................. 268
Radi otypea pproval for the tire
pressure monitor ........................... 270
Restarting ...................................... 270
Warning lamp ................................. 210
W
arning message .......................... 269
Tire-changet oolkit........................... 246
TIREFI Tkit.......................................... 247
Important safety notes .................. 247
Storage location ............................ 246
Tire pressure not reached .............. 249
Tire pressure reached .................... 249
Tires
Aspect rati o(definition) ................. 279
Average weight of the vehicle
occupants (definition) .................... 278
Bar (definition) ............................... 278
Changing awheel .......................... 280
Characteristics .............................. 278
Checking ........................................ 260
Curb weight (definition) ................. 279
Definition of terms ......................... 278
Directio nofrotation ...................... 280
Displa ymessage ............................ 196
Distribution of the vehicl eoccu-
pants (definition) ............................ 280
DOT (Department of Transporta-
tion) (definition) ............................. 278
DOT, Tire Identification Number
(TIN) ............................................... 277
GAW R(GrossA xle Weight Rating)
(definition) ..................................... 278
GV W( GrossV ehicleWeight) (def-
inition) ........................................... 279
GVWR (GrossV ehicleWeight Rat-
ing )(de finition) .............................. 279
Important safety notes .................. 260
Increased vehicl eweigh tdue to
optionale quipment (definition) ...... 278
Information on driving .................... 260
Kilopascal( kPa)(de finition) ........... 279
Labeling (overview) ........................ 275
Loadb earing index (definition) ...... 280
Loadi ndex ..................................... 277
Loadi ndex (definition) ................... 279
M+S tire s....................................... 262
18Index
Page 21 of 298

Maximum load onatire (defini-
tion) ............................................... 279
Maximum loaded vehicle weight
(definition) .....................................2 79
Maximum permissible tire pres-
sure (definition) .............................2 79
Maximum tire load. ........................ 277
Maximum tire load( definition) ....... 279
MOExtended tires .......................... 262
Optional equipment weight (defi-
nition) ............................................ 280
Overview ........................................ 260
PSI (pounds per square inch) (def-
inition) ...........................................2 79
Replacing ....................................... 280
Service life ..................................... 261
Sidewall (definition) ....................... 279
Speed rating (definition) ................ 279
Storing ...........................................2 81
Structure and characteristics
(definition) ..................................... 278
Summer tires ................................. 262
Temperature .................................. 274
TIN (Tire Identification Number)
(definition) ..................................... 280
Tire bead( definition) ......................2 79
Tire pressure (definition) ................ 279
Tire pressure s(recommended). ..... 278
Tire size (data) ............................... 284
Tire size designation, load-bearing
capacity, speedr ating .................... 275
Tire tread ....................................... 261
Tire tread (definition) ..................... 279
Total loadl imit (definition) ............. 280
Traction ......................................... 274
Traction (definition) ....................... 280
Treadw ear..................................... 274
Uniform Tire Quality Grading
Standard s...................................... 273
Uniform Tire Quality Grading
Standard s(de finition) .................... 278
Wea rindicator (definition) ............. 280
Wheel and tire combination ........... 284
Wheel rim (definiti on) .................... 278
se
e Fla ttire
Tow-starting
Emergency engine starting ............ 258
Important safety notes .................. 256 Towin
gaway
Important safety guideline s........... 256
Installing the towing eye. ............... 256
Removing the towing eye. .............. 257
Transporting the vehicl e................ 258
With both axles on the ground ....... 257
With the reara xler aised ................ 257
Trafficr eports
see also Digital Operator's Man-
ua l.................................................. 211
Transmission
Selector lever ................................ 122
see Automati ctransmission
Transmissio nposition display ......... 122
Transporting the vehicle .................. 258
Trip computer (on-board com-
puter) .................................................. 166
Trip odometer
Calling up ....................................... 166
Resetting (on-board computer) ...... 167
Trunk
Emergency release .......................... 73
Important safety notes .................... 72
Locking separately. .......................... 73
Opening/closing (manuall yfrom
outside) ............................................ 73
Overview .......................................... 72
Trunk lid
Displa ymessage ............................ 200
Opening dimensions ...................... 295
Trunk partition
Displa ymessage ............................ 200
Generaln otes .................................. 79
Opening/closing .............................. 80
Turn signals
Displa ymessage ............................ 189
Switching on/off. ............................. 96
Two-wa yradio
Frequencie s................................... 288
Installation ..................................... 288
Transmission output( maximum) .... 288
Type identificatio nplate
see Vehicl eide ntification plate
U
Unlocking
Emergency unlocking ....................... 72
Index19
Page 22 of 298
From inside the vehicle (central
unlocking button) ............................. 71
Upshift indicator
(on-board computer, Mercedes-
AMG SLC 43) .................................1 75
USB devices
Connecting to the MediaI nter-
face ............................................... 218
V
Vehicle
Correct use ...................................... 27
Data acquisition ............................... 28
Display message ............................ 198
Electronics ..................................... 288
Equipment ....................................... 24
Individua lsettings .......................... 172
Limited Warranty .............................2 8
Loading .......................................... 271
Locking (in an emergency) ............... 72
Locking (SmartKey) .......................... 65
Lowering ........................................ 284
Maintenance .................................... 25
Parking for along period. ............... 133
Pulling awa y................................... 118
Raising ........................................... 281
Reporting problems ......................... 27
Securing from rolling away ............ 281
Tow-starting ................................... 256
Towing away .................................. 256
Transporting .................................. 258
Unlocking (i nanemergency) ........... 72
Unlocking (SmartKey). ..................... 65
Vehicl edata. .................................. 295
Vehicl ebattery
see Battery (vehicle)
Vehicl edata ....................................... 295
Vehicl edimensions ........................... 295
Vehicl eemergencyl ocking ................ 72
Vehicl eidentificatio nnumber
see VIN
Vehicl eidentificatio nplate .............. 289
Vehicl etoolkit.................................. 245
Video
Operating the DVD ......................... 169
see also Digital Operator's Man-
ual.................................................. 211 VIN
Seat. .............................................. 290
Type plate ...................................... 289
W
Warning and indicator lamps
ABS ................................................ 204
Active Brake Assist ........................ 209
Brake Assist ................................... 209
Brakes ........................................... 204
Check Engine ................................. 207
Coolant .......................................... 207
Distance Pilo tDISTRONIC ............. 209
Distance warning ........................... 209
ESP
®.............................................. 205
ESP®OFF ....................................... 206
Fue ltank ........................................ 207
Generaln otes ................................ 202
Parking brake ................................ 206
PASSENGER AIR BAG ...................... 39
Reserve fue l................................... 207
Restraint system ............................ 206
Seatb elt. ....................................... 203
SPORTh andling mode. .................. 206
Tire pressure monitor .................... 210
Warning triangle ................................ 244
Warranty .............................................. 24
Washer fluid
Displa ymessage ............................ 201
Weather display (COMAND)
see also Digital Operator's Man-
ual.................................................. 211
Wheel and tire combinations
Tires ............................................... 284
Wheel bolt tightenin gtorque ........... 284
Wheel chock ...................................... 281
Wheels
Changing awheel .......................... 280
Checking ........................................ 260
Cleaning ......................................... 241
Emergency spare wheel. ................ 285
Important safety notes .................. 260
Information on driving .................... 260
Interchanging/changing ................ 280
Mounting anew wheel. .................. 283
Mounting awheel .......................... 281
Overview ........................................ 260
20Index
Page 132 of 298
!Overfilling the fuel tank could damage the
fuel system.
!Take care not to spill any fuel on painted
surfaces. You could otherwise damage the
paintwork.
!Use afilter when adding fuel from afuel can.
The fuel lines and/or the fuel injection system
could otherwise be blocked by particles from
the fuel can.
If you overfill the fuel tank, fuel could spray out
when the fuel pump nozzle is removed.
For further information on fuel and fuel quality
(
Ypage 291).
Refueling
General information
The fuel filler flap is unlocked or locked auto-
matically when you unlock or lock the vehicle
with the SmartKey or using KEYLESS-GO.
The position of the fuel filler cap is displayed
8 in the instrument cluster. The arrow next
to the filling pump indicates the side of the vehi-
cle.
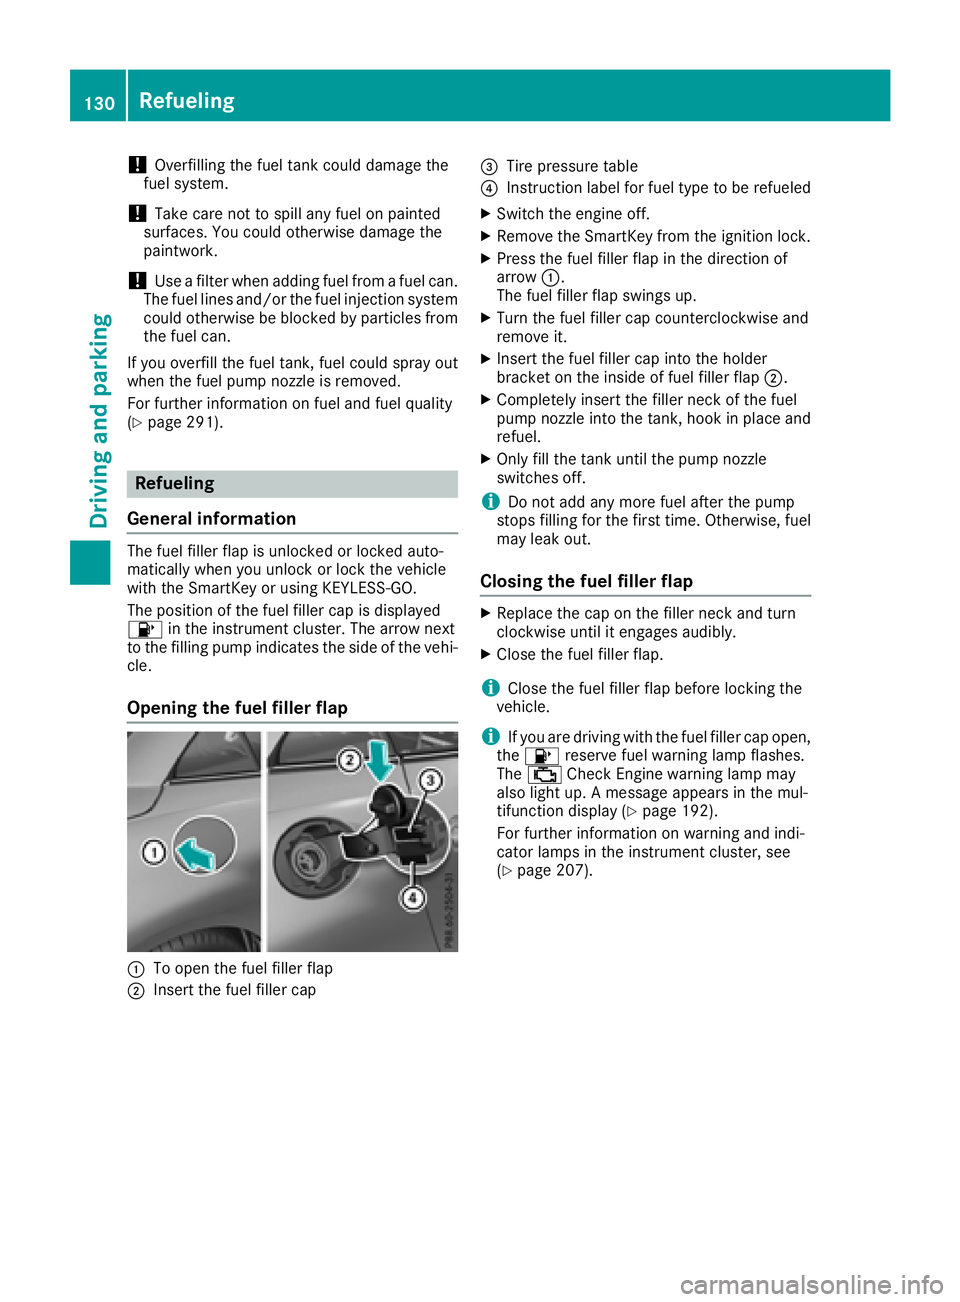
Opening the fuel filler flap
:To open the fuel filler flap
;Insert the fuel filler cap
=Tire pressure table
?Instruction label for fuel type to be refueled
XSwitch the engine off.
XRemove the SmartKey from the ignition lock.
XPress the fuel filler flap in the direction of
arrow :.
The fuel filler flap swings up.
XTurn the fuel filler cap counterclockwise and
remove it.
XInsert the fuel filler cap into the holder
bracket on the inside of fuel filler flap ;.
XCompletely insert the filler neck of the fuel
pump nozzle into the tank, hook in place and
refuel.
XOnly fill the tank until the pump nozzle
switches off.
iDo not add any more fuel after the pump
stops filling for the first time. Otherwise, fuel
may leak out.
Closing the fuel filler flap
XReplace the cap on the filler neck and turn
clockwise until it engages audibly.
XClose the fuel filler flap.
iClose the fuel filler flap before locking the
vehicle.
iIf you are driving with the fuel filler cap open,
the 8 reserve fuel warning lamp flashes.
The ; Check Engine warning lamp may
also light up. Amessage appears in the mul-
tifunction display(
Ypage 192).
For further information on warning and indi-
cator lamps in the instrument cluster, see
(
Ypage 207).
130Refueling
Driving and parking
Page 138 of 298
In addition to driving style, the actual consump-
tion is affected by other factors, such as:
Rload
Rtire pressure
Rcold start
Rchoice of route
Ractive electrical consumers
These factors are not includedint he ECO dis-
play.
An economical driving style specially requires
driving at moderate engine speeds.
Achieving ahigher valueint he categories
"Acceleration" and "Constant":
Robserve the gearshift recommendations.
Rdrive the vehicle in drive program Cor E.
In urbant raffic and stop-start traffic, drive pro-
gram Cis recommended.
On long journeys at aconstant speed,e .g. on the
highway, only the outer area for "constant" will
change.
The ECO display summarizes the driving style
from the start of the journey to its completion.
Therefore, there are more marked changes in
the outer areasatt he start ofajourney. On lon-
ger journeys, there are fewer changes. For more
marked changes, perform amanua lrest
(
Ypage 167).
Further information on the ECO display
(
Ypage 166).
Braking
Important safety notes
GWARNING
If you shift down on aslippery road surface in
an attempt to increase the engine's braking
effect, the drive wheelsc ould lose their grip.
There is an increased danger of skidding and
accidents.
Do not shift down for additional engine brak-
ing on aslippery road surface.
Downhill gradients
!On long, steep gradients, you must reduce
the load on the brakes. To use engine braking,
shift to alowerg ear in good time. This helps you to avoid overheating the brakes and wear-
ing them out excessively.
When making use of the engine braking
effect, it is possible that
adrive wheel may not
turn for some time, e.g. in the case of sud-
denly changing or slippery road surface con-
ditions. This could cause damage to the drive
train. This type of damage is not covered by
the Mercedes-Benz warranty.
Change into alowerg ear in good time on long
and steep downhill gradients. This is especially
important if the vehicle is laden.
This also applies if you have activated cruise
control or Distance PilotD ISTRONIC.
Heavy and light loads
GWARNING
If you rest you rfoot on the brake pedalw hile
driving, the braking system can overheat. This increases the stopping distance and can even
cause the braking system to fail.T here is a
risk of an accident.
Never use the brake pedalasaf ootrest. Never
depresst he brake pedala nd the accelerator
pedalatt he same time.
!Depressing the brake pedalc onstantly
results in excessive and premature weart o
the brake pads.
If the brakes have been subjected to aheavy
load,don ot stop the vehicle immediately,b ut
drive on for ashort while. This allows the airflow
to cool the brakes more quickly.
Wet roads
If you have driven for along time in heavy rain
withoutb raking, there may be adelayed reac-
tion from the brakes when braking for the first
time. This may also occur after the vehicle has
been washed or driven through deep water.
You then have to depresst he brake pedalmore
firmly.M aintainagreater distance from the
vehicle in front.
After driving on awet road or having the vehicle
washed, brake firmly whilep aying attention to
the traffic conditions. This willw arm up the
brake discs, thereby drying them more quickly
and protecting them against corrosion.
136Driving tips
Driving and parking
Page 154 of 298
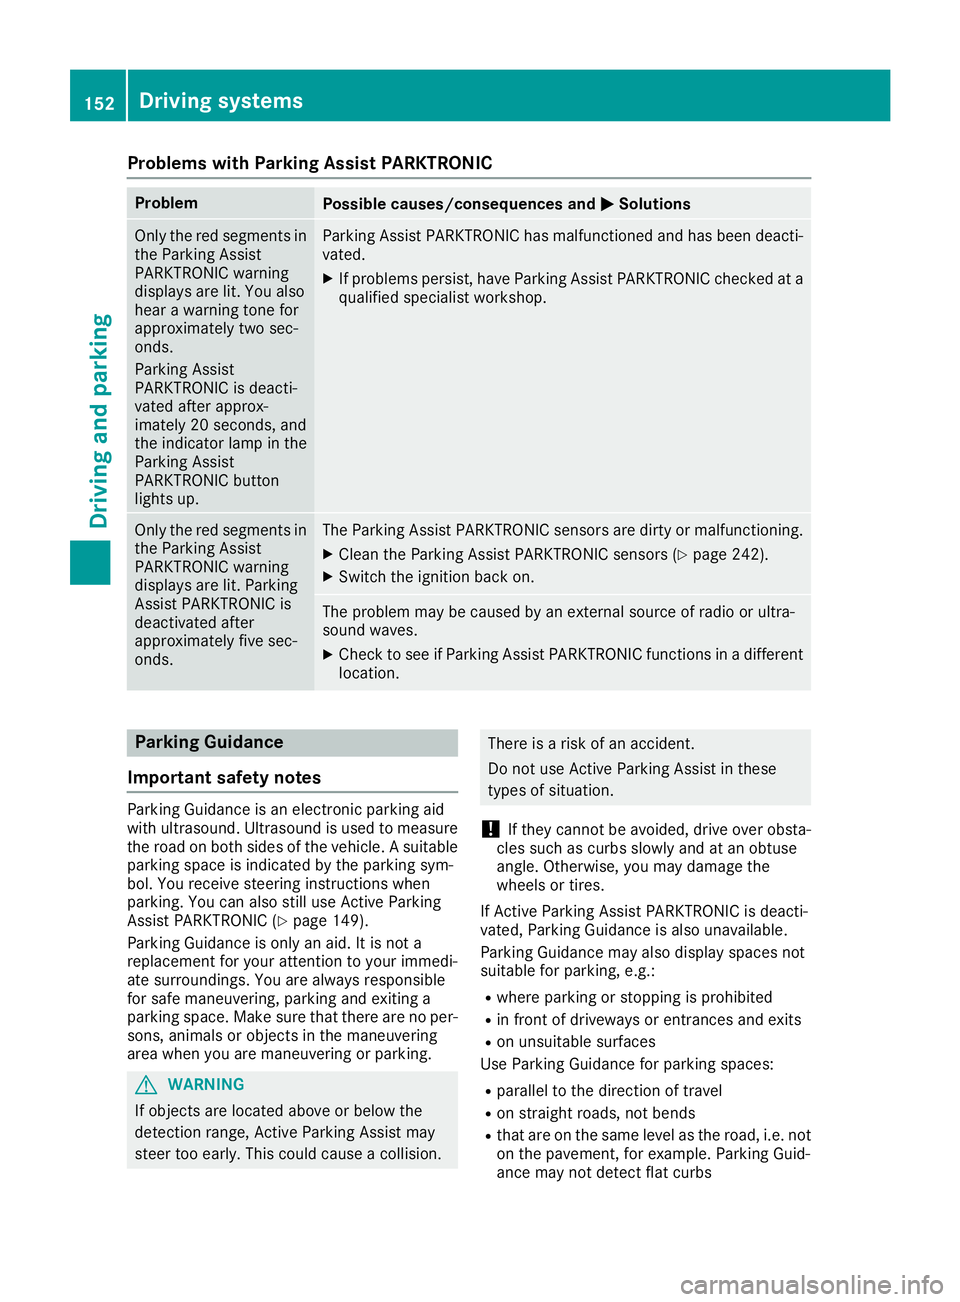
Problems with Parking Assist PARKTRONIC
ProblemPossible causes/consequences andMSolutions
Only the red segments in
the Parking Assist
PARKTRONIC warning
displaysare lit. You also
hear awarning tone for
approximately two sec-
onds.
Parking Assist
PARKTRONIC is deacti-
vated after approx-
imately 20 seconds, and
the indicator lamp in the
Parking Assist
PARKTRONIC button
lights up.Parking Assist PARKTRONIC has malfunctioned and has been deacti-
vated.
XIf problems persist, have Parking Assist PARKTRONIC checked at a
qualified specialist workshop.
Only the red segments in
the Parking Assist
PARKTRONIC warning
displaysa re lit. Parking
Assist PARKTRONIC is
deactivated after
approximately five sec-
onds.The Parking Assist PARKTRONIC sensors are dirty or malfunctioning.
XClean the Parking Assist PARKTRONIC sensors (Ypage 242).
XSwitch the ignition back on.
The problem may be caused by an external source of radio or ultra-
sound waves.
XCheck to see if Parking Assist PARKTRONIC functions in adifferent
location.
Parking Guidance
Important safety notes
Parking Guidance is an electronic parking aid
with ultrasound. Ultrasound is used to measure
the road on both sides of the vehicle. Asuitable
parking space is indicated by the parking sym-
bol. You receive steering instructions when
parking. You can also still use Active Parking
Assist PARKTRONIC (
Ypage 149).
Parking Guidance is only an aid. It is not a
replacement for your attention to your immedi-
ate surroundings. You are always responsible
for safe maneuvering, parking and exiting a
parking space. Make sure that there are no per-
sons, animals or object sinthe maneuvering
area when you are maneuvering or parking.
GWARNING
If object sare located above or below the
detection range, Active Parking Assist may
steer too early. This could cause acollision.
There is arisk of an accident.
Do not use Active Parking Assist in these
types of situation.
!If they cannot be avoided, drive over obsta-
cles such as curbs slowly and at an obtuse
angle. Otherwise, you may damage the
wheels or tires.
If Active Parking Assist PARKTRONIC is deacti-
vated, Parking Guidance is also unavailable.
Parking Guidance may also display spaces not
suitable for parking, e.g.:
Rwhere parking or stopping is prohibited
Rin front of driveways or entrances and exits
Ron unsuitable surfaces
Use Parking Guidance for parking spaces:
Rparalleltot he direction of travel
Ron straight roads, not bends
Rthat are on the same level as the road, i.e. not
on the pavement, for example. Parking Guid-
ance may not detect flat curbs
152Driving systems
Driving and parking
Page 212 of 298
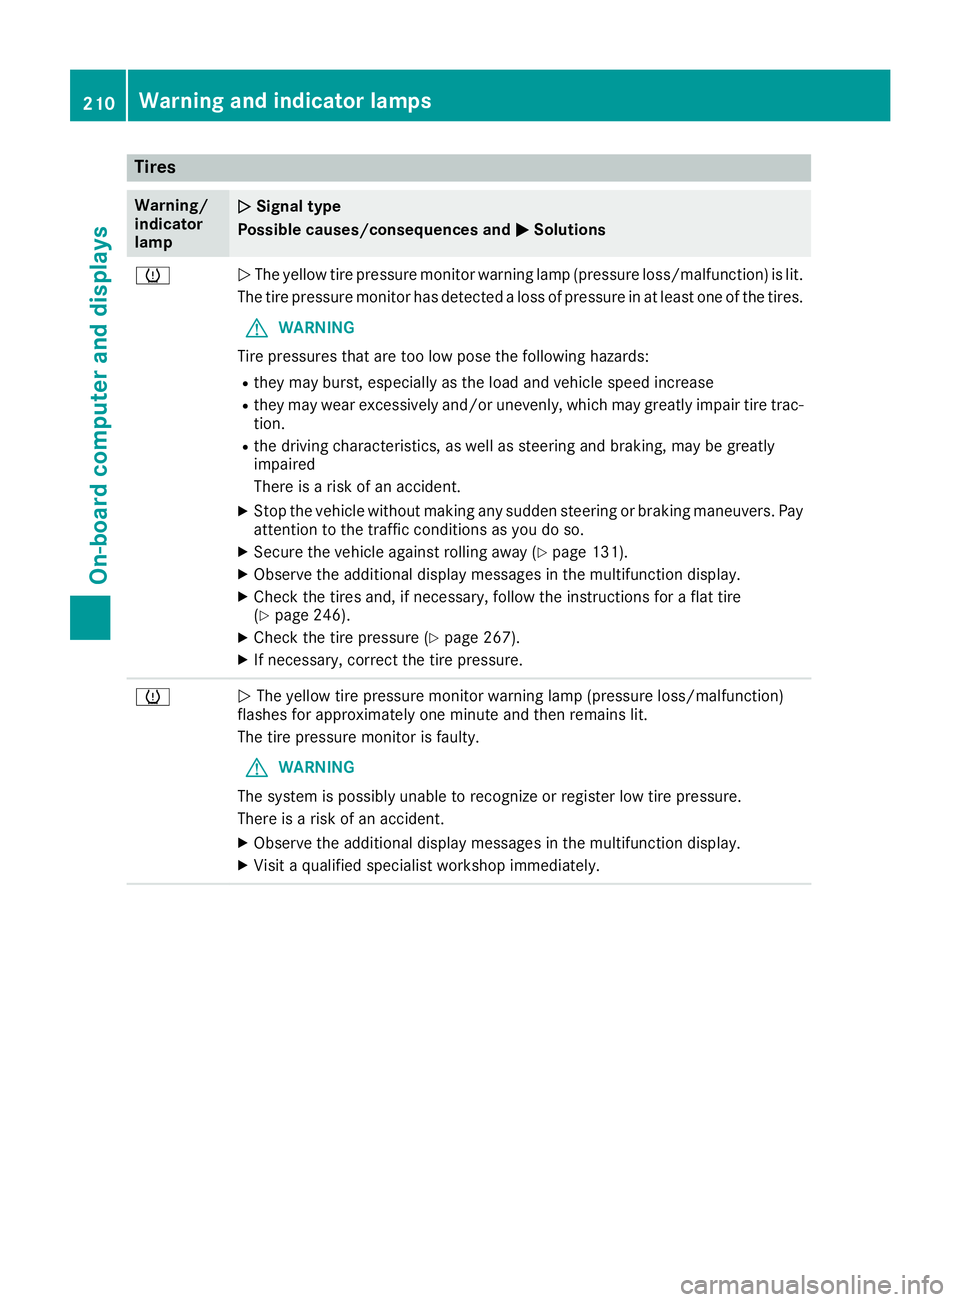
Tires
Warning/
indicator
lampNSignal type
Possible causes/consequence sand M
Solutions
hNThe yellow tire pressure monitor warning lamp (pressure loss/malfunction) is lit.
The tire pressure monitor hasd etecte dalossofp ressure in at leas tone of the tires.
GWARNING
Tire pressures thata retoo lo wposet he following hazards:
Rtheym ayburst, especially as the load and vehicl espeed increase
Rtheym aywear excessivel yand/or unevenly, which mayg reatlyimpai rtire trac-
tion.
Rthe drivin gcharacteristics, as well as steerin gand braking ,maybe greatly
impaired
There is ariskofana ccident.
XStop the vehicl ewithou tmaking any sudden steerin gorbraking maneuvers. Pay
attentio ntothe trafficc onditions as yo udoso.
XSecure the vehicl eagain st rolling away (Ypage 131).
XObserve the additional displa ymessage sinthe multifunctio ndisplay .
XCheck the tire sand,ifn ecessary,f ollowthe instructions for aflatt ire
(Ypage 246).
XCheck the tire pressure (Ypage 267).
XIf necessary,c orrect the tire pressure.
hNThe yellow tire pressure monitor warning lamp (pressure loss/malfunction)
flashe sfor approximately one minute and thenr emains lit.
The tire pressure monitor is faulty.
GWARNING
The system is possibl yunabl etor ecognize or register lo wtire pressure.
There is ariskofana ccident.
XObserve the additional displa ymessage sinthe multifunctio ndisplay .
XVisitaq ualified specialis tworkshop immediately.
210Warning and indicator lamps
On-board computer and displays
Page 241 of 298
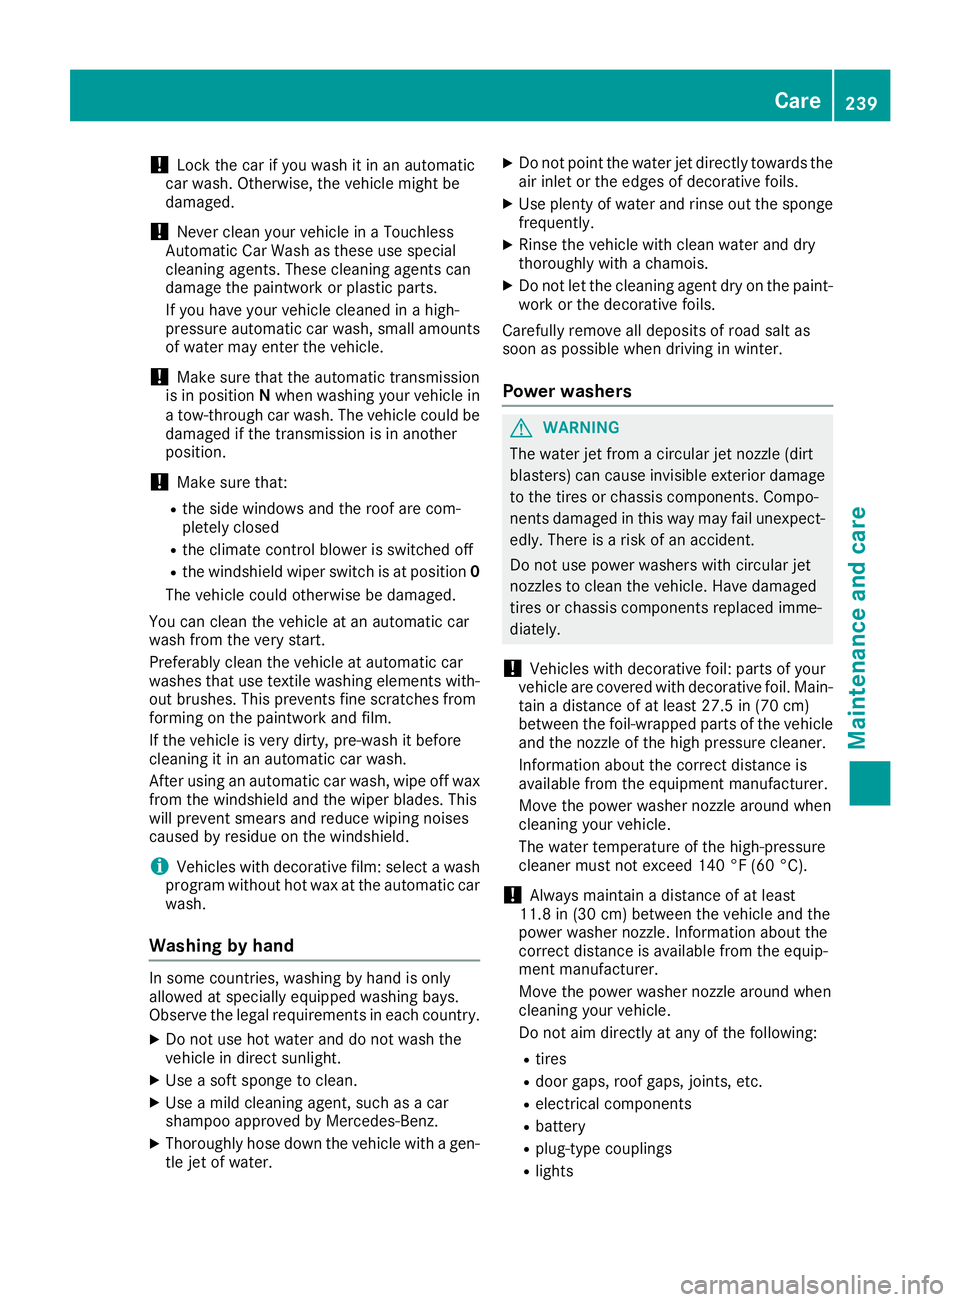
!Lock the car if you wash it in an automatic
car wash. Otherwise, the vehicle might be
damaged.
!Never clean your vehicle in aTouchless
Automatic Car Wash as these use special
cleaning agents. These cleaning agents can
damage the paintwork or plastic parts.
If you have your vehicle cleaned in ahigh-
pressure automatic car wash, small amounts
of water may enter the vehicle.
!Make sure that the automatic transmission
is in position Nwhen washing your vehicle in
at ow-through car wash. The vehicle could be
damagedift he transmission is in another
position.
!Make sure that:
Rthe side windows and the roof are com-
pletely closed
Rthe climate control blower is switched off
Rthe windshieldw iper switch is at position 0
The vehicle could otherwise be damaged.
You can clean the vehicle at an automatic car
wash from the very start.
Preferably clean the vehicle at automatic car
washes that use textile washing elements with-
out brushes. This prevents fine scratches from
forming on the paintwork and film.
If the vehicle is very dirty, pre-wash it before
cleaning it in an automatic car wash.
After using an automatic car wash, wipe off wax
from the windshielda nd the wiper blades. This
will prevent smears and reduce wiping noises
caused by residue on the windshield.
iVehicles with decorative film: select awash
program without hot wax at the automatic car
wash.
Washing by hand
In some countries, washing by hand is only
allowed at speciallye quipped washing bays.
Observe the legal requirements in each country.
XDo not use hot water and do not wash the
vehicle in direct sunlight.
XUse asoft sponge to clean.
XUse amild cleaning agent, such as acar
shampoo approved by Mercedes-Benz.
XThoroughly hose down the vehicle with agen-
tle jet of water.
XDo not point the water jet directly towards the
air inlet or the edges of decorative foils.
XUse plenty of water and rinse out the sponge
frequently.
XRinse the vehicle with clean water and dry
thoroughly with achamois.
XDo not let the cleaning agent dry on the paint-
work or the decorative foils.
Carefully remove all deposits of road salt as
soon as possible when driving in winter.
Powerw ashers
GWARNING
The water jet from acircular jet nozzle (dirt
blasters) can cause invisible exterior damage
to the tires or chassis components. Compo-
nentsd amagedint his way may fail unexpect-
edly.T here is arisk of an accident.
Do not use power washers with circular jet
nozzles to clean the vehicle. Have damaged
tires or chassis componentsr eplaced imme-
diately.
!Vehicles with decorative foil: parts of your
vehicle are covered with decorative foil. Main-
tain adistance of at least 27.5 in (70 cm)
between the foil-wrappedp arts of the vehicle
and the nozzle of the high pressure cleaner.
Information aboutt he correct distance is
available from the equipment manufacturer.
Move the power washer nozzle around when
cleaning your vehicle.
The water temperature of the high-pressure
cleaner must not exceed 140 °F (60 °C).
!Alwaysm aintainadistance of at least
11.8 in (30 cm) between the vehicle and the
power washer nozzle. Information aboutt he
correct distance is available from the equip-
ment manufacturer.
Move the power washer nozzle around when
cleaning your vehicle.
Do not aim directly at any of the following:
Rtires
Rdoor gaps, roof gaps, joints, etc.
Relectrical components
Rbattery
Rplug-type couplings
Rlights
Care239
Maintenance and care
Z