2018 MERCEDES-BENZ SLC ROADSTER coolant
[x] Cancel search: coolantPage 210 of 298
Warning/
indicator
lampNSignal type
Possiblec auses/consequences and M
Solutions
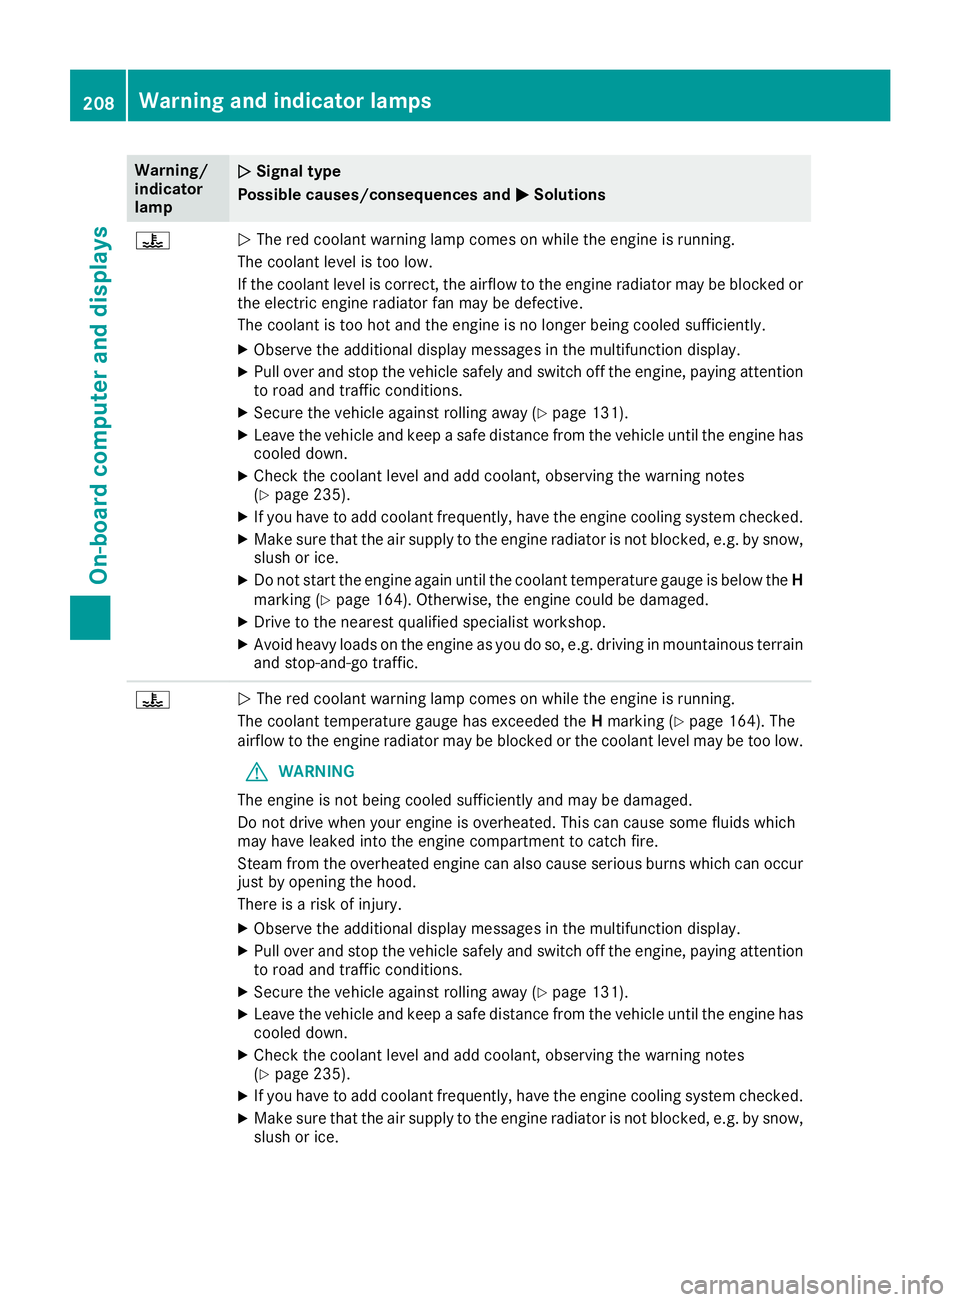
?NThe red coolant warning lamp comes on while the engine is running.
The coolant levelist oo low.
If the coolant levelisc orrect, the airflow to the engine radiator may be blocked or
the electric engine radiator fan may be defective.
The coolant is too hot and the engine is no longer being cooleds ufficiently.
XObserve the additionaldisplay messages in the multifunction display.
XPullover and stop the vehicles afelyand switch off the engine, paying attention
to road and traffic conditions.
XSecure the vehiclea gainst rolling away(Ypage131).
XLeave the vehiclea nd keepasafe distance from the vehicleu ntil the engine has
cooledd own.
XCheck the coolant levela nd add coolant, observing the warning notes
(Ypage2 35).
XIf you have to add coolant frequently, have the engine cooling system checked.
XMake sure that the air supply to the engine radiator is not blocked,e .g. by snow,
slush or ice.
XDo not start the engine again until the coolant temperature gauge is below the H
marking (Ypage1 64). Otherwise, the engine coul dbedamaged.
XDrive to the neares tqualified specialist workshop.
XAvoid heavy loads on the engine as you do so, e.g. driving in mountainous terrain
and stop-and-go traffic.
?N The red coolant warning lamp comes on while the engine is running.
The coolant temperature gauge has exceededt heHmarking (
Ypage1 64).The
airflow to the engine radiator may be blocked or the coolant levelm ay be too low.
GWARNING
The engine is not being cooleds ufficiently and may be damaged.
Do not drive when you rengine is overheated. This can caus esome fluids which
may have leaked into the engine compartment to catch fire.
Steam from the overheated engine can als ocaus eserious burns which can occur
just by opening the hood.
There is arisk of injury.
XObserve the additiona ldisplay messages in the multifunction display.
XPul lover and stop the vehicles afelyand switch off the engine, paying attention
to road and traffic conditions.
XSecure the vehiclea gainst rolling away(Ypage131).
XLeave the vehiclea nd keepasafe distance from the vehicleu ntil the engine has
cooledd own.
XCheck the coolant levela nd add coolant, observing the warning notes
(Ypage2 35).
XIf you have to add coolant frequently, have the engine cooling system checked.
XMake sure that the air supply to the engine radiator is not blocked,e .g. by snow,
slush or ice.
208Warning and indicator lamps
On-board computer and displays
Page 211 of 298
Warning/
indicator
lampNSignal type
Possiblec auses/consequences and M
Solutions
XIf the coolant temperature gauge is below the Hmarking (Ypage1 64),drive on
to the next qualified specialist workshop.
XAvoid heavy loads on the engine as you do so, e.g. driving in mountainous terrain
and stop-and-go traffic.
Driving systems
Warning/
indicator
lampNSignal type
Possiblec auses/consequences and M
Solutions
·NThe red distance warning lamp lights up while the vehicleisinm otion.Awarning
tone als osounds.
You are approaching avehicle, apedestrian or astationary obstacl einyourline of
travel at too high aspeed.
XBe prepared to brake immediately.
XPay carefu lattention to the traffic situation. You may have to brake or take
evasive action.
Further information on Distance Pilot DISTRONIC (
Ypage1 40).
Further information on Active Brake Assist (
Ypag e58).
Warning and indicator lamps209
On-board computer and displays
Z
Page 237 of 298
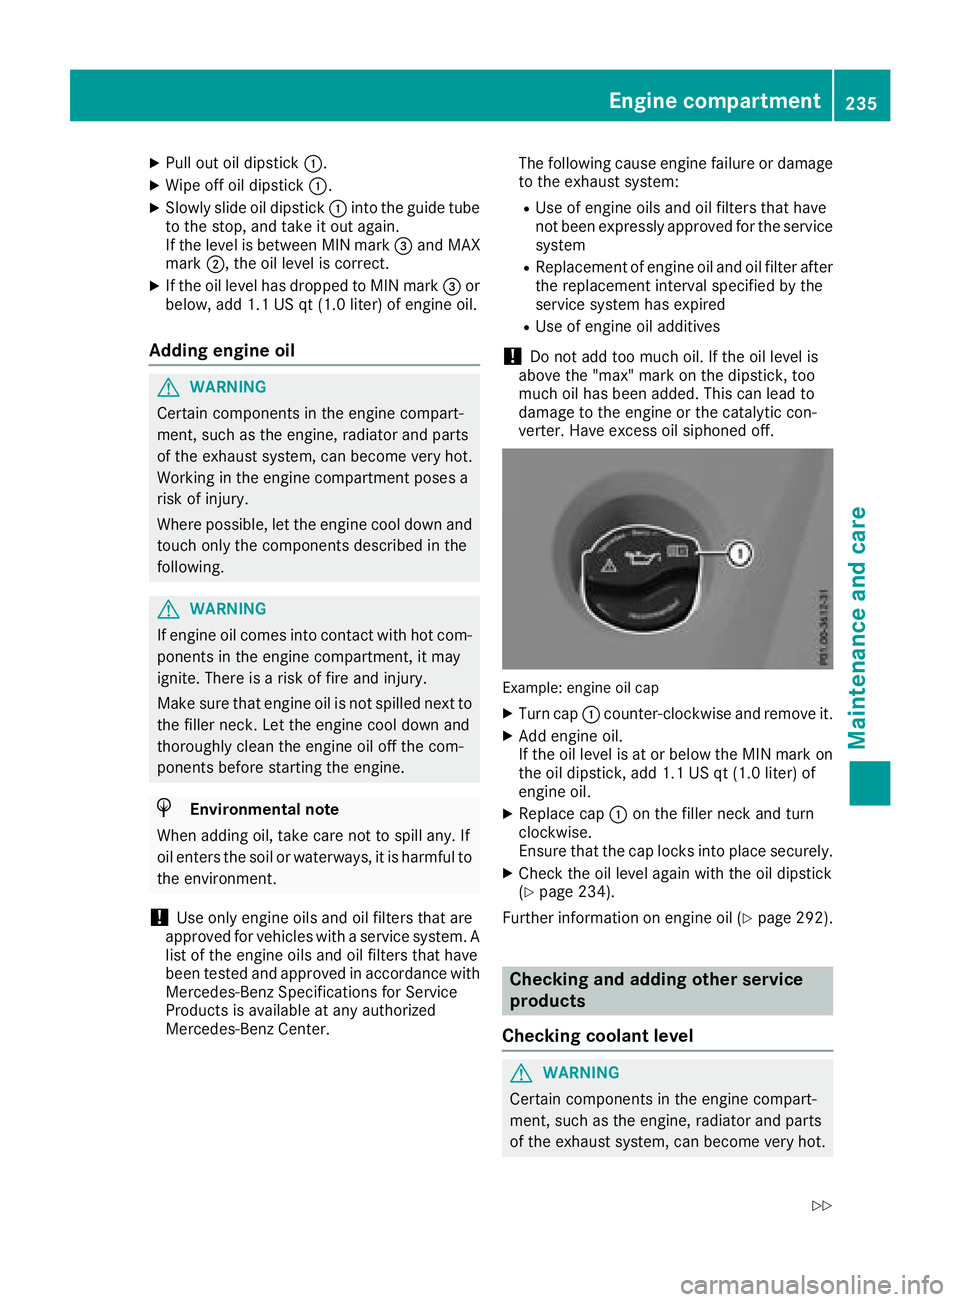
XPull out oil dipstick:.
XWipe off oil dipstick :.
XSlowly slide oil dipstick :into the guide tube
to the stop, and take it out again.
If the level is between MIN mark =and MAX
mark ;,the oil level is correct.
XIf the oil level has dropped to MIN mark =or
below, add 1.1 US qt (1.0 liter) of engine oil.
Adding engine oil
GWARNING
Certain components in the engine compart-
ment ,such as the engine, radiator and parts
of the exhaust system, can become very hot.
Workingint he engine compartment poses a
risk of injury.
Where possible, let the engine cool down and touch only the components described in the
following.
GWARNING
If engine oil comes into contact with hot com- ponentsint he engine compartment ,itmay
ignite. There is arisk of fire and injury.
Make sure that engine oil is not spilled next to
the filler neck.L et the engine cool down and
thoroughly clean the engine oil off the com-
ponentsb efore starting the engine.
HEnvironmenta lnote
When adding oil, take care not to spill any. If
oil enter sthe soil or waterways, it is harmful to
the environment.
!Use only engine oils and oil filters that are
approved for vehicles with aservice system. A
list of the engine oils and oil filters that have
been tested and approved in accordanc ewith
Mercedes-Benz Specifications for Service
Products is availableata ny authorized
Mercedes-Benz Center. The following cause engine failure or damage
to the exhaust system:
RUse of engine oils and oil filters that have
not been expressly approved for the service
system
RReplacement of engine oil and oil filter after
the replacement interval specified by the
service system has expired
RUse of engine oil additives
!Do not add too much oil. If the oil level is
above the "max" mark on the dipstick ,too
much oil has been added. This can lead to
damage to the engine or the catalytic con-
verter .Have excess oil siphoned off.
Example: engine oil cap
XTurn cap :counter-clockwise and remove it.
XAdd engine oil.
If the oil level is at or below the MIN mark on
the oil dipstick ,add 1.1 US qt (1.0 liter) of
engine oil.
XReplace cap :on the filler neck and turn
clockwise.
Ensure that the cap locks into place securely.
XCheck the oil level again with the oil dipstick
(Ypage 234).
Further information on engine oil (
Ypage 292).
Checking and adding other service
products
Checking coolant level
GWARNING
Certain components in the engine compart-
ment ,such as the engine, radiator and parts
of the exhaust system, can become very hot.
Engine compartment235
Maintenance and care
Z
Page 238 of 298
Workinginthe engine compartment poses a
risk of injury.
Where possible, let the engine cool down and touch only the componentsd escribed in the
following.
GWARNING
The cooling system is pressurized, particularly
when the motor is warm. If you open the cap,
you could be scalded if hot coolant sprays out.
There is arisk of injury.
Let the engine cool down before you open the
cap. Wear gloves and eye protection. Slowly
open the cap to relieve pressure.
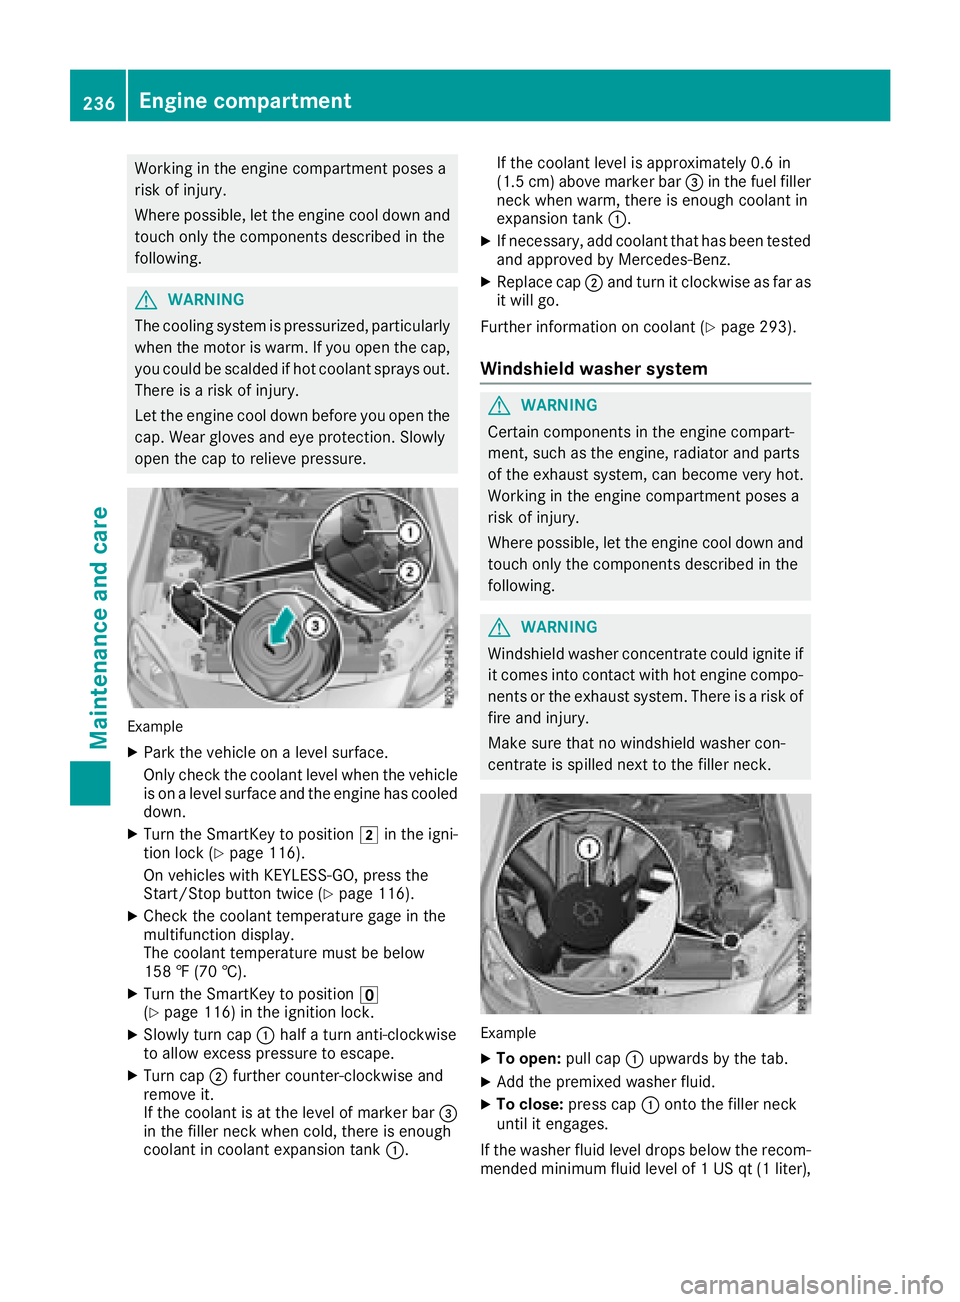
Example
XPark the vehicle on alevel surface.
Only check the coolant level when the vehicle
is on alevel surface and the engine has cooled
down.
XTurn the SmartKey to position 2in the igni-
tion lock (Ypage 116).
On vehicles with KEYLESS-GO, press the
Start/Stop button twice (
Ypage 116).
XCheck the coolant temperature gage in the
multifunction display.
The coolant temperature must be below
158 ‡(70 †).
XTurn the SmartKey to position u
(Ypage 116) in the ignition lock.
XSlowly turn cap :half aturn anti-clockwise
to allow excessp ressure to escape.
XTurn cap;further counter-clockwise and
remove it.
If the coolant is at the level of marker bar =
in the filler neck when cold, there is enough
coolant in coolant expansion tank :.If the coolant level is approximately 0.6 in
(1.5 cm
)above marker bar =in the fuel filler
neck when warm, there is enough coolant in
expansion tank :.
XIf necessary, add coolant that has been tested
and approved by Mercedes-Benz.
XReplace cap;and turn it clockwise as far as
it will go.
Further information on coolant (
Ypage 293).
Windshield washer system
GWARNING
Certain component sinthe engine compart-
ment,s uch as the engine, radiator and parts
of the exhaust system, can become very hot.
Workin ginthe engine compartment poses a
risk of injury.
Where possible, let the engine cool down and touch only the componentsd escribed in the
following.
GWARNING
Windshield washer concentrate could ignite if it comes into contact with hot engine compo-
nents or the exhaust system. There is arisk of
fire and injury.
Make sure that no windshield washer con-
centrate is spilled next to the filler neck.
Example
XTo open: pull cap:upwards by the tab.
XAdd the premixed washer fluid.
XTo close: press cap :ontothe filler neck
until it engages.
If the washer fluid level drops below the recom-
mended minimum fluid level of 1USqt(1l iter),
236Engine compartment
Maintenance and care
Page 239 of 298
amessage appearsint hemultifunction display
prompting you to add washer fluid (Ypage 201).
Further informatio nonwindshield washer fluid/
antifreeze(
Ypage 294).
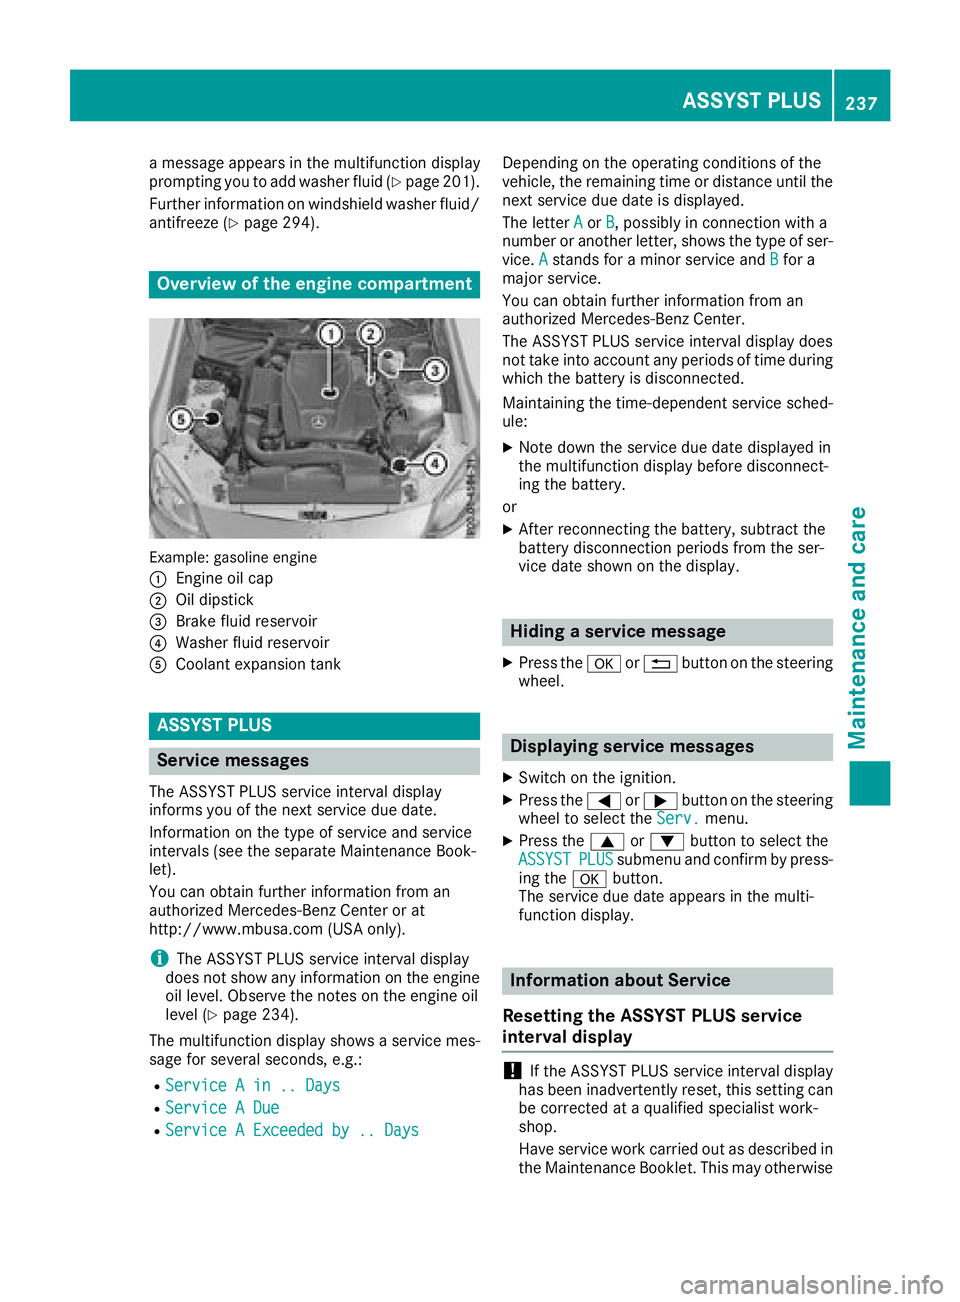
Overview of th eengine compartment
Example :gasoline engine
:
Engineo il cap
;Oil dipstick
=Brake fluid reservoir
?Washerf luid reservoir
ACoolante xpansion tank
ASSYST PLUS
Service messages
The ASSYS TPLUSs erviceinterval display
inform syou of th enexts ervic edue date.
Information on th etype of servic eand service
intervals (see th eseparate Maintenance Book-
let).
You can obtain further informatio nfroma n
authorized Mercedes-Ben zCenter or at
http://www.mbusa.com (USAo nly).
iThe ASSYS TPLUSs erviceinterval display
does no tshow any informatio nontheengine
oil level. Observ ethe note sont heengine oil
level(
Ypage 234).
The multifunction display showsas ervicemes-
sage for several seconds, e.g.:
RServiceAin..D ays
RServiceADue
RServiceAExceeded by .. Days
Dependingont heoperatin gconditionsoft he
vehicle ,the remainin gtimeord istanc euntil the
nex tservic edue dateisd isplayed.
The letter A
orB,possibly in connectio nwith a
number or another letter, showst hetype of ser-
vice. A
stands for aminor servic eand Bfor a
major service.
You can obtain further informatio nfroma n
authorized Mercedes-Ben zCenter.
The ASSYS TPLUSs erviceinterval display does
no ttak eintoa ccounta ny periods of tim eduring
whicht hebattery is disconnected.
Maintaining th etime-dependents ervicesched-
ule:
XNoted own th eservic edue dated isplayedin
th em ultifunction display before disconnect-
ing th ebattery.
or
XAfte rreconnectin gthe battery, subtrac tthe
battery disconnectio nperiods from th eser-
vic ed ates hownont hedisplay.
Hiding aservice message
XPres sthe a or% button on th esteering
wheel.
Displaying service messages
XSwitch on th eignition.
XPres sthe = or; button on th esteering
wheel to selectt heServ.menu.
XPres sthe 9 or: button to selectt he
ASSYSTPLUSsubmenu and confir mbypress-
ing the abutton.
The servic edue datea ppearsint hemulti-
function display.
Information abou tService
Resettin gthe ASSYST PLUS service
interval display
!If th eASSYSTP LUSs erviceinterval display
has been inadvertently reset,t hiss ettin gcan
be correcte dataqualified specialist work-
shop.
Hav eservic ework carried out as describe din
th eM aintenance Booklet. This may otherwise
ASSYST PLUS237
Maintenance and care
Z
Page 242 of 298
Rseals
Rtrim
Rventilation slots
Damaged seals or electrical componentsc an
lead to leaks or failures.
!Do not use high-pressure cleaners if the
tank recess is open while you clean it. This
can cause damage to the seals or other com-
ponents.
Cleaning the paintwork
!Do not affix:
Rstickers
Rfilms
Rmagnetic plates or similar items
to painted surfaces. You could otherwise
damage the paintwork.
Scratches, corrosive deposits, areas affected by
corrosion and damage caused by inadequate
care cannot always be completely repaired. In
such cases, visit aqualified specialist workshop.
XRemove dirt immediately,w here possible,
while avoiding rubbing too hard.
XSoak insect remains with insect remover and
rinse off the treated areas afterwards.
XSoak bird droppings with water and rinse off
the treated areas afterwards.
XRemove coolant, brake fluid, tree resin, oils,
fuels and greases by rubbing gently with a
cloth soaked in petroleum ether or lighter
fluid.
XUse tar remover to remove tar stains.
XUse silicone remover to remove wax.
If water no longer forms "beads" on the paint
surface, use the paint care products recommen-
ded and approved by Mercedes-Benz.T his is the
case approximately every three to five months,
depending on the climate conditions and the
care product used.
If dirt has penetrated the paint surface or if the
paint has become dull,t he paint cleaner recom-
mended and approved by Mercedes-Benz
should be used.
Do not use these care products in the sun or on
the hood while the hood is hot.
XUse asuitable touch-up stick, e.g. MB Touch-
Up Stick,tor epair slight damage to the paint-
work quickly and provisionally.
Mattef inish care
!Never polish the vehicle or the light alloy
wheels. Polishing causes the finish to shine.
!The following can give the paint aglossy
appearance and thus reduce the matt effect:
RRubbing hard with unsuitable agents
RWashing the vehicle in direct sunlight
!Never use paint cleaner, buffing or polishing
products, or gloss preserver, e.g. wax, for the
purpose of paintwork care. These products
are only suitable for high-gloss surfaces. Their
use on vehicles with matte paintwork leads to
considerable surface damage or, more spe-
cifically,tos hiny, spotted areas.
Always have paintwork repairs carried out at a
qualified specialist workshop.
!Only use automatic car washes which cor-
respond to the latest technological stand-
ards. Never use wash programs which finish
by treating the vehicle with hot wax.
Observe these notes if your vehicle has aclear
matte finish. This will help you to avoid damage
to the paintwork due to incorrect treatment.
These notes also apply to light alloy wheels with
ac lear matte finish.
iUse only insect remover and car shampoo
from the range of recommended and
approved Mercedes-Benz care products.
Cleaning the decorative film
!The following may have an effect on the ser-
vice life and coloring of decorative film:
Rsunlight
Rtemperature, e.g. hot-air fan
Rweather conditions
Rstone impacts and dirt
Rchemical cleaning agents
Rgreasy substances
!Do not use any types of polish on matt dec-
orative film. Polishing surfaces covered with
film gives it ashiny finish.
!Do not treat matt or structured decorative
film with wax. This may lead to marks that
cannot be removed.
240Care
Maintenance and care
Page 281 of 298
Speed rating
The speed rating is part of the tire identification.It specifies the speed range for which the tire is
approved.
GVW (Gross Vehicle Weight)
The gross vehicle weight includes the weight of the vehicle including fuel, tools, the spare wheel,
accessories installed, occupants, luggage and
the drawbar noseweight, if applicable. The gross
vehicle weight must not exceed the gross vehi-
cle weight rating GVWR as specified on the vehi- cle identification plate on the B-pillar on the
driver's side.
GVWR (Gross Vehicle Weight Rating)
The GVWR is the maximum permissible gross
weight of afully loaded vehicle (the weight of the
vehicle including all accessories, occupants,
fuel, luggage and the drawbar noseweight, if
applicable). The gross vehicle weight rating is
specified on the vehicle identification plate on
the B-pillar on the driver's side.
Maximu mloaded vehicle weight
The maximum weight is the sum of:
Rthe curb weight of the vehicle
Rthe weight of the accessories
Rthe load limit
Rthe weight of the factory installed optional
equipment
Kilopascal (kPa)
Metric unit for tire pressure. 6.9 kPa corre-
sponds to 1psi. Another unit for tire pressure is
bar. 100 kilopascals (kPa) are the equivalent of
1b ar.
Load index
In addition to the load-bearing index, the load
index may also be imprinted on the sidewallo f
the tire. This specifies the load-bearing capacity
more precisely.
Curb weight
The weight of avehicle with standard equipment
including the maximum capacity of fuel, oil and
coolant. It also includes the air-conditioning sys-
tem and optional equipment if these are instal-
led in the vehicle, but does not include passen-
gers or luggage.
Maximu mload rating
The maximum load rating is the maximum per-
missible weight in kilograms or lbs for which a
tire is approved.
Maximu mpermissible tire pressure
Maximum permissible tire pressure for one tire.
Maximu mload on one tire
Maximum load on one tire. This is calculated by
dividing the maximum axle load of one axle by
two.
PSI (pounds per squarei nch)
Astandard unit of measure for tire pressure.
Aspect ratio
Relationship between tire height and tire width
in percent.
Tire pressure
This is pressure inside the tire applying an out-
ward force to each square inch of the tire's sur-
face. The tire pressure is specified in pounds per
square inch (psi), in kilopascal (kPa) or in bar.
The tire pressure should only be corrected when the tires are cold.
Cold tire pressure
The tires are cold:
Rif the vehicle has been parked with the tires
out of direct sunlight for at least three hours
and
Rif the vehicle has not been driven further than
1m ile (1.6 km)
Tread
The part of the tire that comes into contact with
the road.
Bead
The tire bead ensures that the tire sits securely
on the wheel. There are several steel wires in the
bead to prevent the tire from coming loose from
the wheel rim.
Sidewall
The part of the tire between the tread and the
bead.
All about wheelsa nd tires279
Wheels and tires
Z
Page 292 of 298
from the data shownhere. You can find the
data applicable to you rvehicleont he vehicle
identificatio nplate.
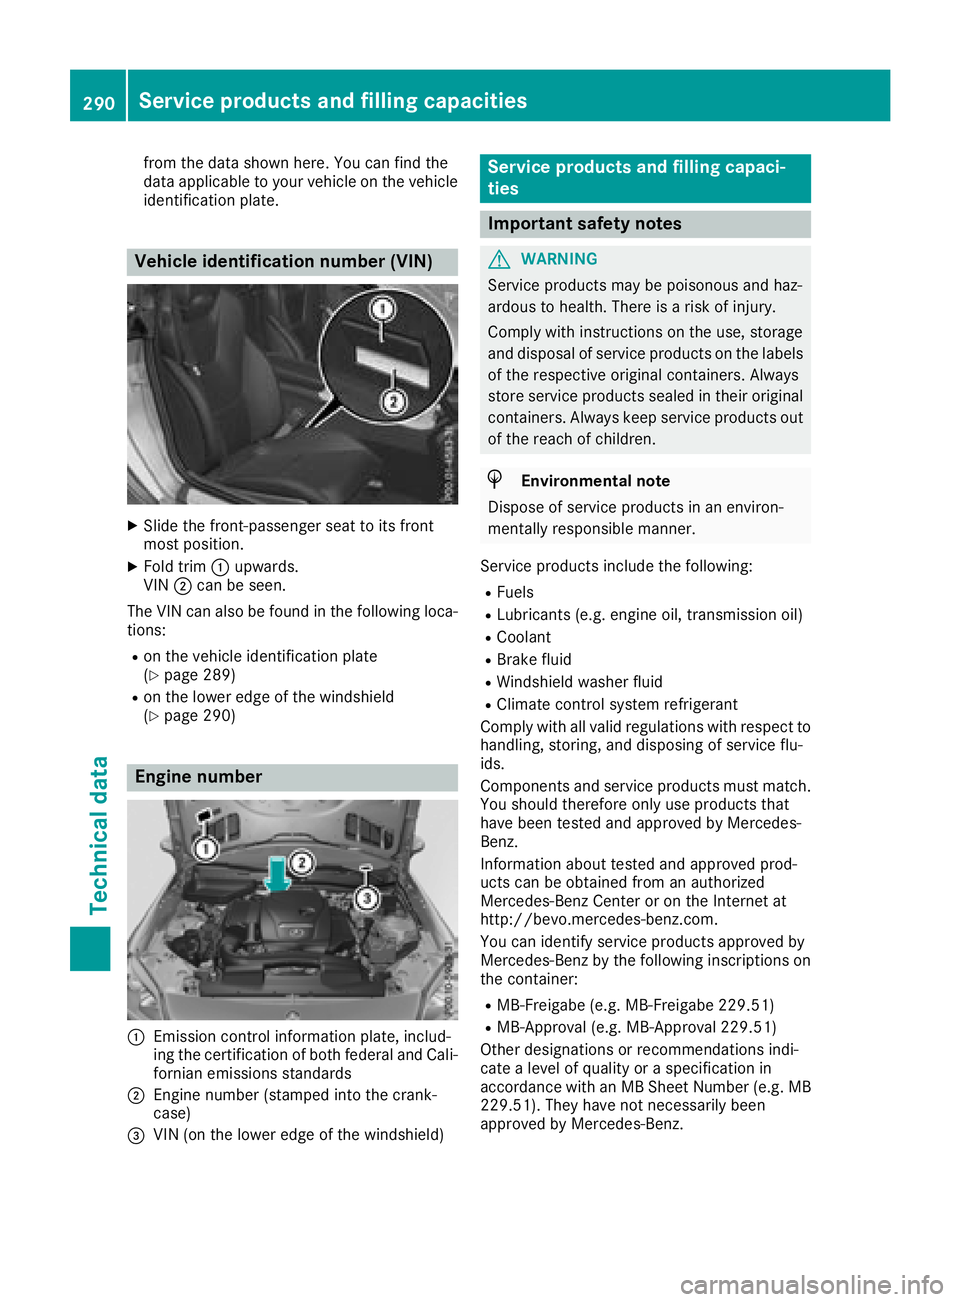
Vehicle identification number (VIN)
XSlid ethe front-passenger seattoi ts front
most position.
XFold trim :upwards.
VIN ;can be seen.
The VIN can als obefound in the following loca-
tions:
Ron the vehiclei dentificationplate
(Ypag e289)
Ron the lower edge of the windshield
(Ypag e290)
Engine number
:Emissionc ontrol information plate, includ-
ing the certification of both federala nd Cali-
forniane missions standards
;Engine numbe r(stamped into the crank-
case)
=VIN (on the lower edge of the windshield)
Service products and filling capaci-
ties
Important safety notes
GWARNING
Service products may be poisonousa nd haz-
ardous to health. There is arisk of injury.
Comply with instructions on the use ,storage
and disposal of service products on the labels
of the respective original containers. Always
store service products sealed in their original
containers. Always keep service products out
of the reach of children.
HEnvironmental note
Disposeofs ervice products in an environ-
mentall yresponsiblem anner.
Service products include the following:
RFuels
RLubricants (e.g. engine oil,t ransmission oil)
RCoolant
RBrake fluid
RWindshieldwasher fluid
RClimate control syste mrefrigerant
Comply with all vali dregulations with respect to
handling, storing, and disposing of service flu-
ids.
Components and service products must match.
You should therefore only use products that
have been tested and approved by Mercedes-
Benz.
Informatio nabout tested and approved prod-
ucts can be obtained from an authorized
Mercedes-Benz Center or on the Internet at
http://bevo.mercedes-benz.com.
You can identify service products approved by
Mercedes-Benz by the following inscriptions on
the container:
RMB-Freigabe (e.g. MB-Freigabe 229.51)
RMB-Approval( e.g. MB-Approval2 29.51)
Other designations or recommendations indi-
cate alevelofq uality or aspecificatio nin
accordance with an MB Sheet Number (e.g. MB
229.51). They have not necessarily been
approved by Mercedes-Benz.
290Service products and filling capacities
Technical data