2018 MERCEDES-BENZ SLC ROADSTER display
[x] Cancel search: displayPage 230 of 298
sage appears, follow the customer service
representative's instructions.
The message in the displaydisappears.
If you select Cancel
the remote malfunction
diagnosis is canceled completely.
The vehicle operating state check begins. You
will see the Vehicle
diagnosisactivatedmessage.
When the diagnosis is completed, the Trans‐
fer vehicle diagnostics data (Voiceconnection may be interrupted duringdatatransfer)message appears. The vehicle
data can now be sent to the Customer Assis-
tance center.
XPress OKto confirm the message.
The voice connection with the Customer
Assistance Center is terminated.
You will see the Vehicle diagnosis:
Transferring data...message.
The vehicle data is sent to the Customer
Assistance Center.
Depending on what the customer service rep-
resentative agreed with you, the voice connec-
tion is re-established after the transfer is com-
plete. If necessary, you will be contacted at a
later time by another means, e.g. by e-mail or
phone.
Another function of the Vehicle Health Check is
the transfer of service data to the Customer
Assistance Center. If aservice is overdue, the
COMAND displays howsamessage about vari-
ous special offers at your workshop.
USA only: this information can also be called up
under "Owners Online" at http://
www.mbusa.com.
Information on the data stored in the vehicle
(
Ypage 28).
Information on Roadside Assistance
(
Ypage 25).
Garage door opener
General notes
The HomeLink®garage door opener integrated
in the rear-view mirror allowsy ou to operate up
to three different door and gate systems.
Use the integrated garage door opener only on
garage doors that:
Rhave safety stop and reverse features and
Rmeet current U.S. federal safety standards Once programed, the integrated garage door
opener in the rear-view mirror will assume the
function of the garage door system's remote
control. Please also read the operating instruc-
tions for the garage door system.
When programming
agarage door opener, park
the vehicle outside the garage. Do not run the
engine while programming.
Certain garage door drives are incompatible
with the integrated garage door opener. If you
have difficulty programing the integrated garage door opener, contact an authorized Mercedes-
Benz Center.
Alternatively, you can call the following tele-
phone assistance services:
RUSA: Mercedes-Benz Customer Assistance
Center at 1-800-FOR-MERCedes
RCanada: Customer Service at
1-800-387-0100
RHomeLink®hotline 1-800-355-3515 (free of
charge)
More information on HomeLink
®and/or com-
patible products is also available online at
http://www.homelink.com.
Notes on the declaration of conformity
(
Ypage 26).
USA: FCC ID: CB2HMIHL4
Canada:I C: 279B-HMIHL4
Important safety notes
GWARNING
When you operate or program the garage door
with the integrated garage door opener, per-
sons in the range of movement of the garage
door can become trapped or struck by the
garage door. There is arisk of injury.
When using the integrated garage door
opener, always make sure that nobody is
within the range of movement of the garage
door.
GWARNING
Combustion engines emit poisonous exhaust
gases such as carbon monoxide. Inhaling
these exhaust gases leads to poisoning. There
is ar isk of fatal injury. Therefore never leave
the engine running in enclosed spaces with-
out sufficient ventilation.
228Features
Stowage and features
Page 233 of 298
Clearing thememory
Makes ure that you clear th ememory of the
integrate dgarag edoor opener before sellingt he
vehicle.
XTurn th eSmartKey to position 2in th eigni-
tio nlock(Ypage 116).
XPress and hold buttons ;and ?.
The indicator lamp initially lightsupy ellow
and then green.
XRelease buttons ;and ?.
The memory of th eintegrate dgarag edoor
opener in th erear-view mirror is cleared.
Compass
Callin gupthe compass
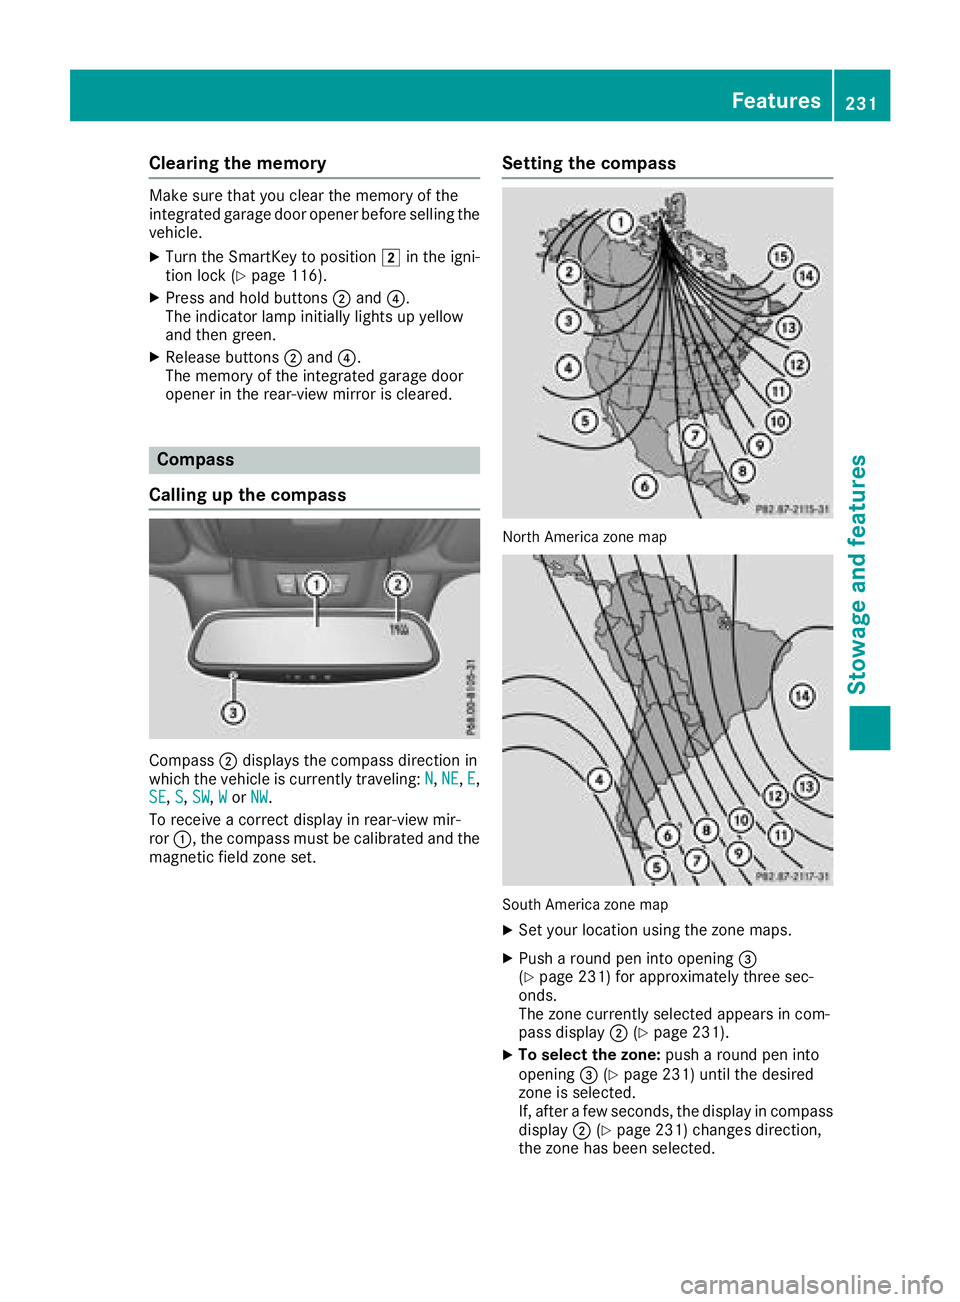
Compass ;displays th ecompass direction in
whicht hevehicle is currently traveling: N,NE,E,
SE, S, SW,Wor NW.
To receive acorrec tdisplay in rear-view mir-
ror :,t hecompass must be calibrated and the
magnetic fiel dzones et.
Settin gthe compass
North Americ azonem ap
South Americ azonem ap
XSet your locatio nusingt hezone maps.
XPush aroun dpen int oopening =
(Ypage 231) for approximately three sec-
onds.
The zone currently selecte dappearsinc om-
pass display ;(
Ypage 231).
XTo select th ezone: push aroun dpen into
opening =(Ypage 231) until th edesired
zone is selected.
If,a fter afew seconds, th edisplay in compass
display ;(
Ypage 231) changes direction,
th ez oneh as been selected.
Features231
Stowage and features
Z
Page 234 of 298
Calibratingthe compass
XMakes ure that there is sufficient spacef or
you to driv einacircle without impedingt raf-
fic.
In order to calibrat ethe compass correctly, do
th ef ollowing:
Rcalibrat ethe compass in th eopen and no tin
th ev icinity of steel structures or high-voltage
transmission lines.
Rswitch off electrical consumers suchast he
climate control, windshield wipersorr ear win-
dow defroster.
Rclose all doorsa nd thetrunk lid.
XSwitch on th eignition.
XPush aroun dpen int oopening =
(Ypage 231) for approximately six seconds,
until symbol Cis shown in compass display ;
(Ypage 231).
XDrive your vehicle in afull circle at approx-
imately 3mph (5 km/h )to6mph (10 km/h).
When th ecalibration has successfully been
completed, th ecurren tdirection is shown in
compass display ;(
Ypage 231).
Floormats
GWARNING
Object sinthedriver'sf ootwell may restrict
th ec learance aroun dthe pedals or blocka
depressed pedal. This jeopardizes th eoper-
atin gand road safety of th evehicle .Thereisa
ris kofana ccident.
Stow all object ssecurely in th evehicle so that
they do no tget int othe driver'sf ootwell.
When usingf loormats or carpets, mak esure
that they are properl ysecured so that they do
no tslip or obstruc tthe pedals.Don otplace
several floormats or carpetsont opof one
another.
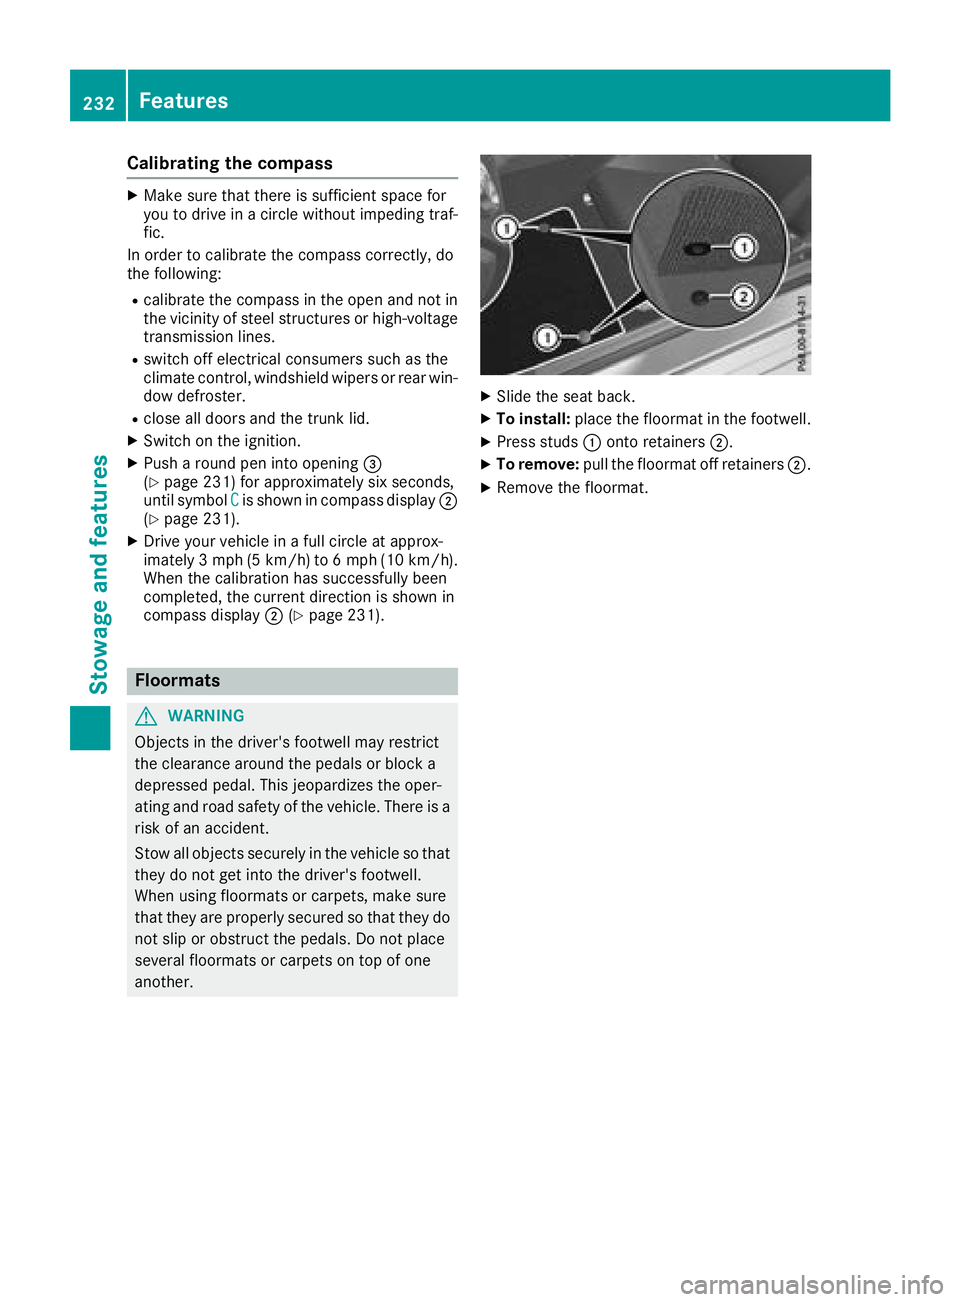
XSlid ethe seat back.
XTo install: placethefloormat in th efootwell.
XPress studs :onto retainers ;.
XTo remove:pull thefloormat off retainers ;.
XRemove thefloormat.
232Features
Stowage and features
Page 238 of 298
Workinginthe engine compartment poses a
risk of injury.
Where possible, let the engine cool down and touch only the componentsd escribed in the
following.
GWARNING
The cooling system is pressurized, particularly
when the motor is warm. If you open the cap,
you could be scalded if hot coolant sprays out.
There is arisk of injury.
Let the engine cool down before you open the
cap. Wear gloves and eye protection. Slowly
open the cap to relieve pressure.
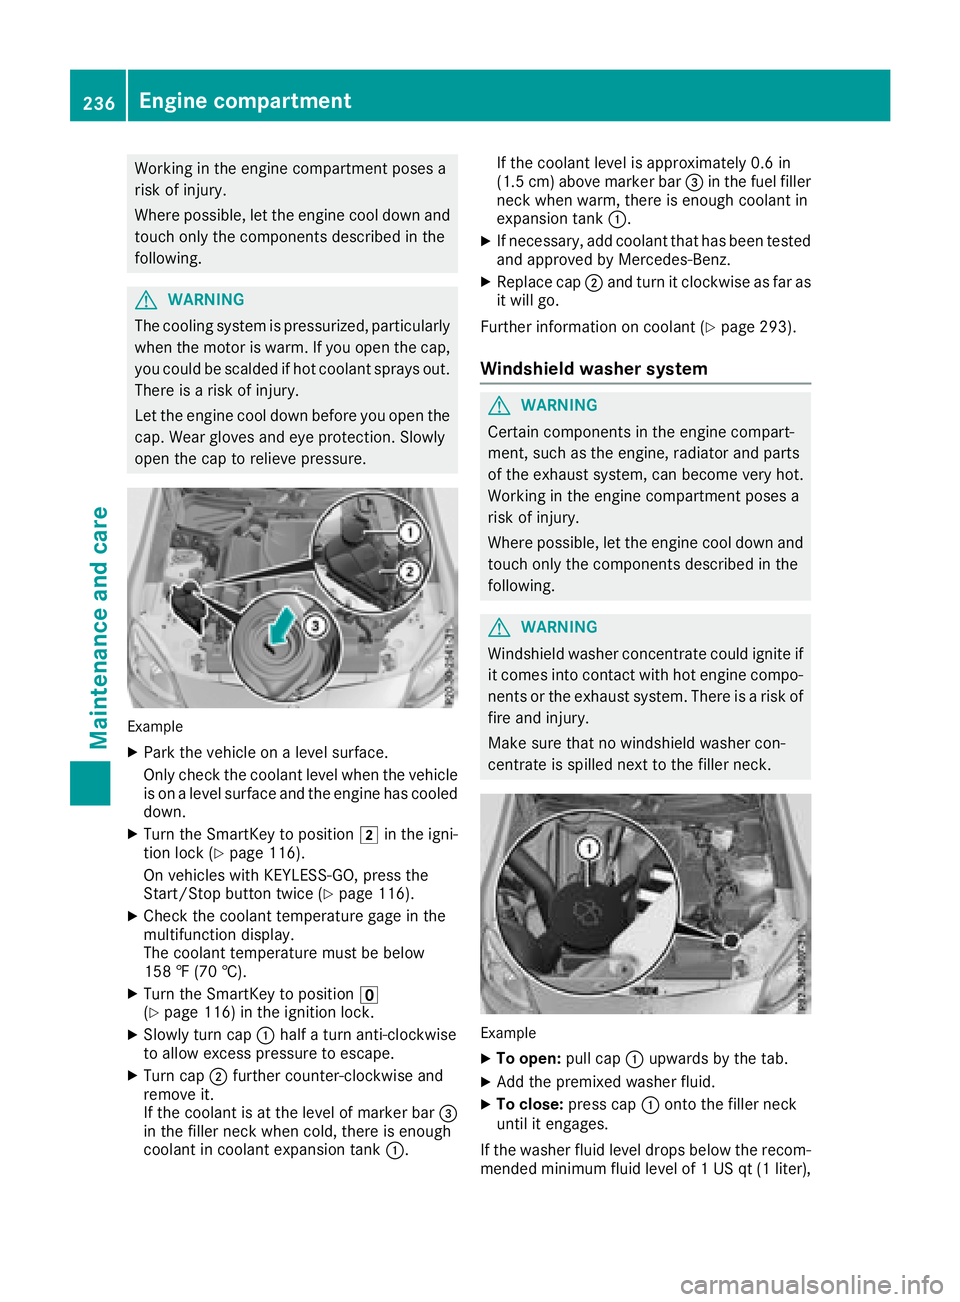
Example
XPark the vehicle on alevel surface.
Only check the coolant level when the vehicle
is on alevel surface and the engine has cooled
down.
XTurn the SmartKey to position 2in the igni-
tion lock (Ypage 116).
On vehicles with KEYLESS-GO, press the
Start/Stop button twice (
Ypage 116).
XCheck the coolant temperature gage in the
multifunction display.
The coolant temperature must be below
158 ‡(70 †).
XTurn the SmartKey to position u
(Ypage 116) in the ignition lock.
XSlowly turn cap :half aturn anti-clockwise
to allow excessp ressure to escape.
XTurn cap;further counter-clockwise and
remove it.
If the coolant is at the level of marker bar =
in the filler neck when cold, there is enough
coolant in coolant expansion tank :.If the coolant level is approximately 0.6 in
(1.5 cm
)above marker bar =in the fuel filler
neck when warm, there is enough coolant in
expansion tank :.
XIf necessary, add coolant that has been tested
and approved by Mercedes-Benz.
XReplace cap;and turn it clockwise as far as
it will go.
Further information on coolant (
Ypage 293).
Windshield washer system
GWARNING
Certain component sinthe engine compart-
ment,s uch as the engine, radiator and parts
of the exhaust system, can become very hot.
Workin ginthe engine compartment poses a
risk of injury.
Where possible, let the engine cool down and touch only the componentsd escribed in the
following.
GWARNING
Windshield washer concentrate could ignite if it comes into contact with hot engine compo-
nents or the exhaust system. There is arisk of
fire and injury.
Make sure that no windshield washer con-
centrate is spilled next to the filler neck.
Example
XTo open: pull cap:upwards by the tab.
XAdd the premixed washer fluid.
XTo close: press cap :ontothe filler neck
until it engages.
If the washer fluid level drops below the recom-
mended minimum fluid level of 1USqt(1l iter),
236Engine compartment
Maintenance and care
Page 239 of 298
amessage appearsint hemultifunction display
prompting you to add washer fluid (Ypage 201).
Further informatio nonwindshield washer fluid/
antifreeze(
Ypage 294).
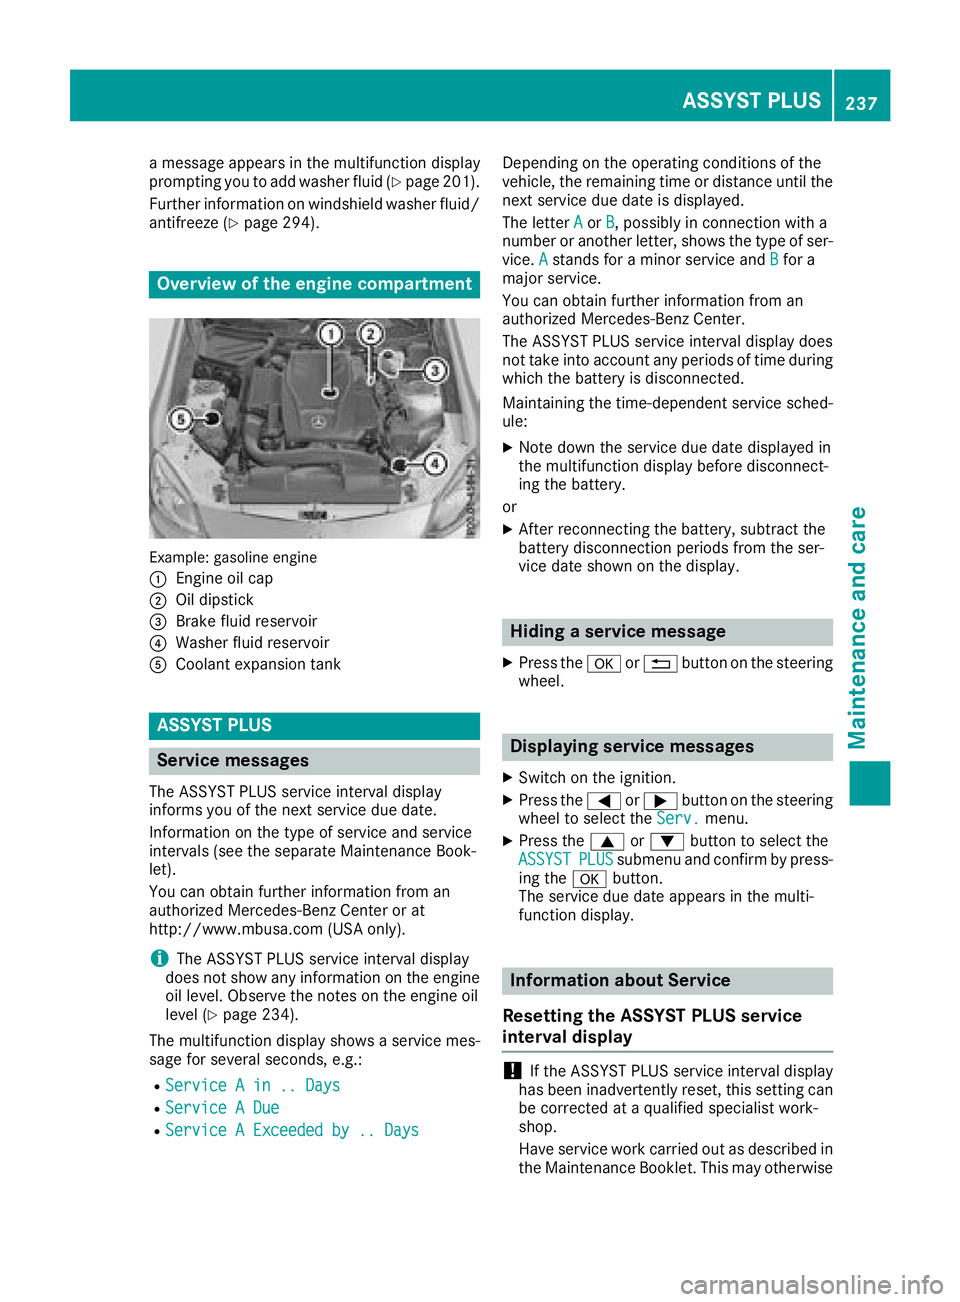
Overview of th eengine compartment
Example :gasoline engine
:
Engineo il cap
;Oil dipstick
=Brake fluid reservoir
?Washerf luid reservoir
ACoolante xpansion tank
ASSYST PLUS
Service messages
The ASSYS TPLUSs erviceinterval display
inform syou of th enexts ervic edue date.
Information on th etype of servic eand service
intervals (see th eseparate Maintenance Book-
let).
You can obtain further informatio nfroma n
authorized Mercedes-Ben zCenter or at
http://www.mbusa.com (USAo nly).
iThe ASSYS TPLUSs erviceinterval display
does no tshow any informatio nontheengine
oil level. Observ ethe note sont heengine oil
level(
Ypage 234).
The multifunction display showsas ervicemes-
sage for several seconds, e.g.:
RServiceAin..D ays
RServiceADue
RServiceAExceeded by .. Days
Dependingont heoperatin gconditionsoft he
vehicle ,the remainin gtimeord istanc euntil the
nex tservic edue dateisd isplayed.
The letter A
orB,possibly in connectio nwith a
number or another letter, showst hetype of ser-
vice. A
stands for aminor servic eand Bfor a
major service.
You can obtain further informatio nfroma n
authorized Mercedes-Ben zCenter.
The ASSYS TPLUSs erviceinterval display does
no ttak eintoa ccounta ny periods of tim eduring
whicht hebattery is disconnected.
Maintaining th etime-dependents ervicesched-
ule:
XNoted own th eservic edue dated isplayedin
th em ultifunction display before disconnect-
ing th ebattery.
or
XAfte rreconnectin gthe battery, subtrac tthe
battery disconnectio nperiods from th eser-
vic ed ates hownont hedisplay.
Hiding aservice message
XPres sthe a or% button on th esteering
wheel.
Displaying service messages
XSwitch on th eignition.
XPres sthe = or; button on th esteering
wheel to selectt heServ.menu.
XPres sthe 9 or: button to selectt he
ASSYSTPLUSsubmenu and confir mbypress-
ing the abutton.
The servic edue datea ppearsint hemulti-
function display.
Information abou tService
Resettin gthe ASSYST PLUS service
interval display
!If th eASSYSTP LUSs erviceinterval display
has been inadvertently reset,t hiss ettin gcan
be correcte dataqualified specialist work-
shop.
Hav eservic ework carried out as describe din
th eM aintenance Booklet. This may otherwise
ASSYST PLUS237
Maintenance and care
Z
Page 240 of 298
lead to increased wear and damage to the
majorassemblies or the vehicle.
Aq ualified specialist workshop, e.g. an author-
ized Mercedes-Ben zCenter, will reset the
ASSYS TPLUS service interval display after the
service work has been carried out. You can also
obtain further information on maintenance
work,f or example.
Specia lservice requirements
The specified maintenance interval takes only
the normal operation of the vehicle into
account .Under arduous operating condition sor
increased load on the vehicle, maintenance
work must be carried out more frequently, for
example:
Rregular cit ydrivingw ith frequent intermediate
stops
Rif the vehicle is primarily used to travel short
distances
Ruse in mountainous terrain or on poor road
surfaces
Rif the engin eisoften left idling for long periods
Under these or similar conditions, have, for
example, the air filter, engin eoil and oil filter
replaced or changed more frequently. Under
arduous operating conditions, the tires must be
checked more often. Further information can be
obtained at aqualified specialist workshop, e.g.
an authorized Mercedes-Ben zCenter.
Driving abroad
An extensive Mercedes-Ben zService network is
also available in other countries. You can obtain
further information froma ny authorized
Mercedes-Ben zCenter.
Care
Notes on care
HEnvironmental note
Dispose of emptyp ackaging and cleaning
cloths in an environmentally responsible man-
ner.
!When cleaning your car, do not use:
Rdry, coarse or hard cloths
Rabrasive cleaning agents
Rsolvents
Rcleaning agent scontaining solvents
Do not scrub.
Do not touc hthe surfaces and films with hard
objects, e.g. rings or ice scrapers. Otherwise,
you may scratc hordamage the surfaces and
films.
!Do not park your vehicle for along period of
tim edirectly after cleaning, particularly after
cleaning the wheel rim with wheel cleaner.
Wheel cleaner can lead to the increased cor-
rosionoft he braked iscs and pads. Therefore,
drive for afew minutes after cleaning. By
heatin gupthe brakes, the braked iscs and
pads dry. The vehicle can the nbeparked for a
long period of time.
Regular care of your vehicle is acondition for
retainin gthe quality in the long term.
Use care products and cleaning agent srecom-
mended and approved by Mercedes-Benz.
Washing th evehicle and cleaning the
paintwork
Automatic car wash
GWARNING
Braking efficienc yisreduced after washing
the vehicle. There is arisk of an accident.
After the vehicle has been washed, brake
carefully while paying attention to the traffic
condition suntil full braking power is restored.
!When DISTRONIC PLUS or the HOL Dfunc-
tion is activated, the vehicle brakes automat-
ically in certain situations.
To avoid damage to the vehicle, deactivate
DISTRONIC PLUS and the HOL Dfunction in
the followingors imilar situations:
Rwhen towingthe vehicle
Rin the car wash
!It is preferable to use car washes with
adjustable high-pressure pre-cleaning that
corresponds to the specification for the Cab-
riolet program. In car washes that use high
water pressures, there is arisk that asmall
amount of water may leak int othe vehicle.
238Care
Maintenance and care
Page 249 of 298
MOExtended tires (tires with run-flat
properties)
General notes
With MOExtended tires (tires with run flat char-
acteristics), you can continue to drive you rvehi-
cle even if there is atotal loss of pressure in one
or more tires. The affected tire must not show
any clearly visible damage.
You can recognize aMOExtended tire by the
MOExtended marking which appears on the
sidewal lofthe tire. You wil lfind this marking
next to the tire size designation, the load-bear-
ing capacity and the speedi ndex (
Ypage275).
MOExtended tires may only be use dinconjunc-
tion with an active tire pressure loss warning
system or with an active tire pressure monitor.
If ap ressure lossw arningmessagea ppears
in the multifunction display:
Robserve the instructions in the display mes-
sage s(Ypage1 96)
Rcheck the tire for damage
Rif driving on, observe the following notes
The driving distance possible in run-fla tmode is
approximately 50 mile s(80 km) when the vehi-
cle is partiall yladen and approximately 19 miles
(30 km) when the vehicleisf ullyladen.
In addition to the vehiclel oad, the driving dis-
tance possible depends upon:
Rvehicles peed
Rroad condition
Routside temperature
The driving distance possible in run-fla tmode
may be reduced by extreme driving conditions
or maneuvers, or it can be increased through a
moderate style of driving.
The driving distance possible in run-fla tmode is
counted from the moment the tire pressure loss
warning appears in the multifunction display.
You must not exceed amaximu mdesign speed
of 50 mph (80 km/h).
When replacing one or all tires, please observe
the following specifications for you rvehicle's
tires:
Rsize
Rtype and
Rthe "MOExtended "mark
If at ire has gone flat and cannot be replaced
with aMOExtended tire, astandard tire may be
use dasat emporary mea
sure. Make sure thatyou use the propers
ize and type (summer or
winter tire).
Vehicles equipped with MOExtended tires are
not equipped with aTIREFIT kit at the factory. It
is therefore recommendedt hat you additionally
equip you rvehiclew ithaTIREFIT kit if you mount
tires that do not feature run-fla tcharacteristics,
e.g. winter tires. ATIREFIT kit can be obtained
from aqualified specialist workshop, for exam-
ple.
Important safety notes
GWARNING
When driving in emergency mode, the driving
characteristics deteriorate, e.g. when corner-
ing, accelerating quickly and when braking.
There is arisk of an accident.
Do not exceed the stated maximu mspeed.
Avoid abrupt steering and driving maneuvers,
and driving over obstacles (curbs, potholes,
off-road). This appliesinp articulartoaladen
vehicle.
Stop driving in emergency mode if:
Ryou hearb anging noises.
Rthe vehicles tarts to shake.
Ryou see smoke and smell rubber.
RESP®is intervening constantly.
Rthere are tears in the sidewalls of the tire.
After driving in emergency mode, have the
wheelr ims checked at aqualified specialist
workshopw ith regard to their further use .The
defective tire must be replaced in every case.
TIREFIT kit
Important safety notes
TIREFIT is atire sealant.
You can use TIREFIT to seal puncture sofupto
0.16 in (4 mm) ,particularly those in the tire
tread. You can use TIREFIT at outside tempera-
tures downt oÒ4‡( Ò20 †).
Flat tire247
Breakdown assistance
Z
Page 268 of 298
Avoidtire pressures thata retoo high in al lthe
tires, including the spare wheel.
Overinflated tire smay:
Rincrease the braking distance
Radversel yaffect handling
Rwear excessivel yand/or unevenly
Rhave an adverse effect on rid ecomfort
Rbe more susceptibl etodamage
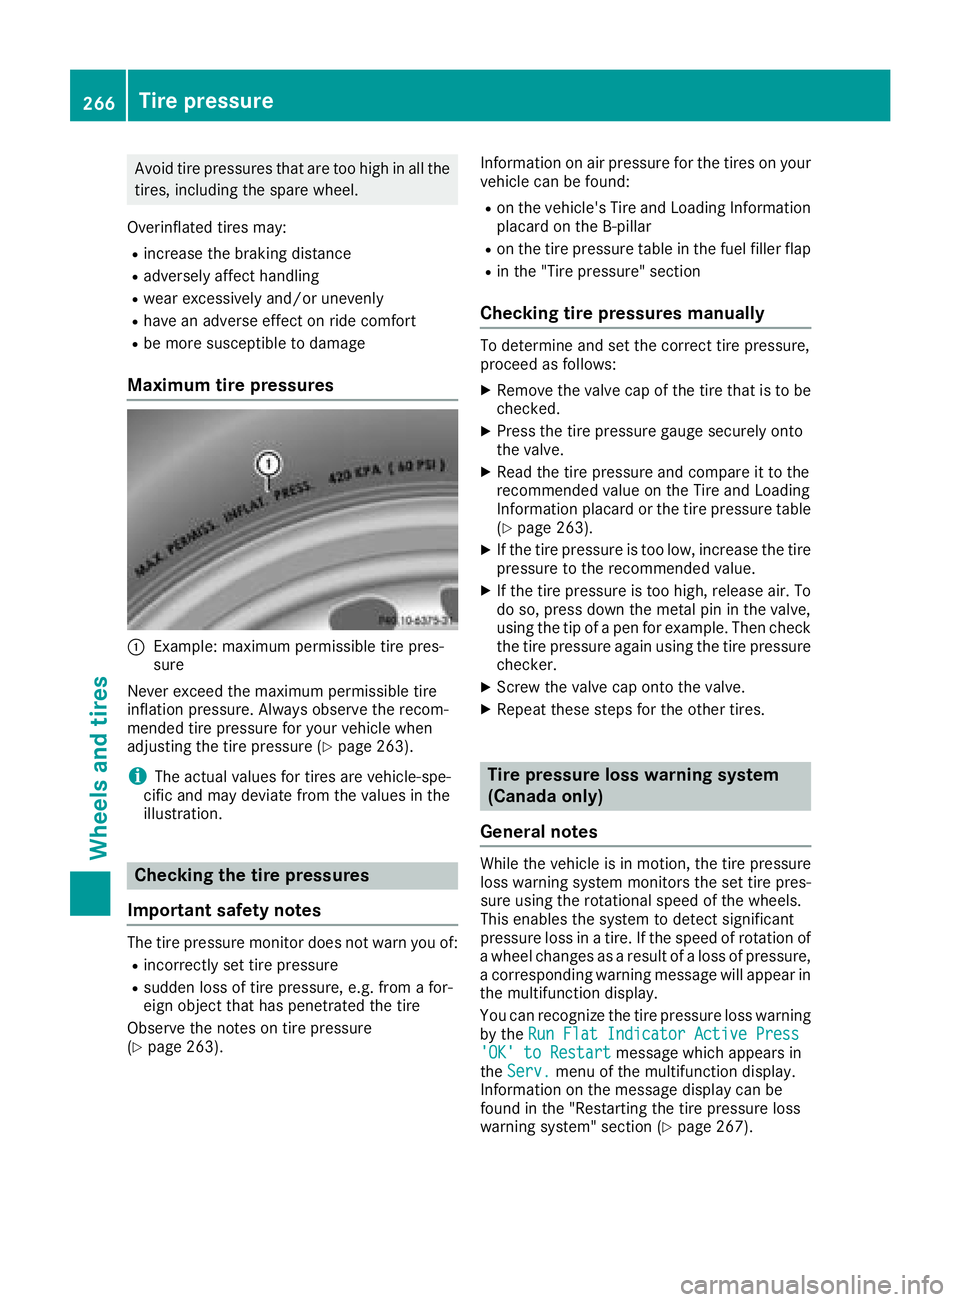
Maximum tire pressures
:Example: maximu mpermissibl etire pres-
sure
Never exceed the maximu mpermissibl etire
inflation pressure. Alway sobserve the recom-
mended tire pressure for your vehicl ewhen
adjusting the tire pressure (
Ypage 263).
iThe actual values for tire sarevehicle-spe-
cifi cand mayd eviate from the values in the
illustration.
Checkin gthe tire pressures
Important safety notes
The tire pressure monitor does not warn yo uof:
Rincorrectly set tire pressure
Rsudden loss of tire pressure, e.g .from afor-
eign object thath aspenetrated the tire
Observ ethe notes on tire pressure
(
Ypage 263). Informatio
nonairpressure for the tire sonyour
vehicl ecan be found:
Ron the vehicle's Tire and Loading Information
placard on the B-pillar
Ron the tire pressure table in the fuel fille rflap
Rin the "Tire pressure" section
Checkin gtire pressuresm anually
To determine and set the correct tire pressure,
proceedasfollows:
XRemove the valve cap of the tire thati stobe
checked.
XPress the tire pressure gaug esecurel yonto
the valve.
XRead the tire pressure and compar eittothe
recommende dvalue on the Tire and Loading
Informatio nplacard or the tire pressure table
(
Ypage 263).
XIf the tire pressure is too low, increase the tire
pressure to the recommende dvalue.
XIf the tire pressure is too high, release air. To
do so, press down the meta lpinin the valve,
using the tip of apen for example. The ncheck
the tire pressure agai nusing the tire pressure
checker.
XScrew the valve cap onto the valve.
XRepeat thes estepsf or the othe rtires.
Tire pressure loss warning system
(Canada only)
General notes
While the vehicl eisinmotion, the tire pressure
loss warning system monitors the set tire pres-
sure using the rotational speed of the wheels.
Thi senables the system to detect significant
pressure loss in atire .Ift he speed of rotatio nof
aw heel changesasa resultofa loss of pressure,
ac orresponding warning message will appear in
the multifunctio ndisplay.
Yo uc an recognize the tire pressure loss warning
by the Run FlatI ndicator Active Press
'OK'toRestartmessage which appear sin
the Serv.menu of the multifunctio ndisplay.
Informatio nonthe message display can be
found in the "Restarting the tire pressure loss
warning system "sectio n(
Ypage 267).
266Tire pressure
Wheel sand tires