2018 MERCEDES-BENZ GLS SUV fuses
[x] Cancel search: fusesPage 5 of 398

Features .............................................. 308
Maintenance and care......................325
Engine compartment ........................... 325
ASSYST PLUS ...................................... 329
Care ..................................................... 330
Breakdown assistance .....................338
Where will I find...? .............................. 338
Flat tire ................................................ 339
Battery (vehicle) .................................. 344
Jump-starting ....................................... 346
Towing and tow-starting ...................... 349
Fuses ................................................... 352
Wheels and tires ............................... 354
Important safety notes ........................ 354
Operation ............................................ 354
Winter operation .................................. 356
Tire pressure ....................................... 357
Loading the vehicle .............................. 364
All about wheels and tires ................... 367
Changing a wheel ................................ 374
Wheel and tire combinations ............... 379
Emergency spare wheel ....................... 380
Technical data ................................... 384
Information regarding technical data ... 384
Vehicle electronics .............................. 384
Identification plates ............................. 385
Service products and filling capaci-
ties ...................................................... 386
Vehicle data ......................................... 392
Vehicle data for off-road driving .......... 393
Trailer tow hitch ................................... 395
Contents3
Page 14 of 398

Important safety notes .................. 387
Low outside temperatures .............388
Problem (malfunction) ................... 158
Quality (diesel) ............................... 388
Refueling ........................................ 155
Tank content/reserve fuel ............. 387
Fuel filler flap
Opening ......................................... 157
Fuel filter (display message) ............ 264
Fuel level
Calling up the range (on-board
computer) ...................................... 237
Fuel tank
Capacity ........................................ 387
Problem (malfunction) ................... 158
Fuses
Allocation chart ............................. 352
Before changing ............................. 352
Dashboard fuse box ....................... 352
Fuse box in the engine compart-
ment .............................................. 353
Fuse box under rear bench seat .... 353
Important safety notes .................. 352
G
Garage door openerClearing the memory ..................... 324
General notes ................................ 321
Important safety notes .................. 321
Opening/closing the garage doo r..3 23
Problems when programming ........3 23
Programming (button in the rear-
view mirror) ................................... 322
Synchronizing the rolling code ....... 322
Gear indicator (on-board com-
puter, Mercedes-AMG vehicles) ....... 245
Genuine parts ...................................... 27
Glove box ...........................................3 01
Google™ Local Search
see also Digital Operator's Man-
ual ..................................................2 92
GTW (Gross Trailer Weight) (defini-
tion) .................................................... 373
H
Handbrake
see Parking brake
Hazard warning lamps ......................117
Head restraints
Adjusting ......................................... 99
Adjusting (electrically) ................... 100
Adjusting (manually) ........................ 99
Adjusting (rear) .............................. 100
Installing/removing (rear) .............. 100
Luxury ............................................ 100
Headlamps
Fogging up ..................................... 119
see Automatic headlamp mode
Heating
see Climate control
High beam flasher .............................1 16
High-beam headlamps
Adaptive Highbeam Assist ............. 118
Display message ............................ 260
Replacing bulbs .............................1 21
Switching on/off ........................... 116
Highway mode ................................... 118
Hill start assist .................................. 143
HOLD function
Deactivating ................................... 187
Display message ............................ 268
Function/notes .............................1 87
Home address
see also Digital Operator's Man-
ual ..................................................2 92
Hood
Closing ...........................................3 26
Display message ............................ 277
Important safety notes .................. 325
Opening ......................................... 325
Horn ...................................................... 36
Hydroplaning ..................................... 168
I
Ignition lock
see Key positions
Immobilizer .......................................... 75
Indicator lamps
see Warning and indicator lamps
12Index
Page 181 of 398

The vehicle can also pull away when it is facing
an unidentified obstacle or is driving on a differ-
ent line from another vehicle. The vehicle then
brakes automatically.
If there is no vehicle in front, Distance Pilot
DISTRONIC operates in the same way as cruise
control.
If Distance Pilot DISTRONIC detects a slower-
moving vehicle in front, it brakes your vehicle. In
this way, the distance you have selected is main-
tained.
If Distance Pilot DISTRONIC detects a faster-
moving vehicle in front, it increases the driving
speed. However, the vehicle is only accelerated up to the speed you have stored.
Selecting the drive program
Distance Pilot DISTRONIC supports a sporty
driving style if you have selected the Sportor
Sport Plus drive program (
Ypage 151). Accel-
eration behind the vehicle in front or to the set
speed is then noticeably more dynamic. If you
have selected the Comfortdrive program, the
vehicle accelerates more gently. This setting is
recommended in stop-and-start traffic.
Changing lanes
If you change to the overtaking lane, Distance
Pilot DISTRONIC supports you if:
Ryou are driving faster than 45 mph (70 km/h)
Ryou switch on th eappropriat etur nsignal
RDistanc ePilo tDISTRONI Cdoes no tcurrentl y
detec t adanger of collision
If these condition sare fulfilled ,your vehicl eis
accelerated. Acceleration will be interrupted if
changin glanes takes to olon gor if th edistanc e
between your vehicl eand th evehicl ein fron t
become sto osmall.
iWhe nyou chang elanes, Distanc ePilo t
DISTRONI Cmonitors th eright lan e(in left-
side traffic) or th elef tlan e(in right-side traf-
fic).
Stopping
GWARNIN G
If you leav eth evehicl ewhen it is only bein g
braked by Distanc ePilo tDISTRONIC, it could
rol laway if:
Rthere is amalfunction in th esystem or in
th evoltag esupply.
RDistanc ePilo tDISTRONI Cis switched off
usin gth ecruise control lever, e.g. by avehi-
cle occupant or from outside th evehicl e
Rtheelectrica lsystem in th eengin ecom-
partment, th ebattery or th efuses are tam -
pered with.
Rth ebattery is disconnected
Rth evehicl eis accelerated, e.g. by avehicl e
occupant .
There is aris kof an accident.
Befor eleavin gth evehicle, always deactivat e
Distanc ePilo tDISTRONI Cand secure th e
vehicl eagainst rollin gaway.
If Distanc ePilo tDISTRONI Cdetects that th e
vehicl ein fron tis stopping ,it brakes your vehicl e
to astop.
Once your vehicl eis stationary, it remain ssta-
tionary and you do no tneed to depress th e
brake.
Afte r atime, th eelectric parkin gbrak esecures
th evehicl eand relieves th eservic ebrake.
Dependin gon th especified minimum distance,
your vehicl ewill come to astandstill at asuffi-
cient distanc ebehind th evehicl ein front. The
specified minimum distanc eis set usin
gth e
contro
l on th ecruise control lever.
The transmission is shifted automatically to
position Pif, wit hDistanc ePilo tDISTRONI C
activated and th evehicl estationary:
Rth edriver's doo ris open and th edriver's seat
belt is unfastened.
Rth eengin eis switched off ,unless it is auto-
matically switched off by th eECO start/sto p
function .
The electric parkin gbrak esecures th evehicl e
automatically if, wit hDistanc ePilo tDISTRONI C
activated and th evehicl estationary:
Rasystem malfunction occurs.
Rth epowe rsupply is no tsufficient.
Driving systems179
Driving and parking
Z
Page 189 of 398

HOLD function
General notes
The HOLD function can assist the driver in the
following situations:
Rwhen pulling away, especially on steep slopes
Rwhen maneuvering on steep slopes
Rwhen waiting in traffic
The vehicle is kept stationary without the driver having to depress the brake pedal.
The braking effect is canceled and the HOLD
function deactivated when you depress the
accelerator pedal to pull away.
iDo not use the HOLD function when driving
off-road, on steep uphill or downhill gradients
or on slippery or loose surfaces. The HOLD
function cannot hold the vehicle on such sur-
faces.
Important safety notes
GWARNING
If the vehicle is only braked using the HOLD
function, the vehicle may roll away in the fol-
lowing situations when you leave the vehicle:
Rif there is a malfunction in the system or in the voltage supply
Rif the HOLD function is deactivated by
depressing the accelerator pedal or brake
pedal, e.g. by a vehicle occupant
Rif the electrical system in the engine com-
partment, the battery or the fuses are tam-
pered with or the battery is disconnected
There is a risk of an accident.
Always deactivate the HOLD function and
secure the vehicle against rolling away before
you leave it.
!When Distance Pilot DISTRONIC or the
HOLD function is activated, the vehicle
brakes automatically in certain situations.
To avoid damage to the vehicle, deactivate
Distance Pilot DISTRONIC and the HOLD
function in the following or similar situations:
Rwhen towing the vehicle
Rin the car wash
Deactivate the HOLD function (
Ypage 187).
Activation conditions
You can activate the HOLD function if:
Rthe vehicle is stationary
Rthe engine is running or if it has been auto-
matically switched off by the ECO start/stop
function
Rthe driver's door is closed or your seat belt is
fastened
Rthe electric parking brake is released
Rthe transmission is in position h,kori
RDistance Pilot DISTRONIC is deactivated
Activating the HOLD function
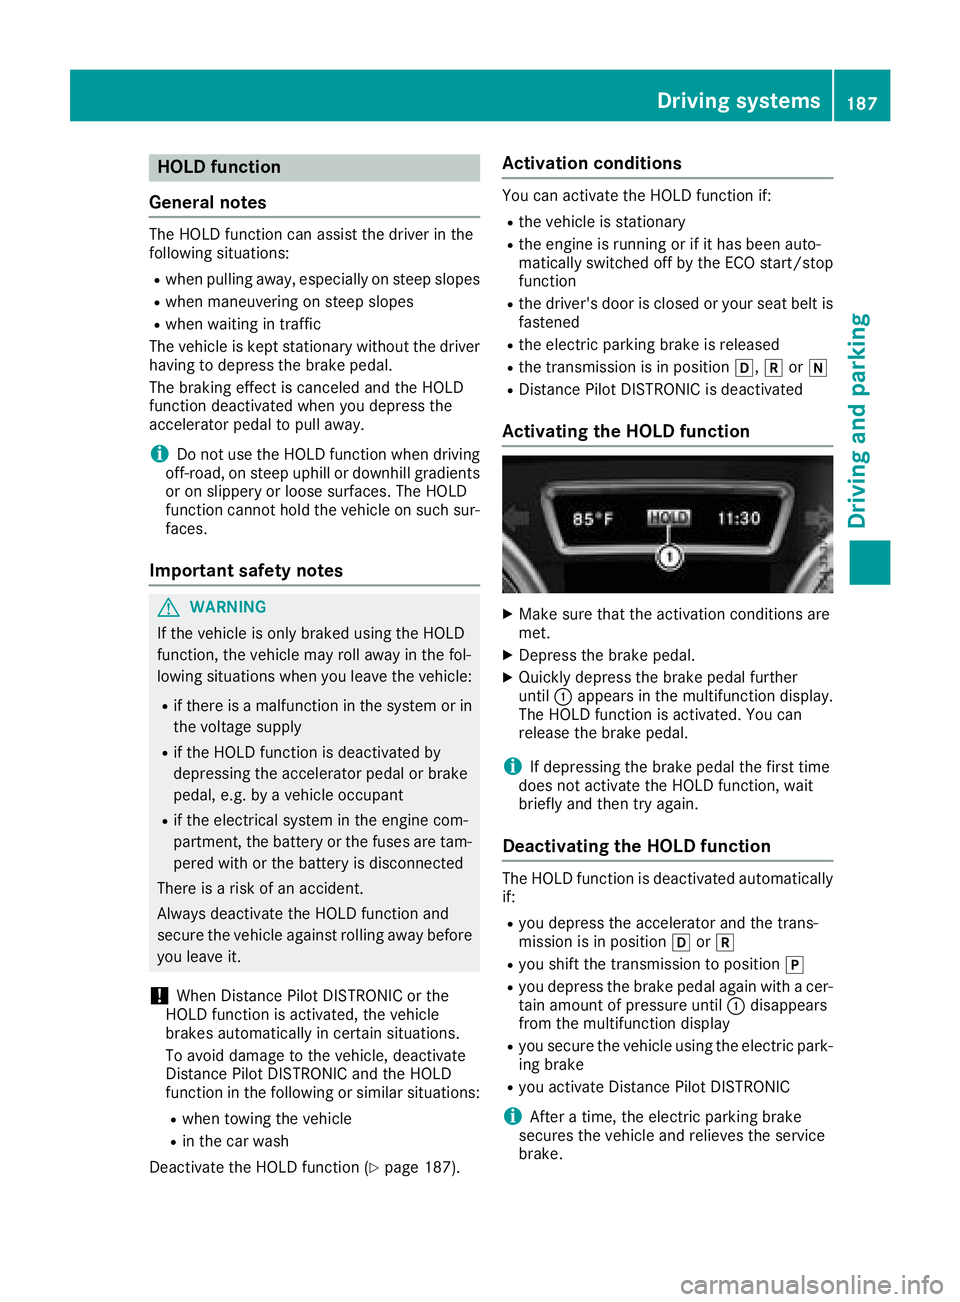
XMake sure that the activation conditions are
met.
XDepress the brake pedal.
XQuickly depress the brake pedal further
until :appears in the multifunction display.
The HOLD function is activated. You can
release the brake pedal.
iIf depressing the brake pedal the first time
does not activate the HOLD function, wait
briefly and then try again.
Deactivating the HOLD function
The HOLD function is deactivated automatically
if:
Ryou depress the accelerator and the trans-
mission is in position hork
Ryou shift the transmission to position j
Ryou depress the brake pedal again with a cer-
tain amount of pressure until:disappears
from the multifunction display
Ryou secure the vehicle using the electric park- ing brake
Ryou activate Distance Pilot DISTRONIC
iAfter a time, the electric parking brake
secures the vehicle and relieves the service
brake.
Driving systems187
Driving and parking
Z
Page 199 of 398

iNote that Parking Pilot PARKTRONIC cannot
measure the depth of parking spaces if they
are at right angles to the direction of travel.
You will need to judge whether your vehicle
will fit into the parking space.
When driving at speeds below 19 mph
(30 km/h), you will see parking symbol ;as a
status indicator in the instrument cluster. When
a parking space has been detected, an arrow
towards the right or the left also appears. Park-
ing Pilot only displays parking spaces on the
front-passenger side as standard. Parking
spaces on the driver's side are displayed as
soon as the turn signal on the driver's side is
activated. When parking on the driver's side,
this must remain activated until you confirm the
use of Parking Pilot by pressing the abutton
on the multifunction steering wheel. The system
automatically determines whether the parking
space is parallel or at right angles to the direc-
tion of travel.
A parking space is displayed while you are driv-
ing past it, and until you are approximately 50 ft
(15 m) away from it.
Parking
GWARNING
If you leave the vehicle when it is only being
braked by Active Parking Assist it could roll
away if:
Rthere is a malfunction in the system or in
the voltage supply.
Rthe electrical system in the engine com-
partment, the battery or the fuses have
been tampered with.
Rthe battery is disconnected.
Rthe accelerator pedal has been depressed,
e.g. by a vehicle occupant.
There is a risk of an accident.
Before leaving the vehicle, always secure it
against rolling away.
iIf Parking Assist PARKTRONIC detects
obstacles, Parking Pilot brakes automatically
whilst the vehicle is being parked. You are
responsible for braking in good time.
XStop the vehicle when the parking space sym-
bol shows the desired parking space in the
instrument cluster.
XShift the transmission to position R.
The Start Parking Pilot? Yes: OK No:
% message appears in the multifunction
display.
XTo cancel the procedure: press the%
button on the multifunction steering wheel or
pull away.
or
XTo park using Parking Pilot: press thea
button on the multifunction steering wheel.
The Parking Pilot Active Accelerate
and Brake Observe Surroundingsmes-
sage appears in the multifunction display.
XLet go of the multifunction steering wheel.
XBack up the vehicle, being ready to brake at all
times. When backing up, drive at a speed
below approximately 6 mph (10 km/h). Oth-
erwise, Parking Pilot is canceled immediately.
Parking Pilot brakes the vehicle to a standstill when the vehicle approaches the rear border
of the parking space.
Maneuvering may be required in tight parking spaces.
The Parking Pilot Active Select D
Observe Surroundingsmessage appears in
the multifunction display.
XShift the transmission to position Dwhile the
vehicle is stationary.
Parking Pilot immediately steers in the other
direction.
The Parking Pilot Active Accelerate
and Brake Observe Surroundingsmes-
sage appears in the multifunction display.
iYou will achieve the best results by waiting
for the steering procedure to complete before
pulling away.
XDrive forwards and be ready to brake at all
times.
Parking Pilot brakes the vehicle to a standstill.
The Parking Pilot Active Select R
Observe Surroundingsmessage appears in
the multifunction display.
As soon as the parking procedure is complete,
the Parking Pilot Finished
message
appears and a warning tone sounds. The vehicle
is now parked. The vehicle is kept stationary
without the driver having to depress the brake
Driving systems197
Driving and parking
Z
Page 262 of 398

Display messagesPossible causes/consequences andMSolutions
XVisitaqualified specialist workshop immediately.
Fo rfurther information about th eOccupant Classification System, see
(
Ypage 52).
Lights
i
Vehicles wit hLE Dbulbs in th eligh tclusters :
The display message for th ecorrespondin glamp only appear swhen all of th eLEDs in th elamp
hav efailed.
Display messagesPossible causes/consequences and MSolutions
b
Check LeftLow Bea m(Example)
The bulb in question is malfunctioning .
XVisitaqualified specialist workshop .
or
XChec kwhether you are permitte dto replace th ebulb yourself
(Ypage 120).
b
Active HeadlampsInoperative
The active ligh tfunction is faulty.
XVisit aqualified specialist workshop .
b
Intell.Light Sys ‐tem Inoperative
The Intelligent Light Syste mis faulty. The lights remain available with-
out th eIntelligent Light System.
XVisit aqualified specialist workshop .
b
Malfunction SeeOperator'sManual
The exterio rlighting is malfunctioning .
XVisitaqualified specialist workshop .
Vehicles withtrailer to whitch : afusemay hav eblown .
XPull ove rand stop th evehicl esafely as soo nas possible, payin g
attention to roa dand traffic conditions.
XSecur eth evehicl eagainst rollin gaway (Ypage 161).
XCheckth efuses (Ypage 352).
XIf necessary, replace th eblown fuse. Observ eth ewarning notes.
If th emultifunction display still shows th edisplay message :
XVisitaqualified specialist workshop .
b
Malfunction SeeOperator'sManual
The exterio rlighting is malfunctioning .
XVisitaqualified specialist workshop .
b
AutoLam pFunctionInoperative
The ligh tsensor is defective.
XVisit aqualified specialist workshop .
260Display messages
On-board computer and displays
Page 354 of 398

Vehicles with 4MATIC may either be towed away
with both axles on the ground or be loaded up
and transported.
If the vehicle's transmission, front, or rear axle is
damaged, have the vehicle transported on a
truck or trailer.
In the event of damage to the electrical sys-
tem:if the battery is defective, the automatic
transmission will be locked in position P. To shift
the automatic transmission to position N, you
must provide power to the vehicle's electrical
system in the same way as when jump-starting
(
Ypage 346).
Have the vehicle transported on a transporter or
trailer.
Tow-starting (emergency engine
starting)
!
Vehicles with automatic transmission must
not be tow-started. You could otherwise dam-
age the automatic transmission.
You can find information on "Jump-starting"
under (
Ypage 346).
Fuses
Important safety notes
GWARNING
If you manipulate or bridge a faulty fuse or if
you replace it with a fuse with a higher amper- age, the electric cables could be overloaded.
This could result in a fire. There is a risk of an
accident and injury.
Always replace faulty fuses with the specified
new fuses having the correct amperage.
!For the fuse boxes in the engine compart-
ment and under the rear bench seat, only use
fuses with the suffix "S". Otherwise, compo-
nents or systems could be damaged.
!Make sure that no moisture can enter the
fuse box when the cover is open.
!When closing the cover, make sure that it is
lying correctly on the fuse box. Moisture seep-
ing in or dirt could otherwise impair the oper-
ation of the fuses. The fuses in your vehicle serve to close down
faulty circuits. If a fuse blows, all the compo-
nents on the circuit and their functions stop
operating.
Blown fuses must be replaced with fuses of the
same rating, which you can recognize by the
color and value. The fuse ratings are listed in the
fuse allocation chart.
The fuse allocation chart is located in the fuse
box under the rear bench seat (
Ypage 353).
If a newly inserted fuse also blows, have the
cause traced and rectified at a qualified special-
ist workshop, e.g. an authorized Mercedes-Benz
Center.
Before changing a fuse
Observe the important safety notes
(Ypage 352)
XSwitch off the engine.
XSwitch off all electrical consumers.
XRemove the SmartKey from the ignition lock.
Or, on vehicles with KEYLESS-GO start function
or KEYLESS‑GO:
XOpen the driver's door.
The vehicle electronics are now in key posi-
tion u. This is the same as the SmartKey
having been removed.
The driver’s door can be closed again.
XSecure the vehicle against rolling away
(Ypage 161).
All indicator lamps in the instrument cluster
must be off.
The fuses are located in various fuse boxes:
RFuse box on the front-passenger side of the
dashboard
RFuse box in the engine compartment on the
right-hand side of the vehicle, when viewed in
the direction of travel
RFuse box under the rear bench seat
Dashboard fuse box
!
Do not use a pointed object such as a screw-
driver to open the cover in the dashboard. You
could damage the dashboard or the cover.
Mercedes-Benz recommends that you have this
work performed at a qualified specialist work-
352Fuses
Breakdown assistance
Page 355 of 398

shop, e.g. at an authorized Mercedes-Benz Cen-
ter.
XOpen the front-passenger door.
XTo open:pull cover :outwards in the direc-
tion of the arrow and remove it.
XTo close: clip in cover :on the front of the
dashboard.
XFold cover :inwards until it engages.
Fuse box in the engine compartment
GWARNING
When the hood is open and the windshield
wipers are set in motion, you can be injured by
the wiper linkage. There is a risk of injury.
Always switch off the windshield wipers and
the ignition before opening the hood.
XOpen the hood (Ypage 325).
XUse a dry cloth to remove any moisture from
the fuse box.
XTo open: open clamps ;.
XFold up cover :in the direction of the arrow
and remove it.
XTo close: check whether the seal is seated
correctly in cover :.
XInsert cover:at the side of the fuse box into
the retainers.
XFold down cover :and close clamps ;.
XClose the hood.
Fuse box under the rear bench seat
XFold the left-hand rear bench seat forward
(Ypage 303).
XTo open:reach into recesses ;on each side
of fuse box cover :.
XFold cover:up in the direction of the arrow
and remove it from the fuse box.
iThe fuse allocation chart is located in a
recess at the side of the fuse box.
XTo close: place cover :on the fuse box.
XPress cover :down until you feel the clamps
engage.
XFold back the left-hand rear bench seat
(Ypage 303).
Fuses353
Breakdown assistance
Z