2018 MERCEDES-BENZ GLS SUV eco start
[x] Cancel search: eco startPage 165 of 398
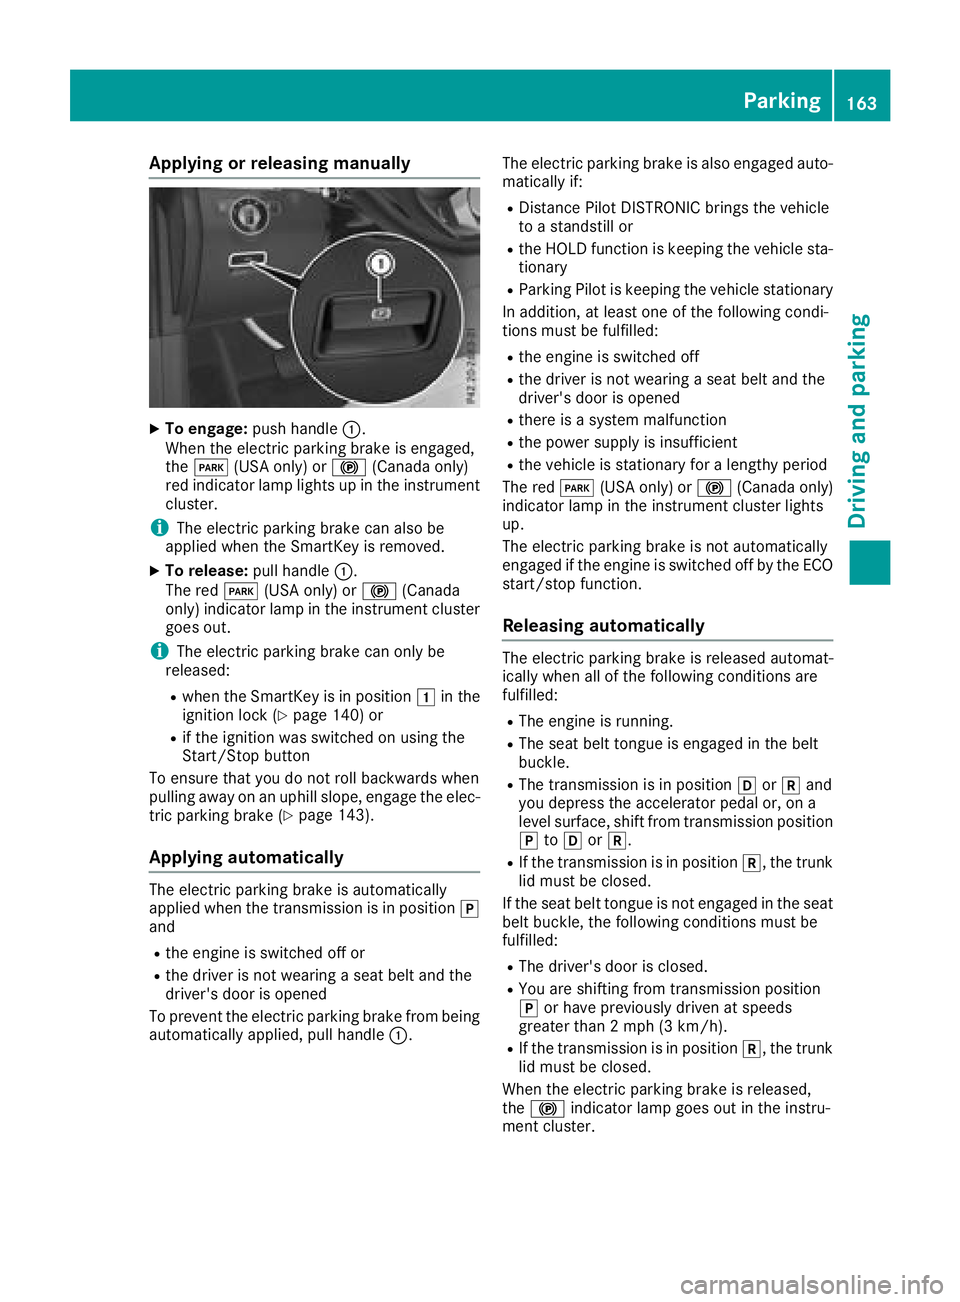
Applyingorreleasing manually
XTo engage: push handle :.
When th eelectric parking brak eis engaged,
th eF (USAonly) or !(Canada only)
red indicator lamp lights up in th einstrumen t
cluster.
iThe electric parking brak ecan also be
applie dwhen th eSmartKey is removed.
XTo release: pull handle:.
The red F(USAonly) or !(Canada
only) indicator lamp in th einstrumen tcluste r
goe sout .
iThe electric parking brak ecan only be
released:
Rwhen th eSmartKey is in position 1in th e
ignition loc k (Ypage 140) or
Rif theignition was switched on usin gth e
Start/Sto pbutto n
To ensur ethat you do no trol lbackwards when
pullin gaway on an uphil lslope, engage th eelec -
tric parking brak e (
Ypage 143).
Applying automatically
The electric parking brak eis automatically
applie dwhen th etransmission is in position j
and
Rth eengin eis switched off or
Rth edriver is no twearing aseat belt and th e
driver's door is opened
To preven tth eelectric parking brak efrom bein g
automatically applied, pull handle :.The electric parking brak
eis also engage dauto -
matically if:
RDistanc ePilo tDISTRONI Cbring sth evehicl e
to astandstill or
Rth eHOLD function is keepin gth evehicl esta-
tionary
RParking Pilo tis keepin gth evehicl estationary
In addition ,at least on eof th efollowin gcondi-
tion smus tbe fulfilled :
Rtheengin eis switched off
Rth edriver is no twearing aseat belt and th e
driver's door is opened
Rthere is asystem malfunction
Rth epowe rsupply is insufficien t
Rthevehicl eis stationary for alengthy period
The red F(USAonly) or !(Canada only)
indicator lamp in th einstrumen tcluste rlights
up.
The electric parking brak eis no tautomatically
engage dif th eengin eis switched off by th eECO
start/sto pfunction .
Releasing automatically
The electric parking brak eis release dautomat -
ically when all of th efollowin gcondition sare
fulfilled :
RThe engin eis running.
RThe seat belt tongue is engage din th ebelt
buckle.
RThe transmission is in position hork and
you depress th eaccelerato rpedal or, on a
level surface, shif tfrom transmission position
j toh ork.
RIf th etransmission is in position k,thetrunk
lid mus tbe closed.
If th eseat belt tongue is no tengage din th eseat
belt buckle, th efollowin gcondition smus tbe
fulfilled :
RThe driver's door is closed.
RYou are shifting from transmission position
jor hav epreviously driven at speeds
greate rthan 2mph (3 km/h).
RIf th etransmission is in position k,thetrunk
lid mus tbe closed.
When th eelectric parking brak eis released,
th e! indicator lamp goes out in th einstru-
men tcluster.
Parking163
Driving and parking
Z
Page 167 of 398
XAvoid frequent acceleration or braking.
XHave all service and maintenance work car-
ried out at the specified intervals.
Fuel consumption also increases when driving in
cold weather, in stop-start traffic and in hilly ter-
rain.
Drinking and driving
GWARNING
Drinking and driving and/or taking drugs and driving are very dangerous combinations.
Even a small amount of alcohol or drugs can
affect your reflexes, perceptions and judg-
ment.
The possibility of a serious or even fatal acci-
dent is greatly increased when you drink or
take drugs and drive.
Do not drink or take drugs and drive or allow
anyone to drive who has been drinking or tak-
ing drugs.
Emission control
GWARNING
Combustion engines emit poisonous exhaust
gases such as carbon monoxide. Inhaling
these exhaust gases leads to poisoning. There
is a risk of fatal injury. Therefore never leave
the engine running in enclosed spaces with-
out sufficient ventilation.
Certain engine systems are designed to keep
the level of poisonous components in exhaust
fumes within legal limits.
These systems only work at peak efficiency if
they are serviced exactly in accordance with the
manufacturer's specifications. Always have
work on the engine carried out at a qualified
specialist workshop. Mercedes-Benz recom-
mends that you use an authorized Mercedes-
Benz Center for this purpose. In particular, work
relevant to safety or on safety-related systems
must be carried out at a qualified specialist
workshop.
The engine settings must not be changed under any circumstances. Furthermore, all specific
service work must be carried out at regular
intervals and in accordance with the Mercedes-
Benz service requirements. You can obtain current information concerning
the servicing of your vehicle at any time from a
qualified specialist workshop. This could be an
overview of the mainte
nance w
ork or any addi-
tional maintenance work, for example.
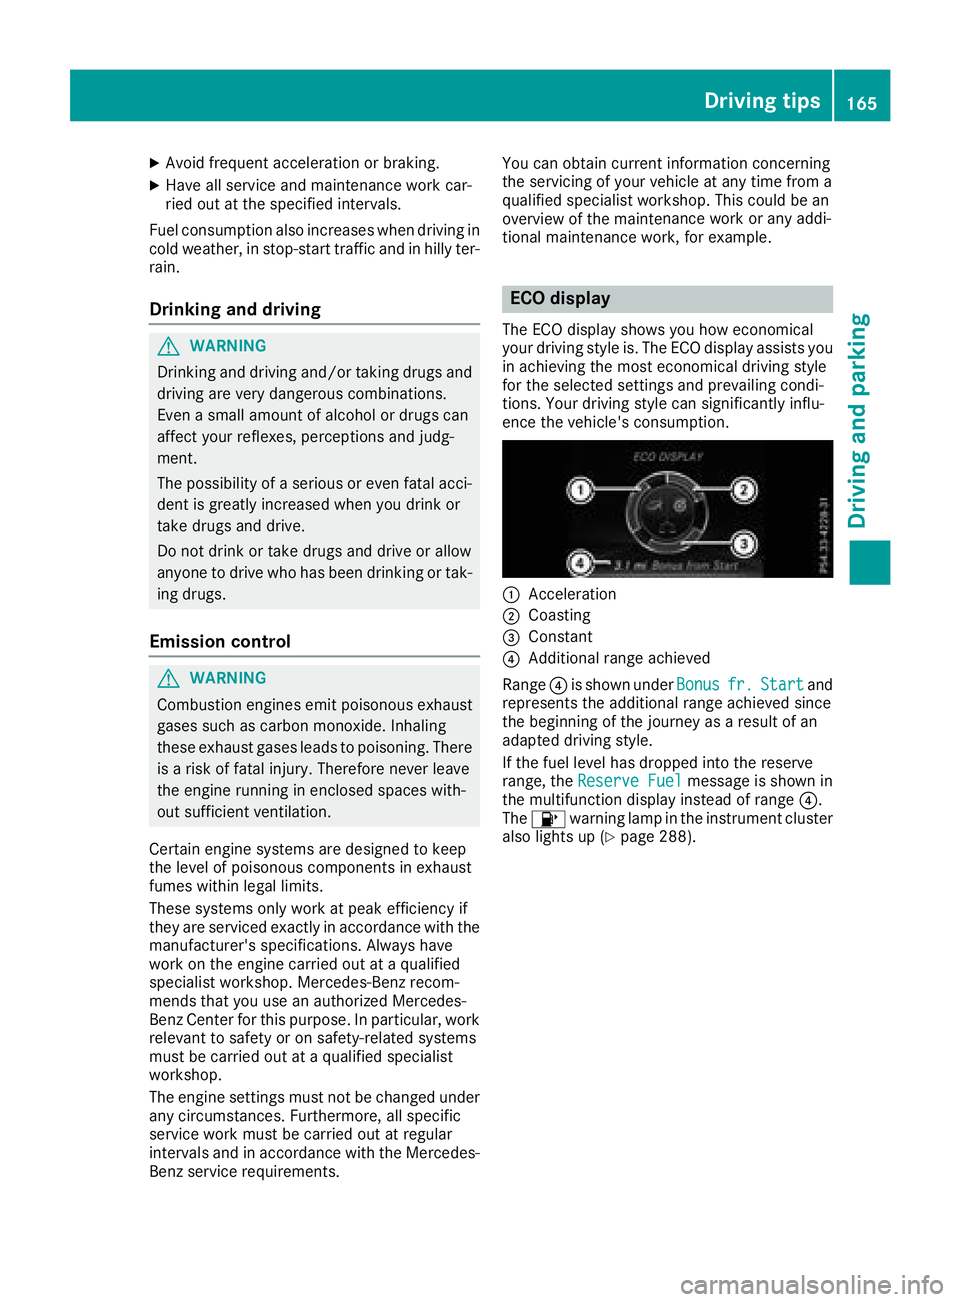
ECO display
The ECO display shows you how economical
your driving style is. The ECO display assists you
in achieving the most economical driving style
for the selected settings and prevailing condi-
tions. Your driving style can significantly influ-
ence the vehicle's consumption.
:Acceleration
;Coasting
=Constant
?Additional range achieved
Range ?is shown under Bonus
fr.Startand
represents the additional range achieved since
the beginning of the journey as a result of an
adapted driving style.
If the fuel level has dropped into the reserve
range, the Reserve Fuel
message is shown in
the multifunction display instead of range ?.
The 8 warning lamp in the instrument cluster
also lights up (
Ypage 288).
Driving tips165
Driving an d parking
Z
Page 168 of 398
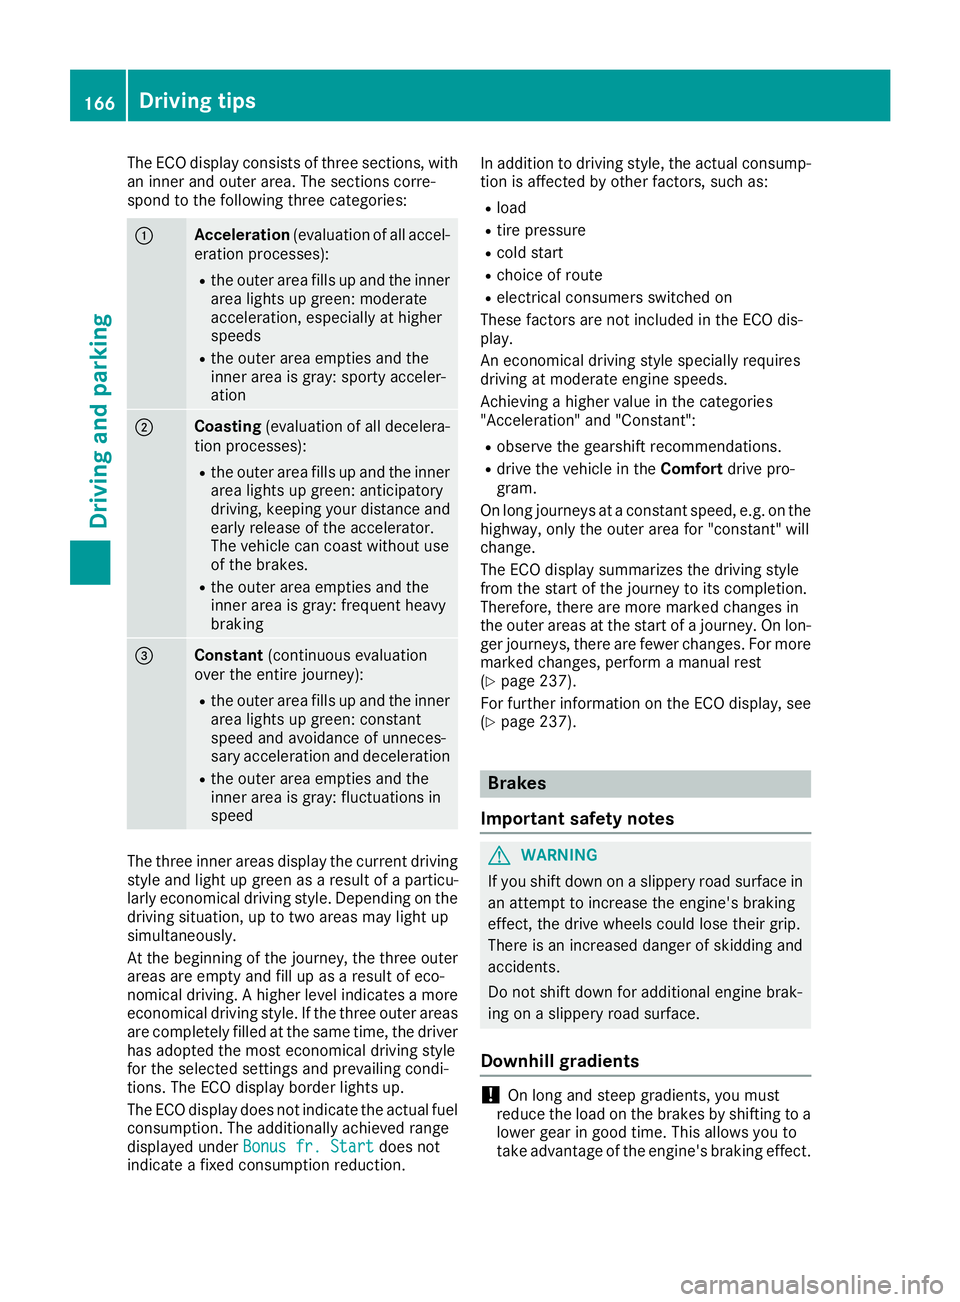
The ECO display consists of three sections, with
an inner and outer area. The sections corre-
spond to the following three categories:
:Acceleration(evaluation of all accel-
eration processes):
Rthe outer area fills up and the inner area lights up green: moderate
acceleration, especially at higher
speeds
Rthe outer area empties and the
inner area is gray: sporty acceler-
ation
;Coasting (evaluation of all decelera-
tion processes):
Rthe outer area fills up and the inner area lights up green: anticipatory
driving, keeping your distance and
early release of the accelerator.
The vehicle can coast without use
of the brakes.
Rthe outer area empties and the
inner area is gray: frequent heavy
braking
=Constant (continuous evaluation
over the entire journey):
Rthe outer area fills up and the inner area lights up green: constant
speed and avoidance of unneces-
sary acceleration and deceleration
Rthe outer area empties and the
inner area is gray: fluctuations in
speed
The three inner areas display the current driving
style and light up green as a result of a particu-
larly economical driving style. Depending on thedriving situation, up to two areas may light up
simultaneously.
At the beginning of the journey, the three outer
areas are empty and fill up as a result of eco-
nomical driving. A higher level indicates a more
economical driving style. If the three outer areas
are completely filled at the same time, the driver
has adopted the most economical driving style
for the selected settings and prevailing condi-
tions. The ECO display border lights up.
The ECO display does not indicate the actual fuel consumption. The additionally achieved range
displayed under Bonus fr. Start
does not
indicate a fixed consumption reduction. In addition to driving style, the actual consump-
tion is affected by other factors, such as:
Rload
Rtire pressure
Rcold start
Rchoice of route
Relectrical consumers switched on
These factors are not included in the ECO dis-
play.
An economical driving style specially requires
driving at moderate engine speeds.
Achieving a higher value in the categories
"Acceleration" and "Constant":
Robserve the gearshift recommendations.
Rdrive the vehicle in the Comfortdrive pro-
gram.
On long journeys at a constant speed, e.g. on the
highway, only the outer area for "constant" will
change.
The ECO display summarizes the driving style
from the start of the journey to its completion.
Therefore, there are more marked changes in
the outer areas at the start of a journey. On lon- ger journeys, there are fewer changes. For more
marked changes, perform a manual rest
(
Ypage 237).
For further information on the ECO display, see
(
Ypage 237).
Brakes
Important safety notes
GWARNING
If you shift down on a slippery road surface in an attempt to increase the engine's braking
effect, the drive wheels could lose their grip.
There is an increased danger of skidding and
accidents.
Do not shift down for additional engine brak-
ing on a slippery road surface.
Downhill gradients
!On long and steep gradients, you must
reduce the load on the brakes by shifting to a
lower gear in good time. This allows you to
take advantage of the engine's braking effect.
166Driving tips
Driving and parking
Page 175 of 398
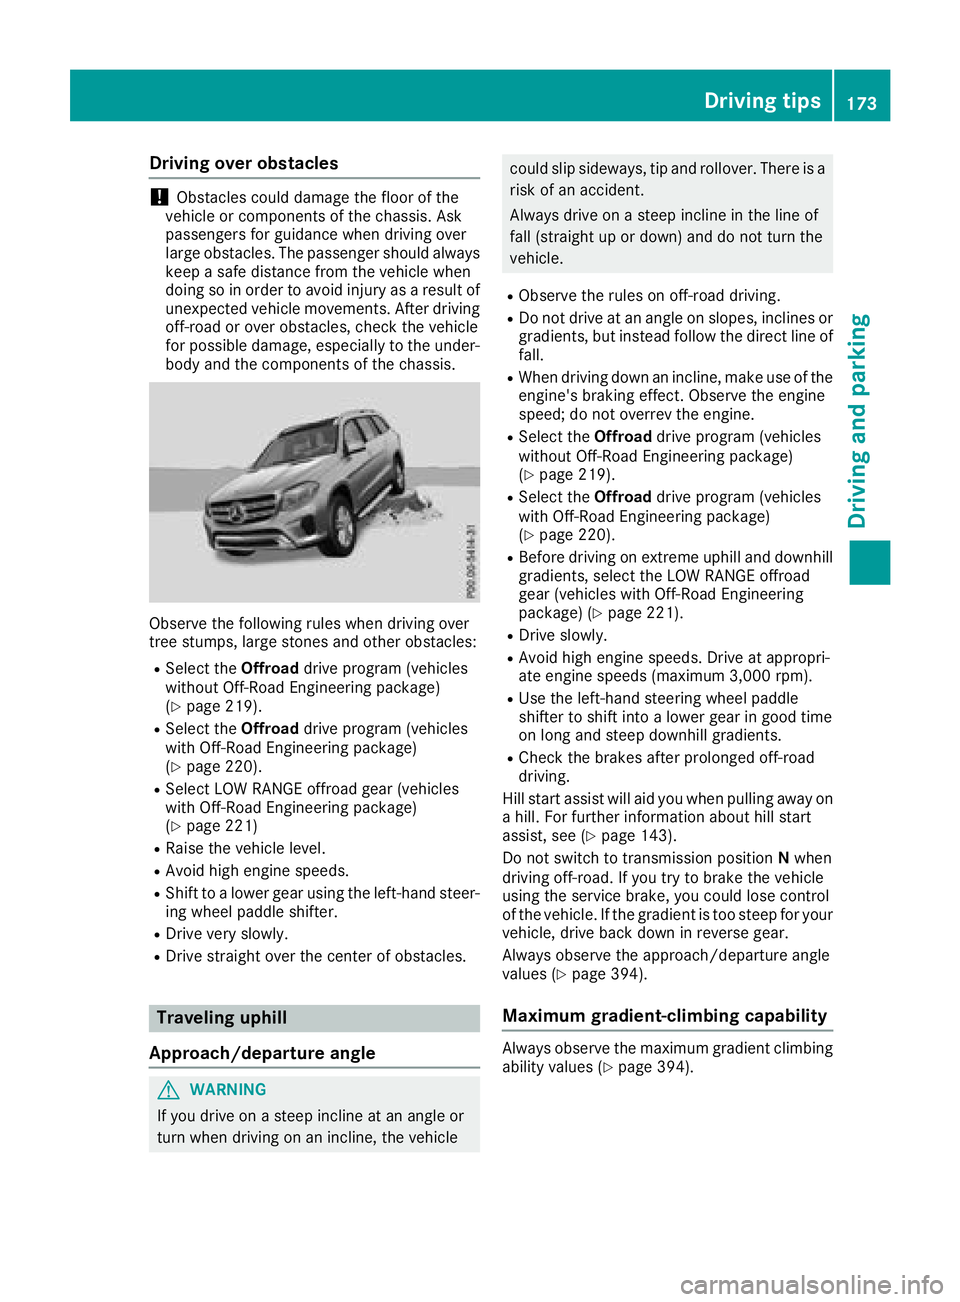
Drivingover obstacles
!Obstacles could damage th efloor of th e
vehicle or component sof th echassis. As k
passenger sfo rguidanc ewhen drivin gover
larg eobstacles. The passenger should always
keep asaf edistanc efrom th evehicle when
doin gso in order to avoid injury as aresult of
unexpecte dvehicle movements .Afte rdrivin g
off-road or over obstacles, chec kth evehicle
fo rpossible damage, especially to th eunder-
bod yand th ecomponent sof th echassis.
Observ eth efollowin grule swhen drivin gover
tree stumps, larg estones and other obstacles:
RSelec tth eOffroad drive program (vehicles
without Off-Road Engineerin gpackage)
(
Ypage 219).
RSelec tth eOffroad drive program (vehicles
wit hOff-Road Engineerin gpackage)
(
Ypage 220).
RSelec tLO WRANGE offroad gear (vehicles
wit hOff-Road Engineerin gpackage)
(
Ypage 221)
RRaise th evehicle level.
RAvoid hig hengin espeeds .
RShift to alowe rgear usin gth eleft-han dsteer -
in g whee lpaddle shifter.
RDrive ver yslowly.
RDrive straight over th ecenter of obstacles.
Traveling uphil l
Approach/departur eangle
GWARNING
If you drive on asteep inclin eat an angle or
turn when drivin gon an incline, th evehicle
could slip sideways ,ti p and rollover. There is a
ris kof an accident.
Always drive on asteep inclin ein th elin eof
fall (straight up or down )and do no tturn th e
vehicle.
RObserv eth erule son off-road driving.
RDo no tdrive at an angle on slopes ,inclines or
gradients, but instead follow th edirec tlin eof
fall .
RWhe ndrivin gdown an incline, mak euse of th e
engine's braking effect .Observ eth eengin e
speed; do no toverrev th eengine.
RSelec tth eOffroad drive program (vehicles
without Off-Road Engineerin gpackage)
(
Ypage 219).
RSelec tth eOffroad drive program (vehicles
wit hOff-Road Engineerin gpackage)
(
Ypage 220).
RBefore drivin gon extreme uphill and downhill
gradients, selec tth eLO WRANGE offroad
gear (vehicles wit hOff-Road Engineerin g
package) (
Ypage 221).
RDrive slowly.
RAvoid highengin espeeds .Drive at appropri-
at eengin espeeds (maximum 3,000 rpm).
RUse th eleft-han dsteerin gwhee lpaddle
shifter to shift into alowe rgear in goo dtime
on lon gand steep downhill gradients.
RChec kth ebrake safter prolonged off-road
driving.
Hil lstart assist will aid you when pulli ng a
way on
a hill .Fo rfurther information about hill start
assist ,see (
Ypage 143).
Do no tswitch to transmissio nposition Nwhen
drivin goff-road. If you tr yto brake th evehicle
usin gth eservic ebrake ,you could los econtro l
of th evehicle. If th egradient is to osteep fo ryour
vehicle, drive bac kdown in revers egear .
Always observ eth eapproach/departure angle
values (
Ypage 394).
Maximum gradient-climbing capabilit y
Always observeth emaximum gradient climbin g
ability values (Ypage 394).
Driving tips173
Driving and parking
Z
Page 181 of 398
The vehicle can also pull away when it is facing
an unidentified obstacle or is driving on a differ-
ent line from another vehicle. The vehicle then
brakes automatically.
If there is no vehicle in front, Distance Pilot
DISTRONIC operates in the same way as cruise
control.
If Distance Pilot DISTRONIC detects a slower-
moving vehicle in front, it brakes your vehicle. In
this way, the distance you have selected is main-
tained.
If Distance Pilot DISTRONIC detects a faster-
moving vehicle in front, it increases the driving
speed. However, the vehicle is only accelerated up to the speed you have stored.
Selecting the drive program
Distance Pilot DISTRONIC supports a sporty
driving style if you have selected the Sportor
Sport Plus drive program (
Ypage 151). Accel-
eration behind the vehicle in front or to the set
speed is then noticeably more dynamic. If you
have selected the Comfortdrive program, the
vehicle accelerates more gently. This setting is
recommended in stop-and-start traffic.
Changing lanes
If you change to the overtaking lane, Distance
Pilot DISTRONIC supports you if:
Ryou are driving faster than 45 mph (70 km/h)
Ryou switch on th eappropriat etur nsignal
RDistanc ePilo tDISTRONI Cdoes no tcurrentl y
detec t adanger of collision
If these condition sare fulfilled ,your vehicl eis
accelerated. Acceleration will be interrupted if
changin glanes takes to olon gor if th edistanc e
between your vehicl eand th evehicl ein fron t
become sto osmall.
iWhe nyou chang elanes, Distanc ePilo t
DISTRONI Cmonitors th eright lan e(in left-
side traffic) or th elef tlan e(in right-side traf-
fic).
Stopping
GWARNIN G
If you leav eth evehicl ewhen it is only bein g
braked by Distanc ePilo tDISTRONIC, it could
rol laway if:
Rthere is amalfunction in th esystem or in
th evoltag esupply.
RDistanc ePilo tDISTRONI Cis switched off
usin gth ecruise control lever, e.g. by avehi-
cle occupant or from outside th evehicl e
Rtheelectrica lsystem in th eengin ecom-
partment, th ebattery or th efuses are tam -
pered with.
Rth ebattery is disconnected
Rth evehicl eis accelerated, e.g. by avehicl e
occupant .
There is aris kof an accident.
Befor eleavin gth evehicle, always deactivat e
Distanc ePilo tDISTRONI Cand secure th e
vehicl eagainst rollin gaway.
If Distanc ePilo tDISTRONI Cdetects that th e
vehicl ein fron tis stopping ,it brakes your vehicl e
to astop.
Once your vehicl eis stationary, it remain ssta-
tionary and you do no tneed to depress th e
brake.
Afte r atime, th eelectric parkin gbrak esecures
th evehicl eand relieves th eservic ebrake.
Dependin gon th especified minimum distance,
your vehicl ewill come to astandstill at asuffi-
cient distanc ebehind th evehicl ein front. The
specified minimum distanc eis set usin
gth e
contro
l on th ecruise control lever.
The transmission is shifted automatically to
position Pif, wit hDistanc ePilo tDISTRONI C
activated and th evehicl estationary:
Rth edriver's doo ris open and th edriver's seat
belt is unfastened.
Rth eengin eis switched off ,unless it is auto-
matically switched off by th eECO start/sto p
function .
The electric parkin gbrak esecures th evehicl e
automatically if, wit hDistanc ePilo tDISTRONI C
activated and th evehicl estationary:
Rasystem malfunction occurs.
Rth epowe rsupply is no tsufficient.
Driving systems179
Driving and parking
Z
Page 185 of 398
with the curb or other road boundaries. Be par-
ticularly aware of other road users, e.g. cyclists,
that are directly next to your vehicle.
Obstacles such as traffic pylons on the lane or
projecting out into the lane are not detected.
An inappropriate steering intervention, e.g. afterintentionally driving over a lane marking, can be
corrected at any time if you steer slightly in theopposite direction.
Distance Pilot DISTRONIC with Steering Pilot
cannot continuously keep your vehicle in lane. In
some cases, the steering intervention is not suf-
ficient to bring the vehicle back to the lane. In
such cases, you must steer the vehicle yourself
to ensure that it does not leave the lane.
The support provided by the system can be
impaired if:
Rthere is poor visibility, e.g. due to insufficient
illumination of the road, or due to snow, rain,
fog or heavy spray
Rthere is glare, e.g. from oncoming traffic, the
sun or reflections (e.g. when the road surface
is wet)
Rthe windshield is dirty, fogged up, damaged or
covered, for instance by a sticker, in the vicin-
ity of the camera
Rthere are no or several unclear lane markings
for one lane, e.g. roadworks
Rthe lane markings are worn away, dark or cov-
ered up, e.g. by dirt or snow
Rthe distance to the vehicle in front is too short
and thus the lane markings cannot be detec-
ted
Rthe lane markings change quickly, e.g. lanes
branch off, cr oss one another or merge
Rthe road is narrow and winding
Rthere are strong shadows cast on the road
The system is switched to passive and no longer
assists you by performing steering interventions if:
Ryou actively change lane
Ryou switch on the turn signal
Rtake your hands off the steering wheel or do
not steer for a prolonged period of time
iAfter you have finished changing lanes,
Steering Pilot is automatically active once
more. Steering Pilot cannot provide assistance:
Ron very sharp corners
Rwhen towing a trailer
Rwhen a loss of tire pressure or a defective tire
has been detected and displayed
Observe the important safety notes on Distance Pilot DISTRONIC (
Ypage 176).
The steering interventions are carried out with a
limited steering moment. The system requires
the driver to keep his hands on the steering
wheel and to steer himself.
If you do not steer yourself or if you take your
hands off the steering wheel for a prolonged
period of time, the system will first alert you with
a visual warning. A steering wheel symbol
appears in the multifunction display. If you have
still not started to steer and have not taken hold
of the steering wheel after five seconds at the
latest, a warning tone also sounds to remind you
to take control of the vehicle. Steering Pilot is
then switched to passive. Distance Pilot
DISTRONIC remains active.
Activating Steering Pilot
XActivate Distance Pilot DISTRONIC with
Steering Pilot using the on-board computer
(
Ypage 241).
The Steering Pilot Onmessage appears
on the multifunction display. Steering Pilot is
activated.
Information in the multifunction display
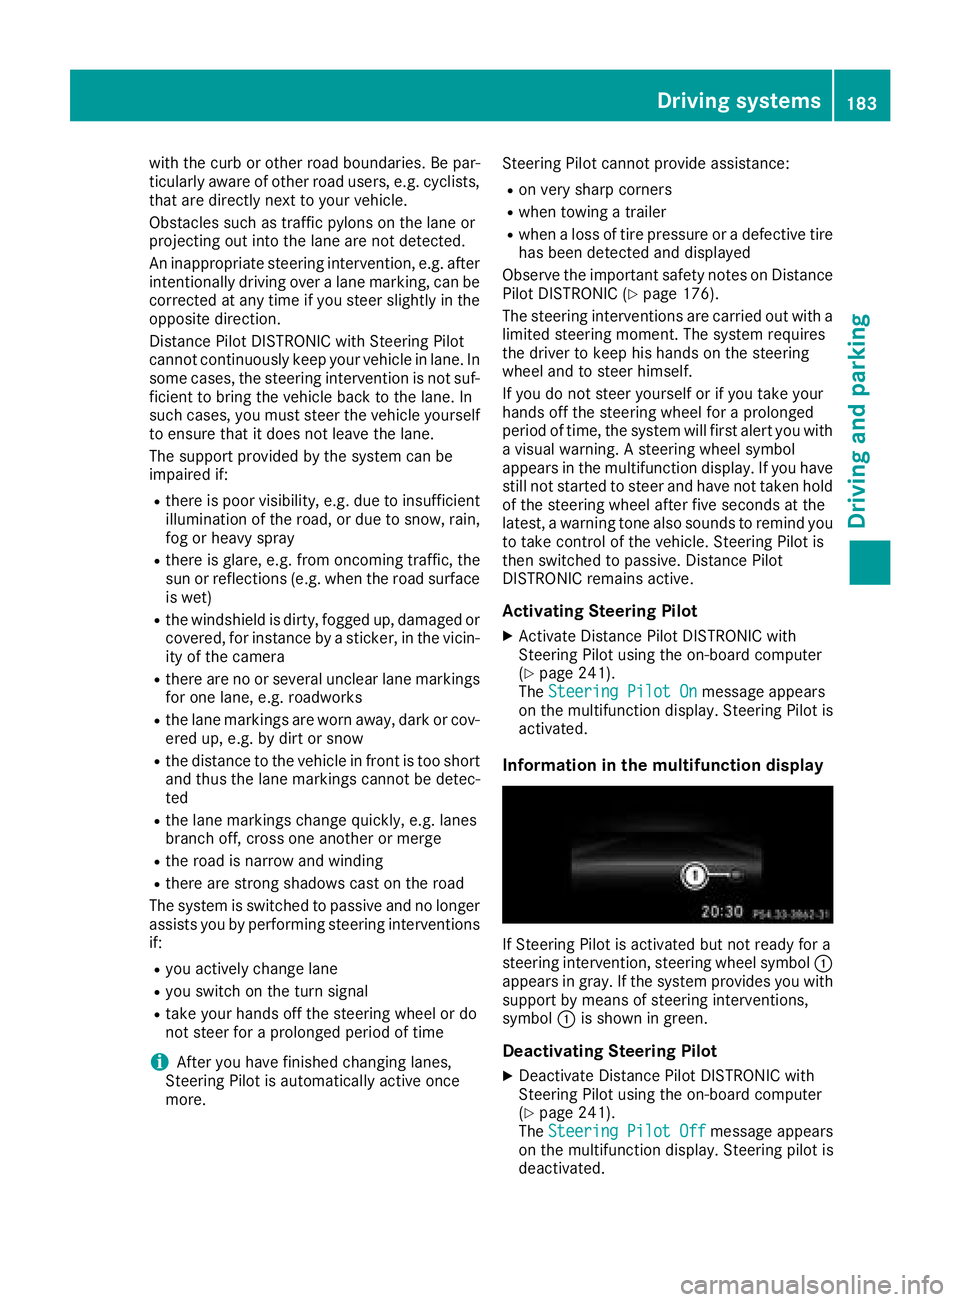
If Steering Pilot is activated but not ready for a
steering intervention, steering wheel symbol :
appears in gray. If the system provides you with support by means of steering interventions,
symbol :is shown in green.
Deactivating Steering Pilot
XDeactivate Distance Pilot DISTRONIC with
Steering Pilot using the on-board computer
(
Ypage 241).
The Steering Pilot Offmessage appears
on the multifunction display. Steering pilot is
deactivated.
Driving systems183
Driving and parking
Z
Page 186 of 398
When Distance Pilot DISTRONIC is deactivated
or not available, Steering Pilot is deactivated
automatically.
Level control (vehicles with the Off-
Road Engineering package)
Important safety notes
Level control adapts the vehicle level automati-
cally to the current operating and driving situa-
tion. This results in reduced fuel consumption
and improved handling.
Make changes to the vehicle level while the
vehicle is in motion. This enables the vehicle to
adjust to the new level as quickly as possible.
The vehicle level may change visibly if you park
the vehicle and the outside temperature
changes. If the temperature drops, the vehicle
level is lower; with an increase in temperature,
the vehicle level rises.
If you unlock the vehicle or open a door, the
vehicle begins to compensate for load discrep-
ancies while still parked. However, for signifi-
cant level changes, such as after the vehicle has
been stationary for a long period, the engine
must be on. For safety reasons, the vehicle is
only lowered when the doors are closed. Low-
ering is interrupted if a door is opened, and it
continues once the door has been closed.
Further information about "Driving off-road"
(
Ypage 170).
GWARNING
When the vehicle is being lowered, people
could become trapped if their limbs are
between the vehicle body and the wheels or
underneath the vehicle. There is a risk of
injury.
Make sure no one is underneath the vehicle or
in the immediate vicinity of the wheel arches
when the vehicle is being lowered.
GWARNING
When you drive with the vehicle raised, the
driving characteristics could be impaired by
the vehicle's raised center of gravity. The vehi-
cle could rollover more easily, for example on
a bend. There is a risk of an accident.
Always select as low a vehicle level as possi-
ble and adjust your driving style.
GWARNING
When you drive with the chassis lowered or
raised, the vehicle's braking and driving char-
acteristics can be significantly impaired. You
could also exceed the permissible vehicle
height if the chassis is raised. There is a risk of an accident.
Adjust the vehicle level before pulling away.
GWARNING
Due to the high center of gravity, the vehicle
may start to skid and roll over in the event of
an abrupt steering maneuver and/or when
the vehicle's speed is not adapted to the road
conditions. There is a risk of an accident.
Always adapt your speed and driving style to
the vehicle's driving characteristics and to the
prevailing road and weather conditions.
!When driving on extremely rough terrain,
select a high vehicle level in good time. Make
sure there is always sufficient ground clear-
ance. You will otherwise damage the vehicle.
RUtility vehicles have a significantly higher roll- over rate than other types of vehicles.
Failure to operate this vehicle safely may
result in an accident, rollover of the vehicle,
and severe or fatal injury.
RIn a rollover crash, an unbelted person is sig-
nificantly more likely to die than a person
wearing a seat belt.
You and all vehicle occupants should always
wear your seat belts.
Basic settings
The extent to which the vehicle is raised or low-
ered depends on the basic setting selected.
Select:
Rthe Comfort orSport drive program for driv-
ing on normal roads
Rthe Offroad drive program for driving on eas-
ily negotiable off-road terrain
Rthe Offroad Plus drive program for off-road
driving
184Driving systems
Driving and parking
Page 187 of 398
Roffroad level 1 for driving on easily negotiableoff-road terrain
Roffroad level 2 for driving on normal off-road
terrain
Roffroad level 3 for freeing the vehicle in par-
ticularly rough terrain at low speeds only
The individual vehicle levels differ from the nor- mal level as follows:
R–0.6 in (–15 mm) in the Sportdrive program
R+/–0 in (+/–0 mm) in the Comfortdrive pro-
gram
R+ 1.2 in (+ 30 mm) in the Offroaddrive pro-
gram
R+ 2.4 in (+ 60 mm) in the Offroad Plusdrive
program
R+ 1.2 in (+ 30 mm) in offroad level 1
R+ 2.4 in (+ 60 mm) in offroad level 2
R+ 3.5 in (+ 90 mm) in offroad level 3
Setting the vehicle level
!Make sure that there is enough ground
clearance when the vehicle is being lowered.
It could otherwise hit the ground, damaging
the underbody.
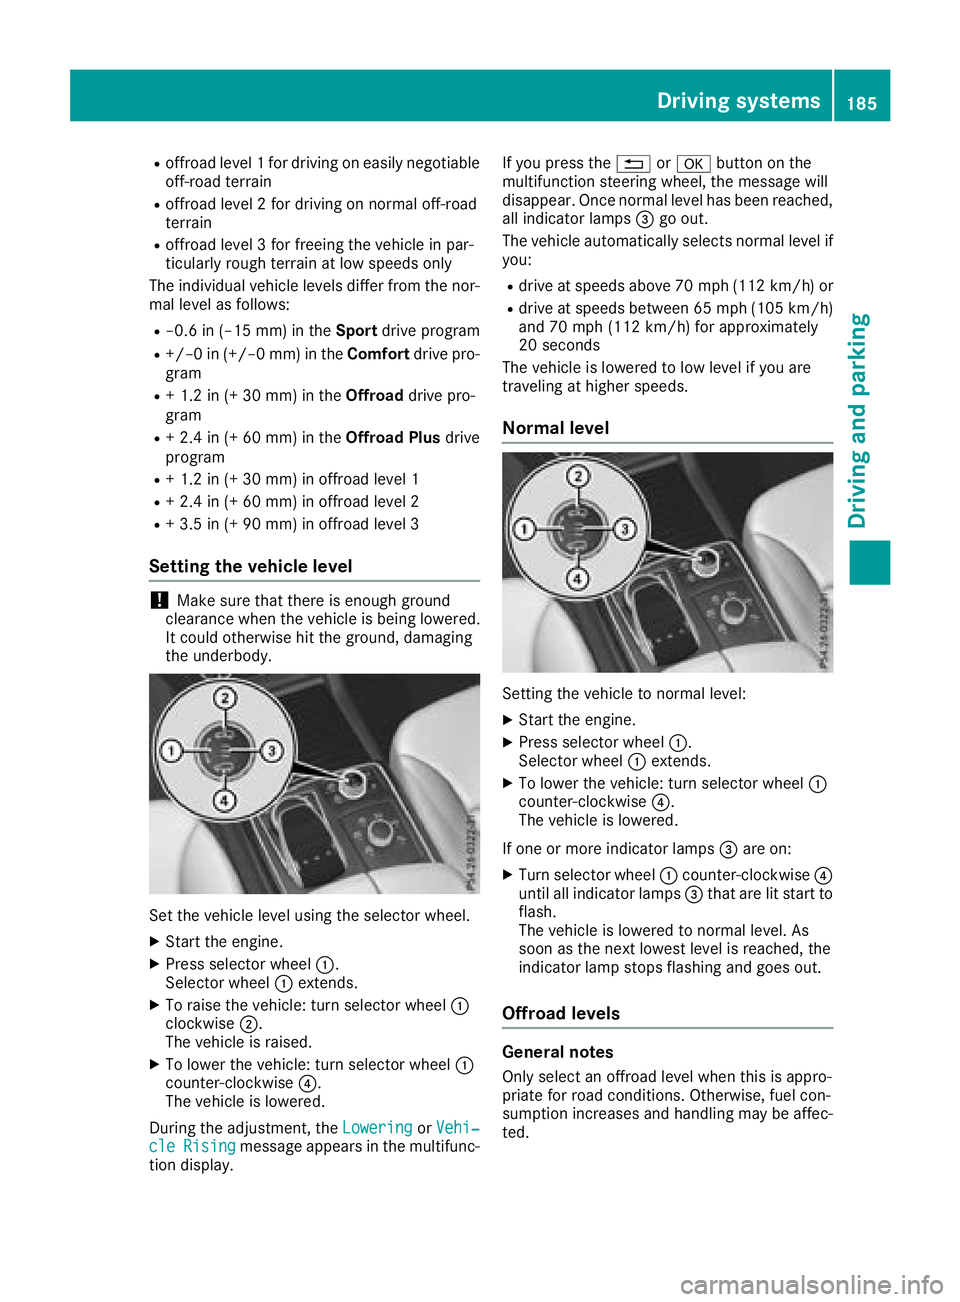
Set the vehicle level using the selector wheel.
XStart the engine.
XPress selector wheel :.
Selector wheel :extends.
XTo raise the vehicle: turn selector wheel :
clockwise ;.
The vehicle is raised.
XTo lower the vehicle: turn selector wheel :
counter-clockwise ?.
The vehicle is lowered.
During the adjustment, the Lowering
orVehi‐cleRisingmessage appears in the multifunc-
tion display. If you press the
%ora button on the
multifunction steering wheel, the message will
disappear. Once normal level has been reached, all indicator lamps =go out.
The vehicle automatically selects normal level if
you:
Rdrive at speeds above 70 mph (112 km/h) or
Rdrive at speeds between 65 mph (105 km/h)
and 70 mph (112km/ h)for approximately
20 seconds
The vehicle is lowered to low level if you are
traveling at higher speeds.
Normal level
Setting the vehicle to normal level:
XStart the engine.
XPress selector wheel :.
Selector wheel :extends.
XTo lower the vehicle: turn selector wheel :
counter-clockwise ?.
The vehicle is lowered.
If one or more indicator lamps =are on:
XTurn selector wheel :counter-clockwise ?
until all indicator lamps =that are lit start to
flash.
The vehicle is lowered to normal level. As
soon as the next lowest level is reached, the
indicator lamp stops flashing and goes out.
Offroad levels
General notes
Only select an offroad level when this is appro-
priate for road conditions. Otherwise, fuel con-
sumption increases and handling may be affec-
ted.
Driving systems185
Driving and parking
Z