2018 MERCEDES-BENZ G-CLASS lumbar support
[x] Cancel search: lumbar supportPage 14 of 294

General notes .................................. 86
Hazard warning lamps .....................88
High beam flasher ............................ 88
High-beam headlamps ..................... 88
Light switch .....................................8 6
Low-beam headlamps ...................... 86
Parking lamps .................................. 87
Rear fog lamp .................................. 87
Standing lamps ................................ 87
Switching the daytime running
lamps on/off (on-board com-
puter) ............................................. 169
Switching the daytime running
lamps on/off (switch) ...................... 86
Switching the exterior lighting
delayed switch-off on/off (on-
board computer) ............................ 169
Switching the surround lighting
on/off (on-board computer) .......... 169
Turn signals ..................................... 88
see Interior lighting
see Replacing bulbs
Load anchorage ................................. 213
Loading guidelines ............................ 209
Locking
see Central locking
Locking (doors)
Automatic ........................................ 67
Emergency locking ........................... 68
From inside (central locking but-
ton) .................................................. 67
Locking centrally
see Central locking
Locking verification signal (on-
board computer) ............................... 170
LOW RANGE off-road gear ................ 149
Low-beam headlamps
Display message ............................ 180
Switching on/off .............................. 86
Lumbar support
Adjusting the 4-way lumbar sup-
port .................................................. 78
Luxury head restraints ....................... 76
M
M+S tires............................................ 259 Malfunction message
see Display messages
Matte finish (cleaning instruc-
tions) .................................................. 238
mbrace
Call priority .................................... 223
Display message ............................ 177
Downloading destinations
(COMAND) ..................................... 223
Downloading routes ....................... 226
Emergency call .............................. 220
General notes ................................ 219
Geo fencing ................................... 226
Info call button .............................. 222
Locating a stolen vehicle ............... 225
Remote fault diagnosis .................. 225
Remote vehicle locking .................. 224
Roadside assistance button ........... 221
Search & Send ............................... 223
Self-test ......................................... 220
Speed alert .................................... 226
System .......................................... 220
Triggering the vehicle alarm ........... 226
Vehicle remote unlocking .............. 224
Mechanical key
Function/notes ................................ 64
General notes .................................. 64
Inserting .......................................... 64
Locking vehicle ................................ 68
Removing ......................................... 64
Unlocking the driver's door .............. 68
Memory card (audio) ......................... 165
Memory function ................................. 84
Mercedes-Benz Intelligent Drive
DISTRONIC PLUS ........................... 134
Message memory (on-board com-
puter) .................................................. 174
Messages
see Display messages
Mirror turn signal
Cleaning ......................................... 239
Mirrors
Sun visor ........................................ 216
see Exterior mirrors
see Rear-view mirror
12Index
Page 79 of 294

XMake sure that the cup holder on the center
console is folded down (Ypage 215).
XMove the seat as far forward as possible andthe head restraint in as far as possible.
Rear seat head restraints
Important safety notes
GWARNING
If the head restraints are not installed or not
adjusted correctly, they cannot provide pro-
tection as intended. There is an increased risk
of injury in the head and neck area, e.g. in the event of an accident or when braking.
Always drive with the head restraints instal-
led. Before driving off, make sure for every
vehicle occupant that the center of the head
restraint supports the back of the head at
about eye level.
Observe the following when adjusting the head
restraints:
XDo not rotate the head restraints of the front
and rear seats.
Otherwise, you cannot adjust the height and
angle of the head restraints correctly.
XAdjust the head restraint so that it is as close
as possible to your head.
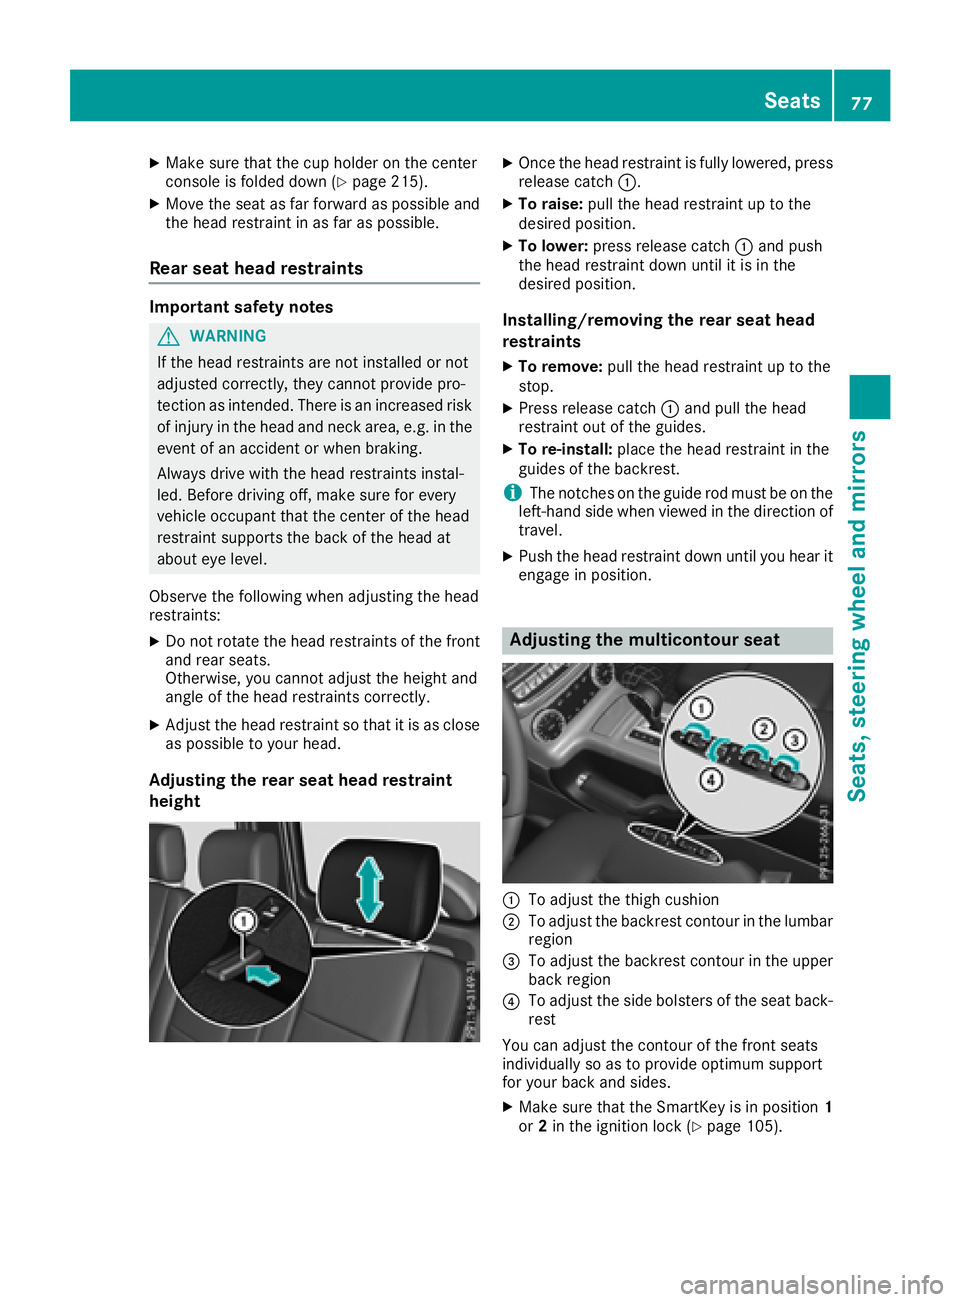
Adjusting the rear seat head restraint
height
XOnce the head restraint is fully lowered, press
release catch :.
XTo raise:pull the head restraint up to the
desired position.
XTo lower: press release catch :and push
the head restraint down until it is in the
desired position.
Installing/removing the rear seat head
restraints
XTo remove: pull the head restraint up to the
stop.
XPress release catch :and pull the head
restraint out of the guides.
XTo re-install: place the head restraint in the
guides of the backrest.
iThe notches on the guide rod must be on the
left-hand side when viewed in the direction of
travel.
XPush the head restraint down until you hear it
engage in position.
Adjusting the multicontour seat
:To adjust the thigh cushion
;To adjust the backrest contour in the lumbar
region
=To adjust the backrest contour in the upper
back region
?To adjust the side bolsters of the seat back-
rest
You can adjust the contour of the front seats
individually so as to provide optimum support
for your back and sides.
XMake sure that the SmartKey is in position 1
or 2in the ignition lock (Ypage 105).
Seats77
Seats, steering wheel and mirrors
Z
Page 80 of 294

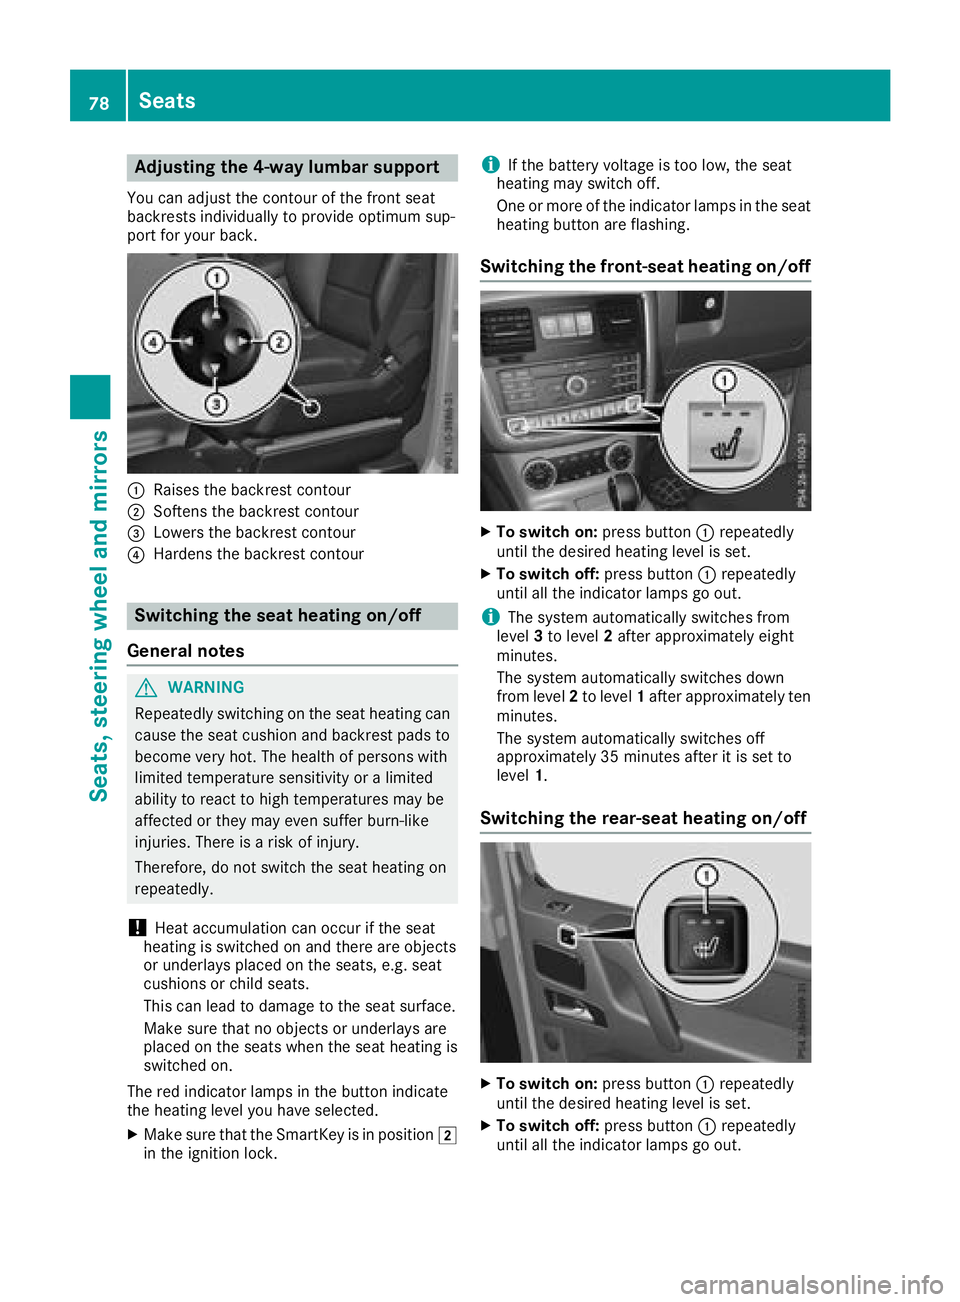
Adjusting the 4-way lumbar support
You can adjust thecontour of th efron tseat
backrest sindividually to provid eoptimum sup-
por tfor your back.
:Raises th ebackrest contour
;Soften sth ebackrest contour
=Lowers th ebackrest contour
?Harden sth ebackrest contour
Switching the seat heating on/off
Gene ral notes
GWARNIN G
Repeatedly switching on th eseat heating can
caus eth eseat cushion and backrest pads to
become ver yhot .The healt hof person swit h
limite dtemperature sensitivit yor alimite d
abilit yto reac tto high temperatures may be
affecte dor they may eve nsuffer burn-like
injuries. There is aris kof injury.
Therefore ,do no tswitch th eseat heating on
repeatedly.
!Hea taccumulation can occur if th eseat
heating is switched on and there are objects
or underlays placed on th eseats, e.g. seat
cushion sor child seats.
This can lead to damag eto th eseat surface.
Mak esur ethat no objects or underlays are
placed on th eseat swhen th eseat heating is
switched on .
The red indicator lamp sin th ebutto nindicat e
th eheating level you hav eselected.
XMak esur ethat th eSmartKey is in position 2
in th eignition lock.
iIf th ebattery voltag eis to olow, th eseat
heating may switch off .
On eor mor eof th eindicator lamp sin th eseat
heating butto nare flashing.
Switching the front-seat heating on/off
XTo switch on: press button: repeatedly
until th edesired heating level is set .
XTo switch off:press butto n: repeatedly
until all th eindicator lamp sgo out .
iThe system automatically switches from
level 3to level 2after approximately eigh t
minutes.
The system automatically switches down
from level 2to level 1after approximately te n
minutes.
The system automatically switches off
approximately 35 minute safter it is set to
level 1.
Switching the rea r-seat heating on/off
XTo switch on: press button: repeatedly
until th edesired heating level is set .
XTo switch off:press butto n: repeatedly
until all th eindicator lamp sgo out .
78Seats
Seats, steering wheel and mirrors