Page 217 of 294

iFurther information on suitable mobile
phones can be obtained on the Internet at:
http://www.mercedes-benz.com/
connect
iIn the USA, you can get in touch with the
Mercedes-Benz Customer Assistance Center
on 1-800-FOR-MERCede s(1-800-367-6372).
In Canada, you can get in touch with the Cus-
tomer Relations Center on 1-800-387-0100.
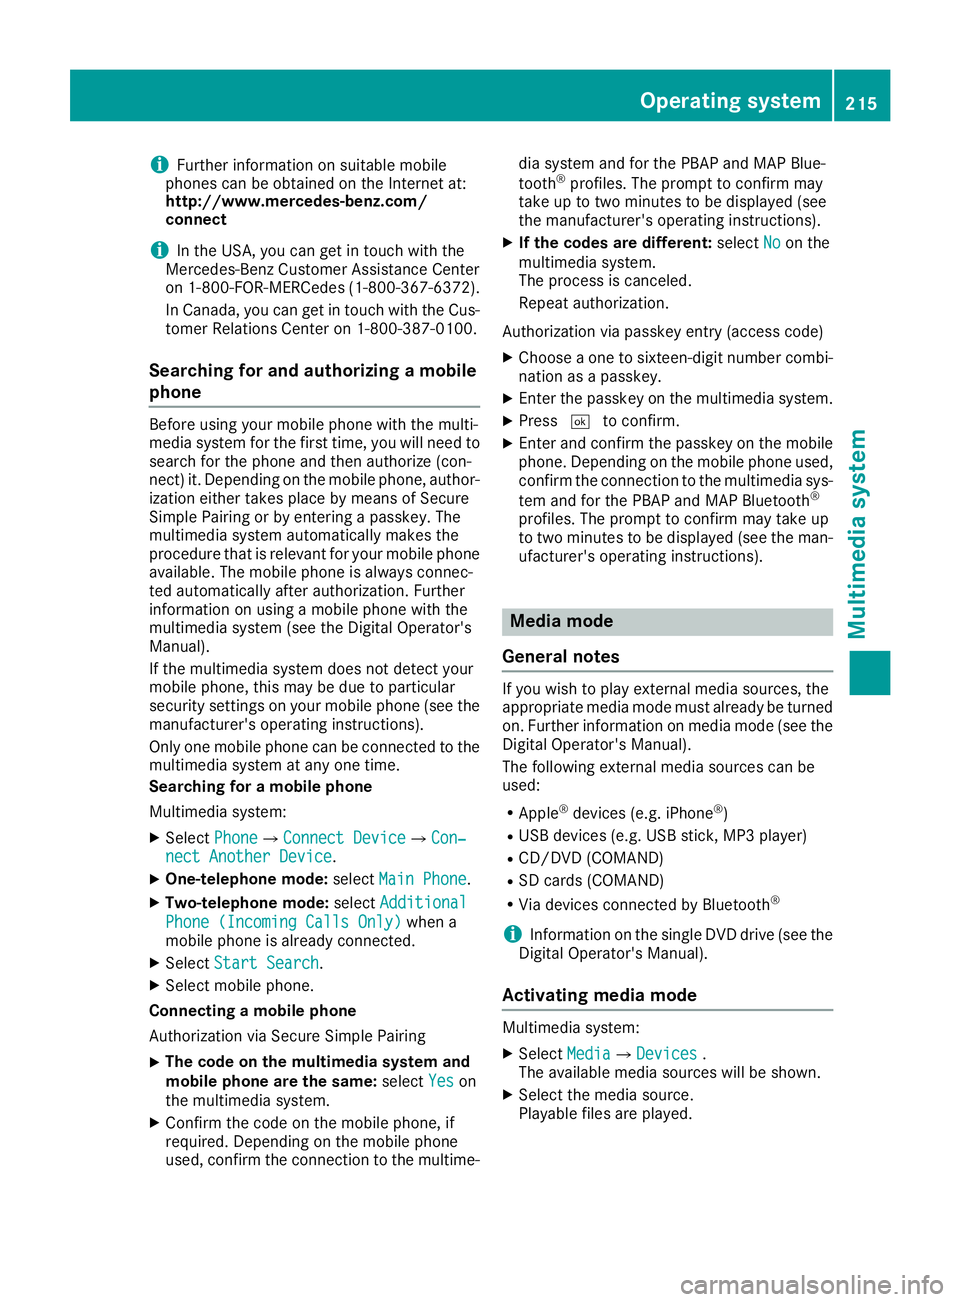
Searching for and authorizing a mobile
phone
Before using your mobile phone with the multi-
media system for the first time, you will need to search for the phone and then authorize (con-
nect) it. Depending on the mobile phone, author-
ization either takes place by means of Secure
Simple Pairing or by entering a passkey. The
multimedia system automatically makes the
procedure that is relevant for your mobile phone
available. The mobile phone is always connec-
ted automatically after authorization. Further
information on using a mobile phone with the
multimedia system (see the Digital Operator's
Manual).
If the multimedia system does not detect your
mobile phone, this may be due to particular
security settings on your mobile phone (see the
manufacturer's operating instructions).
Only one mobile phone can be connected to themultimedia system at any one time.
Searching for a mobile phone
Multimedia system:
XSelect PhoneQConnect DeviceQCon‐nect Another Device.
XOne-telephone mode: selectMain Phone.
XTwo-telephone mode: selectAdditional
Phone (Incoming Calls Only)when a
mobile phone is already connected.
XSelect Start Search.
XSelect mobile phone.
Connecting a mobile phone
Authorization via Secure Simple Pairing
XThe code on the multimedia system and
mobile phone are the same: selectYes
on
the multimedia system.
XConfirm the code on the mobile phone, if
required. Depending on the mobile phone
used, confirm the connection to the multime- dia system and for the PBAP and MAP Blue-
tooth
®profiles. The prompt to confirm may
take up to two minutes to be displayed (see
the manufacturer's operating instructions).
XIf the codes are different: selectNoon the
multimedia system.
The process is canceled.
Repeat authorization.
Authorization via passkey entry (access code)
XChoose a one to sixteen-digit number combi- nation as a passkey.
XEnter the passkey on the multimedia system.
XPress ¬to confirm.
XEnter and confirm the passkey on the mobile
phone. Depending on the mobile phone used,
confirm the connection to the multimedia sys-
tem and for the PBAP and MAP Bluetooth
®
profiles. The prompt to confirm may take up
to two minutes to be displayed (see the man-
ufacturer's operating instructions).
Media mode
General notes
If you wish to play external media sources, the
appropriate media mode must already be turned
on. Further information on media mode (see the
Digital Operator's Manual).
The following external media sources can be
used:
RApple®devices (e.g. iPhone®)
RUSB devices (e.g. USB stick, MP3 player)
RCD/DVD (COMAND)
RSD cards (COMAND)
RVia devices connected by Bluetooth®
iInformation on the single DVD drive (see the
Digital Operator's Manual).
Activating media mode
Multimedia system:
XSelect MediaQDevices.
The available media sources will be shown.
XSelect the media source.
Playable files are played.
Operating system215
Multimedia system
Z
Page 218 of 294

Inserting and removing the SD card
(COMAND)
Important safety notes
GWARNIN G
SD cards are small parts. They can be swal-
lowed and caus echoking .This poses an
increased ris kof injury or eve nfatal injury.
Kee pth eSD car dout of th ereac hof children .
If aSD car dis swallowed, seek medical atten -
tion immediately.
!If you are no longer usin gth eSD card, you
should remove it and store it outside th evehi-
cle .Hig htemperatures can damag eth ecard.
Inserting an SD card
The SD car dslot is locate din th estowage com-
partmen tunder th earmrest.
XInser tth eSD car dint oth eSD car dslot until
th eSD car dengages. The side wit hth econ-
tacts must fac edown .
XSelec tth emedia source (Ypage 215).
Removing an SD card
XPress theSD card.
The SD car dis ejected.
XRemove th eSD card.
Connecting USB devices
Ther eare two US Bports in th estowage spac e
under th earmrest.
XConnect th eUS Bdevice to th eUS Bport.
XSelec tth emedia source (Ypage 215).
216Operating system
Multimedia system
Page 219 of 294

Stowage areas
Loading guidelines
GWARNING
Combustion engines emit poisonous exhaust
gases such as carbon monoxide. Exhaust
gases can enter the vehicle interior if the
trunk lid is open when the engine is running,
especially if the vehicle is in motion. There is a
risk of poisoning.
Always switch off the engine before opening
the trunk lid. Never drive with the trunk lid
open.
GWARNING
If objects, luggage or loads are not secured or
not secured sufficiently, they could slip, tip
over or be flung around and thereby hit vehicle
occupants. There is a risk of injury, particu-
larly in the event of sudden braking or a sud-
den change in direction.
Always store objects so that they cannot be
flung around. Secure objects, luggage or
loads against slipping or tipping before the
journey.
GWARNING
The exhaust tail pipe and tail pipe trim can
become very hot. If you come into contact
with these parts of the vehicle, you could burn
yourself. There is a risk of injury.
Always be particularly careful around the
exhaust tail pipe and the tail pipe trim. Allow
these components to cool down before touch-
ing them.
!This vehicle is not designed to transport any
items on the trunk lid or to allow luggage car-
riers or equipment of any kind to be installed
to the trunk lid. Otherwise the vehicle and the
retractable hardtop could be damaged. The handling characteristics of a laden vehicle
are dependent on the distribution of the load
within the vehicle. For this reason, you should
observe the following notes when transporting a
load:
RNever exceed the maximum permissible
gross vehicle mass or the gross axle weight
rating for the vehicle (including occupants).
The values are specified on the vehicle iden-
tification plate on the B-pillar of the driver's
door.
RThe trunk is the preferred place to carry
objects.
RPosition heavy loads as far forwards as pos-
sible and as low down in the trunk as possible.
RThe load must not protrude above the upper
edge of the seat backrests.
RSecure the load with sufficiently strong and
wear-resistant tie-downs. Pad sharp edges for
protection.
Stowage spaces
Important safety notes
GWARNING
If objects in the passenger compartment are
stowed incorrectly, they can slide or be
thrown around and hit vehicle occupants. In
addition, cup holders, open stowage spaces
and mobile phone brackets cannot always
retain all objects they contain. There is a risk of injury, particularly in the event of sudden
braking or a sudden change in direction.
RAlways stow objects so that they cannot be
thrown around in such situations.
RAlways make sure that objects do not pro-
trude from stowage spaces, parcel nets or
stowage nets.
RClose the lockable stowage spaces before
starting a journey.
RAlways stow and secure heavy, hard, poin-
ted, sharp-edged, fragile or bulky objects in
the trunk.
Observe the loading guidelines (
Ypage 217).
Stowage areas217
Stowage and features
Z
Page 220 of 294

Glove box
XTo open:pull handle :and open glove box
flap ;.
XTo close: fold glove box flap ;up until it
engages.
The glove box can be locked and unlocked using
the mechanical key.
XTo lock: insert the mechanical key into the
lock and turn it to key position 2.
XTo unlock:insert the mechanical key into the
lock and turn it to key position 1.
Stowage compartment in front of the
armrest
XTo open:slide cover :forwards.
Stowage compartment under armrest
XTo open: press button :.
The stowage compartment opens from the
rear.
Depending on the vehicle's equipment, the fol-
lowing may be in the stowage space:
Ra multimedia connector unit with an SD card
slot and two USB ports, for example, for use
with an iPod
®, iPhone®or MP3 player (see the
Digital Operator's Manual).
The ignition lock for starting the engine with the
SmartKey is in the stowage compartment
(
Ypage 111).
Additional stowage space
Depending on the equipment, the following
additional stowage areas are available in the
vehicle:
Ropen stowage compartments in the doors
Rstowage net in the front-passenger footwell
Ra net on the rear wall behind the driver's seat
provides stowage space for small objects
such as a reflective safety jacket
iReflective safety jackets can be stored in
the door stowage compartments.
Observe the safety guidelines for stowage
spaces (
Ypage 217).
218Stowage areas
Stowage and features
Page 221 of 294

Features
Cup holder
Important safety notes
GWARNIN G
If object sin th epassenger compartmen tare
stowed incorrectly, they can slide or be
thrown aroun dand hit vehicl eoccupants. In
addition ,cup holders ,open stowage spaces
and mobile phon ebrackets canno talways
retain all object sthey contain .Ther eis aris k
of injury, particularly in th eevent of sudde n
braking or asudde nchang ein direction .
RAlways stow object sso that they canno tbe
thrown aroun din suc hsituations.
RAlways mak esure that object sdo no tpro -
trude from stowage spaces, parcel nets or
stowage nets .
RClose thelockable stowage spaces before
starting ajourney.
RAlways stow and secure heavy, hard ,poin -
ted, sharp-edged, fragile or bulk yobject sin
th etrunk .
!Only use th ecup holders for containers of
th eright siz eand whic hhave lids. The drinks
could otherwise spill .
Cup holder in the center console
XTo open:slide cover :forward until it
engages. The divider in th
ecup holder can be removed,
e.g. for inserting smaller drinks cans.
XTo remove: pull thedivider up and remove it .
XTo install:re-insert thedivider and push it
down until it engages.
You can remove th erubber mat of cup holder ;
to clean it .Clean wit hclear, lukewarm water
only.
Sun visors
Important safety notes
GWARNIN G
If th emirror cover of th evanit ymirror is folded
up when th evehicl eis in motion ,you could be
blinded by inciden tlight. Ther eis aris kof an
accident.
Always keep th emirror cover folded down
while driving .
Sun visor (variant 1)
:Mirror light
;Retainer
=Retaining clip, e.g. for acar park ticket
?Vanit ymirror
AMirror cover
Features219
Stowage and features
Z
Page 222 of 294

Sun visor (variant 2)
:Mirror light
;Retainer
=Retaining strip, e.g. for a parking lot ticket
?Vanity mirror
AMirror cover
Vanity mirror in the sun visor
Mirror light:only functions if the sun visor is
clipped into retainer ;and mirror cover Ahas
been folded up.
Moving the sun visor
(sun visor variant 1 only)
XFold down the sun visor.
XSlide the sun visor horizontally as desired.
Glare from the side
XFold down sun visor :.
XPull sun visor:out of bracket ;.
XSwing sun visor :to the side.
XSlide sun visor :horizontally as required.
Ashtray
!
The stowage space under the ashtray is not
heat resistant. Before placing lit cigarettes in the ashtray, make sure that the ashtray is
properly engaged. Otherwise, the stowage
space could be damaged.
You can place insert ?into the cup holder on
the left-hand or right-hand side.
XSlide cover :forwards until it engages.
XTo open: lift up lid;.
XTo close: press lid;downwards.
XTo remove: pull ashtray=up and out of
insert ?.
XTo insert: place ashtray =into insert ?.
Remove insert ?to be able to use the entire
cup holder. Store removed insert ?and ashtray
= in a suitable place. Observe the loading
guidelines (
Ypage 217).
220Features
Stowage and features
Page 223 of 294

Cigarette lighter
GWARNING
You can burn yourself if you touch the hot
heating element or the socket of the cigarette lighter.
In addition, flammable materials can ignite if:
Rthe hot cigarette lighter falls
Ra child holds the hot cigarette lighter to
objects, for example
There is a risk of fire and injury.
Always hold the cigarette lighter by the knob.
Always make sure that the cigarette lighter is
out of reach of children. Never leave children
unsupervised in the vehicle.
Your attention must always be focused on the
traffic conditions. Only use the cigarette lighter when road and traffic conditions permit.
XSelect key position 2with the Start/Stop
button (Ypage 111).
XTo open: slide cover :forward until it
engages.
XPress in cigarette lighter ;.
Cigarette lighter ;will pop out automatically
when the heating element is red-hot.
XTo close: briefly press cover :at the front.
12 V sockets
General notes
XSelect key position 1with the Start/Stop
button (Ypage 111).
The sockets can be used for accessories with a
maximum draw of 180 W (15 A). Accessories include such items as chargers for mobile
phones.
If you use the sockets for long periods when the
engine is switched off, the battery may dis-
charge.
An emergency cut-out ensures that the on-
board voltage does not drop too low. If the on-
board voltage is too low, the power to the sock-
ets is automatically cut. This ensures that there
is sufficient power to start the engine.
Socket in the trunk
XLift up the cover of socket
:.
mbrace
General notes
The mbrace system is only available in the USA.
A license agreement must be in place in order to
activate the mbrace service. Make sure that
your system is activated and operational. To
register, press the ïInfo call button. If any of
the steps mentioned are not carried out, the
system may not be activated.
If you have questions about the activation, con-
tact one of the following telephone hotlines:
Mercedes-Benz Customer Assistance Center at
1-800 FOR-MERCEDES (1-800-367-6372) or
1-866-990-9007
Shortly after successfully registering with the
mbrace service, a user ID and password will be
sent to you by mail. You can use this password
to log onto the mbrace area under "Owners
Online" at http://www.mbusa.com.
Features221
Stowage and features
Z
Page 224 of 294

The system is available if:
Rit has been activated and is operational
Rthe corresponding mobile phone network is
available for transmitting data to the Cus-
tomer Center
Ra service subscription is available
Determining the location of the vehicle on a map
is only possible if:
RGPS reception is available
Rthe vehicle position can be forwarded to the
Customer Assistance Center
The mbrace system
To adjust the volume during a call, proceed as
follows:
XPress the WorX button on the multi-
function steering wheel.
or
XUse the multimedia system volume control.
The system offers various services, e.g.:
RAutomatic and manual emergency call
RRoadside Assistance call
RInfo call
You can find information and a description of all
available features under "Owners Online" at
http://www.mbusa.com.
System self-test
After you have switched on the ignition, the sys- tem carries out a self-diagnosis.
A malfunction in the system has been detected
if one of the following occurs:
RThe indicator lamp in the SOS button does notcome on during the system self-test.
RThe indicator lamp in the FRoadside
Assistance button does not light up during
self-diagnosis of the system.
RThe indicator lamp in the ïInfo call button
does not light up during the system self-diag-
nosis.
RThe indicator lamp in one or more of the fol-
lowing buttons continues to light up red after
the system self-diagnosis:
-SOS button
-F Roadside Assistance call button
-ïInfo call button
RTheInoperativeor the Service NotActivatedmessage appears in the multi-
function display after the system self-diagno-
sis.
If a malfunction is indicated as outlined above,
the system may not operate as expected. In the event of an emergency, help will have to be
summoned by other means.
Have the system checked at the nearest author-
ized Mercedes-Benz Center or call the following telephone assistance services:
Mercedes-Benz Customer Assistance Center at
1-800 FOR-MERCEDES (1-800-367-6372) or
1-866-990-9007.
Emergency call
Important safety notes
GWARNING
It can be dangerous to remain in the vehicle,
even if you have pressed the SOS button in an emergency if:
Ryou see smoke inside or outside of the vehi-
cle, e.g. if there is a fire after an accident
Rthe vehicle is on a dangerous section of
road
Rthe vehicle is not visible or cannot easily beseen by other road users, particularly when
dark or in poor visibility conditions
There is a risk of an accident and injury.
Leave the vehicle immediately in this or simi-
lar situations as soon as it is safe to do so.
Move to a safe location along with other vehi-
cle occupants. In such situations, secure the
vehicle in accordance with national regula-
tions, e. g. with a warning triangle.
General notes
Observe the notes on system activation
(Ypage 221).
The emergency call is triggered automatically if
an air bag is deployed or an Emergency Ten-
222Features
Stowage and features