2018 MERCEDES-BENZ AMG GT ROADSTER fuel type
[x] Cancel search: fuel typePage 23 of 294
Two-way radioFrequencies ................................... 285
Installation ..................................... 285
Transmission output (maximum) .... 285
Type identification plate
see Vehicle identification plate
U
UnlockingEmergency unlocking ....................... 73
From inside the vehicle (central
unlocking button) ............................. 72
USB devices
Connecting to the Media Inter-
face ...............................................2 16
V
Vanity mirror (in the sun visor)........220
Vehicle
Correct use ...................................... 28
Data acquisition ............................... 29
Display message ............................ 193
Electronics ..................................... 285
Equipment ....................................... 25
Individual settings .......................... 168
Limited Warranty .............................2 9
Loading .......................................... 269
Locking (in an emergency) ............... 73
Locking (SmartKey) .......................... 66
Lowering ........................................ 283
Maintenance .................................... 26
Operating safety .............................. 27
Parking .......................................... 127
Parking for a long period ................ 130
Pulling away ................................... 112
Raising ........................................... 280
Reporting problems ......................... 28
Securing from rolling away ............ 280
Towing away .................................. 257
Transporting .................................. 259
Unlocking (in an emergency) ........... 73
Unlocking (SmartKey) ...................... 66
Vehicle data ................................... 291
Vehicle battery
see Battery (vehicle)
Vehicle data
Trunk load (maximum) ................... 291 Vehicle dimensions
........................... 291
Vehicle emergency locking ................ 73
Vehicle identification number
see VIN
Vehicle identification plate .............. 285
Vehicle maintenance
see ASSYST PLUS
Vehicle tool kit .................................. 248
Ventilation
see Climate control
Video
Operating the DVD ......................... 166
see also Digital Operator's Man-
ual .................................................. 208
VIN
Seat ............................................... 286
Type plate ...................................... 285W
Warning and indicator lampsABS ................................................ 200
Active Brake Assist ........................ 205
Brakes ........................................... 199
Check Engine ................................. 203
Coolant .......................................... 203
Distance warning ........................... 205
ESP
®.............................................. 200
ESP®OFF ....................................... 201
Fuel tank ........................................ 203
Overview .......................................... 34
Parking brake ................................ 202
PASSENGER AIR BAG ...................... 41
Reserve fuel ................................... 203
Restraint system ............................ 202
Seat belt ........................................ 198
SPORT handling mode ................... 202
Steering ......................................... 207
Tire pressure monitor .................... 206
Warranty .............................................. 25
Washer fluid
Display message ............................ 196
Weather display (COMAND)
see also Digital Operator's Man-
ual .................................................. 208
Wheel and tire combinations
Tires ............................................... 283
Wheel bolt tightening torque ........... 283
Index21
Page 57 of 294
If the seat belt pre-tensioning is not reduced:
XMove the seat backrest or seat back slightly
when the vehicle is stationary.
The seat belt pre-tensioning is reduced and
the locking mechanism is released.
The seat-belt adjustment is an integral part of
the PRE-SAFE
®convenience function. Informa-
tion about the convenience function can be
found under "Belt adjustment" (
Ypage 44).
Automatic measures after an acci-
dent
Immediately after an accident, the following
measures are implemented, depending on the
type and severity of the impact:
Rthe hazard warning lamps are switched on
Rthe emergency lighting is activated
Rthe vehicle doors are unlocked
Rthe front side windows are lowered
Rvehicles with a memory function: the electri-
cally adjustable steering wheel is raised when
the driver's door is opened
Rthe engine is switched off and the fuel supply
is switched off
Rvehicles with mbrace: automatic emergency
call
Children in the vehicle
Important safety notes
If a child younger than twelve years old and
under 5 ft (1.50 m) in height is traveling in the
vehicle:
Ralways secure the child in a child restraint
system suitable for Mercedes-Benz vehicles.
The child restraint system must be appropri-
ate to the age, weight and size of the child
Rbe sure to observe the instructions and safety
notes in this section in addition to the child
restraint system manufacturer's installation
instructions
Rbe sure to observe the instructions and safety notes on the "Occupant classification system
(OCS)" (
Ypage 48)
GWARNING
If you leave children unsupervised in the vehi-
cle, they could set it in motion, for example by:
Rreleasing the parking brake
Rshifting the transmission to the neutral
position
Rstarting the engine
In addition, they may operate vehicle equip-
ment and become trapped. There is a risk of
an accident and injury.
When leaving the vehicle, always take the
SmartKey with you and lock the vehicle. Never
leave children unsupervised in the vehicle.
GWARNING
If persons, particularly children are subjected to prolonged exposure to extreme heat or
cold, there is a risk of injury, possibly even
fatal. Never leave children unattended in the
vehicle.
GWARNING
If the child restraint system is subjected to
direct sunlight, parts may get very hot. Chil-
dren may burn themselves on these parts,
particularly on the metal parts of the child
restraint system. There is a risk of injury.
If you leave the vehicle, taking the child with
you, always ensure that the child restraint
system is not exposed to direct sunlight. Pro- tect it with a blanket, for example. If the child
restraint system has been exposed to direct
sunlight, let it cool down before securing the
child in it. Never leave children unattended in
the vehicle.
Always ensure that all vehicle occupants have
their seat belts fastened correctly and are sitting
properly. Particular attention must be paid to
children.
Observe the safety notes on the seat belt
(
Ypage 42) and the notes on correct use of seat
belts (Ypage 43).
A booster seat may be necessary to achieve
proper seat belt positioning for children over
40 lbs (18 kg) until they reach a height where a
Children in the vehicle55
Safety
Z
Page 128 of 294
!Use a filter when adding fuel from a fuel can.
The fuel lines and/or the fuel injection system
could otherwise be blocked by particles from
the fuel can.
If you overfill the fuel tank, fuel could spray out
when the fuel pump nozzle is removed.
For further information on fuel and fuel quality
(
Ypage 286).
Refueling
General information
Pay attention to the important safety notes
(Ypage 125).
If you unlock/lock the vehicle from the outside, the fuel filler flap also unlocks/locks.
The position of the fuel filler cap is displayed
8 in the instrument cluster. The arrow next
to the filling pump indicates the side of the vehi-
cle.
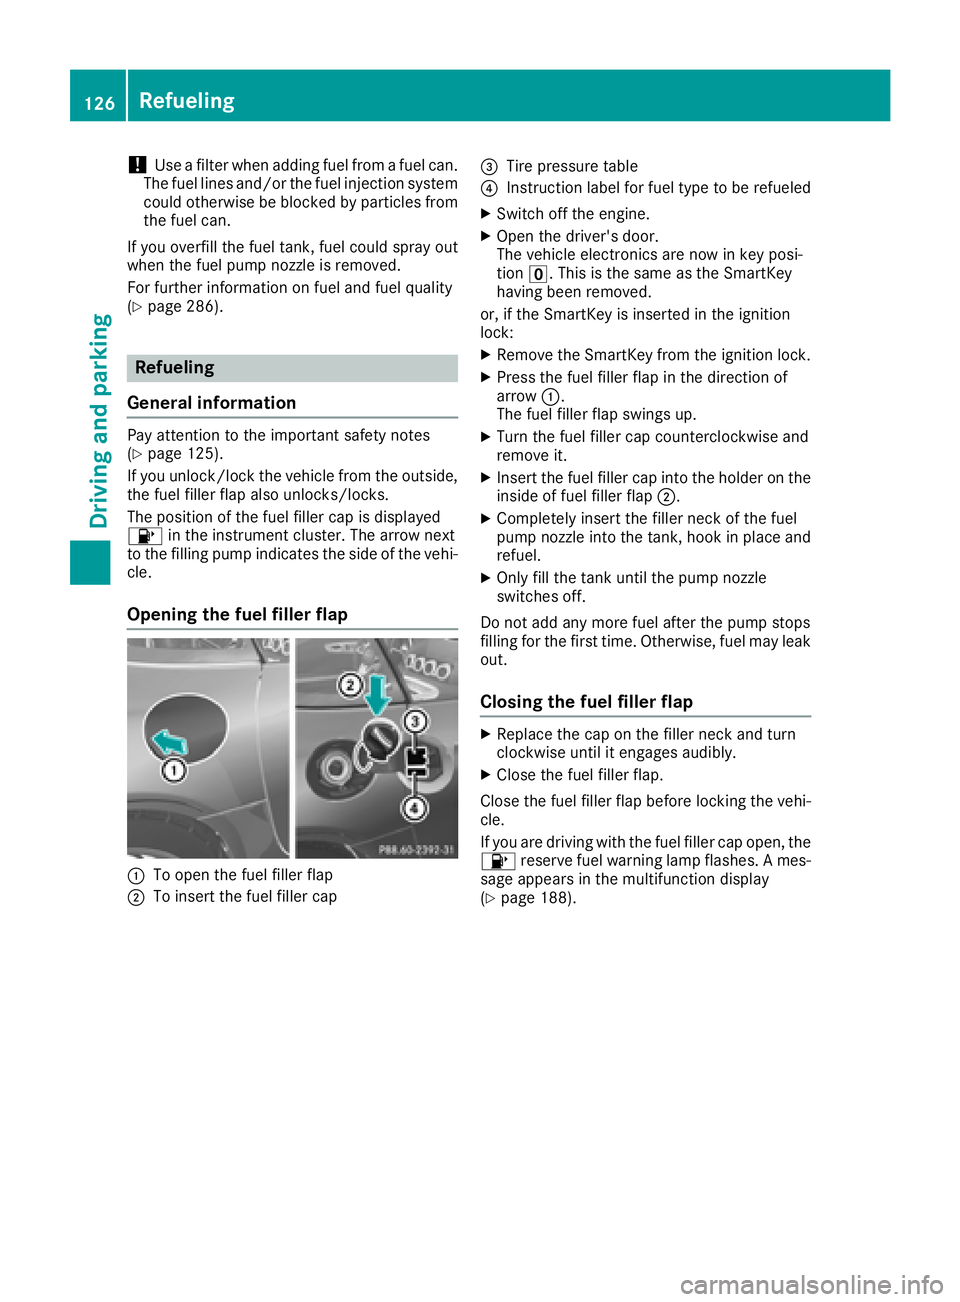
Opening the fuel filler flap
:To open the fuel filler flap
;To insert the fuel filler cap
=Tire pressure table
?Instruction label for fuel type to be refueled
XSwitch off the engine.
XOpen the driver's door.
The vehicle electronics are now in key posi-
tion u. This is the same as the SmartKey
having been removed.
or, if the SmartKey is inserted in the ignition
lock:
XRemove the SmartKey from the ignition lock.
XPress the fuel filler flap in the direction of
arrow :.
The fuel filler flap swings up.
XTurn the fuel filler cap counterclockwise and
remove it.
XInsert the fuel filler cap into the holder on the
inside of fuel filler flap ;.
XCompletely insert the filler neck of the fuel
pump nozzle into the tank, hook in place and
refuel.
XOnly fill the tank until the pump nozzle
switches off.
Do not add any more fuel after the pump stops
filling for the first time. Otherwise, fuel may leak
out.
Closing the fuel filler flap
XReplace the cap on the filler neck and turn
clockwise until it engages audibly.
XClose the fuel filler flap.
Close the fuel filler flap before locking the vehi-
cle.
If you are driving with the fuel filler cap open, the 8 reserve fuel warning lamp flashes. A mes-
sage appears in the multifunction display
(
Ypage 188).
126Refueling
Driving and parking
Page 161 of 294

Important safety notes
GWARNING
If you operate information systems and com-
munication equipmen tintegrate din th evehi-
cle when driving ,you may be distracte dfrom
th etraffic situation .You could also lose con-
trol of th evehicle. Ther eis aris kof an acci-
dent.
Only operate this equipmen twhen th etraffic
situation permits. If you are no tsur ethat this
is possible ,park th evehicl epayin gattention
to traffic condition sand operate th eequip-
men twhen th evehicl eis stationary.
You must observ eth elegal requirements for th e
country in whic hyou are currentl ydriving when
operating th eon-board computer.
GWARNIN G
If th einstrumen tcluste rhas faile dor mal-
functioned, you may no trecognize function
restriction sin systems relevan tto safety. The
operating safet yof your vehicl emay be
impaired .Ther eis aris kof an accident.
Drive on carefully. Hav eth evehicl echecke d
at aqualified specialist workshop immedi-
ately.
The on-board computer only shows message sor
warning sfrom certain systems in th emultifunc-
tion display. You should therefor emak esur e
your vehicl eis operating safely at all times .
If th eoperating safet yof your vehicl eis
impaired ,pull ove ras soo nas it is saf eto do so.
Contac t aqualified specialist workshop.
Fo ran overview, see th einstrumen tpanel illus-
tration (
Ypage 34).
Displays and operation
Speedometer with segments
The segments in th espeedometer indicat e
whic hspee drange is available:
RCruis econtrol activated (Ypage 134): The segments ligh
tup from th estore dspee d
to th etype-tested maximum speed.
RDistanc ePilot DISTRONI Cis activated
(Ypage 136):
On eor two segments in th eset spee drange
ligh tup.
RDistanc ePilot DISTRONI Cdetects avehicl ein
fron tmoving mor eslowly than th estore d
speed:
The segments between th espee dof th evehi-
cle in fron tand th estore dspee dligh tup.
Tachometer
!
Do no tdriv ein th eoverrevving range, as this
could damag eth eengine.
The red ban din th etachometer indicates th e
engine's overrevving range.
The fuel suppl yis interrupted to protect th e
engin ewhen th ered ban dis reached.
Outside temperature display
You should pay special attention to road condi-
tion swhen temperatures are aroun dfreezing
point.
Bea rin min dthat th eoutside temperature dis-
play indicates th emeasured air temperature
and no tth eroad surfac etemperature.
The outside temperature display is in th emulti-
function display (
Ypage 161).
Changes in th eoutside temperature are dis-
played after ashort delay.
Coolant temperature gage
GWARNIN G
Opening th ehoo dwhen th eengin eis over-
heated or when there is afir ein th eengin e
compartmen tcould expos eyou to hot gase s
or other servic eproducts .Ther eis aris kof
injury.
Let an overheate dengin ecool down before
opening th ehood. If there is afir ein th e
engin ecompartment, keep th ehoo dclosed
and contact th efir edepartment.
Displays and operation159
On-board computer and displays
Z
Page 205 of 294
Engine
Warning/
indicator
lampNSignal type
Possible causes/consequences and M
Solutions
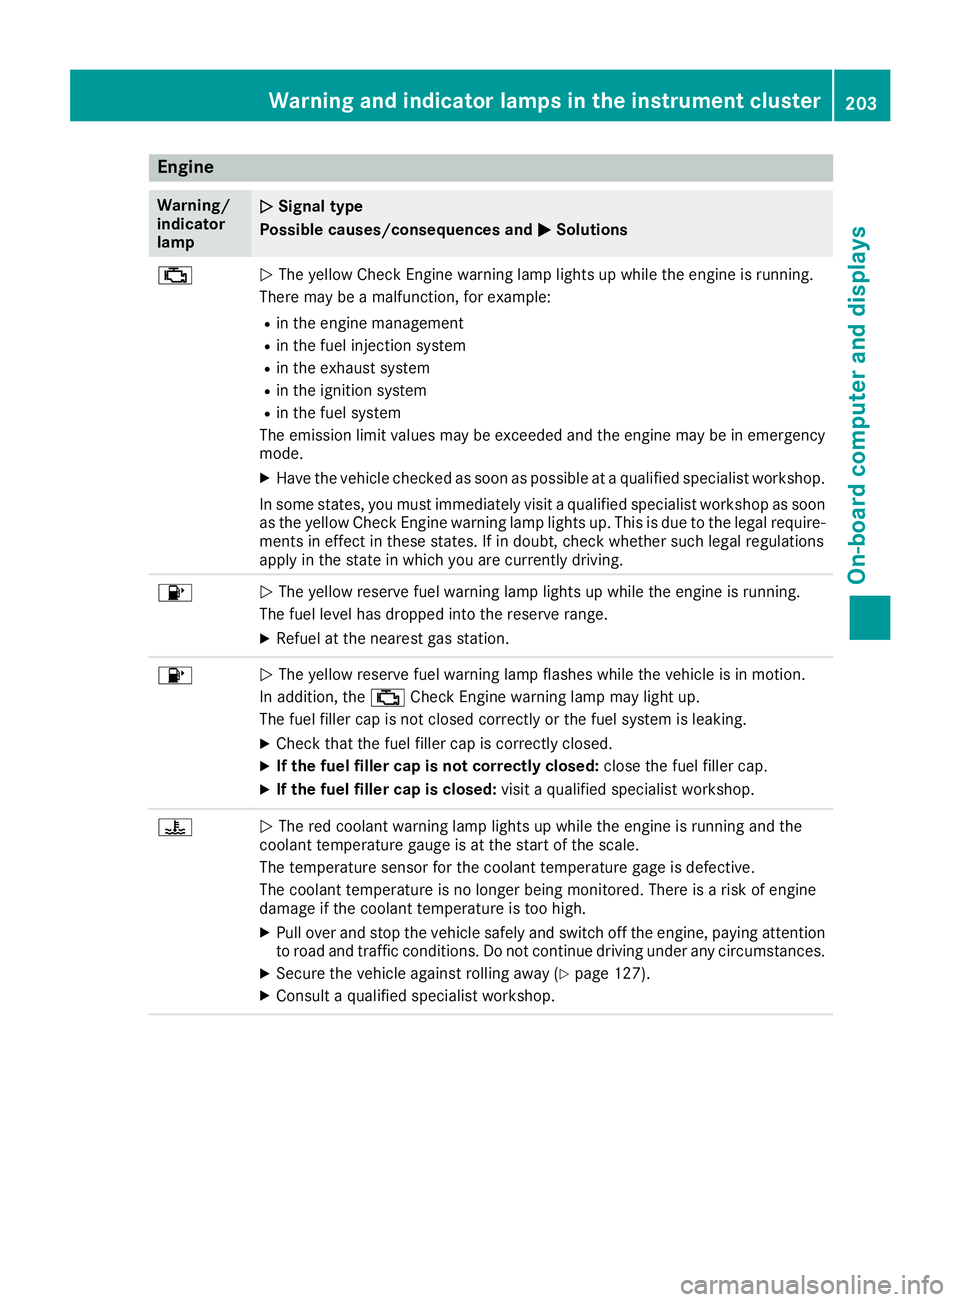
;NThe yellow Check Engine warning lamp lights up while the engine is running.
There may be a malfunction, for example:
Rin the engine management
Rin the fuel injection system
Rin the exhaust system
Rin the ignition system
Rin the fuel system
The emission limit values may be exceeded and the engine may be in emergency
mode.
XHave the vehicle checked as soon as possible at a qualified specialist workshop.
In some states, you must immediately visit a qualified specialist workshop as soon as the yellow Check Engine warning lamp lights up. This is due to the legal require-
ments in effect in these states. If in doubt, check whether such legal regulations
apply in the state in which you are currently driving.
8N The yellow reserve fuel warning lamp lights up while the engine is running.
The fuel level has dropped into the reserve range.
XRefuel at the nearest gas station.
8N The yellow reserve fuel warning lamp flashes while the vehicle is in motion.
In addition, the ;Check Engine warning lamp may light up.
The fuel filler cap is not closed correctly or the fuel system is leaking.
XCheck that the fuel filler cap is correctly closed.
XIf the fuel filler cap is not correctly closed: close the fuel filler cap.
XIf the fuel filler cap is closed:visit a qualified specialist workshop.
?NThe red coolant warning lamp lights up while the engine is running and the
coolant temperature gauge is at the start of the scale.
The temperature sensor for the coolant temperature gage is defective.
The coolant temperature is no longer being monitored. There is a risk of engine
damage if the coolant temperature is too high.
XPull over and stop the vehicle safely and switch off the engine, paying attention
to road and traffic conditions. Do not continue driving under any circumstances.
XSecure the vehicle against rolling away (Ypage 127).
XConsult a qualified specialist workshop.
Warning and indicator lamps in the instrument cluster203
On-board computer and displays
Z
Page 215 of 294
XTo selectOA/C: turn and press the control-
ler.
XSwitch cooling with air dehumidification on
O or off ª.
iThe current status of the cooling function is
displayed in the climate control bar: A/C ON
– activated, A/C OFF – deactivated.
iDeactivating the cooling with air dehumidi-
fication function reduces fuel consumption.
Synchronizing the climate control set-
tings
Use OSync(synchronization) to select the cli-
mate control setting for all zones together Oor
separately ª.
XCall up the climate control menu
(Ypage 212).
XSlide6the controller repeatedly until the
bottom bar is activated.
XTo select OSync: turn and press the con-
troller.
XSwitch the synchronization function on Oor
off ª.
For further information on synchronizing climate
control settings, see (
Ypage 106).
Navigation mode
Important safety notes
GWARNING
If you operate information systems and com-
munication equipment integrated in the vehi-
cle when driving, you may be distracted from
the traffic situation. You could also lose con-
trol of the vehicle. There is a risk of an acci-
dent.
Only operate this equipment when the traffic
situation permits. If you are not sure that this
is possible, park the vehicle paying attention
to traffic conditions and operate the equip-
ment when the vehicle is stationary.
You must observe the legal requirements for the
country in which you are currently driving when
operating the navigation system.
General notes
Among other things, correct functioning of the
navigation system depends on GPS reception. In
certain situations, GPS reception may be
impaired, there may be interference or there
may be no reception at all, e.g. in tunnels or
parking garages.
The following descriptions apply to navigation
with COMAND. Further information can be
found in the Digital Operator's Manual.
Selecting a route type and route options
Multimedia system:
XSelect NaviQNavigation.
XSelectZQRoute Settings.
iIf route guidance is active, first slide 6the
controller and show the menu.
XSelect a route type.
Notes for route types:
REco Route
Calculates an economic route.
RDynamic Traffic Route(only available in
the USA)
Traffic reports on the route for the route guid-
ance are taken into account.
RCalculate Alternative Routes
Different routes are being calculated. Instead
of Start, select the Continuemenu item.
XTo avoid/use route options: selectAvoid
Options.
XSelect a route option.
Notes for route options:
RUse Toll Roads
The route calculation includes roads which
require you to pay a usage fee (toll).
RUse Carpool Lanes(only available in the
USA)
Prerequisite: your vehicle meets the access
conditions for carpool lanes.
Carpool lanes will be included if the carpool
lanes option is activated.
Entering an address
Multimedia system:
XSelect NaviQNavigation.
XSelectDestinationQAddress Entry.
Operating system213
Multimedia system
Z
Page 244 of 294

XDo not use hot water and do not wash the
vehicle in direct sunlight.
XUse a soft sponge to clean.
XUse a mild cleaning agent, such as a car
shampoo approved by Mercedes-Benz.
XThoroughly hose down the vehicle with a gen-
tle jet of water.
XDo not point the water jet directly towards the
air inlet.
XUse plenty of water and rinse out the sponge
frequently.
XRinse the vehicle with clean water and dry
thoroughly with a chamois.
XDo not let the cleaning agent dry on the paint-work.
Carefully remove all deposits of road salt as
soon as possible when driving in winter.
Power washers
GWARNING
The water jet from a circular jet nozzle (dirt
blasters) can cause invisible exterior damage
to the tires or chassis components. Compo-
nents damaged in this way may fail unexpect-
edly. There is a risk of an accident.
Do not use power washers with circular jet
nozzles to clean the vehicle. Have damaged
tires or chassis components replaced imme-
diately.
!Always maintain a distance of at least
11.8 in (30 cm) between the vehicle and the
high-pressure cleaner nozzle. Information
about the correct distance is available from
the equipment manufacturer.
Move the power washer nozzle around when
cleaning your vehicle.
Do not aim directly at any of the following:
Rtires
Rdoor gaps, joints etc.
Rsoft top
Rwind deflector net
Relectrical components
Rbattery
Rplug-type couplings
Rlights
Rseals
Rtrim
Rventilation slots
Damaged seals or electrical components can
lead to leaks or failures.
!Vehicles with decorative foil: parts of your
vehicle are covered with decorative foil. Main-
tain a distance of at least 27.5 in (70 cm)
between the foil-wrapped parts of the vehicle
and the nozzle of the high pressure cleaner.
Informatio n a
bout the correct distance is
available from the equipment manufacturer.
Move the power washer nozzle around when
cleaning your vehicle.
The water temperature of the high-pressure
cleaner must not exceed 140 °F (60 °C).
!If the SmartKey is within the rear detection
range of KEYLESS-GO, the following situa-
tions, for example, could lead to the uninten-
tional opening of the trunk lid:
Rwhen using an automatic car wash
Rwhen using a power washer
Make sure that the SmartKey is at least 10 ft
(3 m) away from the vehicle.
Cleaning the paintwork
!Do not affix:
Rstickers
Rfilms
Rmagnetic plates or similar items
to painted surfaces. You could otherwise
damage the paintwork.
Scratches, corrosive deposits, areas affected by corrosion and damage caused by inadequate
care cannot always be completely repaired. In
such cases, visit a qualified specialist workshop.
XRemove dirt immediately, where possible,
while avoiding rubbing too hard.
XSoak insect remains with insect remover and
rinse off the treated areas afterwards.
XSoak bird droppings with water and rinse off
the treated areas afterwards.
XRemove coolant, brake fluid, tree resin, oils,
fuels and greases by rubbing gently with a
cloth soaked in petroleum ether or lighter
fluid.
XUse tar remover to remove tar stains.
XUse silicone remover to remove wax.
242Care
Maintenance and care
Page 263 of 294

Important safety notes
GWARNING
If wheels and tires of th ewrong siz eare used,
th ewhee lbrakes or suspension component s
may be damaged. Ther eis aris kof an acci-
dent.
Always replace wheels and tires wit hthose
that fulfill th especification sof th eoriginal
part .
When replacing wheels, mak esur eto use th e
correct:
Rdesignation
Rmodel
When replacing tires ,mak esur eto use th e
correct:
Rdesignation
Rmanufacturer
Rmodel
GWARNIN G
A flat tire severely impairs th edriving ,steer -
ing and braking characteristics of th evehicle.
Ther eis aris kof accident.
Tires without run-flat characteristics :
Rdo notdriv ewit h a flat tire.
Rimmediately replace th eflat tire wit hyour
emergenc yspar ewhee lor spar ewheel, or
consult aqualified specialist workshop.
Tires wit hrun-flat characteristics :
Rpay attention to theinformation and warn -
ing notice son MOExtended tires (tire swit h
run-flat characteristics).
Accessories that are no tapprove dfor your vehi-
cle by Mercedes-Ben zor are no tbein gused cor-
rectl ycan impair th eoperating safety.
Before purchasing and usin gnon-approve d
accessories, visit aqualified specialist work-
sho pand inquire about :
Rsuitability
Rlegal stipulation s
Rfactory recommendation sInformation on th
esizes and types of wheels and
tires for your vehicl ecan be foun dunder
"Wheel/tire combinations" (
Ypage 283).
Tir epressur einformation can be found:
Ron th eTir eand Loading Information placard
on th eB-pillar on th edriver' sside
(
Ypage 269)
Rin th etire pressur etable in th efuel filler flap
(Ypage 126)
Rin th e"Tir epressure" section
Operation
Information on driving
Chec kth etire pressur ewhen th evehicl eis
heavily laden and adjust prio rto atrip.
While driving ,pay attention to vibrations, noises
and unusual handlin gcharacteristics ,e.g. pull-
ing to on eside .This may indicat ethat th e
wheels or tires are damaged. If you suspec tthat
a tire is defective, reduce your spee dimmedi-
ately. Stop th evehicl eas soo nas possible to
chec kth ewheels and tires for damage. Hidden
tire damag ecould also be causing th eunusual
handlin gcharacteristics .If you fin dno sign sof
damage, hav eth etires and wheels checke dat a
qualified specialist workshop.
When parking your vehicle, mak esur ethat th e
tires do no tget deformed by th ecur bor other
obstacles. If they canno tbe avoided, driv eove r
obstacles suc has curbs slowly and at an obtuse
angle. Otherwise, you may damag eth ewheels
or tires .
Notes on high performance tires
GWARNIN G
Due to th especial tire tread in combination
wit hth eoptimized rubber compound ,there is
an increased ris kof hydroplaning and skid-
din gon damp or wet road surfaces. In addi-
tion ,tire traction is significantly reduce dat
low outside temperatures and low tire-oper -
ating temperatures .Ther eis aris kof an acci-
dent.
Activat eES P
®and adapt your driving style. At
outside temperatures belo w50 ‡(10 †), use
M+S tires.
Operation261
Wheels and tires
Z