Page 489 of 621

*
NO
TEVehicle damage from the jack If
yo u do not position the jack cor rectly at
th e appropriate jack support point of the
ve hicle, the jack could tip over with theve hi‐
cle raised. #
The jack is designed exclusively for
jacking up theve hicle at the jack sup‐
port points. #
Take thera tchet out of the tyre-change tool
kit and place it on the he xagon nut of the
jack so that the letters "AUF" are visible. #
Position jack 2at jack support point 1.
% Ifth ere is a total loss of pressure in a tyre, it
may be possible that the jack cann otbe
positioned at jack support point 1. Inthis
case, unload theve hicle. #
Turn ratchet 3clockwise until jack 2sits
comple tely on jack support point 1and the
base of the jack lies evenly on the ground. #
Turn ratchet 3until the tyre is raised a max‐
imum of 3 cm from the ground. #
Loosen and remo vethe wheel
(/ page 486). Re
moving a wheel Re
quirements:
R The vehicle is raised (/ page 484).
When changing a wheel, avoid applying any force
to the brake discs, since this could impair the
le ve l of com fort when braking.
* NO
TEDama getothre ading from dirt on
wheel bolts #
Do not place wheel bolts in sand or on
a dirty sur face. #
Unscr ew the uppermost wheel bolt com‐
ple tely. 486
Wheels and tyres
Page 490 of 621

#
Screw centring pin 1into theth re ad
ins tead of the wheel bolt. #
Unscr ew there maining wheel bolts fully. #
Remo vethe wheel and, if necessar y,store it
in the boot. #
Note s onremoving an eme rgency spa re
wheel: (/page 489). #
Fitthe new wheel (/ page 487).Fi
tting a new wheel Re
quirements:
R The wheel is remo ved (/ page 486). &
WARNING Risk of accident from losing a
wheel
Oiled, greased or damaged wheel bolt/wheel
nut thre ads or wheel hub/wheel mounting
bolt thre ads can cause the wheel bolts/
wheel nuts tocome loose.
As a result, you could lose a wheel while driv‐
ing. #
Never oil or grease theth re ads. #
Intheeve nt of dama getotheth re ads,
con tact a qualified specialist workshop
immediatel y. #
Have the damaged wheel bolts or dam‐
aged hub thre ads replaced. #
Do not continue driving. #
Obser vethe information on thech oice of
tyres (/ page479).
Fo r tyres with a specified direction of rotation,
an ar rowonthe side wall of the tyre indicates
th e cor rect di rection of rotat ion. Obser vethe
direction of rotation when fitting. #
Slide the wheel tobe mounted onto the cen‐
tring pin and push it on. #
Note s onfitting an eme rgency spa re
wheel: (/page 489). &
WARNING Risk of inju ryfrom tightening
wheel bolts and nuts
If yo u tighten the wheel bolts or wheel nuts
when theve hicle is raised, the jack could tip. #
Only tighten wheel bolts or wheel nuts
when theve hicle is on the ground. #
Be sure toobser vethe instructions and
saf ety no tes on "Changing a wheel"
(/ page479). #
For saf etyre asons, on lyuse wheel bolts
which ha vebeen appr ovedby Mercedes-
Benz and forth e wheel in question. #
Tighten the wheel bolts evenly in a diagonal
pattern in the order indicated until they are
fi nger-tight. #
Unscr ew the cent ring pin. Wheels and tyres
487
Page 491 of 621

#
Tighten the last wheel bolt until it is finger-
tight. #
Lowe rth eve hicle (/ page 488). Lo
weri ngtheve hicle af ter a wheel change Re
quirements:
R The new wheel has been fitted
(/ page 487).
* NO
TEDama getothe emer gency spa re
wheel when lo wering theve hicle Lo
we ring theve hicle without pr eviously
inflating the emer gency collapsible spa re
wheel can damage its rim. #
Inflate the emer gency collapsible spa re
wheel using the tyre inflation compres‐
sor before lo wering theve hicle. #
Place thera tchet onto the he xagon nut of the
jack so that the letters "AB" are visible. #
Tolowe r the vehicle: turnthera tchet of the
jack anti-clo ckwise. #
Tighten the wheel bolts evenly in a diagonal
pattern in the order indicated (1 to5 ).
Specified tightening torq ue: 130 Nm. &
WARNING Risk of inju rythro ugh incor‐
re ct tigh tening torque
The wheels could come loose if the wheel
bolts or wheel nuts are not tightened tothe
prescribed tightening torque. #
Makesure the wheel bolts or wheel
nuts are tightened tothe prescribed
tightening torque. #
Ifyo u are not sure, do not mo vethe
ve hicle. Consult a qualified specialist wo
rkshop and ha vethe tightening tor‐
qu ech ecked immediately. #
Check the tyre pressure of the newly moun‐
te d wheel and adjust according ly. #
Vehicles with tyre pressure loss warning
sy stem: restart the tyre pressure loss warn‐
ing sy stem (/ page478).
Excep tion:the new wheel is an emer gency
spa rewheel. #
Vehicles with a tyre pressure monitoring
sy stem: restart the tyre pressure monitoring
sy stem (/ page473).
Except ion:the new wheel is an emer gency
spa rewheel.
Make sure toobser vethefo llowing fur ther rela‐
te d subjec t:
R Notes on tyre pressure (/ page470) 488
Wheels and tyres
Page 492 of 621

Emer
gency spare wheel Note
s onthe emer gency spare wheel &
WARNING Risk of accident caused by
incor rect wheel and tyre dimensions
The wheel or tyre size and the tyre type of
th e emer gency spa rewheel or spare wheel
and the wheel tobe replaced may dif fer.
Mounting an emer gency spa rewheel/spare
wheel may se verely impair the driving char‐
acteristics.
To preve nt hazardous situations: #
Adapt your driving style according lyand
drive carefull y. #
Neverfit more than one emer gency
spa rewheel or spare wheel that dif fers
in size. #
Only use an emer gency spa rewheel or
spare wheel of a dif fere nt size brie fly. #
Do not switch off ESP ®
. #
Have the emer gency spa rewheel or
spare wheel of a dif fere nt size replaced
at the nearest qualified specialist work‐ shop. The new wheel must ha
vethe
cor rect dimensions. Obser
vethefo llowing no tes on removing an
emergency spare wheel:
R Before stowingthe emer gency spa rewheel,
make sure there is no air left in the tyre.
If necessar y,allow the air toescape.
R Torelease air from the ty re:re mo vethe
va lve cap of the tyre.
R Press down the me tal inse rtin theva lve
using a pointed object, e.g. a pen.
R Screw theva lve cap onto theva lve.
R Stow the deflated emer gency spa rewheel in
th e emer gency spa rewheel bag in the boot
(/ page 490).
Obser vethefo llowing no tes on fitting an emer‐
ge ncy spa rewheel:
R Fitthe emer gency spa rewheel when it is
deflated (/ page 487).
R Inflate the emer gency spa rewheel af terfit‐
ting it (/ page 490). The maximum permissible speed with an emer‐
ge ncy spa rewheel fitted is 80 km/h.
Do not fit th e emer gency spa rewheel with sn ow
ch ains.
Re place the emer gency spa rewheel af ter six
ye ars at the latest, rega rdless of wear.
% Ve
hicles with a tyre pressure loss warn‐
ing sy stem: if an emer gency spa rewheel is
fi tted the tyre pressure loss warning sy stem
cann otfunction reliabl y.Only restart the sys‐
te m again when the emer gency spa rewheel
has been replaced with a new wheel.
Ve hicles with a tyre pressure monitoring
sy stem: if an emer gency spa rewheel is fit‐
te dth e tyre pressure monitoring sy stem can‐
not function reliabl y.Only restart the sy stem
again when the emer gency spa rewheel has
been replaced with a new wheel.
Ve hicles with a tyre pressure monitoring
sy stem: for a few minutes af ter an emer‐
ge ncy spa rewheel is fitted, the sy stem may
st ill display the tyre pressure of there mo ved
wheel. Wheels and tyres
489
Page 493 of 621

Be sure
toalso obse rveth efo llowing fur ther
re lated subjects:
R Notes on tyre pressure (/ page470)
R Tyre pressure table (/ page471) Re
moving the eme rgency spa rewheel The deflated eme
rgency spare wheel is secured
in the emer gency spa rewheel bag in the boot. #
Obser vethe information on mounting tyres
(/ page479). #
Open the boot. #
Detach thefast ening stra ps. #
Unhook there taining spring hooks of thefa s‐
te ning stra ps from the brac kets. #
Remo vethe emer gency spa rewheel bag with
th e emer gency spa rewheel. #
Open the emer gency spa rewheel bag and
re mo vethe emer gency spa rewheel. Inflating
the emer gency spare wheel *
NO
TEOverheating due tothe tyre infla‐
tion compressor running too long #
Do not runth e tyre inflation compres‐
sor for longer than ten minu tes without
inter ruption. Re
quirements:
R Comply with the manufacturer's saf ety no tes
on thest icke r of the emer gency spa rewheel
and on the tyre inflation compressor.
R Remo vethe tyre inflation compressor from
th estow age space under the boot floor
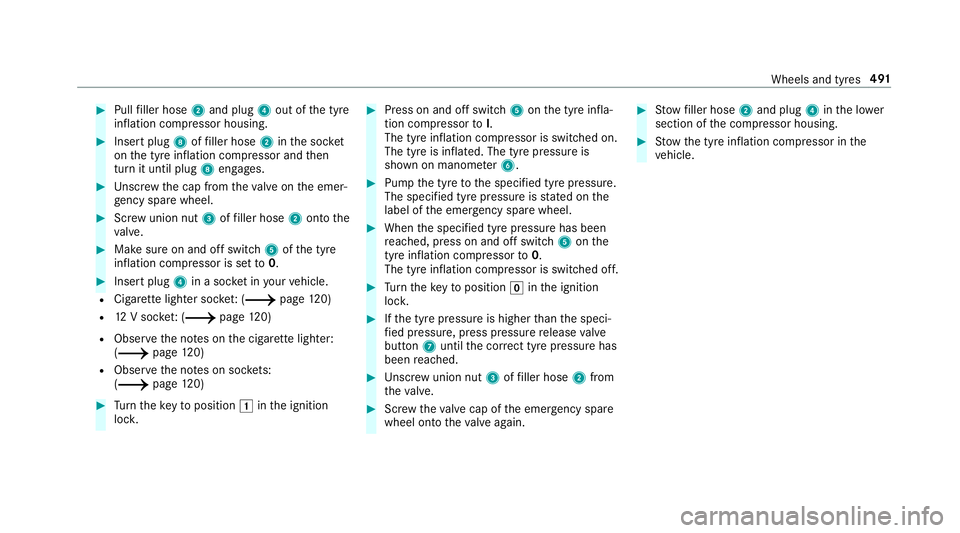
(/ page 450). #
Remo vesticke r1 from the tyre inflation
compressor housing and af fix it tothe instru‐
ment clus ter within the driver's field of
vision. 490
Wheels and tyres
Page 494 of 621

#
Pull filler hose 2and plug 4out of the tyre
inflation compressor housing. #
Insert plug 8offiller hose 2inthe soc ket
on the tyre inflation compressor and then
turn it until plug 8engages. #
Unscr ew the cap from theva lve on the emer‐
ge ncy spa rewheel. #
Screw union nut 3offiller hose 2onto the
va lve. #
Make sure on and off switch 5ofthe tyre
inflation compressor is set to0. #
Insert plug 4in a soc ket in your vehicle.
R Cigar ette lighter soc ket: ( / page120)
R 12V soc ket: ( / page120)
R Obse rveth e no tes on the cigar ette lighter:
(/ page120)
R Obse rveth e no tes on soc kets:
(/ page 120) #
Turn theke yto position 1inthe ignition
loc k. #
Press on and off switch 5onthe tyre infla‐
tion compressor toI.
The tyre inflation compressor is switched on.
The tyre is inflated. The tyre pressure is
shown on manome ter6. #
Pump the tyre tothe specified tyre pressure.
The specified tyre pressure is stated on the
label of the emer gency spa rewheel. #
When the specified tyre pressure has been
re ached, press on and off swit ch5 onthe
tyre inflation compressor to0.
The tyre inflation compressor is switched off. #
Turn theke yto position ginthe ignition
loc k. #
Ifth e tyre pressure is higher than the speci‐
fi ed pressure, press pressure release valve
button 7until the cor rect tyre pressure has
been reached. #
Unscr ew union nut 3offiller hose 2from
th eva lve. #
Screw theva lve cap of the emer gency spa re
wheel onto theva lve again. #
Stow filler hose 2and plug 4inthe lo wer
section of the compressor housing. #
Stow th e tyre inflation compressor in the
ve hicle. Wheels and tyres
491
Page 495 of 621

Note
s ontech nical data
The tech nical da tawa s de term ined in accord‐
ance with EU Directives. The data stated on ly
applies tovehicles with standard equipment. Yo u
can obtain fur ther information from a Mercedes-
Benz Service Centre.
Only for ce rtain countries: you can find vehi‐
cle-specific vehicle data in the EC-Certificate of
Conformity (CERTIFIC ATE OF CONFORMITY).
These documents are deli vered with your vehi‐
cle. On-board electronics
Note
s on tampering with the engine elec‐
tronics *
NO
TEPremature wearthro ugh improper
main tenance Improper maintenance may cause
vehicle
components towe ar more quickly and the
ve hicle's operating permit may be in valida‐
te d. #
Alw ays ha vewo rkon the engine elec‐
tronics and related components car ried
out at a qualified specialist workshop. Tw
o-w ayradios Note
s onfitting two-w ayradios &
WARNING Risk of accident due to
improper workon two-w ayradios
The elect romagnetic radiation from two-w ay
ra dios can inter fere with the on-board elec‐
tronics if RF transmit ters are manipulated or
re trofitted inco rrectly.
This could jeopardise the operating saf ety of
th eve hicle. #
You should ha veall workon electrical
and electronic components car ried out
at a qualified specialist workshop. &
WARNING Risk of accident from incor‐
re ct ope ration of two-w ayradios
If yo u operate two- wayra dios inco rrectly in
th eve hicle, the electromagnetic radiation
could inter fere with the on-board electronics,
e.g.:
R ifth e two-w ayradio is not connec tedto
an exterior aerial
R ifth eex terior aerial is not cor rectly
mounted or is not of low reflection
This could jeopardise the operating saf ety of
th eve hicle. #
Have the lo w-reflection exterior aerial
fi tted at a qualified specialist workshop. #
When operating two-w ayradios in the
ve hicle, alw ays connect them tothe
lo w- reflection exterior aerial. 492
Tech nical da ta
Page 496 of 621

*
NO
TEInva lidation of the operating per‐
mit due tofailure tocomply wi th the
instructions for ins tallation and use The operating permit may be in
validated if
th e instructions for ins tallation and use of
two-w ayradios are not obser ved. #
Only use appr oved frequency bands. #
Obser vethe maximum permissible out‐
put po wer in these frequency bands. #
Only use appr oved aerial positions. 1
Front roof area
2 Rear roof area
3 Rear wings
4 Boot lid
On vehicles with a panoramic sliding sunroof, fit‐
ting an ae rial to the front or rear roof area is not
permitted. On
there ar wings, it is recommended that you
fi t th e aerial on the side of theve hicle closest to
th e cent reofthero ad.
Use Tech nical Specification ISO/TS 21609 (Road
Ve hicles – "EMCs for ins tallation of af term arket
ra dio frequency transmitting equipment") when
re trofitting two-w ayradios. Comply with the
legal requirements for de tach able parts.
If yo ur vehicle has fittings for two-w ayradio
equipment, use the po wer supp lyand aerial con‐
nec tors prov ided in the pre-ins tallation. Be sure
to obser vethe manufacturer's supplements
when fitting.
Tw o-w ayradio transmission output
The maximum transmission output (PEAK) at the
base of the aerial must not exceed theva lues in
th efo llowing table. Te
ch nical da ta493