2018 LINCOLN CONTINENTAL warning
[x] Cancel search: warningPage 280 of 615
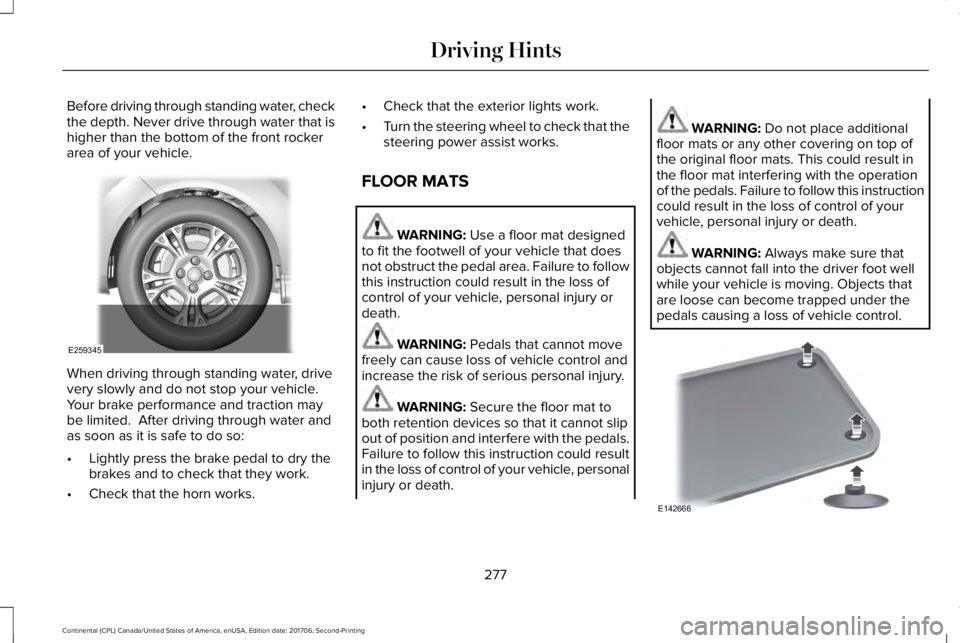
Before driving through standing water, checkthe depth. Never drive through water that ishigher than the bottom of the front rockerarea of your vehicle.
When driving through standing water, drivevery slowly and do not stop your vehicle. Your brake performance and traction maybe limited. After driving through water andas soon as it is safe to do so:
•Lightly press the brake pedal to dry thebrakes and to check that they work.
•Check that the horn works.
•Check that the exterior lights work.
•Turn the steering wheel to check that thesteering power assist works.
FLOOR MATS
WARNING: Use a floor mat designedto fit the footwell of your vehicle that doesnot obstruct the pedal area. Failure to followthis instruction could result in the loss ofcontrol of your vehicle, personal injury ordeath.
WARNING: Pedals that cannot movefreely can cause loss of vehicle control andincrease the risk of serious personal injury.
WARNING: Secure the floor mat toboth retention devices so that it cannot slipout of position and interfere with the pedals.Failure to follow this instruction could resultin the loss of control of your vehicle, personalinjury or death.
WARNING: Do not place additionalfloor mats or any other covering on top ofthe original floor mats. This could result inthe floor mat interfering with the operationof the pedals. Failure to follow this instructioncould result in the loss of control of yourvehicle, personal injury or death.
WARNING: Always make sure thatobjects cannot fall into the driver foot wellwhile your vehicle is moving. Objects thatare loose can become trapped under thepedals causing a loss of vehicle control.
277
Continental (CPL) Canada/United States of America, enUSA, Edition date: 201706, Second-Printing
Driving HintsE259345 E142666
Page 283 of 615
If you need to arrange roadside assistancefor yourself, Lincoln Motor Companyreimburses a reasonable amount for towingto the nearest Lincoln dealership within100 mi (160 km). To obtain reimbursementinformation, United States clients, call1-800-521-4140. Clients need to submit theiroriginal receipts.
Vehicles Sold in Canada: GettingRoadside Assistance
To fully assist you should you have a vehicleconcern, Lincoln Motor Company offers acomplimentary roadside assistance program. This program is eligible within Canada or thecontinental United States.
This program is separate from the NewVehicle Limited Warranty, beginning fromthe original warranty start date and lasts thelife of the vehicle for the original owner.Subsequent owners receive coverage thatis concurrent with the 6 years or 70,000 mi(110,000 km) (whichever occurs first)powertrain warranty coverage period.
If you purchased your vehicle in Canada andrequire roadside assistance, please call1-800-387-9333.
Vehicles Sold in Canada: UsingRoadside Assistance
Complete the roadside assistanceidentification card and place it in your walletfor quick reference.
In Canada, this card is found in the WarrantyGuide in the glove compartment of yourvehicle.
Vehicles Sold in Canada: RoadsideAssistance Program Coverage
The service is available 24 hours a day,seven days a week.
Canadian roadside coverage and benefitsmay differ from the U.S. coverage.
For complete program coverage detailsreview your warranty guide, contact yourdealer, call us in Canada at 1-800-387-9333,or visit our website atwww.lincolncanada.com.
HAZARD FLASHERS
Note:The hazard flashers operate when theignition is in any position, or if the key is notin the ignition. If used when the vehicle is notrunning, the battery loses charge. As a result,there may be insufficient power to restartyour vehicle.
The flasher control is on theinstrument panel. Use your hazardflashers when your vehicle iscreating a safety hazard for other motorists.
•Press the flasher control and all front andrear direction indicators flash.
•Press the button again to switch them off.
FUEL SHUTOFF
WARNING: If your vehicle has beeninvolved in a crash, have the fuel systemchecked. Failure to follow this instructioncould result in fire, personal injury or death.
280
Continental (CPL) Canada/United States of America, enUSA, Edition date: 201706, Second-Printing
Roadside Emergencies
Page 284 of 615
Note: When you try to restart your vehicleafter a fuel shutoff, the vehicle makes surethat various systems are safe to restart. Once the vehicle determines the systemsare safe, then the vehicle allows you torestart.
Note: In the event that your vehicle doesnot restart after your third attempt, contacta qualified technician.
The fuel pump shutoff stops the flow of fuelto the engine in the event of a moderate tosevere crash. Not every impact causes ashutoff.
Should your vehicle shut off after a crash,you may restart your vehicle.
1. Press START/STOP to switch off yourvehicle.
2.Press the brake pedal and START/STOPto switch on your vehicle.
3. Remove your foot from the brake pedaland press START/STOP to switch offyour vehicle.
4. You can attempt to start the vehicle bypressing the brake pedal andSTART/STOP, or press START/STOPwithout pressing the brake pedal.
JUMP STARTING THE VEHICLE
WARNING: Batteries normally produceexplosive gases which can cause personalinjury. Therefore, do not allow flames, sparksor lighted substances to come near thebattery. When working near the battery,always shield your face and protect youreyes. Always provide correct ventilation.
WARNING: Keep batteries out of reachof children. Batteries contain sulfuric acid.Avoid contact with skin, eyes or clothing.Shield your eyes when working near thebattery to protect against possible splashingof acid solution. In case of acid contact withskin or eyes, flush immediately with waterfor a minimum of 15 minutes and get promptmedical attention. If acid is swallowed, call aphysician immediately.
WARNING: Use only adequately sizedcables with insulated clamps.
Preparing Your Vehicle
Do not attempt to push-start your automatictransmission vehicle.
Note:Attempting to push-start a vehicle withan automatic transmission may causetransmission damage.
Note:Use only a 12-volt supply to start yourvehicle.
281
Continental (CPL) Canada/United States of America, enUSA, Edition date: 201706, Second-Printing
Roadside Emergencies
Page 285 of 615
Note:Do not disconnect the battery of thedisabled vehicle as this could damage thevehicle electrical system.
Park the booster vehicle close to the hoodof the disabled vehicle, making sure the twovehicles do not touch.
Connecting the Jumper Cables
WARNING: Do not attach the cablesto fuel lines, engine rocker covers, the intakemanifold or electrical components asgrounding points. Stay clear of moving parts.To avoid reverse polarity connections, makesure that you correctly identify the positive(+) and negative (-) terminals on both thedisabled and booster vehicles beforeconnecting the cables.
WARNING: Do not attach the end ofthe positive cable to the studs or L-shapedeyelet located above the positive (+) terminalof your vehicle’s battery. High current mayflow through and cause damage to the fuses.
WARNING: Do not connect the end ofthe second cable to the negative (-) terminalof the battery to be jumped. A spark maycause an explosion of the gases thatsurround the battery.
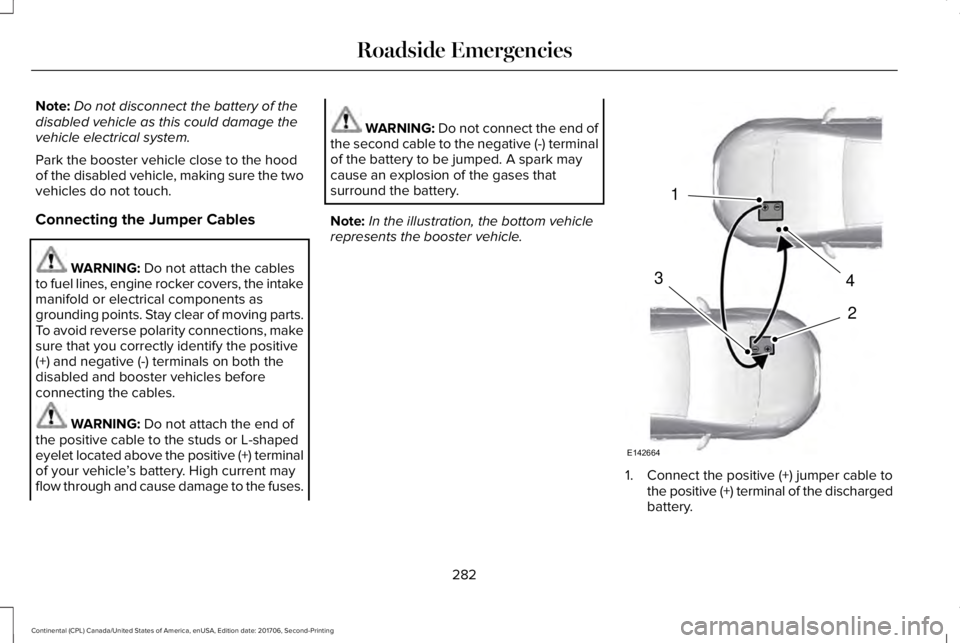
Note:In the illustration, the bottom vehiclerepresents the booster vehicle.
1. Connect the positive (+) jumper cable tothe positive (+) terminal of the dischargedbattery.
282
Continental (CPL) Canada/United States of America, enUSA, Edition date: 201706, Second-Printing
Roadside Emergencies4
2
1
3
E142664
Page 297 of 615

FUSE SPECIFICATION CHART
Power Distribution Box
WARNING: Always disconnect thebattery before servicing high current fuses.
WARNING: To reduce risk of electricalshock, always replace the cover to the powerdistribution box before reconnecting thebattery or refilling fluid reservoirs.
The power distribution box is in the enginecompartment. It has high-current fuses thatprotect your vehicle's main electrical systemsfrom overloads.
If the battery has been disconnected andreconnected, some features will need to bereset. See Changing the 12V Battery (page325).
294
Continental (CPL) Canada/United States of America, enUSA, Edition date: 201706, Second-Printing
Fuses
Page 312 of 615
CHANGING A FUSE
Fuses
WARNING: Always replace a fuse withone that has the specified amperage rating.Using a fuse with a higher amperage ratingcan cause severe wire damage and couldstart a fire.
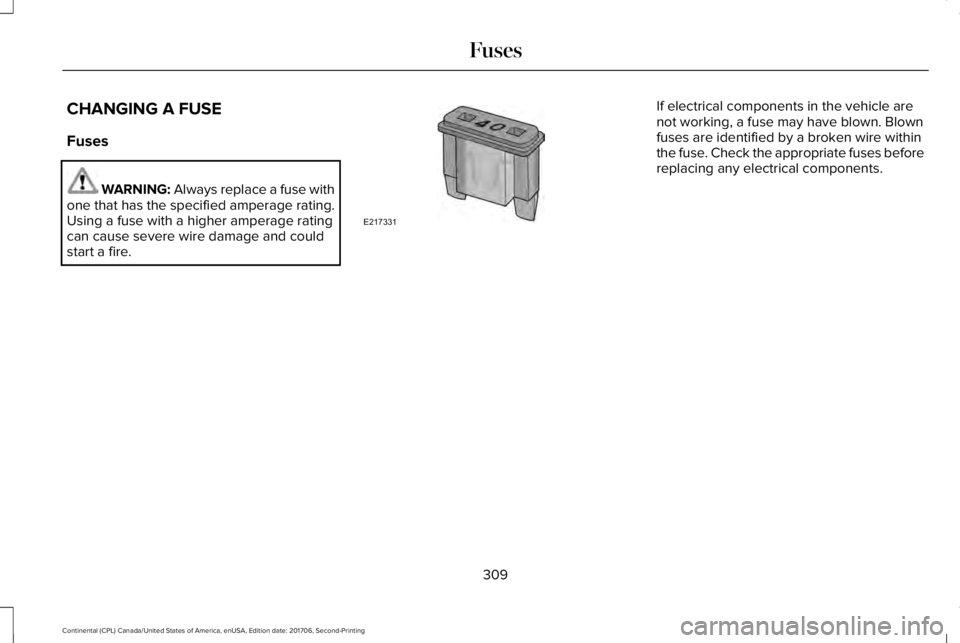
If electrical components in the vehicle arenot working, a fuse may have blown. Blownfuses are identified by a broken wire withinthe fuse. Check the appropriate fuses beforereplacing any electrical components.
309
Continental (CPL) Canada/United States of America, enUSA, Edition date: 201706, Second-Printing
FusesE217331
Page 315 of 615
GENERAL INFORMATION
Have your vehicle serviced regularly to helpmaintain its roadworthiness and resale value.There is a large network of authorizeddealers that are there to help you with theirprofessional servicing expertise. We believethat their specially trained technicians arebest qualified to service your vehicle properlyand expertly. They are supported by a widerange of highly specialized tools developedspecifically for servicing your vehicle.
If your vehicle requires professional service,an authorized dealer can provide thenecessary parts and service. Check yourwarranty information to find out which partsand services are covered.
Use only recommended fuels, lubricants,fluids and service parts conforming tospecifications. Motorcraft® parts aredesigned and built to provide the bestperformance in your vehicle.
Precautions
•Do not work on a hot engine.
•Make sure that nothing gets caught inmoving parts.
•Do not work on a vehicle with the enginerunning in an enclosed space, unless youare sure you have enough ventilation.
•Keep all open flames and other burningmaterial (such as cigarettes) away fromthe battery and all fuel related parts.
Working with the Engine Off
1. Set the parking brake and shift thetransmission to park (P).
2. Switch off the engine.
3. Block the wheels.
Working with the Engine On
WARNING: To reduce the risk ofvehicle damage and personal burn injuries,do not start your engine with the air cleanerremoved and do not remove it while theengine is running.
1. Set the parking brake and shift thetransmission to park (P).
2. Block the wheels.
OPENING AND CLOSING THE
HOOD
Opening the Hood
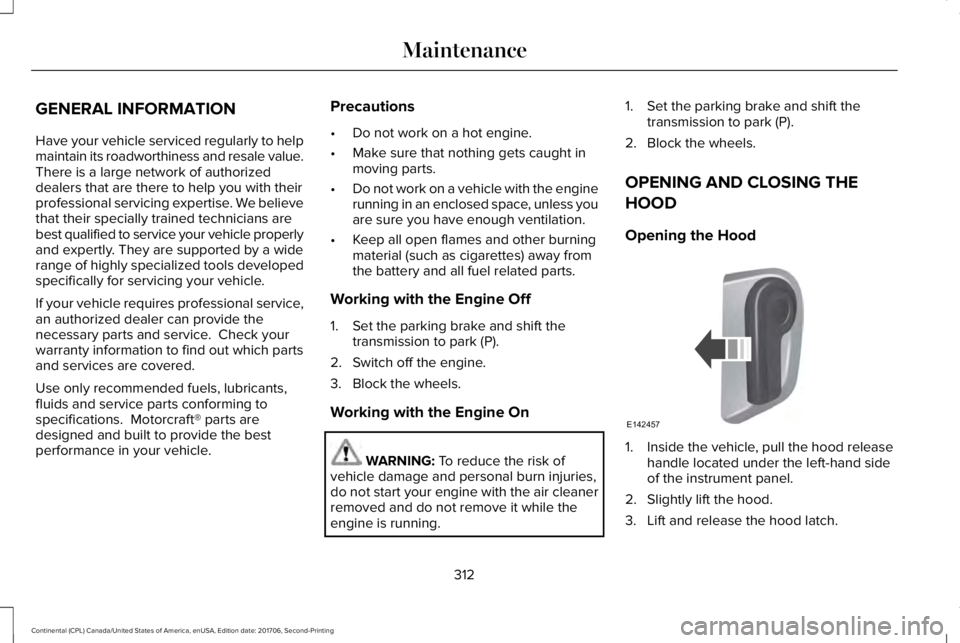
1. Inside the vehicle, pull the hood releasehandle located under the left-hand sideof the instrument panel.
2. Slightly lift the hood.
3. Lift and release the hood latch.
312
Continental (CPL) Canada/United States of America, enUSA, Edition date: 201706, Second-Printing
MaintenanceE142457
Page 321 of 615

Note:Do not remove the dipstick when theengine is running.
Note: If the oil level is between themaximum and minimum marks, the oil levelis acceptable. Do not add oil.
Note:The oil consumption of new enginesreaches its normal level after approximately3,000 mi (5,000 km).
Adding Engine Oil
WARNING: Do not remove the fillercap when the engine is running.
Do not use supplemental engine oil additivesbecause they are unnecessary and couldlead to engine damage that may not becovered by the vehicle Warranty.
Only use oils certified for gasoline enginesby the American Petroleum Institute (API). An oil with this trademark symbol conformsto the current engine and emission systemprotection standards and fuel economyrequirements of the International LubricantsSpecification Advisory Committee (ILSAC).
To top up the engine oil level do thefollowing:
1. Clean the area surrounding the engineoil filler cap before you remove it.
2. Remove the engine oil filler cap. SeeUnder Hood Overview (page 315). Turnit counterclockwise and remove it.
3. Add engine oil that meets ourspecifications. See Capacities andSpecifications (page 382). You may haveto use a funnel to pour the engine oil intothe opening.
4. Recheck the oil level.
5. If the oil level is correct, replace thedipstick and make sure it is fully seated.
6. Replace the engine oil filler cap. Turn itclockwise until you feel a strongresistance.
Note: Do not add oil further than themaximum mark. Oil levels above themaximum mark may cause engine damage.
Note:Make sure you install the oil filler capcorrectly.
Note:Soak up any spillage with anabsorbent cloth immediately.
OIL CHANGE INDICATOR RESET
Use the information display controls on thesteering wheel to reset the oil changeindicator.
318
Continental (CPL) Canada/United States of America, enUSA, Edition date: 201706, Second-Printing
MaintenanceE142732