Page 121 of 544

Features of your vehicle
4-40
PANORAMIC SUNROOF (IF EQUIPPED)
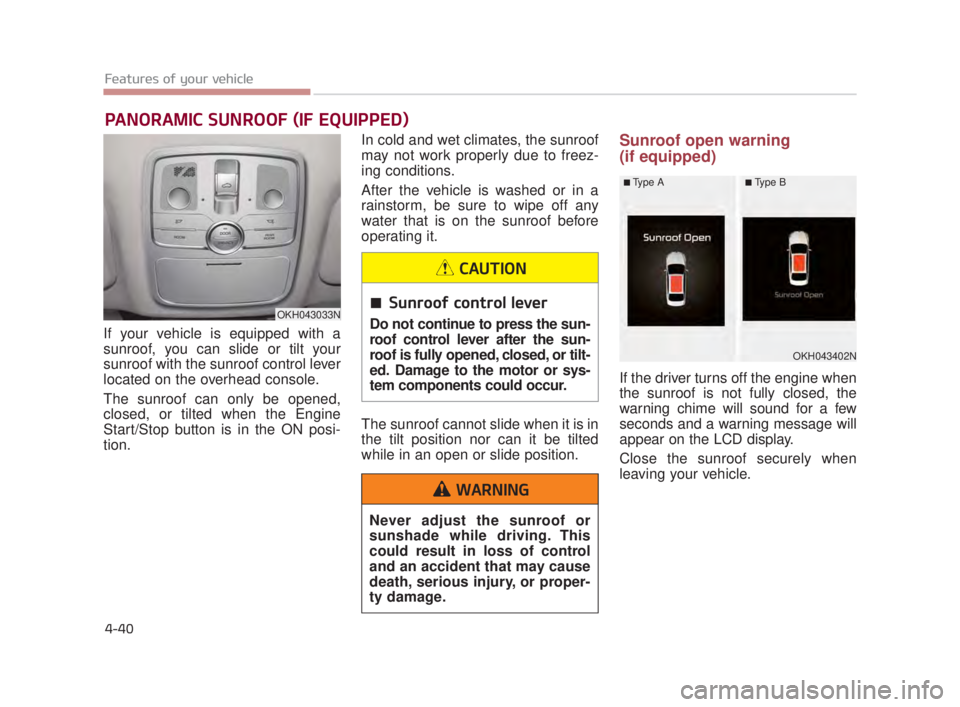
If your vehicle is equipped with a
sunroof, you can slide or tilt your
sunroof with the sunroof control lever
located on the overhead console.
The sunroof can only be opened,
closed, or tilted when the Engine
Start/Stop button is in the ON posi-
tion.In cold and wet climates, the sunroof
may not work properly due to freez-
ing conditions.
After the vehicle is washed or in a
rainstorm, be sure to wipe off any
water that is on the sunroof before
operating it.
The sunroof cannot slide when it is in
the tilt position nor can it be tilted
while in an open or slide position.
Sunroof open warning
(if equipped)
If the driver turns off the engine when
the sunroof is not fully closed, the
warning chime will sound for a few
seconds and a warning message will
appear on the LCD display.
Close the sunroof securely when
leaving your vehicle.
OKH043033N
OKH043402N
■Type A■Type B
Sunroof control lever
Do not continue to press the sun-
roof control lever after the sun-
roof is fully opened, closed, or tilt-
ed. Damage to the motor or sys-
tem components could occur.
CAUTION
Never adjust the sunroof or
sunshade while driving. This
could result in loss of control
and an accident that may cause
death, serious injury, or proper-
ty damage.
WARNING
KH USA 4:2018 4/18/2017 5:57 PM Page 40
Page 122 of 544
Features of your vehicle
4
4-41
Sliding the sunroof
When the sunshade is closed
If you pull the sunroof control lever
backward to the second detent posi-
tion, the sunshade will slide all the
way open, then the sunroof glass will
slide all the way open. To stop the
sunroof movement at any point, pull
or push the sunroof control lever
momentarily.
When the sunshade is opened
If you pull the sunroof control lever
backward, the sunroof glass will slide
all the way open. To stop the sunroof
movement at any point, pull or push
the sunroof control lever momentarily.
OKH043501N
Sunroof operation
When closing the sunroof, make
sure there are no body parts in
the movement range of the slid-
ing roof. Parts of the body could
become trapped or crushed.
WARNING
To avoid accident injury, do not
let children operate the sunroof
without adult supervision.
WARNING
KH USA 4:2018 4/18/2017 5:57 PM Page 41
Page 123 of 544

Features of your vehicle
4-42
Closing the sunroof
To close the sunroof glass only
Push the sunroof control lever for-
ward to the first detent position or
pull the lever downward.
To close the sunroof glass withthe sunshade
Push the sunroof control lever for-
ward to the second detent position.
The sunroof glass will close, then the
sunshade close automatically.
To stop the sunroof movement at any
point, pull or push the sunroof control
lever momentarily.
✽ NOTICE
Only the front glass of the panorama
sunroof opens and closes.
Automatic reversal
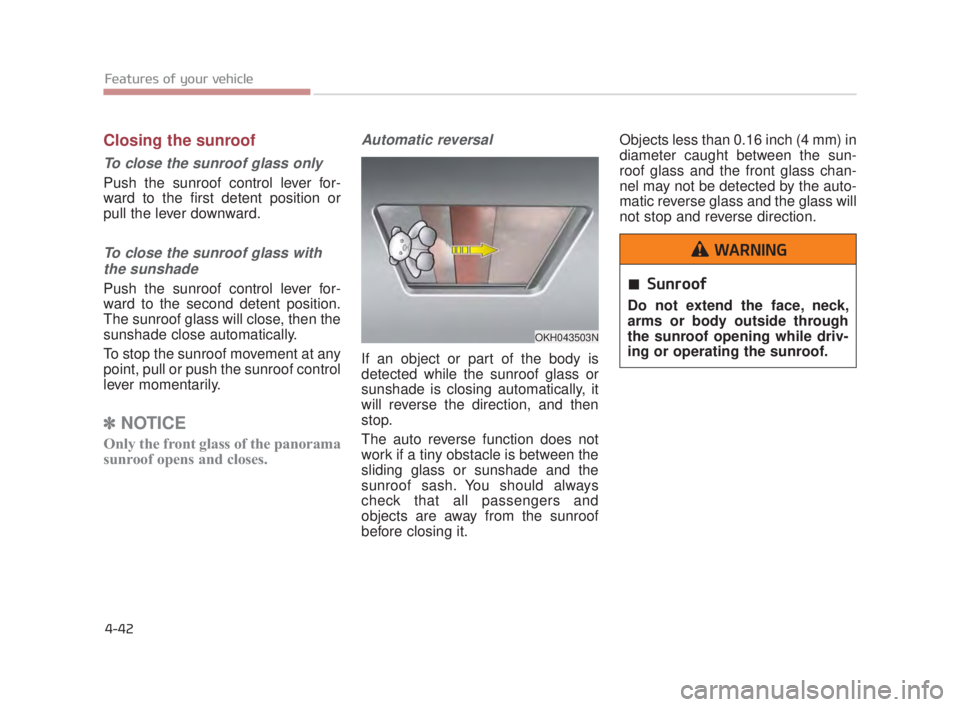
If an object or part of the body is
detected while the sunroof glass or
sunshade is closing automatically, it
will reverse the direction, and then
stop.
The auto reverse function does not
work if a tiny obstacle is between the
sliding glass or sunshade and the
sunroof sash. You should always
check that all passengers and
objects are away from the sunroof
before closing it. Objects less than 0.16 inch (4 mm) in
diameter caught between the sun-
roof glass and the front glass chan-
nel may not be detected by the auto-
matic reverse glass and the glass will
not stop and reverse direction.
OKH043503N
Sunroof
Do not extend the face, neck,
arms or body outside through
the sunroof opening while driv-
ing or operating the sunroof.
WARNING
KH USA 4:2018 4/18/2017 5:57 PM Page 42
Page 126 of 544

Features of your vehicle
4
4-45
STEERING WHEEL
Electronic Hydraulic Power
Steering (EHPS)
This system uses an electromotor to
assist you with steering the vehicle.
If the engine is turned off or if the
EHPS becomes inoperative, you
may still steer the vehicle, but it will
require increased steering effort.
Should you notice any change in the
effort required to steer during normal
vehicle operation, have the EHPS
checked by an authorized K900 Kia
dealer.
✽NOTICE
If the EHPS motor pump malfunc-
tions, the steering effort will greatly
increase.
✽NOTICE
If the vehicle is parked for extended
periods outside in cold weather
(below 14°F/-10°C), the power steer-
ing may require increased effort
when the engine is first started. This
is caused by increased fluid viscosity
due to the cold weather and does not
indicate a malfunction.
When this happens, increase the
engine RPM by depressing accelera-
tor until the RPM reaches 1,500 rpm
then release or let the engine idle for
two or three minutes to warm up the
fluid.
Tilt Steering/Telescope Steering
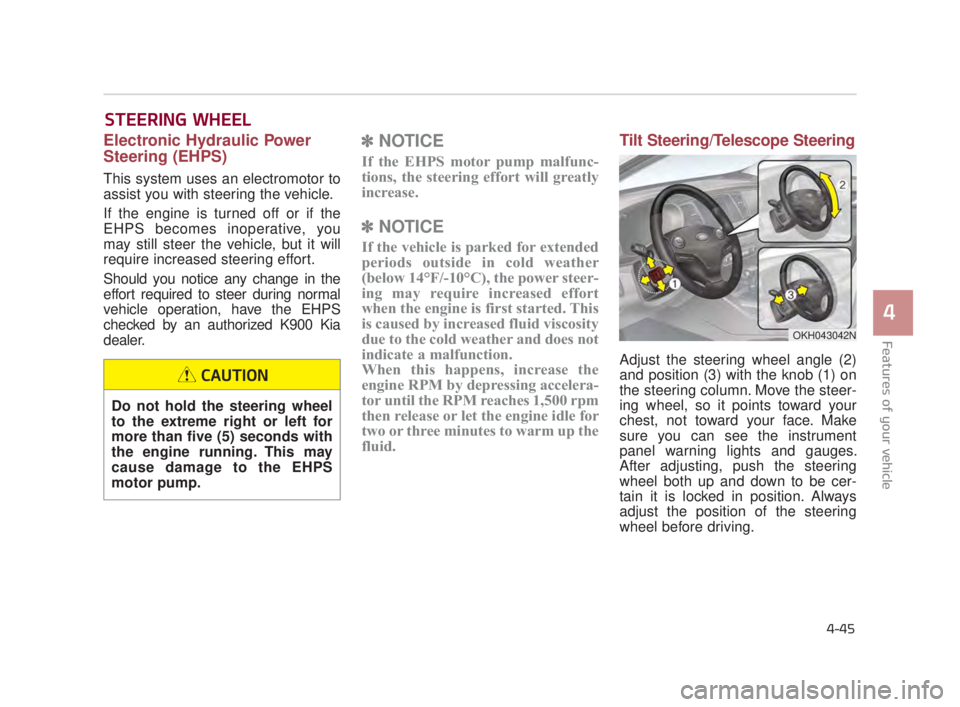
Adjust the steering wheel angle (2)
and position (3) with the knob (1) on
the steering column. Move the steer-
ing wheel, so it points toward your
chest, not toward your face. Make
sure you can see the instrument
panel warning lights and gauges.
After adjusting, push the steering
wheel both up and down to be cer-
tain it is locked in position. Always
adjust the position of the steering
wheel before driving.
Do not hold the steering wheel
to the extreme right or left for
more than five (5) seconds with
the engine running. This may
cause damage to the EHPS
motor pump.
CAUTION
OKH043042N
KH USA 4:2018 4/18/2017 5:57 PM Page 45
Page 127 of 544
Features of your vehicle
4-46
Heated steering wheel
(if equipped)
When the Engine Start/Stop Button
is in the ON position, press the heat-
ed steering wheel button to warm the
steering wheel. The indicator on the
button will illuminate.
To turn the heated steering wheel off,
press the button once again. The
indicator on the button will turn off
and notify you on the LCD display.
OKH043043N
Steering wheel adjustment
Never adjust the angle and
height of the steering wheel
while driving. You may lose
steering control.
WARNING
Steering Wheel Damage
Do not install any grip to oper-
ate the steering wheel. This
causes damage to the heated
steering wheel system.
CAUTION
Heated Steering Wheel
If the steering wheel becomes
too warm, turn the system off.
The heated steering wheel may
cause burns even at low tem-
peratures, especially if used for
long periods of time.
WARNING
KH USA 4:2018 4/18/2017 5:57 PM Page 46
Page 129 of 544

Features of your vehicle
4-48
MIRRORS
Inside rearview mirror
Adjust the rearview mirror so that the
center view through the rear window
is seen. Make this adjustment before
you start driving.
Do not place objects in the rear seat
which would interfere with your vision
through the rear window.
Electric chromic mirror (ECM)with HomeLink®system and
compass (if equipped)
Your vehicle may be equipped with a
Gentex Automatic-Dimming Mirror
with a Z-Nav
®Electronic Compass
Display and an Integrated HomeLink®
Wireless Control System.
During nighttime driving, this feature
will automatically detect and reduce
rearview mirror glare while the com-
pass indicates the direction the vehi-
cle is pointed. The HomeLink
®
Universal Transceiver allows you to
activate your garage door(s), electric
gate, home lighting, etc. (1) Channel 1 button
(2) Channel 2 button
(3) Status indicator LED
(4) Channel 3 button
(5) Rear light sensor
(6) Dimming ON/OFF button
(7) Compass control button
(8) Compass display
OKH043505N
Mirror adjustment
Do not adjust the rearview mirror
while the vehicle is moving. This
could result in loss of control.
WARNING
KH USA 4:2018 4/18/2017 5:57 PM Page 48
Page 145 of 544

Features of your vehicle
4-64
Adjusting outside rearview mirror
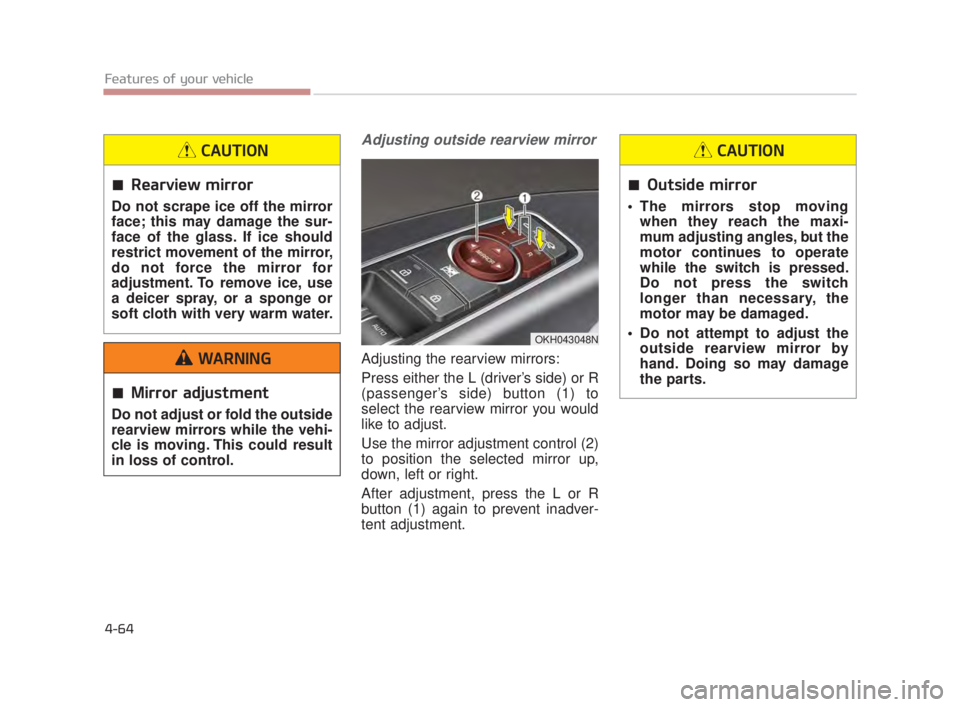
Adjusting the rearview mirrors:
Press either the L (driver’s side) or R
(passenger’s side) button (1) to
select the rearview mirror you would
like to adjust.
Use the mirror adjustment control (2)
to position the selected mirror up,
down, left or right.
After adjustment, press the L or R
button (1) again to prevent inadver-
tent adjustment.
OKH043048N
Rearview mirror
Do not scrape ice off the mirror
face; this may damage the sur-
face of the glass. If ice should
restrict movement of the mirror,
do not force the mirror for
adjustment. To remove ice, use
a deicer spray, or a sponge or
soft cloth with very warm water.
CAUTION
Outside mirror
The mirrors stop movingwhen they reach the maxi-
mum adjusting angles, but the
motor continues to operate
while the switch is pressed.
Do not press the switch
longer than necessary, the
motor may be damaged.
Do not attempt to adjust the outside rearview mirror by
hand. Doing so may damage
the parts.
CAUTION
Mirror adjustment
Do not adjust or fold the outside
rearview mirrors while the vehi-
cle is moving. This could result
in loss of control.
WARNING
KH USA 4:2018 4/18/2017 5:58 PM Page 64
Page 148 of 544
Features of your vehicle
4
4-67
INSTRUMENT CLUSTER
1. Tachometer
2. Speedometer
3. Engine coolant temperature gauge
4. Fuel gauge
5. LCD display
6. Warning and indicator lights
OKH045050N/OKH045051N
■Ty p e A
❈The actual cluster in the vehicle may differ
from the illustration.
For more details, refer to the "Gauges" in
this chapter.
■Ty p e B
KH USA 4:2018 4/18/2017 5:58 PM Page 67