Page 105 of 292

of application services may be chan-
ged or terminated.
. If the smartphone is out of the range
of communication, some functions
cannot be used.
. Before exchanging ownership of the
vehicle, delete application data (Email
data, etc.) stored in the in-vehicle
device.
GETTING USER ID AND PASS-
WORD
When you activate the Infiniti InTouchTM
Mobile Apps service for the first time, you
should acquire the user ID and password in
advance, the acquisition of a user ID and a
setup of a password which logs in to
exclusive applications are required.
INFO:
. It is also possible to acquire an ID and a
password directly from an INFINITI
portal site.
. The vehicle information is required for
entering the user information.
NOTE:
Other applications may not operate as a
result of installing Infiniti InTouch
TMApp.
(It is impossible to perform verification
tests that combine the system with all
possible applications available for a smart-
phone.)
For details of Mobile Apps, please refer to
http://www.infiniti.ca/infinitiintouch.
NOTES ON LINKING SMART-
PHONE APP TO VEHICLE
NOTE:
. The configuration setting for each ap-
plication within the Infiniti InTouch
TM
Mobile Apps must be set to ON in order
for the application to be accessible
through the in-vehicle interface.
. Some applications may not run unless
they are installed on a smartphone.
. The set of applications shown on the in-
vehicle display is determined by the user
ID information registered in the Infiniti
InTouch
TMMobile Apps of the con-
nected smartphone.
. When using each application, it is as-
sumed that the user has already agreed to the user policy of each application in
advance. Accuracy of information that
is obtained using an application is not
guaranteed.
. Even when Mobile Apps are updated,
regular Apps used in a smartphone may
not always be synchronized.
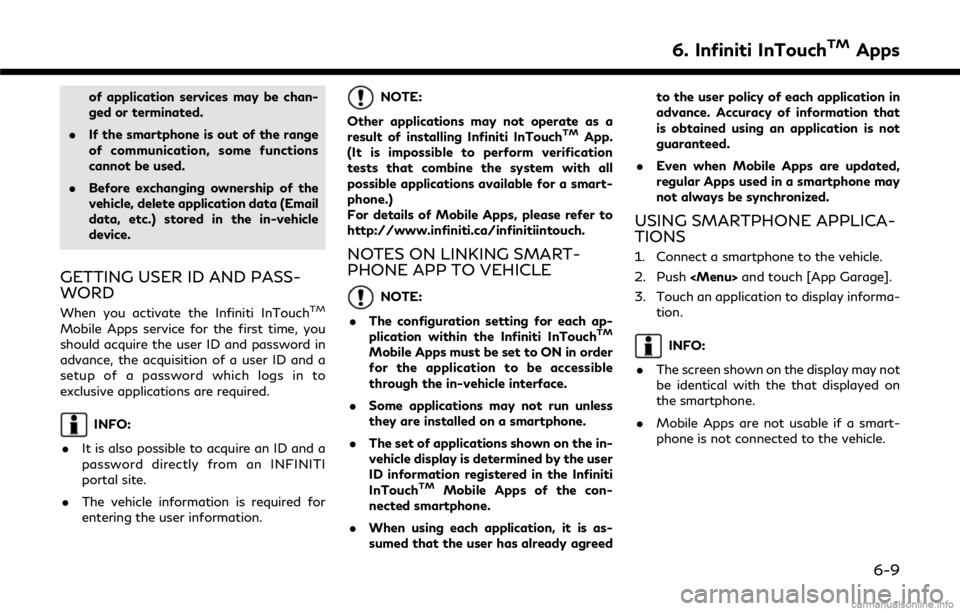
USING SMARTPHONE APPLICA-
TIONS
1. Connect a smartphone to the vehicle.
2. Push
Page 106 of 292
6. Infiniti InTouchTMApps
MEMO
6-10
Page 108 of 292

7. Monitor system
REARVIEW MONITOR (if so
equipped)
WARNING
Failure to follow the warnings and in-
structions for proper use of the RearView
Monitor system could result in serious
injury or death.. The RearView Monitor is a conveni-
ence but it is not a substitute for
proper backing. Always turn and look
out the windows, and check mirrors to
be sure that it is safe to move before
operating the vehicle. Always back up
slowly.
. The system is designed as an aid to
the driver in showing large stationary
objects directly behind the vehicle, to
help avoid damaging the vehicle.
. The distance guide line and the vehicle
width line should be used as a refer-
ence only when the vehicle is on a level
paved surface. The distance viewed
on the monitor is for reference only
and may be different than the actual
distance between the vehicle and displayed objects.
CAUTION
Do not scratch the camera lens when
cleaning dirt or snow from the front of
camera.
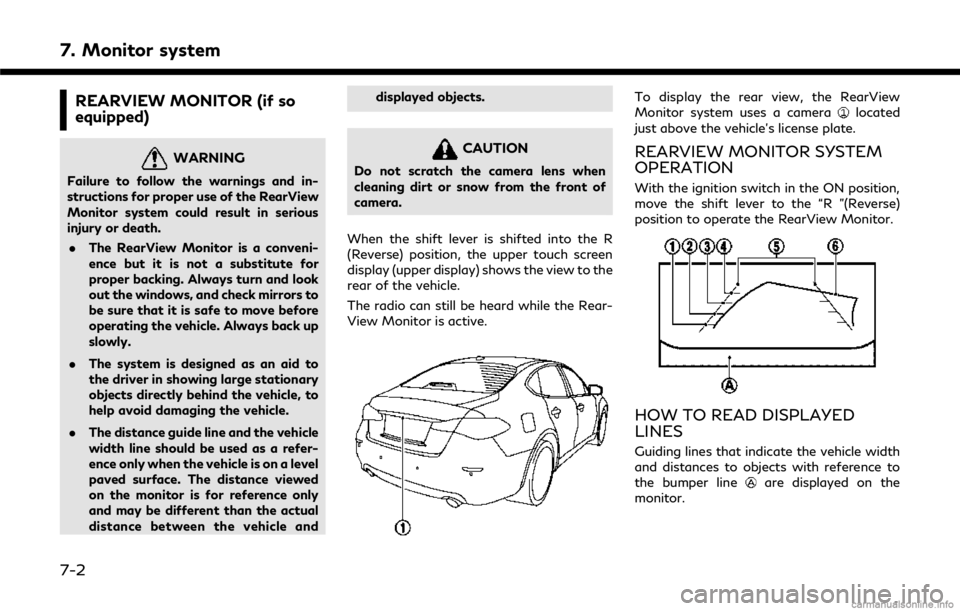
When the shift lever is shifted into the R
(Reverse) position, the upper touch screen
display (upper display) shows the view to the
rear of the vehicle.
The radio can still be heard while the Rear-
View Monitor is active.
To display the rear view, the RearView
Monitor system uses a cameralocated
just above the vehicle’s license plate.
REARVIEW MONITOR SYSTEM
OPERATION
With the ignition switch in the ON position,
move the shift lever to the “R ”(Reverse)
position to operate the RearView Monitor.
HOW TO READ DISPLAYED
LINES
Guiding lines that indicate the vehicle width
and distances to objects with reference to
the bumper line
are displayed on the
monitor.
7-2
Page 111 of 292
Backing up on a steep downhill:
When backing up the vehicle down a hill, the
distance guide lines and the vehicle width
guide lines are shown farther than the actual
distance. Note that any object on the hill is
closer than it appears on the monitor.Backing up near a projecting object:The predictive course linesdo not touch
the object in the display. However, the
vehicle may hit the object if it projects over
the actual backing up course. Backing up behind a projecting object:The positionis shown farther than the
positionin the display. However, the
positionis actually at the same distance
as the position. The vehicle may hit the
object when backing up to the positionif
7. Monitor system
7-5
Page 112 of 292

7. Monitor system
the object projects over the actual backing
up course.
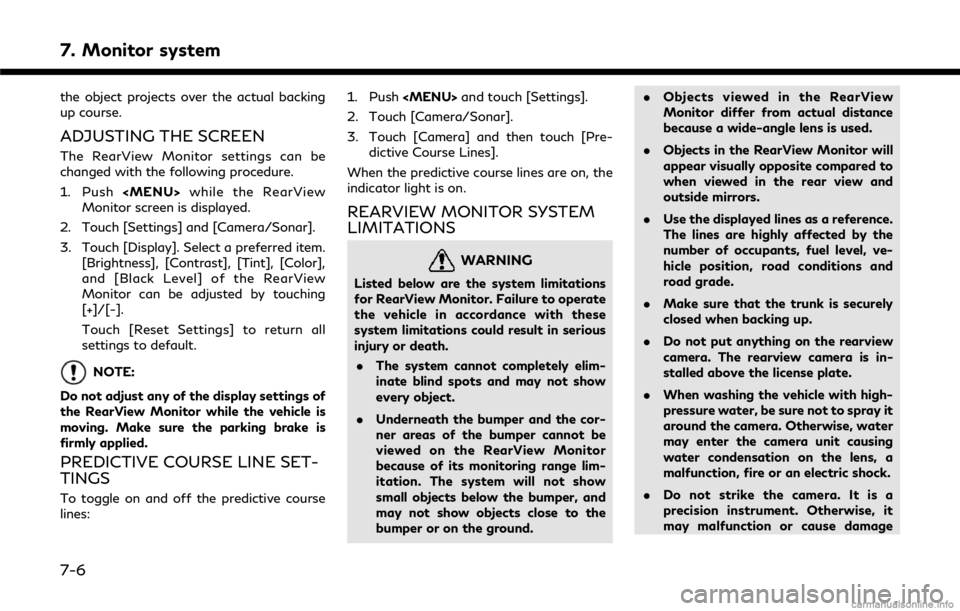
ADJUSTING THE SCREEN
The RearView Monitor settings can be
changed with the following procedure.
1. Push
Page 120 of 292
7. Monitor system
Backing up on a steep downhill:
When backing up the vehicle down a hill, the
distance guide lines and the vehicle width
guide lines are shown farther than the actual
distance. Note that any object on the hill is
closer than it appears on the monitor.Backing up near a projecting object:The predictive course linesdo not touch
the object in the display. However, the
vehicle may hit the object if it projects over
the actual backing up course. Backing up behind a projecting object:The positionis shown farther than the
positionin the display. However, the
positionis actually at the same distance
as the position. The vehicle may hit the
object when backing up to the positionif
7-14
Page 121 of 292

the object projects over the actual backing
up course.
How to switch the display
The Around View® Monitor can display two
split views as well as a single view of the
front-wide view or rear-wide view (if so
equipped). Push, change the
shift lever position, or select [Change View]
to switch between the available views.
INFO:
If the vehicle is equipped with the Back-up
Collision Intervention (BCI) system, [
]
may be displayed on the Around View®
Monitor screen when the shift lever is in the
“R” position. For details of the BCI system,
refer to the vehicle Owner’s Manual.
HOW TO ADJUST THE SCREEN
VIEW
The display settings such as Brightness, Tint,
Color, Contrast and Black Level of the
Around View® Monitor can be adjusted.
1. When the camera screen is displayed on the upper display, push , touch
[Settings] and then touch [Camera/
Sonar].
2. Touch [Display] to adjust camera display.
[Bright-
ness] Adjust the display settings
by touching [+]/[-].
[Con-
trast]
[Black
Level]
[Tint]
[Color] [Reset
Settings] Return all the settings to
default.
NOTE:
Do not adjust any of the display settings of
the Around View® Monitor while the ve-
hicle is moving. Make sure the parking brake
is firmly applied.
AROUND VIEW® MONITOR SET-
TINGS
To set up the Around View® Monitor
function to your preferred settings, push
, touch [Settings] and then touch
[Camera/Sonar].
Touch [Camera] to set the camera function.
Designs and items displayed on the screen
may vary depending on the models. . [Back-up Collision Intervention]:
Turns on/off the Back-up Collision In-
tervention (BCI) system.
Refer to the vehicle Owner’s Manual for
details.
. [Moving Object Detection]:
Turns on/off the MOD system.
“Turning on and off the MOD
system” (page 7-25)
. [MOD Volume]:
Adjust the volume level of the Moving
Object Detection warning.
“Moving Object Detection (MOD)”
(page 7-23)
. [Non-viewable Area Reminder]:
When this item is turned on, the non-
viewable area is highlighted in yellow for
several seconds after the bird’s-eye view
7. Monitor system
7-15
Page 126 of 292

7. Monitor system
Upper display
Sonar indicator
SONAR SYSTEM OPERATION
The system gives the tone for front objects
when the shift lever is in the “D” (Drive)
position and both front and rear objects
when the shift lever is in the “R” (Reverse)
position.
When the camera image is shown on the
center display, the system shows the sonarindicator regardless of the shift lever posi-
tion.
The system is deactivated at speeds above 6
MPH (10 km/h). It is reactivated at lower
speeds.
The colors of the sonar indicators and the
distance guide lines in the front and rear
views (or front-wide and rear-wide views, if
so equipped) indicate different distances to
the object.
When the objects are detected, the indicator
(green) appears and blinks and the tone
sounds intermittently. When the vehiclemoves closer to the object, the color of the
indicator turns yellow and the rate of the
blinking and the rate of the tone increase.
When the vehicle is very close to the object,
the indicator stops blinking and turns red,
and the tone sounds continuously.
The intermittent tone will stop after 3
seconds when an object is detected by only
the corner sonar and the distance does not
change.
The tone will stop when the object is no
longer near the vehicle.
TURNING ON AND OFF THE SO-
NAR FUNCTION
When the Sonar·MOD keyis touched, the
indicator light on the keywill turn off and
the sonar will turn off temporarily. The
7-20