2018 Hyundai Kona engine
[x] Cancel search: enginePage 105 of 497
3-27
Convenient features of your vehicle
3
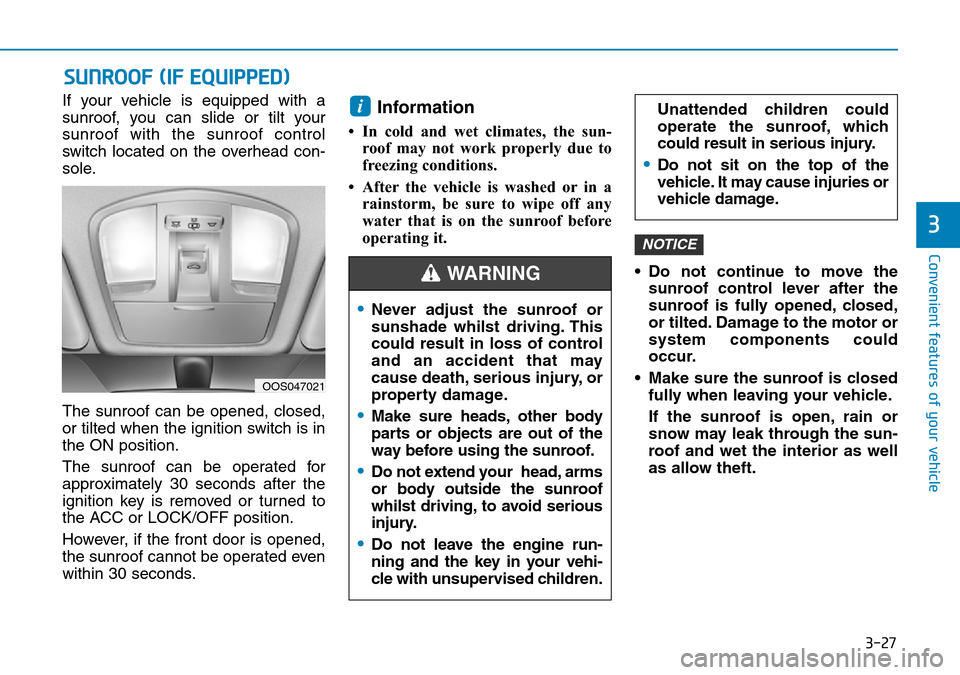
If your vehicle is equipped with a
sunroof, you can slide or tilt your
sunroof with the sunroof control
switch located on the overhead con-
sole.
The sunroof can be opened, closed,
or tilted when the ignition switch is in
the ON position.
The sunroof can be operated for
approximately 30 seconds after the
ignition key is removed or turned to
the ACC or LOCK/OFF position.
However, if the front door is opened,
the sunroof cannot be operated even
within 30 seconds.Information
• In cold and wet climates, the sun-roof may not work properly due to
freezing conditions.
• After the vehicle is washed or in a rainstorm, be sure to wipe off any
water that is on the sunroof before
operating it.
• Do not continue to move thesunroof control lever after the
sunroof is fully opened, closed,
or tilted. Damage to the motor or
system components could
occur.
• Make sure the sunroof is closed fully when leaving your vehicle.
If the sunroof is open, rain or
snow may leak through the sun-
roof and wet the interior as well
as allow theft.
NOTICE
i
SUNROOF (IF EQUIPPED)
OOS047021
•Never adjust the sunroof or
sunshade whilst driving. This
could result in loss of control
and an accident that may
cause death, serious injury, or
property damage.
•Make sure heads, other body
parts or objects are out of the
way before using the sunroof.
•Do not extend your head, arms
or body outside the sunroof
whilst driving, to avoid serious
injury.
•Do not leave the engine run-
ning and the key in your vehi-
cle with unsupervised children.
Unattended children could
operate the sunroof, which
could result in serious injury.
•Do not sit on the top of the
vehicle. It may cause injuries or
vehicle damage.
WARNING
Page 108 of 497
3-30
Convenient features of your vehicle
Resetting the sunroof
The sunroof may need to be reset if
the following conditions occur:
- The battery is discharged or dis- connected or the sunroof fuse has
been replaced or disconnected
- The sunroof control lever is not operating correctly
To reset the sunroof, perform the fol-
lowing steps:
1. Place the ignition switch to the ON position or start the engine. It is
recommended to reset the sunroof
whilst the engine is running.
2. Push the control lever forward. The sunroof will close completely or tilt
depending on the condition of the
sunroof.
3. Release the control lever until the sunroof does not move.
4. Push the control lever forward about 10 seconds.
- When the sunroof is in the close position :
The glass will tilt and slightly move up and down. - When the sunroof is in the tilt
position:
The glass will slightly move up and down.
Do not release the lever until the
operation is completed.
If you release the lever during opera-
tion, try again from step 2.
5. Within 3 seconds, push the control lever forward until the sunroof
operates as follows:
Tilt down → Slide Open → Slide
Close.
Do not release the lever until the
operation is completed.
If you release the lever during opera-
tion, try again from step 2.
6. Release the sunroof control lever after all operation has completed.
(The sunroof system has been
reset.)
Information
• If the sunroof does not reset whenthe vehicle battery is disconnected
or discharged, or related fuse is
blown, the sunroof may not operate
normally.
• For more detailed information, we recommend that you contact a
HYUNDAI authorised repairer.
Sunroof open warning
(if equipped)
• If the driver turns off the enginewhen the sunroof is not fully
closed, the warning chime will
sound for approximately 3 seconds
and sunroof open warning will
appear on the LCD display.
• If the driver turns off the engine and opens the door when the sun-
roof is not fully closed, the open
sunroof warning will appear on the
LCD display until the door is closed
or the sunroof is fully closed.
Close the sunroof securely when
leaving your vehicle.
i
Page 109 of 497
3-31
Convenient features of your vehicle
3
EXTERIOR FEATURES
Bonnet
Opening the bonnet
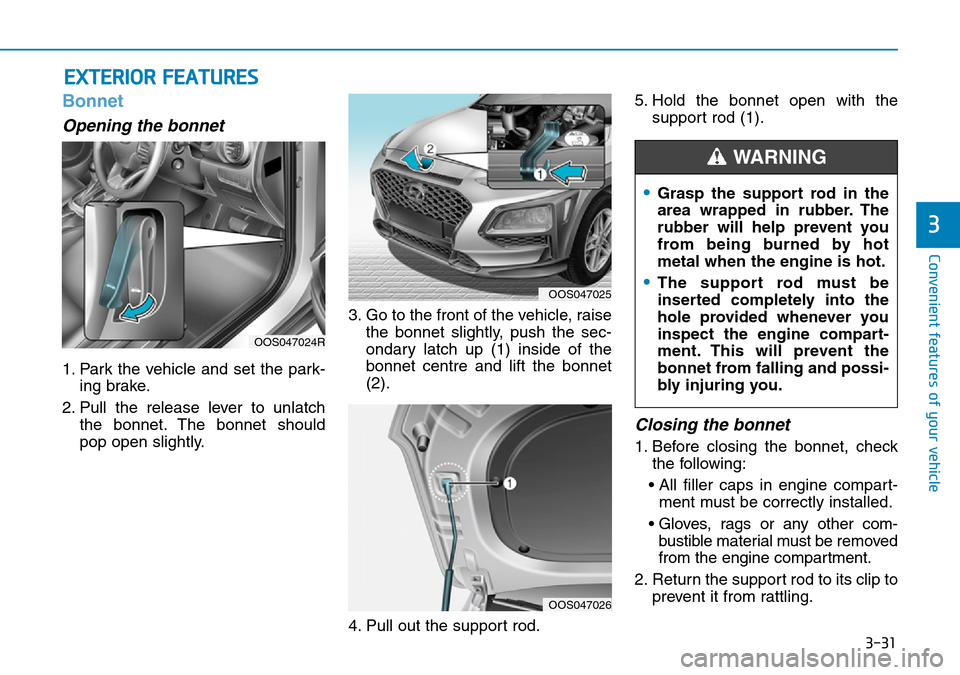
1. Park the vehicle and set the park-ing brake.
2. Pull the release lever to unlatch the bonnet. The bonnet should
pop open slightly. 3. Go to the front of the vehicle, raise
the bonnet slightly, push the sec-
ondary latch up (1) inside of the
bonnet centre and lift the bonnet
(2).
4. Pull out the support rod. 5. Hold the bonnet open with the
support rod (1).
Closing the bonnet
1. Before closing the bonnet, checkthe following:
• All filler caps in engine compart- ment must be correctly installed.
• Gloves, rags or any other com- bustible material must be removed
from the engine compartment.
2. Return the support rod to its clip to prevent it from rattling.
OOS047024R
OOS047025
•Grasp the support rod in the
area wrapped in rubber. The
rubber will help prevent you
from being burned by hot
metal when the engine is hot.
•The support rod must be
inserted completely into the
hole provided whenever you
inspect the engine compart-
ment. This will prevent the
bonnet from falling and possi-
bly injuring you.
WARNING
OOS047026
Page 112 of 497
3-34
Convenient features of your vehicle
Emergency tailgate safetyrelease
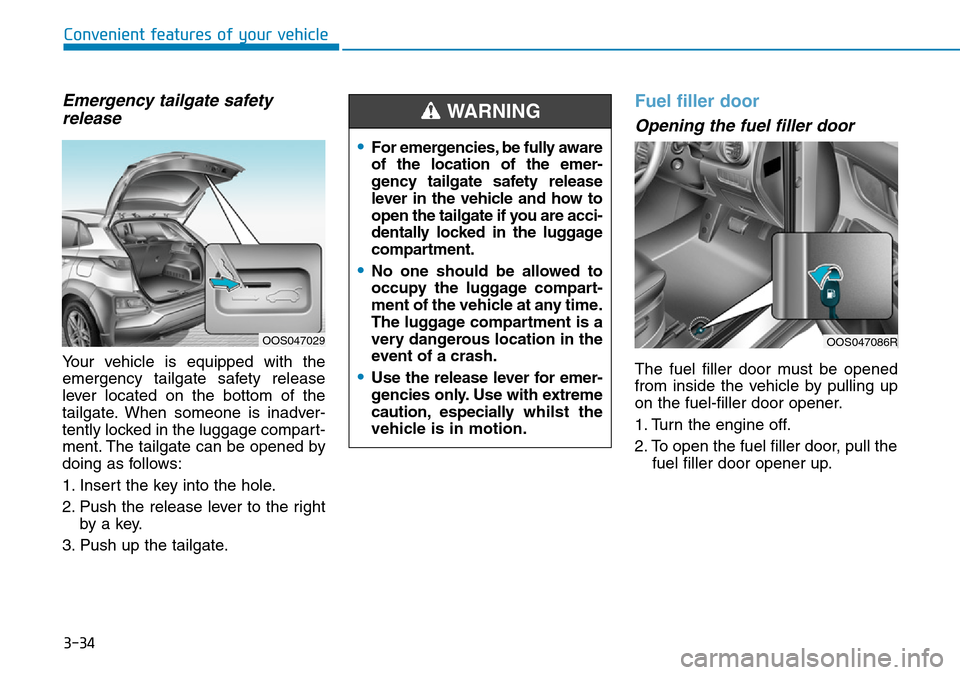
Your vehicle is equipped with the
emergency tailgate safety release
lever located on the bottom of the
tailgate. When someone is inadver-
tently locked in the luggage compart-
ment. The tailgate can be opened by
doing as follows:
1. Insert the key into the hole.
2. Push the release lever to the right
by a key.
3. Push up the tailgate.
Fuel filler door
Opening the fuel filler door
The fuel filler door must be opened
from inside the vehicle by pulling up
on the fuel-filler door opener.
1. Turn the engine off.
2. To open the fuel filler door, pull the fuel filler door opener up.
OOS047086ROOS047029
•For emergencies, be fully aware
of the location of the emer-
gency tailgate safety release
lever in the vehicle and how to
open the tailgate if you are acci-
dentally locked in the luggage
compartment.
•No one should be allowed to
occupy the luggage compart-
ment of the vehicle at any time.
The luggage compartment is a
very dangerous location in the
event of a crash.
•Use the release lever for emer-
gencies only. Use with extreme
caution, especially whilst the
vehicle is in motion.
WARNING
Page 114 of 497
3-36
Convenient features of your vehicle
•Use only approved portable
plastic fuel containers
designed to carry and store
petrol.
•Do not use matches or a
lighter and do not smoke or
leave a lit cigarette in your
vehicle whilst at a gas station,
especially during refuelling.
•Do not over-fill or top-off your
vehicle tank, which can cause
petrol spillage.
•If a fire breaks out during refu-
elling, leave the vicinity of the
vehicle, and immediately con-
tact the manager of the gas
station and then contact the
local fire department. Follow
any safety instructions they
provide.
•When refuelling, always move
the shift lever to the P (Park,
for dual clutch transmission)
or first gear or R (Reverse, for
manual transmission) posi-
tion, set the parking brake, and
place the ignition switch to the
LOCK/OFF position. Sparks
produced by electrical compo-
nents related to the engine can
ignite fuel
vapourscausing a
fire.
•When using an approved
portable fuel container, be
sure to place the container on
the ground prior to refuelling.
Static electricity discharge
from the container can ignite
fuel vapours causing a fire.
Once refuelling has begun,
contact between your bare
hand and the vehicle should
be maintained until the filling
is complete.
•Do not use mobile phones
whilst refuelling. Electric cur-
rent and/or electronic interfer-
ence from mobile phones can
potentially ignite fuel vapours
and cause a fire.
•Do not get back into a vehicle
once you have begun refu-
elling. You can generate a
build-up of static electricity by
touching, rubbing or sliding
against any item or fabric
capable of producing static
electricity.
Static electricity discharge
can ignite fuel vapours caus-
ing a fire. If you must re-enter
the vehicle, you should once
again eliminate potentially
dangerous static electricity
discharge by touching a metal
part of the vehicle, away from
the fuel filler neck, nozzle or
other petrol source, with your
bare hand.
Page 116 of 497
3-38
Convenient features of your vehicle
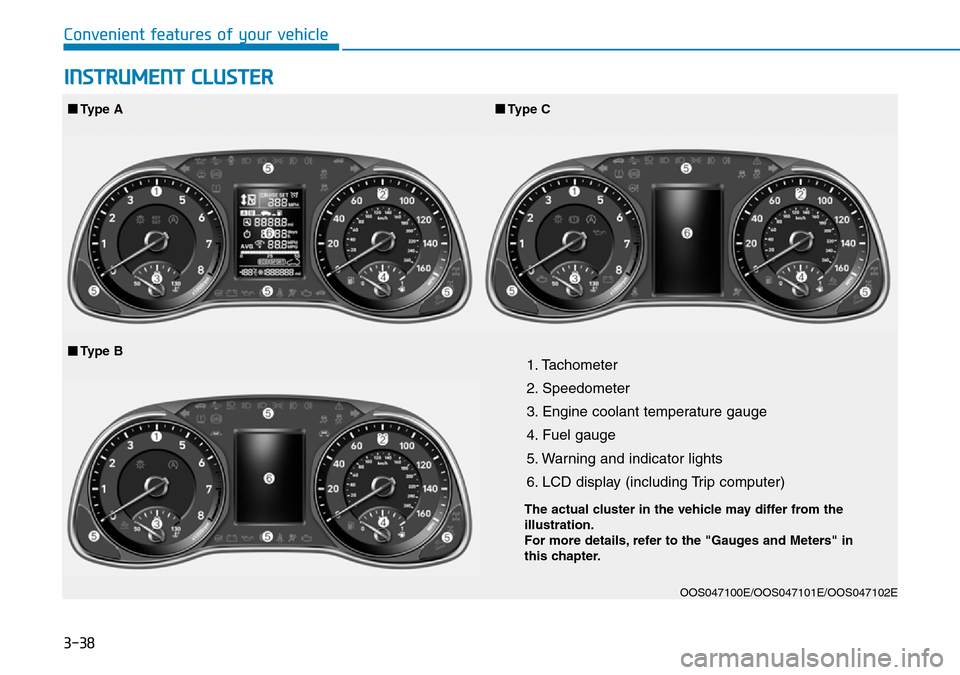
1. Tachometer
2. Speedometer
3. Engine coolant temperature gauge
4. Fuel gauge
5. Warning and indicator lights
6. LCD display (including Trip computer)
OOS047100E/OOS047101E/OOS047102E
■Type A■Type C
■Type B
INSTRUMENT CLUSTER
The actual cluster in the vehicle may differ from the
illustration.
For more details, refer to the "Gauges and Meters" in
this chapter.
Page 118 of 497
3-40
Convenient features of your vehicle
Tachometer
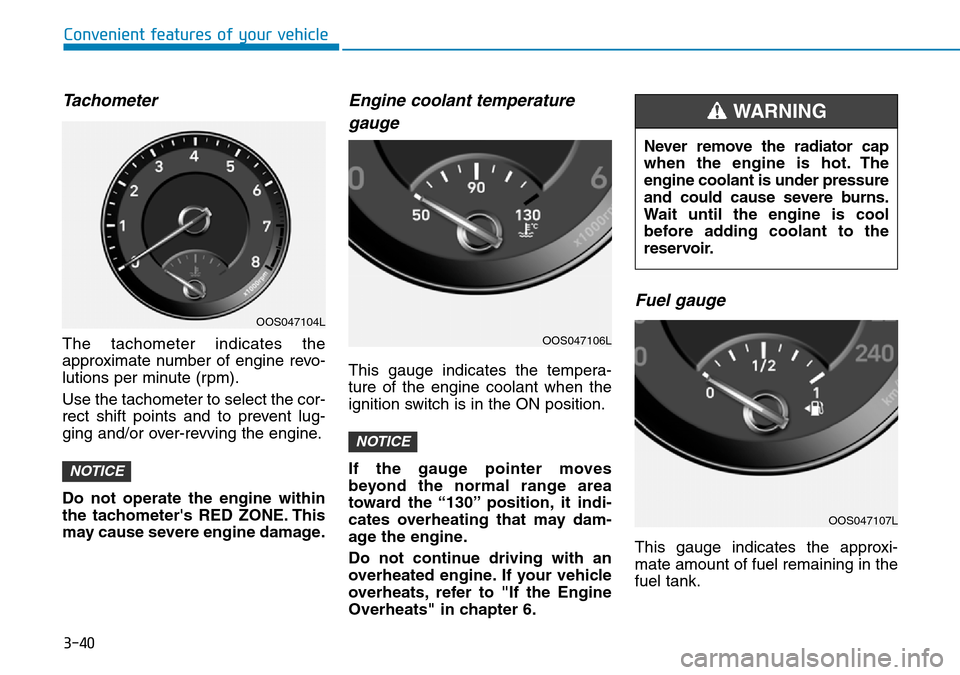
The tachometer indicates the
approximate number of engine revo-
lutions per minute (rpm).
Use the tachometer to select the cor-
rect shift points and to prevent lug-
ging and/or over-revving the engine.
Do not operate the engine within
the tachometer's RED ZONE. This
may cause severe engine damage.
Engine coolant temperaturegauge
This gauge indicates the tempera-
ture of the engine coolant when the
ignition switch is in the ON position.
If the gauge pointer moves
beyond the normal range area
toward the “130” position, it indi-
cates overheating that may dam-
age the engine.
Do not continue driving with an
overheated engine. If your vehicle
overheats, refer to "If the Engine
Overheats" in chapter 6.
Fuel gauge
This gauge indicates the approxi-
mate amount of fuel remaining in the
fuel tank.
NOTICE
NOTICE
OOS047104L
OOS047106L
Never remove the radiator cap
when the engine is hot. The
engine coolant is under pressure
and could cause severe burns.
Wait until the engine is cool
before adding coolant to the
reservoir.
WARNING
OOS047107L
Page 119 of 497
3-41
Convenient features of your vehicle
3
Information
• The fuel tank capacity is given inchapter 8.
• The fuel gauge is supplemented by a low fuel warning light, which will
illuminate when the fuel tank is
nearly empty.
• On inclines or curves, the fuel gauge pointer may fluctuate or the low fuel
warning light may come on earlier
than usual due to the movement of
fuel in the tank.
Avoid driving with an extremely
low fuel level. Running out of fuel
could cause the engine to misfire
damaging the catalytic converter.
Outside temperature gauge
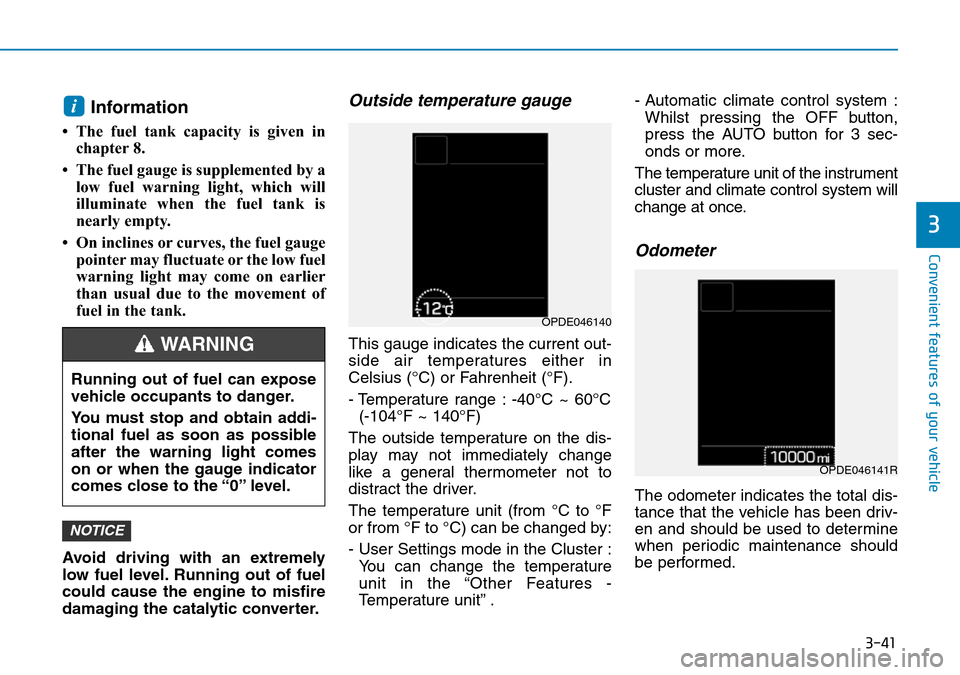
This gauge indicates the current out-
side air temperatures either in
Celsius (°C) or Fahrenheit (°F).
- Temperature range : -40°C ~ 60°C (-104°F ~ 140°F)
The outside temperature on the dis-
play may not immediately change
like a general thermometer not to
distract the driver.
The temperature unit (from °C to °F
or from °F to °C) can be changed by:
- User Settings mode in the Cluster : You can change the temperature
unit in the “Other Features -
Temperature unit” . - Automatic climate control system :
Whilst pressing the OFF button,
press the AUTO button for 3 sec-
onds or more.
The temperature unit of the instrument
cluster and climate control system will
change at once.
Odometer
The odometer indicates the total dis-
tance that the vehicle has been driv-
en and should be used to determine
when periodic maintenance should
be performed.
NOTICE
i
Running out of fuel can expose
vehicle occupants to danger.
You must stop and obtain addi-
tional fuel as soon as possible
after the warning light comes
on or when the gauge indicator
comes close to the “0” level.
WARNING
OPDE046140
OPDE046141R