2018 Hyundai Kona engine
[x] Cancel search: enginePage 147 of 497
3-69
Convenient features of your vehicle
3
• FCW (Forward Collision Warning)- Late/Normal/Early
To adjust the initial warning alert time
for Forward Collision-Avoidance
Assist (FCA) system.
For more information, refer to
"Forward Collision-Avoidance
Assist (FCA) system" in chapter 5.
• BCW sound (Blind-Spot Collision Warning)
To activate or deactivate the Blind-
Spot Collision Warning (BCW) sound.
For more information, refer to "
Blind-Spot Collision Warning
(BCW) system" in chapter 5.
• BCW (Blind-Spot Collision Warning)
To activate or deactivate the Blind-
Spot Collision Warning (BCW) sys-
tem.
For more information, refer to
"Blind-Spot Collision Warning
(BCW) system" in chapter 5. 3. Door
• Auto lock
- Disable: The auto door lock opera-
tion will be cancelled.
- Enable on speed: All doors will be automatically locked when the vehi-
cle speed exceeds 9mph (15km/h).
- Enable on shift: All doors will be automatically locked if the dual
clutch transmission shift lever is
shifted from the P (Park) position to
the R (Reverse), N (Neutral), or D
(Drive) position.
• Auto unlock
- Disable: The auto door unlock oper- ation will be cancelled.
- Vehicle Off: All doors will be auto- matically unlocked when the
Engine Star/Stop button is set to
the OFF position. (if equipped with
smart key) - On key out: All doors will be auto-
matically unlocked when the igni-
tion key is removed from the igni-
tion switch. (if equipped with remote
key)
- On shift to P: All doors will be auto- matically unlocked if the dual clutch
transmission shift lever is shifted to
the P (Park) position.
- Driver door unlock: All doors will be automatically unlocked when the
driver’s door is opened.
• Horn feedback
To activate or deactivate the horn
feedback.
If the horn feedback is activated,
after locking the door by pressing the
lock button on the remote key, and
pressing it again within 4 seconds,
the horn feedback sound will operate
once to indicate that all doors are
locked. (if equipped with remote key)
Page 149 of 497
3-71
Convenient features of your vehicle
3
7. Service interval
• Service interval
To activate or deactivate the service
interval function.
• Adjust interval
If the service interval menu is acti-
vated, you may adjust the time and
distance.
Information
To use the service interval menu, con-
sult a HYUNDAI authorised repairer.
If the service interval is activated and
the time and distance is adjusted,
messages are displayed in the fol-
lowing situations each time the vehi-
cle is turned on.
- Service in: Displayed to inform the driver theremaining mileage and days to
service.
- Service required : Displayed when the mileage anddays to service has been reached
or passed.
Information
If any of the following conditions
occur, the mileage and number of days
to service may be incorrect.
- The battery cable is disconnected.
- The fuse switch is turned off.
- The battery is discharged.
8. Other features
• Fuel economy auto reset
- Off: The average fuel economy will not reset automatically whenever
refuelling.
- After ignition: When the engine has been OFF for 4 hours or longer the
average fuel economy will reset
automatically.
- After refuelling: The average fuel economy will reset automatically
after adding 6 litres (1.3 lmp. gal.)
of fuel or more and after driving
speed exceeds 1 mph (1 km/h).
For more information, refer to
"Trip Computer" in this chapter. • Fuel economy unit
To select the fuel economy unit.
(UK gallon, US gallon)
• Temperature unit
To select the temperature unit.
(°C,°F)
• Tyre pressure unit
To select the tyre pressure unit.
(psi, kPa, bar)
9. Language
Choose the language.
10. Reset
You can reset the menus in the User
Settings Mode. All menus in the User
Settings Mode are initialised, except
language and service interval.
i
i
Page 152 of 497
3-74
Convenient features of your vehicle
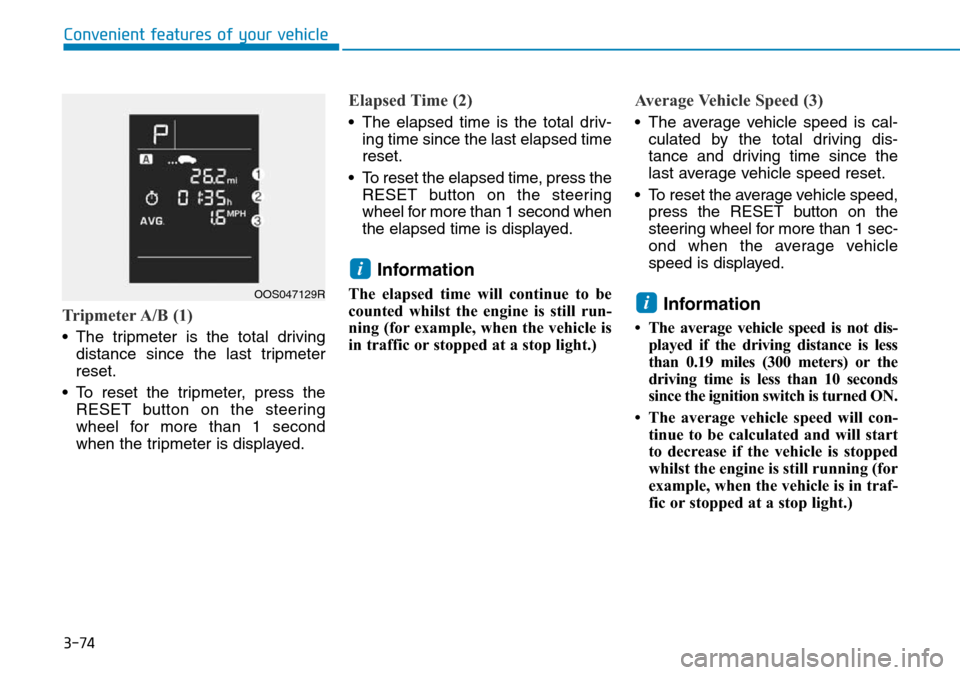
Tripmeter A/B (1)
• The tripmeter is the total drivingdistance since the last tripmeter
reset.
• To reset the tripmeter, press the RESET button on the steering
wheel for more than 1 second
when the tripmeter is displayed.
Elapsed Time (2)
• The elapsed time is the total driv-ing time since the last elapsed time
reset.
• To reset the elapsed time, press the RESET button on the steering
wheel for more than 1 second when
the elapsed time is displayed.
Information
The elapsed time will continue to be
counted whilst the engine is still run-
ning (for example, when the vehicle is
in traffic or stopped at a stop light.)
Average Vehicle Speed (3)
• The average vehicle speed is cal-culated by the total driving dis-
tance and driving time since the
last average vehicle speed reset.
• To reset the average vehicle speed, press the RESET button on the
steering wheel for more than 1 sec-
ond when the average vehicle
speed is displayed.
Information
• The average vehicle speed is not dis-played if the driving distance is less
than 0.19 miles (300 meters) or the
driving time is less than 10 seconds
since the ignition switch is turned ON.
• The average vehicle speed will con- tinue to be calculated and will start
to decrease if the vehicle is stopped
whilst the engine is still running (for
example, when the vehicle is in traf-
fic or stopped at a stop light.)
i
i
OOS047129R
Page 156 of 497
3-78
Convenient features of your vehicle
Fuel economy
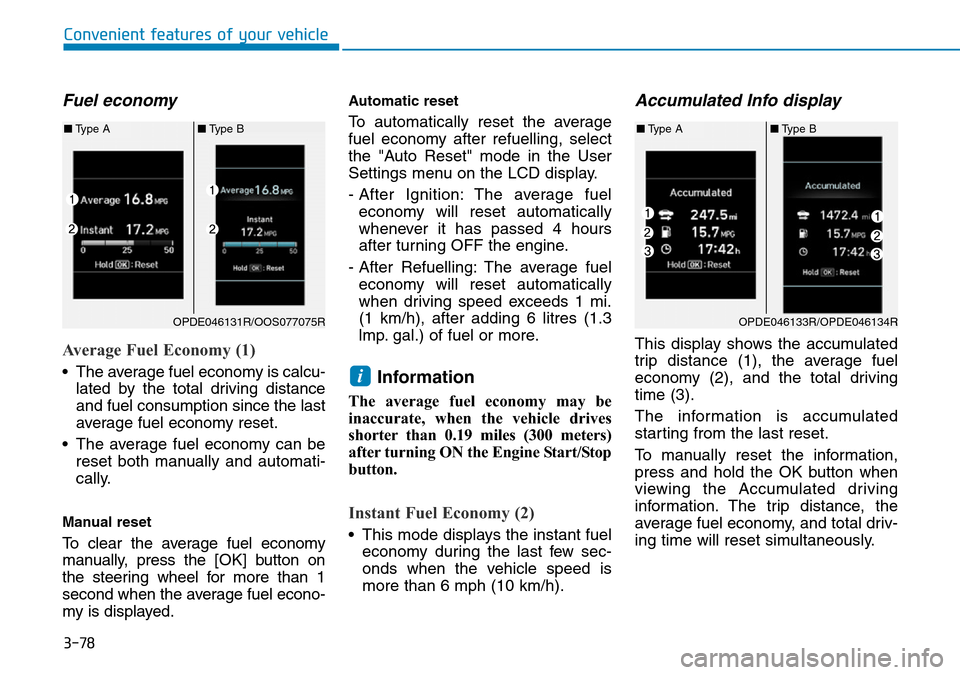
Average Fuel Economy (1)
• The average fuel economy is calcu-lated by the total driving distance
and fuel consumption since the last
average fuel economy reset.
• The average fuel economy can be reset both manually and automati-
cally.
Manual reset
To clear the average fuel economy
manually, press the [OK] button on
the steering wheel for more than 1
second when the average fuel econo-
my is displayed.
Automatic reset
To automatically reset the average
fuel economy after refuelling, select
the "Auto Reset" mode in the User
Settings menu on the LCD display.
- After Ignition: The average fuel economy will reset automatically
whenever it has passed 4 hours
after turning OFF the engine.
- After Refuelling: The average fuel economy will reset automatically
when driving speed exceeds 1 mi.
(1 km/h), after adding 6 litres (1.3
lmp. gal.) of fuel or more.
Information
The average fuel economy may be
inaccurate, when the vehicle drives
shorter than 0.19 miles (300 meters)
after turning ON the Engine Start/Stop
button.
Instant Fuel Economy (2)
• This mode displays the instant fuel economy during the last few sec-
onds when the vehicle speed is
more than 6 mph (10 km/h).
Accumulated Info display
This display shows the accumulated
trip distance (1), the average fuel
economy (2), and the total driving
time (3).
The information is accumulated
starting from the last reset.
To manually reset the information,
press and hold the OK button when
viewing the Accumulated driving
information. The trip distance, the
average fuel economy, and total driv-
ing time will reset simultaneously.
i
OPDE046131R/OOS077075R
■ Type A ■Type B
OPDE046133R/OPDE046134R
■Type A ■Type B
Page 157 of 497
3-79
Convenient features of your vehicle
3
The accumulated driving information
will continue to be counted whilst the
engine is still running (for example,
when the vehicle is in traffic or
stopped at a stop light).
Information
The vehicle must be driven for a min-
imum of 0.19 miles (300 meters) since
the last ignition key cycle before the
average fuel economy will be recalcu-
lated.
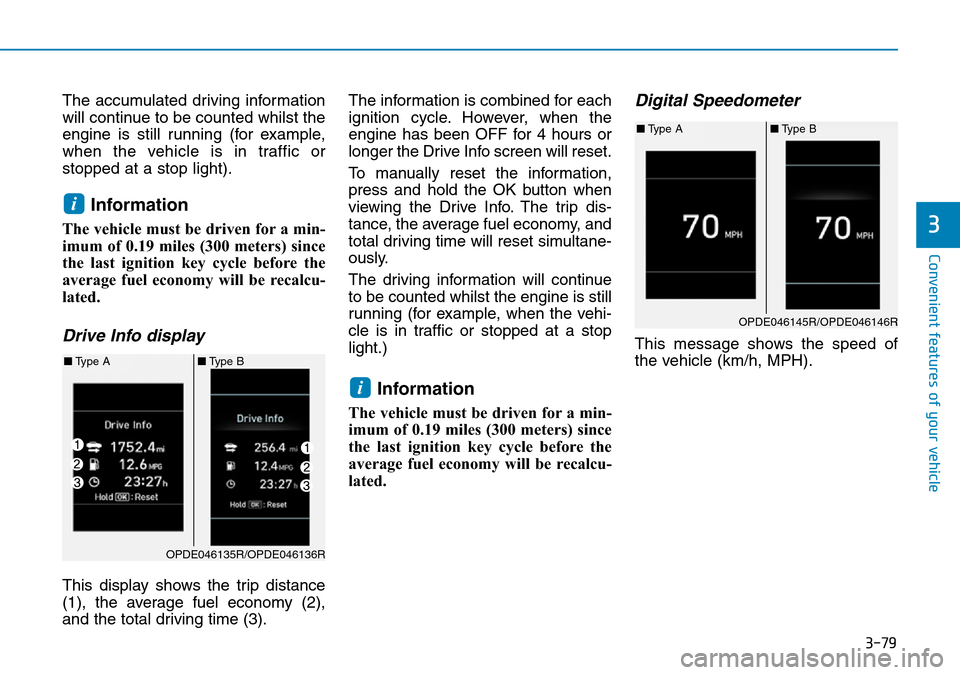
Drive Info display
This display shows the trip distance
(1), the average fuel economy (2),
and the total driving time (3).The information is combined for each
ignition cycle. However, when the
engine has been OFF for 4 hours or
longer the Drive Info screen will reset.
To manually reset the information,
press and hold the OK button when
viewing the Drive Info. The trip dis-
tance, the average fuel economy, and
total driving time will reset simultane-
ously.
The driving information will continue
to be counted whilst the engine is still
running (for example, when the vehi-
cle is in traffic or stopped at a stop
light.)
Information
The vehicle must be driven for a min-
imum of 0.19 miles (300 meters) since
the last ignition key cycle before the
average fuel economy will be recalcu-
lated.
Digital Speedometer
This message shows the speed of
the vehicle (km/h, MPH).
i
i
OPDE046135R/OPDE046136R
■
Type A ■Type B
OPDE046145R/OPDE046146R
■Type A ■Type B
Page 159 of 497
3-81
Convenient features of your vehicle
3
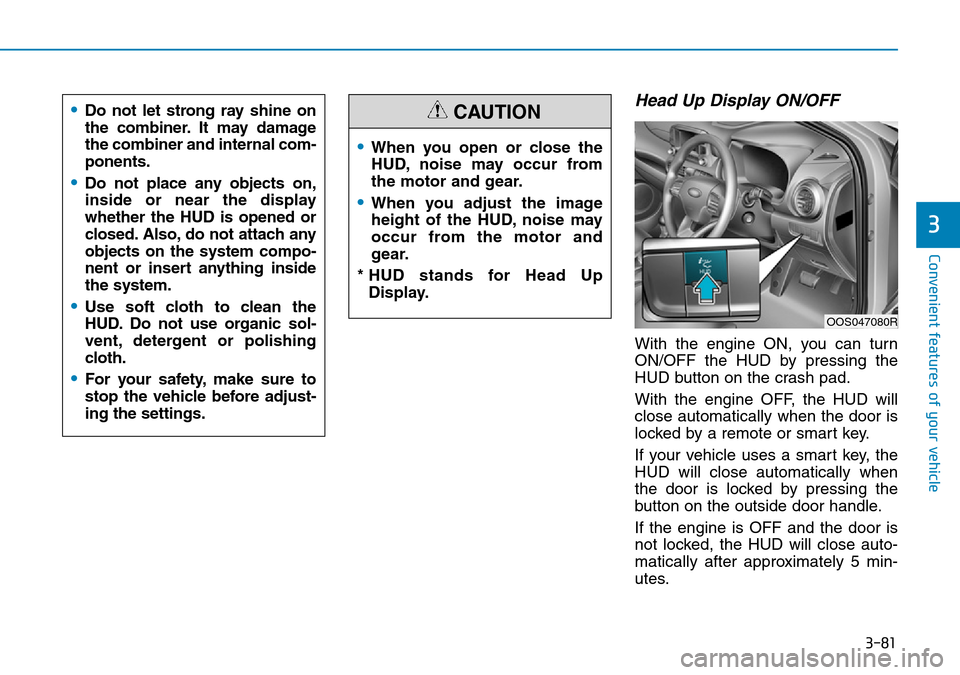
Head Up Display ON/OFF
With the engine ON, you can turn
ON/OFF the HUD by pressing the
HUD button on the crash pad.
With the engine OFF, the HUD will
close automatically when the door is
locked by a remote or smart key.
If your vehicle uses a smart key, the
HUD will close automatically when
the door is locked by pressing the
button on the outside door handle.
If the engine is OFF and the door is
not locked, the HUD will close auto-
matically after approximately 5 min-
utes.
•When you open or close the
HUD, noise may occur from
the motor and gear.
•When you adjust the image
height of the HUD, noise may
occur from the motor and
gear.
* HUD stands for Head Up Display.
CAUTION
OOS047080R
•Do not let strong ray shine on
the combiner. It may damage
the combiner and internal com-
ponents.
•Do not place any objects on,
inside or near the display
whether the HUD is opened or
closed. Also, do not attach any
objects on the system compo-
nent or insert anything inside
the system.
•Use soft cloth to clean the
HUD. Do not use organic sol-
vent, detergent or polishing
cloth.
•For your safety, make sure to
stop the vehicle before adjust-
ing the settings.
Page 168 of 497
3-90
Convenient features of your vehicle
Battery saver function
The purpose of this feature is to pre-
vent the battery from being dis-
charged. The system automatically
turns off the position lamp when the
driver turns the engine off and opens
the driver-side door.
With this feature, the position lamps
will turn off automatically if the driver
parks on the side of road at night.
If necessary, to keep the lamps on
when the engine is turned off, perform
the following:
1) Open the driver-side door.
2) Turn the position lamps OFF andON again using the light switch on
the steering column.
Headlamp delay function (if equipped)
If you place the ignition switch to the
ACC or OFF position with the head-
lamps ON, the headlamps (and/or
position lamps) remain on for about 5
minutes. However, with the engine off if
the driver’s door is opened and closed,
the headlamps (and/or position lamps)
are turned off after 15 seconds.
The headlamps (and/or position
lamps) can be turned off by pressing
the lock button on the remote key or
smart key twice or turning the light
switch to the OFF or AUTO position.
However, if you turn the light switch
to the AUTO position when it is dark
outside, the headlamps will not be
turned off.
You can activate or deactivate the
Headlamp Delay function from the
User Settings mode on the LCD dis-
play. For more details, refer to
"LCD Display" in this chapter. If the driver gets out of the vehicle
through other doors (except dri-
ver's door), the battery saver func-
tion does not operate and the
headlamp delay function does not
turn off automatically. Therefore, It
causes the battery to be dis-
charged. In this case, make sure to
turn off the lamp before getting out
of the vehicle.
NOTICE
Page 169 of 497
3-91
Convenient features of your vehicle
3
Daytime running light (DRL) (if equipped)
The Daytime Running Lights (DRL)
can make it easier for others to see
the front of your vehicle during the
day, especially after dawn and before
sunset.
The DRL system will turn the dedi-
cated lamp OFF when:
1. The headlamps or front fog lights
are in the ON position.
2. The position light switch is in the ON position.
3. The engine is turned off.
Headlamp levelling device (if equipped)
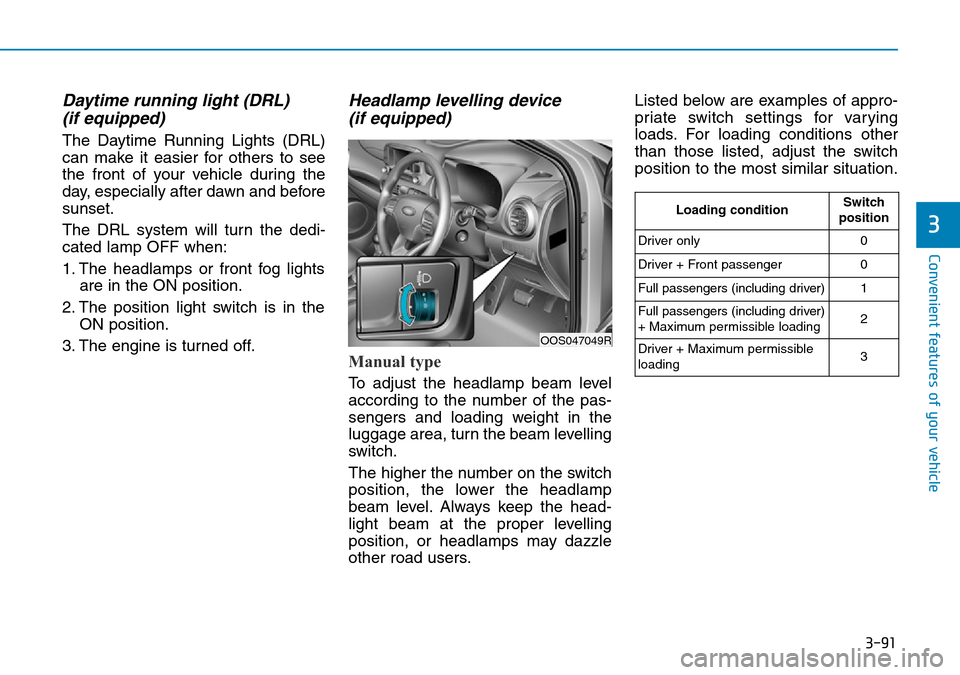
Manual type
To adjust the headlamp beam level
according to the number of the pas-
sengers and loading weight in the
luggage area, turn the beam levelling
switch.
The higher the number on the switch
position, the lower the headlamp
beam level. Always keep the head-
light beam at the proper levelling
position, or headlamps may dazzle
other road users. Listed below are examples of appro-
priate switch settings for varying
loads. For loading conditions other
than those listed, adjust the switch
position to the most similar situation.
OOS047049R
Loading conditionSwitch
position
Driver only0
Driver + Front passenger0
Full passengers (including driver)1
Full passengers (including driver)
+ Maximum permissible loading2
Driver + Maximum permissible
loading 3