Page 246 of 696

WARNING!(Continued)
vehicle in a collision, increasing head and neck
injury. A seat belt worn under the arm can cause
internal injuries. Ribs aren’t as strong as shoulder
bones. Wear the seat belt over your shoulder so that
your strongest bones will take the force in a collision.
• A shoulder belt placed behind you will not protect
you from injury during a collision. You are more
likely to hit your head in a collision if you do not
wear your shoulder belt. The lap and shoulder belt
are meant to be used together.
• A frayed or torn seat belt could rip apart in a collision
and leave you with no protection. Inspect the seat
belt system periodically, checking for cuts, frays, or
loose parts. Damaged parts must be replaced imme-
diately. Do not disassemble or modify the seat belt
system. Seat belt assemblies must be replaced after a
collision.
Lap/Shoulder Belt Operating Instructions
1. Enter the vehicle and close the door. Sit back and adjust
the seat.
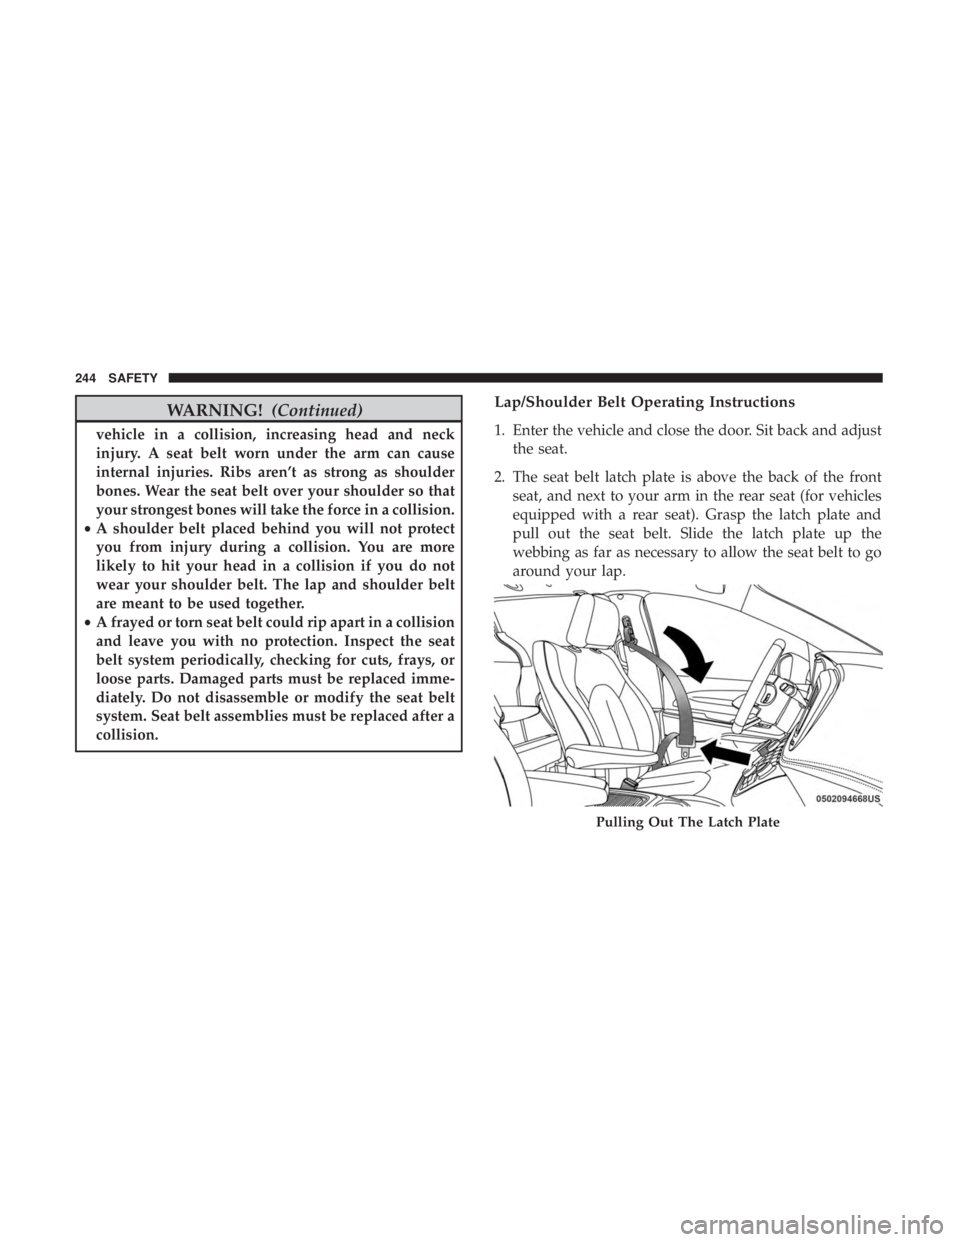
2. The seat belt latch plate is above the back of the front seat, and next to your arm in the rear seat (for vehicles
equipped with a rear seat). Grasp the latch plate and
pull out the seat belt. Slide the latch plate up the
webbing as far as necessary to allow the seat belt to go
around your lap.
Pulling Out The Latch Plate
244 SAFETY
Page 249 of 696

As a guide, if you are shorter than average, you will prefer
the shoulder belt anchorage in a lower position, and if you
are taller than average, you will prefer the shoulder belt
anchorage in a higher position. After you release the
anchorage button, try to move it up or down to make sure
that it is locked in position.
NOTE:The adjustable upper shoulder belt anchorage is
equipped with an Easy Up feature. This feature allows the
shoulder belt anchorage to be adjusted in the upward
position without pushing or squeezing the release button.
To verify the shoulder belt anchorage is latched, pull
downward on the shoulder belt anchorage until it is locked
into position.
WARNING!
• Wearing your seat belt incorrectly could make your
injuries in a collision much worse. You might suffer
internal injuries, or you could even slide out of the
seat belt. Follow these instructions to wear your seat
belt safely and to keep your passengers safe, too.
(Continued)
WARNING! (Continued)
•Position the shoulder belt across the shoulder and
chest with minimal, if any slack so that it is comfort-
able and not resting on your neck. The retractor will
withdraw any slack in the shoulder belt.
• Misadjustment of the seat belt could reduce the
effectiveness of the safety belt in a crash.
Second Row Center (If Equipped) And Third Row
Center Seat Belt Operating Instructions
The second row center (if equipped) and third row center seat
belts feature a seat belt with a mini-latch plate and buckle,
which allows the seat belt to detach from the lower anchor
when the seat is folded. The mini-latch plate and regular latch
plate can then be stored out of the way in the headliner for
added convenience to open up utilization of the storage areas
behind the front seats when the seat is not occupied.
5
SAFETY 247
Page 250 of 696
1. Remove the mini-latch plate and regular latch platefrom its stowed position in the headliner slightly behind
the second or third row seat. 2. Grasp the mini-latch plate and pull the seat belt over the
seat.
Mini-Latch Stowage
Mini-Latch Plate
248 SAFETY
Page 251 of 696
3. Route the shoulder belt to the inside of the left headrestraint. 4. When the seat belt is long enough to fit, insert the
mini-latch plate into the mini-buckle until you hear a
“click.”
Routing The Rear Seat Belt Latch Plate
1 — Seat Belt Latch PlateConnect Mini-Latch To Mini-Buckle
5
SAFETY 249
Page 271 of 696

through the seat seam into the space between the occupant
and the door. The SAB moves at a very high speed and
with such a high force that it could injure occupants if they
are not seated properly, or if items are positioned in the
area where the SAB inflates. Children are at an even greater
risk of injury from a deploying air bag.
WARNING!
Do not use accessory seat covers or place objects
between you and the Side Air Bags; the performance
could be adversely affected and/or objects could be
pushed into you, causing serious injury.
Supplemental Side Air Bag Inflatable Curtains (SABICs)
This vehicle is equipped with Supplemental Side Air Bag
Inflatable Curtains (SABICs).
Supplemental Side Air Bag Inflatable Curtains (SABICs)
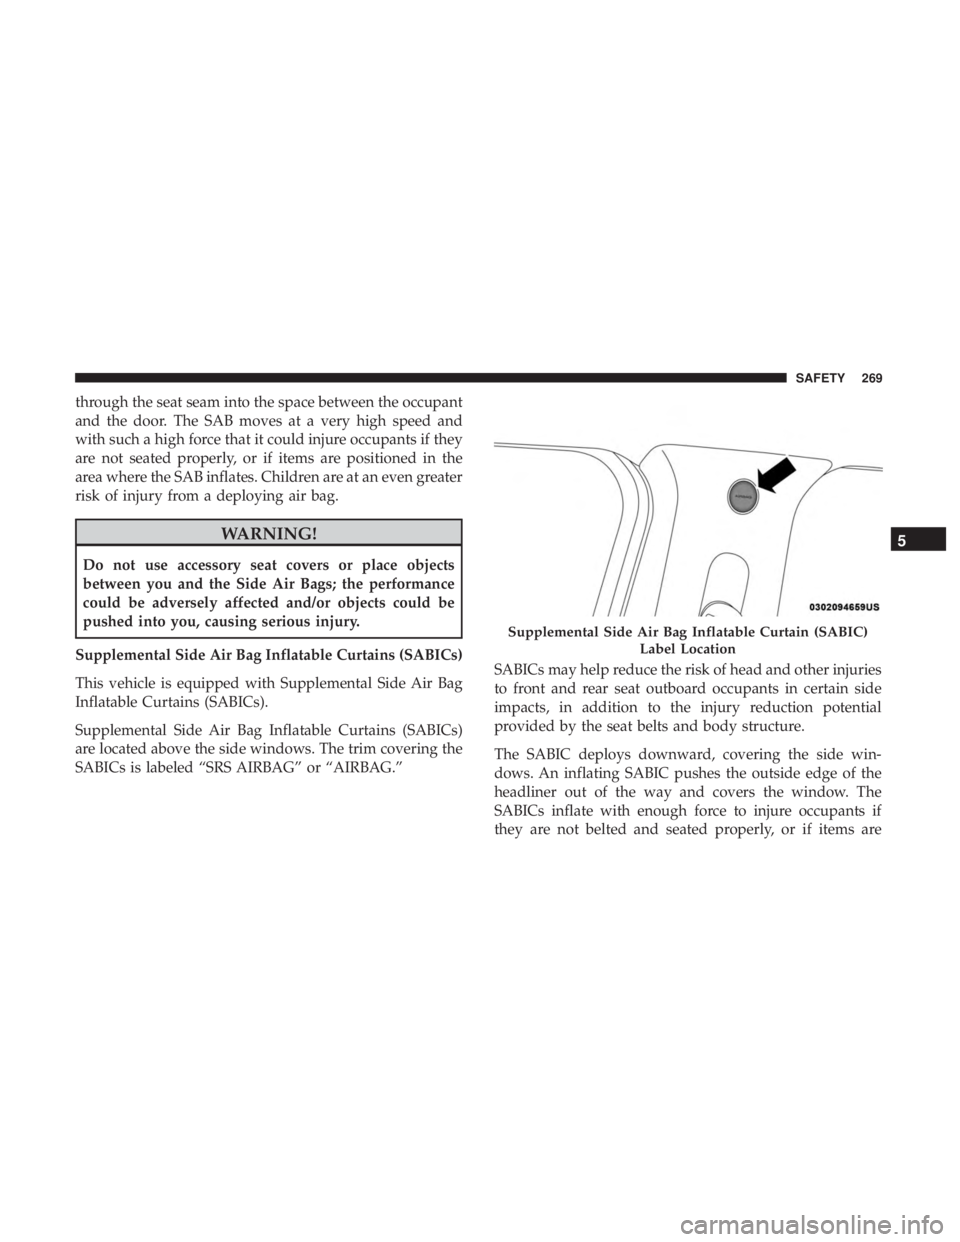
are located above the side windows. The trim covering the
SABICs is labeled “SRS AIRBAG” or “AIRBAG.” SABICs may help reduce the risk of head and other injuries
to front and rear seat outboard occupants in certain side
impacts, in addition to the injury reduction potential
provided by the seat belts and body structure.
The SABIC deploys downward, covering the side win-
dows. An inflating SABIC pushes the outside edge of the
headliner out of the way and covers the window. The
SABICs inflate with enough force to injure occupants if
they are not belted and seated properly, or if items are
Supplemental Side Air Bag Inflatable Curtain (SABIC)
Label Location
5
SAFETY 269
Page 276 of 696

Your vehicle may also be designed to perform any of these
other functions in response to the Enhanced Accident
Response System:
•Turn off the Fuel Filter Heater, Turn off the HVAC
Blower Motor, Close the HVAC Circulation Door
• Cut off battery power to the:
• Engine
• Electric Motor (if equipped)
• Electric power steering
• Brake booster
• Electric park brake
• Automatic transmission gear selector
• Horn
• Front wiper
• Headlamp washer pump
NOTE: After an accident, remember to cycle the ignition to
the STOP (OFF/LOCK) position and remove the key from
the ignition switch to avoid draining the battery. Carefully
check the vehicle for fuel leaks in the engine compartment
and on the ground near the engine compartment and fuel
tank before resetting the system and starting the engine. If
there are no fuel leaks or damage to the vehicle electrical
devices (e.g. headlights) after an accident, reset the system by following the procedure described below. If you have
any doubt, contact an authorized dealer.
Enhanced Accident Response System Reset
Procedure
In order to reset the Enhanced Accident Response System
functions after an event, the ignition switch must be changed
from ignition START or ON/RUN to ignition OFF. Carefully
check the vehicle for fuel leaks in the engine compartment
and on the ground near the engine compartment and fuel
tank before resetting the system and starting the engine.
Maintaining Your Air Bag System
WARNING!
•
Modifications to any part of the air bag system could
cause it to fail when you need it. You could be
injured if the air bag system is not there to protect
you. Do not modify the components or wiring, in-
cluding adding any kind of badges or stickers to the
steering wheel hub trim cover or the upper passenger
side of the instrument panel. Do not modify the front
bumper, vehicle body structure, or add aftermarket
side steps or running boards.
(Continued)
274 SAFETY
Page 286 of 696

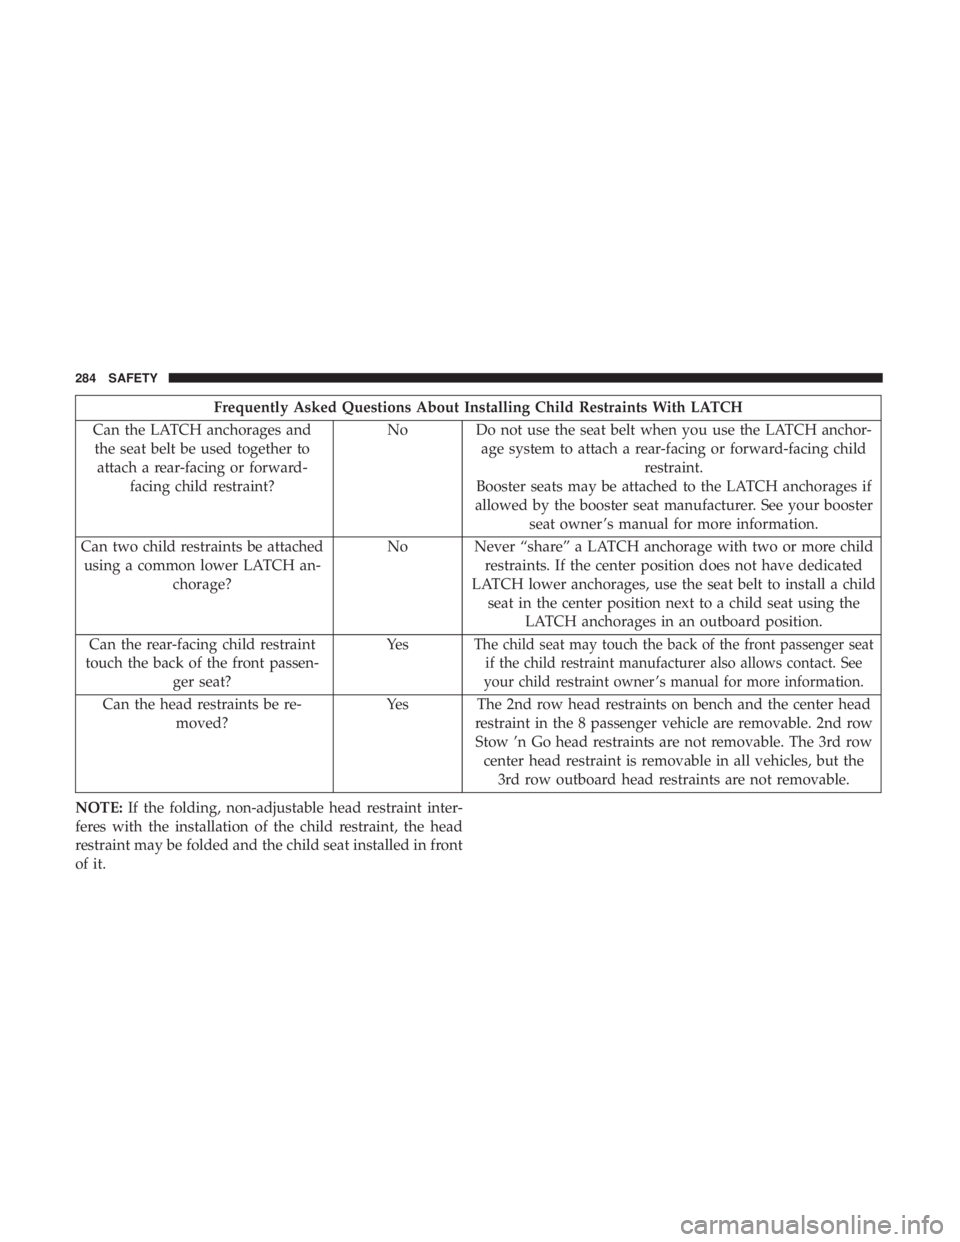
Frequently Asked Questions About Installing Child Restraints With LATCH
Can the LATCH anchorages and the seat belt be used together to attach a rear-facing or forward- facing child restraint? No Do not use the seat belt when you use the LATCH anchor-
age system to attach a rear-facing or forward-facing child restraint.
Booster seats may be attached to the LATCH anchorages if
allowed by the booster seat manufacturer. See your booster seat owner ’s manual for more information.
Can two child restraints be attached using a common lower LATCH an- chorage? No Never “share” a LATCH anchorage with two or more child
restraints. If the center position does not have dedicated
LATCH lower anchorages, use the seat belt to install a child seat in the center position next to a child seat using the LATCH anchorages in an outboard position.
Can the rear-facing child restraint
touch the back of the front passen- ger seat? Ye s
The child seat may touch the back of the front passenger seat
if the child restraint manufacturer also allows contact. See
your child restraint owner ’s manual for more information.
Can the head restraints be re- moved? Yes The 2nd row head restraints on bench and the center head
restraint in the 8 passenger vehicle are removable. 2nd rowStow ’n Go head restraints are not removable. The 3rd row center head restraint is removable in all vehicles, but the 3rd row outboard head restraints are not removable.
NOTE: If the folding, non-adjustable head restraint inter-
feres with the installation of the child restraint, the head
restraint may be folded and the child seat installed in front
of it.
284 SAFETY
Page 287 of 696
WARNING!
Always make sure the head restraint is in its upright
position when the seat is to be used by an occupant
who is not in a child restraint. Sitting in a seat with the
head restraint in its lowered position could result in
serious injury or death in a collision.
Locating The LATCH Anchorages
The lower anchorages are round bars that are
found at the rear of the seat cushion where it
meets the seatback, below the anchorage sym-
bols on the seatback. They are just visible when
you lean into the rear seat to install the child restraint. You
will easily feel them if you run your finger along the gap
between the seatback and seat cushion.
Car Seat With Head Restraint Folded1 — Folded Headrest
2 — Child RestraintLATCH Anchorages (Second Row Anchorages Shown)
5
SAFETY 285