Page 16 of 614

▫To Arm The System .....................54
▫ To Disarm The System ...................54
� DOORS ...............................55
▫ Manual Lock ...........................55
▫ Central Lock/Unlock — If Equipped ..........57
▫ Unlock Doors Automatically On Exit —
If Equipped ...........................58
▫ Keyless Enter-N-Go — Passive Entry .........58
▫ Manual Sliding Side Door ..................62
▫ Power Sliding Side Door — If Equipped .......63
▫ Hands-Free Sliding Doors — If Equipped .......65
▫ Child Locks ............................66
� SEATS ................................68
▫
Manual Adjustment (Front Seats) — If Equipped . .68
▫ Manual Adjustment (Rear Seats) ............70
▫ Power Adjustment (Front Seats) — If Equipped . .72
▫ Heated Seats ...........................74 ▫
Ventilated Seats — If Equipped ..............75
▫ Easy Entry Slide Second Row Seating .........76
▫ Fold-Flat ..............................78
▫ Second Row Removable Seat ...............78
▫ Manually Folding Third Row Seats —
If Equipped ............................81
� HEAD RESTRAINTS ......................83
▫ Head Restraints — Front Seats ..............83
▫ Head Restraints — Second Row .............85
▫ Head Restraints — Third Row ..............86
� STEERING WHEEL .......................87
▫ Tilt/Telescoping Steering Column ............87
▫ Heated Steering Wheel — If Equipped ........88
� MIRRORS ..............................89
▫ Inside Day/Night Mirror — If Equipped ......89
▫ Automatic Dimming Mirror — If Equipped .....89
▫ Outside Mirrors ........................90
14 GETTING TO KNOW YOUR VEHICLE
Page 89 of 614

The head restraint in the center position can be raised and
lowered for tether routing or height adjustment. Refer to
“Occupant Restraint Systems” in “Safety” for further infor-
mation.
NOTE:To remove the center head restraint, raise it as far as
it can go. Then, push the release button and the adjustment
button at the base of each post while pulling the head
restraint up. To reinstall the head restraint, put the head
restraint posts into the holes and push downward. Then,
using the adjustment button, adjust the head restraint to
the appropriate height.STEERING WHEEL
Tilt/Telescoping Steering Column
This feature allows you to tilt the steering column upward
or downward. It also allows you to lengthen or shorten the
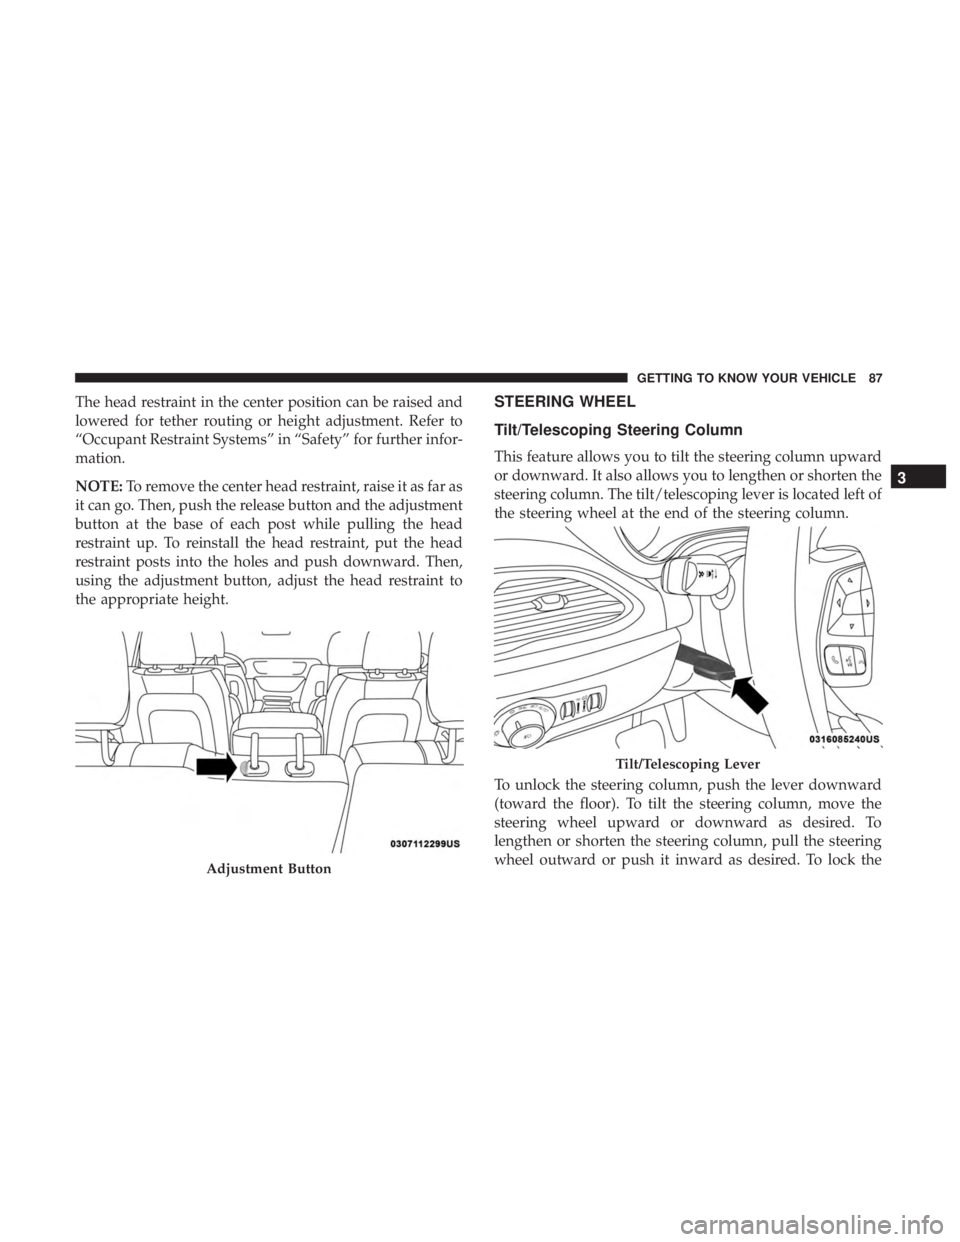
steering column. The tilt/telescoping lever is located left of
the steering wheel at the end of the steering column.
To unlock the steering column, push the lever downward
(toward the floor). To tilt the steering column, move the
steering wheel upward or downward as desired. To
lengthen or shorten the steering column, pull the steering
wheel outward or push it inward as desired. To lock the
Adjustment Button
Tilt/Telescoping Lever
3
GETTING TO KNOW YOUR VEHICLE 87
Page 162 of 614

through HV battery use. The outer ring represents
current energy economy. The white inner ring repre-
sents average energy economy.
• NONE
INSTRUMENT CLUSTER DISPLAY
Your vehicle is equipped with an instrument cluster dis-
play, which offers useful information to the driver. With the
ignition in the STOP/OFF mode, opening/closing of a
door will activate the display for viewing, and display the
total miles or kilometers in the odometer. Your instrument
cluster display is designed to display important informa-
tion about your vehicle’s systems and features. Using a
driver interactive display located on the instrument panel,
your instrument cluster display can show you how sys-
tems are working and give you warnings when they are
not. The steering wheel mounted controls allow you to
scroll through and enter the main menus and submenus.
You can access the specific information you want and make
selections and adjustments.
Instrument Cluster Display Location And Controls
The Instrument Cluster Display is located in the center of
the instrument cluster.
The Main Menu items consists of the following:
• Speedometer
• Vehicle Info
• Driver Assist
• Hybrid Info
• Trip (Trip A/Trip B)
• Audio
• Messages
• Screen Setup
• Speed Warning — If Equipped
160 GETTING TO KNOW YOUR INSTRUMENT PANEL