2018 CHRYSLER PACIFICA HYBRID charging
[x] Cancel search: chargingPage 36 of 614
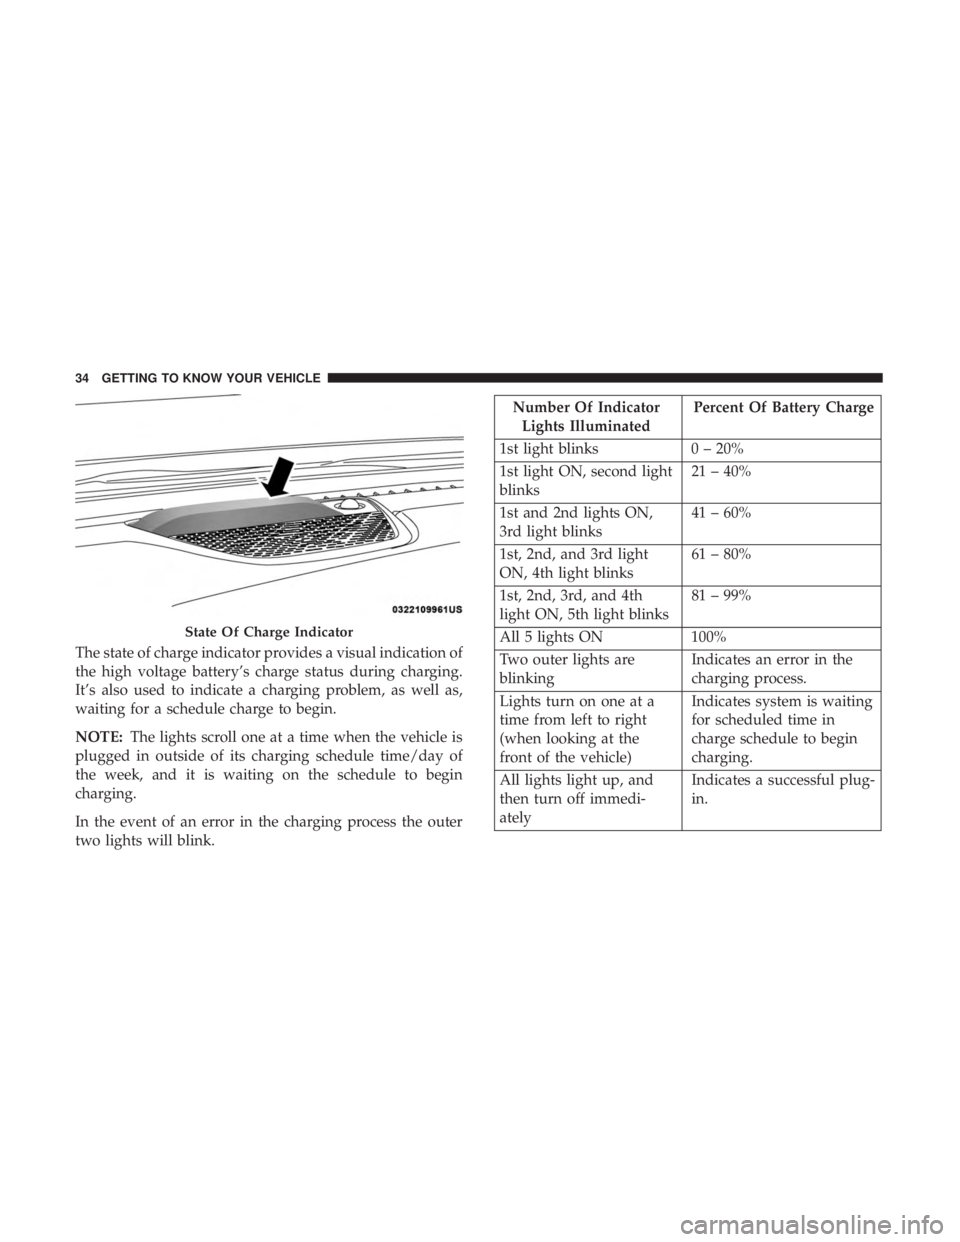
The state of charge indicator provides a visual indication of
the high voltage battery’s charge status during charging.
It’s also used to indicate a charging problem, as well as,
waiting for a schedule charge to begin.
NOTE:The lights scroll one at a time when the vehicle is
plugged in outside of its charging schedule time/day of
the week, and it is waiting on the schedule to begin
charging.
In the event of an error in the charging process the outer
two lights will blink.
Number Of Indicator Lights Illuminated Percent Of Battery Charge
1st light blinks 0 – 20%
1st light ON, second light
blinks 21 – 40%
1st and 2nd lights ON,
3rd light blinks 41 – 60%
1st, 2nd, and 3rd light
ON, 4th light blinks 61 – 80%
1st, 2nd, 3rd, and 4th
light ON, 5th light blinks 81 – 99%
All 5 lights ON 100%
Two outer lights are
blinking Indicates an error in the
charging process.
Lights turn on one at a
time from left to right
(when looking at the
front of the vehicle) Indicates system is waiting
for scheduled time in
charge schedule to begin
charging.
All lights light up, and
then turn off immedi-
ately Indicates a successful plug-
in.
State Of Charge Indicator
34 GETTING TO KNOW YOUR VEHICLE
Page 37 of 614

Hybrid Electric Pages
Within your Uconnect 4C/4C NAV system is the “Hybrid
Electric Pages” App that allows you to see your vehicle’s
power flow, understand your drive history, and set an
EVSE charging schedule for your vehicle’s high voltage
battery. To access this app, press the “Apps” button on the
main menu bar of the radio’s touch screen, and locate the
“Hybrid Electric” App. Pressing the “Hybrid Electric
Pages” App brings you to a set of three pages: Power Flow,
Driving History, and Charging Schedule.
Power Flow
The first screen within the “Hybrid Electric Pages” App is
the Power Flow screen. The Power Flow screen shows the
current power readings for all of the following:
•Engine - Shows the amount of power (in kW) the engine
is generating. Based on vehicle operating conditions, this
power is used to: propel the vehicle, provide passenger
compartment heating & cooling, power vehicle electrical
loads, and charge the High Voltage Battery. Engine
operation is controlled to maximize fuel economy.
• Battery - Shows the amount of power (in kW) the high
voltage battery is currently providing/absorbing. A
negative kW indicates the vehicle’s high voltage battery
is charging.
• Climate - Shows the amount of power (in kW) the
climate control system is using to maintain the current
interior temperature.
Hybrid Electric Pages App Location
3
GETTING TO KNOW YOUR VEHICLE 35
Page 39 of 614
Charging Schedule
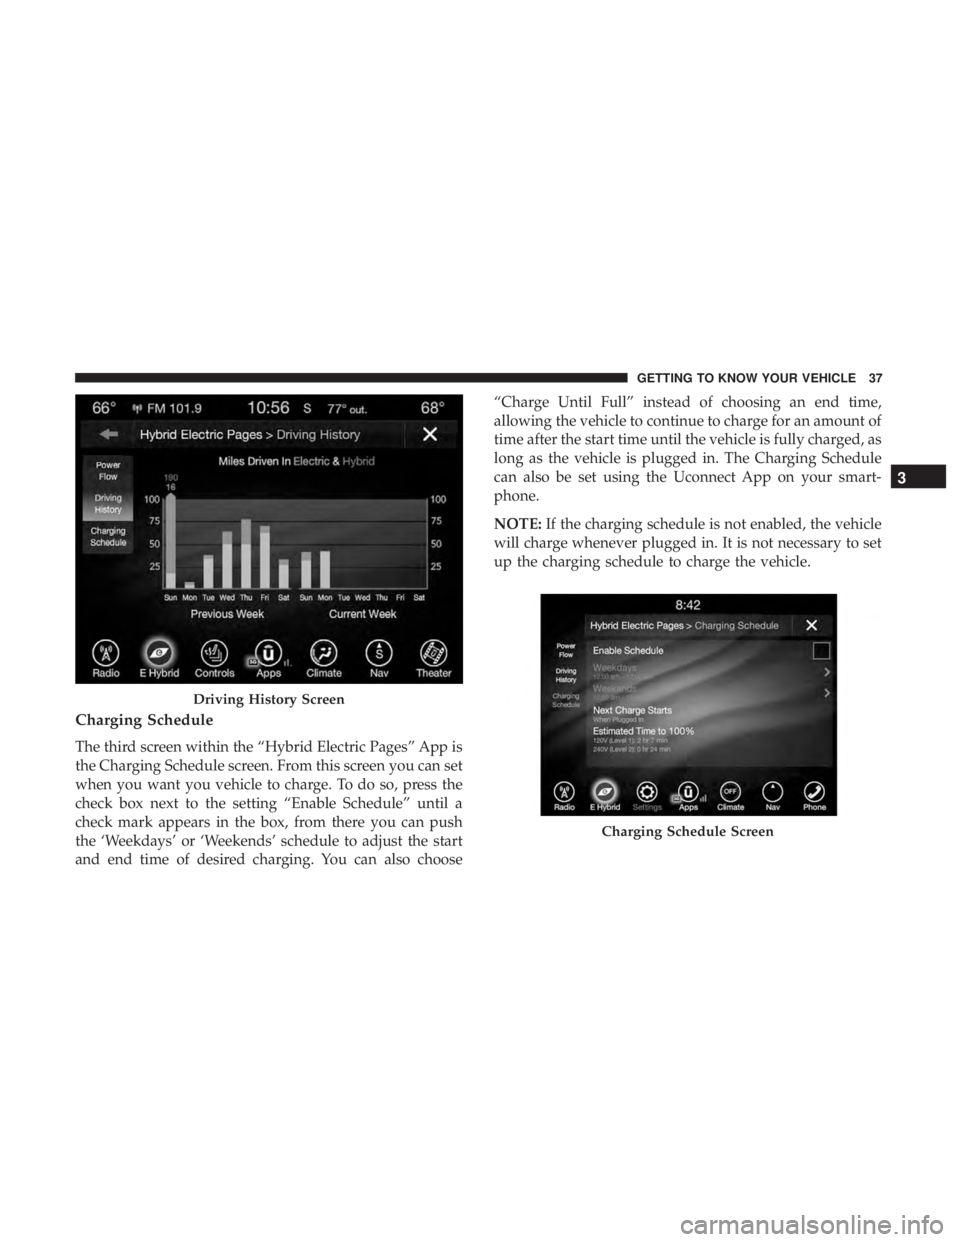
The third screen within the “Hybrid Electric Pages” App is
the Charging Schedule screen. From this screen you can set
when you want you vehicle to charge. To do so, press the
check box next to the setting “Enable Schedule” until a
check mark appears in the box, from there you can push
the ‘Weekdays’ or ‘Weekends’ schedule to adjust the start
and end time of desired charging. You can also choose“Charge Until Full” instead of choosing an end time,
allowing the vehicle to continue to charge for an amount of
time after the start time until the vehicle is fully charged, as
long as the vehicle is plugged in. The Charging Schedule
can also be set using the Uconnect App on your smart-
phone.
NOTE:
If the charging schedule is not enabled, the vehicle
will charge whenever plugged in. It is not necessary to set
up the charging schedule to charge the vehicle.
Driving History Screen
Charging Schedule Screen
3
GETTING TO KNOW YOUR VEHICLE 37
Page 40 of 614

NOTE:If the vehicle is plugged in outside of the charging
schedule set in the Uconnect 4C radio, the vehicle’s battery
will not charge. Charging will only begin immediately if
the vehicle is plugged in within the time and day of the
week set in the schedule. Otherwise, charging will auto-
matically begin when the selected charge time/day of the
week occurs or whenever the vehicle is plugged in with no
charge schedule set.
If the vehicle is turned off outside of the charging window,
a radio pop-up message will be displayed, which provides
an option to begin charging the vehicle immediately. The
pop-up message asks the driver if they would like to
“Charge Now?” and provides other information, including
the next charging schedule start time and estimated time to
charge the battery to 100%. If within one hour of selecting
“Yes,” the vehicle is connected to a powered EVSE, the
vehicle will immediately begin to charge (temporarily
ignoring any set charge schedule). To fully deactivate the
charge schedule, refer to the “Charging Schedule” feature
within the “Hybrid Electric Pages” App.
The charging schedule can also be overridden if the EVSE
is plugged in, unplugged, and then plugged in a second
time to the vehicle. This “double plugged-in” feature will
override the schedule that is set in the radio, and begin charging the vehicle immediately. The double plug se-
quence must be completed within ten seconds for it to
override the programed schedule.
KEYS
Key Fob
Your vehicle uses a keyless ignition system. The ignition
system consists of a key fob with Remote Keyless Entry
(RKE) and a START/STOP push button ignition system.
The Remote Keyless Entry system consists of a key fob and
Keyless Enter-N-Go feature if equipped.
NOTE:
The key fob may not be found if it is located next to
a mobile phone, laptop or other electronic device; these
devices may block the key fob’s wireless signal.
This system allows you to lock or unlock the doors and
liftgate, activate the Panic Alarm, optional power liftgate,
left power sliding door, and right power sliding door from
distances up to approximately 66 ft (20 m) using a hand-
held key fob. The key fob does not need to be pointed at the
vehicle to activate the system.
38 GETTING TO KNOW YOUR VEHICLE
Page 100 of 614
The battery protection feature will be disabled if the
ignition switch is turned to any other position other than
LOCK during the eight minute delay.
INTERIOR LIGHTS
Courtesy/Interior Lighting
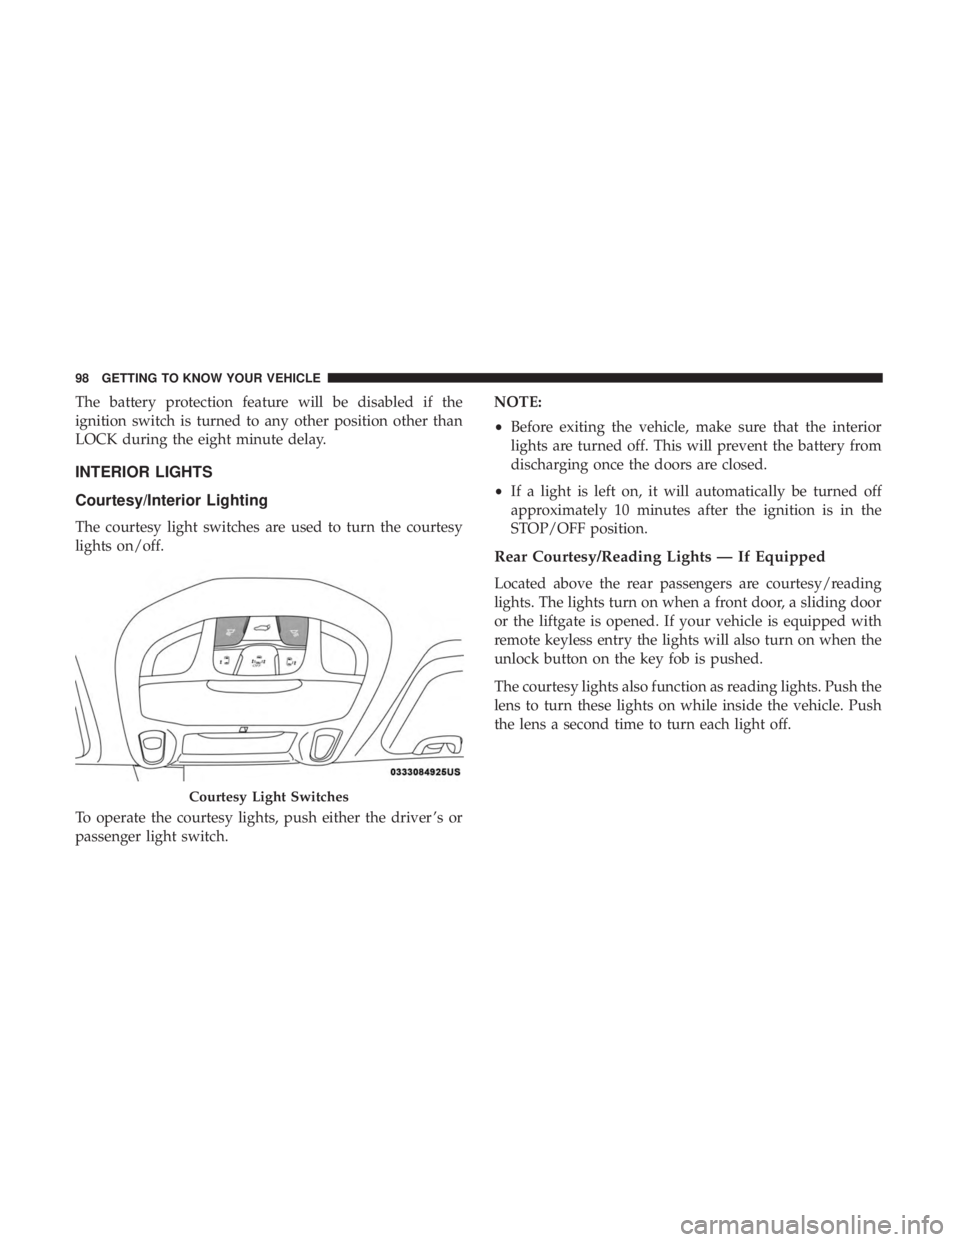
The courtesy light switches are used to turn the courtesy
lights on/off.
To operate the courtesy lights, push either the driver ’s or
passenger light switch.NOTE:
•
Before exiting the vehicle, make sure that the interior
lights are turned off. This will prevent the battery from
discharging once the doors are closed.
• If a light is left on, it will automatically be turned off
approximately 10 minutes after the ignition is in the
STOP/OFF position.
Rear Courtesy/Reading Lights — If Equipped
Located above the rear passengers are courtesy/reading
lights. The lights turn on when a front door, a sliding door
or the liftgate is opened. If your vehicle is equipped with
remote keyless entry the lights will also turn on when the
unlock button on the key fob is pushed.
The courtesy lights also function as reading lights. Push the
lens to turn these lights on while inside the vehicle. Push
the lens a second time to turn each light off.
Courtesy Light Switches
98 GETTING TO KNOW YOUR VEHICLE
Page 130 of 614
•If the vehicle was actively charging the HV battery when
the hood was opened, the vehicle will stop charging
until the hood is closed.
Closing
1. Hold up the hood with one hand and with the other hand remove the support rod from its seat and reinsert
it into the locking tab.
2. Lower the hood to approximately 12 inches (30 cm) from the engine compartment and drop it. Make sure that the
hood is completely closed.
NOTE: If the vehicle stopped charging the HV battery
when the hood was opened, the vehicle will resume
charging when the hood closes.
WARNING!
Be sure the hood is fully latched before driving your
vehicle. If the hood is not fully latched, it could open
when the vehicle is in motion and block your vision.
Failure to follow this warning could result in serious
injury or death.
CAUTION!
To prevent possible damage, do not slam the hood to
close it. Lower hood to approximately 12 inches (30 cm)
and drop the hood to close. Make sure hood is fully
closed for both latches. Never drive vehicle unless
hood is fully closed, with both latches engaged.
LIFTGATE
Opening
To Unlock/Enter The Liftgate
The liftgate may be released in several ways:
• Overhead console liftgate button
• Key fob
• Outside handle
Push the liftgate button on the key fob twice within five
seconds to release the liftgate.
128 GETTING TO KNOW YOUR VEHICLE
Page 161 of 614
Instrument Cluster Descriptions
1. % Power Gauge•Indicates vehicle power. The upper half of the gauge is
a summation of the engine and high voltage battery
power applied to move the vehicle. Bottom half indi-
cates when the high voltage battery is charging via
regenerative braking, while slowing the vehicle down.
2. Instrument Cluster Display •The instrument cluster display features a driver-
interactive display. When the appropriate conditions
exist, this display shows messages. Refer to “Instru-
ment Cluster Display” located in “Getting To Know
Your Instrument Panel” for further information.
3. Fuel Gauge •The gauge shows the level of fuel in the fuel tank when
the ignition switch is in the ON/RUN position.
•
The fuel pump symbol points to the side of the
vehicle where the fuel door is located.
4. Reconfigurable Screen With Four Customer Program- mable Options
• Battery % & Electric Range: shows values for electric
range and battery %, along with a teal gauge showing
battery % (state of charge 0-100%). •
Electric Range: shows electric range, along with a teal
gauge showing battery % (state of charge 0-100%).
• All Range: shows values for electric, hybrid and total
range, along with a white gauge showing the total
range.
• NONE
5. Reconfigurable Screen With 4 Options •Efficiency Coach: This gauge provides visual aware-
ness on how to achieve maximum energy efficiency
while driving. When accelerating or decelerating the
most efficient operation will be represented with the
gauge color being green. Less efficient operation will
be represented by yellow, followed by orange, as the
level of efficiency decreases.
• Charge/Power: This gauge represents the source of
the power utilized to accelerate the vehicle. The teal
outer ring represents the HV (High Voltage) battery
output during acceleration, and input power during
regeneration. The blue inner ring represents the engine
output power.
• Energy economy: this gauge represents the combined
MPG (km/L, L/100km) obtained through engine use
and MPG (km/L, L/100km) equivalent obtained
4
GETTING TO KNOW YOUR INSTRUMENT PANEL 159
Page 172 of 614
Speed Warning — If Equipped
Push and release theupordown arrow button until Speed
Warning is highlighted in the instrument cluster display.
Push and release the OKbutton to enter speed warning.
Use the upordown arrow button to turn the speed
warning ON or OFF, then push and release the OKbutton
to confirm the selection. If the ON status is selected, use the
up ordown arrow button to set the desired speed, then
push the OKbutton to set the speed for the speed warning.
A speed warning telltale will illuminate in the instrument
cluster, with a number matching the set speed, with a pop
up message to inform the driver that the speed warning
has been set to the desired speed. Each time the set speed
is exceeded, a single chime will sound and a pop up
warning message will display. If the set speed is exceeded
more than 2 mph (3 km/h), a continuous chime will sound
for up to 10 seconds, or until the speed is no longer
exceeded. The telltale in the instrument cluster will also
change from white to yellow, and a pop up warning
message will pop up on the instrument cluster display.
NOTE: Speed Warning is unavailable while KeySense is in
use.
Battery Saver On/Battery Saver Mode Message —
Electrical Load Reduction Actions — If Equipped
The vehicle is equipped with an Intelligent Battery Sensor
(IBS) to perform additional monitoring of the 12 volt
electrical system and status of the 12 volt vehicle battery.
In cases when the IBS detects charging system failure, or
the 12 volt vehicle battery conditions are deteriorating,
electrical load reduction actions will take place to extend
the driving time and distance of the vehicle. This is done by
reducing power to or turning off non-essential 12 volt
electrical loads. Load reduction will be functional when the
vehicle propulsion system is active.
The vehicle may not be running depending on the HV
battery SOC or temperature. It will display a message if
there is a risk of battery depletion to the point where the
vehicle may stall due to lack of electrical supply, or will not
restart after the current drive cycle.
When 12 volt load reduction is activated, the message
“Battery Saver On” or “Battery Saver Mode” will appear in
the Instrument Cluster Display.
These messages indicate the 12 volt vehicle battery has a
low state of charge and continues to lose electrical charge at
a rate that the charging system cannot sustain.
170 GETTING TO KNOW YOUR INSTRUMENT PANEL