Page 79 of 614
3. Push on seatback to slide seat forward to access the thirdrow. 4. To put the seat back into original position, just pull back
on the seatback and lock the seat into position.
WARNING!
Do not use this feature with a child in seat. Serious
injury or death my occur.
Easy Tilt Seat LeverEasy Tilt Seat
3
GETTING TO KNOW YOUR VEHICLE 77
Page 125 of 614
Wind Buffeting
Wind buffeting can be described as the perception of
pressure on the ears or a helicopter-type sound in the ears.
Your vehicle may exhibit wind buffeting with the windows
down, or the sunroof (if equipped) in certain open or
partially open positions. This is a normal occurrence and
can be minimized. If the rear windows are open and
buffeting occurs, open the front and rear windows together
to minimize the buffeting. If the buffeting occurs with the
sunroof open, adjust the sunroof opening to minimize the
buffeting.
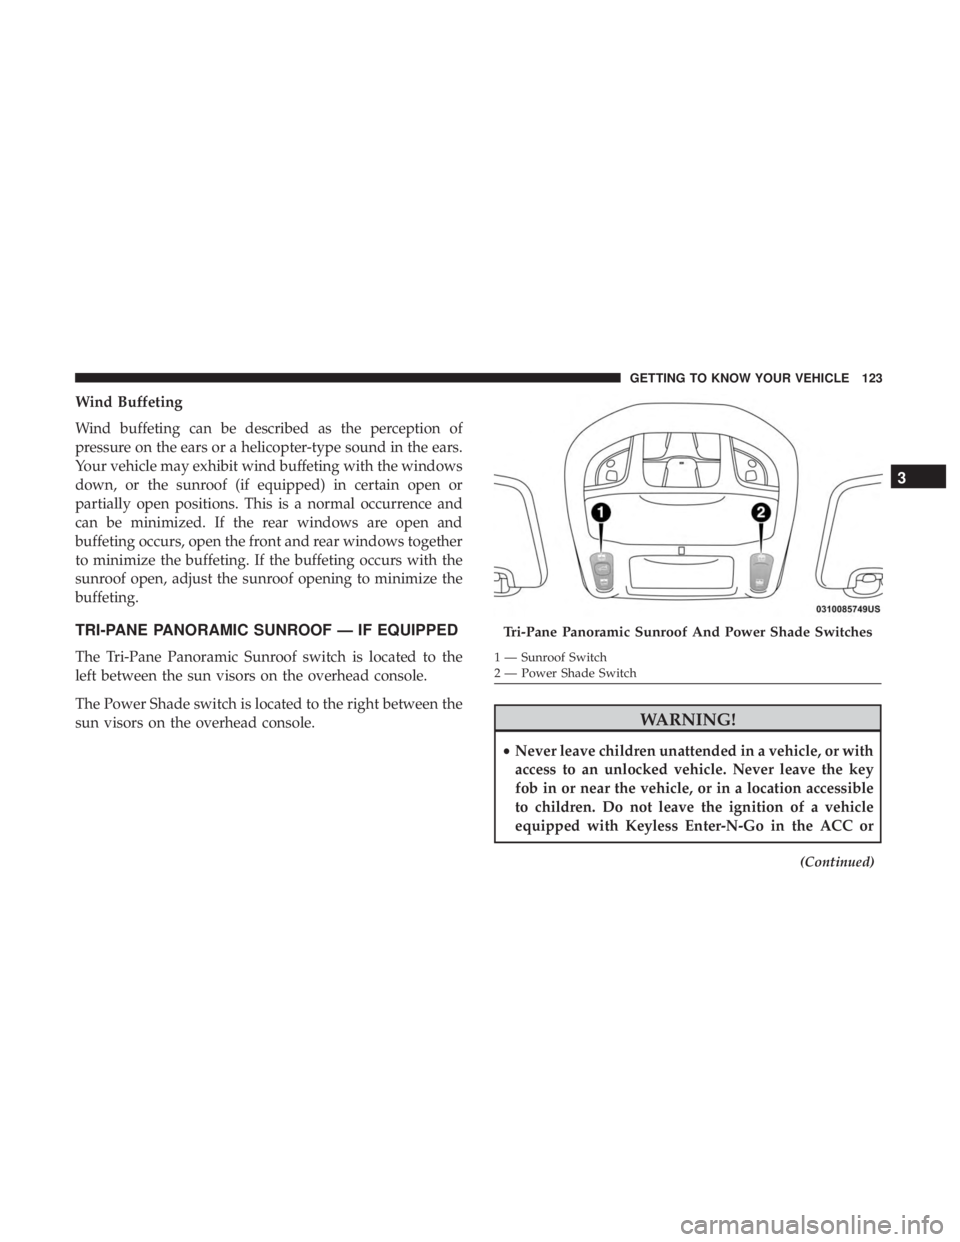
TRI-PANE PANORAMIC SUNROOF — IF EQUIPPED
The Tri-Pane Panoramic Sunroof switch is located to the
left between the sun visors on the overhead console.
The Power Shade switch is located to the right between the
sun visors on the overhead console.
WARNING!
•Never leave children unattended in a vehicle, or with
access to an unlocked vehicle. Never leave the key
fob in or near the vehicle, or in a location accessible
to children. Do not leave the ignition of a vehicle
equipped with Keyless Enter-N-Go in the ACC or
(Continued)
Tri-Pane Panoramic Sunroof And Power Shade Switches
1 — Sunroof Switch
2 — Power Shade Switch
3
GETTING TO KNOW YOUR VEHICLE 123
Page 189 of 614
SAFETY
CONTENTS
�SAFETY FEATURES ..................... .188
▫ Anti-Lock Brake System (ABS) .............188
▫ Electronic Brake Control System ............189
▫ Regenerative Braking System (RBS) — Hybrid . .196
� AUXILIARY DRIVING SYSTEMS .............197
▫ Blind Spot Monitoring (BSM) — If Equipped . . .197
▫ Forward Collision Warning (FCW) With
Mitigation — If Equipped ................204
▫ Tire Pressure Monitor System (TPMS) ........207
� OCCUPANT RESTRAINT SYSTEMS ..........213
▫ Occupant Restraint Systems Features ........213
▫ Important Safety Precautions ..............213▫
Seat Belt Systems ..................... .214
▫ Supplemental Restraint Systems (SRS) ........229
▫ Child Restraints ...................... .248
▫ Transporting Pets ..................... .271
� SAFETY TIPS .......................... .271
▫ Transporting Passengers ..................271
▫ Exhaust Gas ......................... .271
▫ Safety Checks You Should Make
Inside The Vehicle ..................... .272
▫ Periodic Safety Checks You Should Make
Outside The Vehicle ....................274
5
Page 228 of 614
Seat Belt Pretensioner
The front seat belt system is equipped with pretensioning
devices that are designed to remove slack from the seat belt
in the event of a collision. These devices may improve the
performance of the seat belt by removing slack from the
seat belt early in a collision. Pretensioners work for all size
occupants, including those in child restraints.
NOTE:These devices are not a substitute for proper seat
belt placement by the occupant. The seat belt still must be
worn snugly and positioned properly.
The pretensioners are triggered by the Occupant Restraint
Controller (ORC). Like the air bags, the pretensioners are
single use items. A deployed pretensioner or a deployed air
bag must be replaced immediately.
Energy Management Feature
The front seat belt system is equipped with an Energy
Management feature that may help further reduce the risk
of injury in the event of a collision. The seat belt system has
a retractor assembly that is designed to release webbing in
a controlled manner.
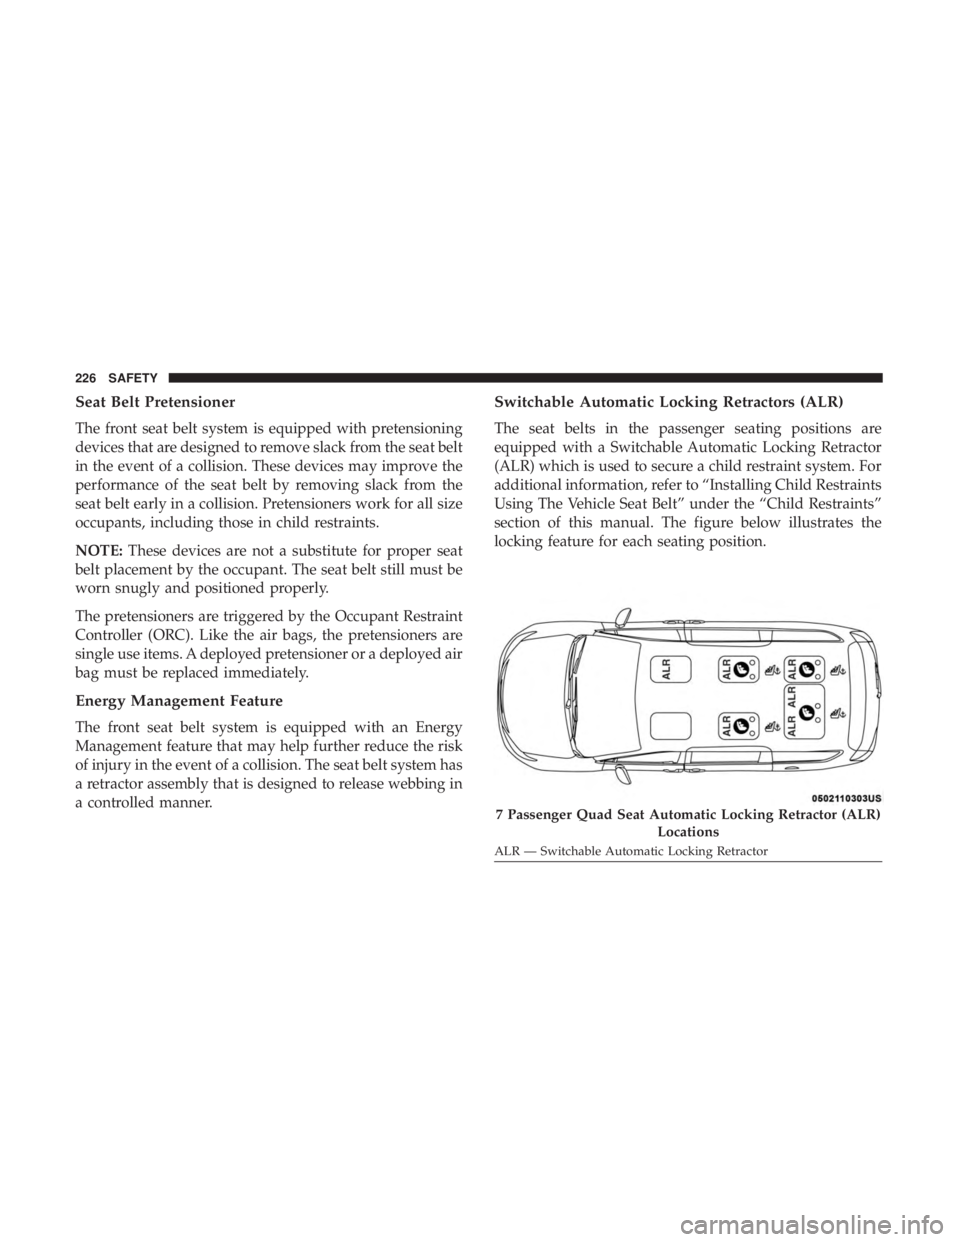
Switchable Automatic Locking Retractors (ALR)
The seat belts in the passenger seating positions are
equipped with a Switchable Automatic Locking Retractor
(ALR) which is used to secure a child restraint system. For
additional information, refer to “Installing Child Restraints
Using The Vehicle Seat Belt” under the “Child Restraints”
section of this manual. The figure below illustrates the
locking feature for each seating position.
7 Passenger Quad Seat Automatic Locking Retractor (ALR)
Locations
ALR — Switchable Automatic Locking Retractor
226 SAFETY
Page 229 of 614
If the passenger seating position is equipped with an ALR
and is being used for normal usage, only pull the seat belt
webbing out far enough to comfortably wrap around the
occupant’s mid-section so as to not activate the ALR. If the
ALR is activated, you will hear a clicking sound as the seat
belt retracts. Allow the webbing to retract completely in this
case and then carefully pull out only the amount of webbing
necessary to comfortably wrap around the occupant’s mid-
section. Slide the latch plate into the buckle until you hear a
�click.�
In Automatic Locking Mode, the shoulder belt is automati-
cally pre-locked. The seat belt will still retract to remove
any slack in the shoulder belt. Use the Automatic Locking
Mode anytime a child restraint is installed in a seating
position that has a seat belt with this feature. Children 12
years old and under should always be properly restrained
in a vehicle with a rear seat.
WARNING!
•Never place a rear-facing child restraint in front of an
air bag. A deploying passenger front air bag can cause
death or serious injury to a child 12 years or younger,
including a child in a rear-facing child restraint.
(Continued)
WARNING! (Continued)
•Only use a rear-facing child restraint in a vehicle
with a rear seat.
How To Engage The Automatic Locking Mode
1. Buckle the combination lap and shoulder belt.
2. Grasp the shoulder portion and pull downward until the entire seat belt is extracted.
3. Allow the seat belt to retract. As the seat belt retracts, you will hear a clicking sound. This indicates the seat
belt is now in the Automatic Locking Mode.
How To Disengage The Automatic Locking Mode
Unbuckle the combination lap/shoulder belt and allow it
to retract completely to disengage the Automatic Locking
Mode and activate the vehicle sensitive (emergency) lock-
ing mode.
5
SAFETY 227
Page 230 of 614
WARNING!
•The seat belt assembly must be replaced if the
switchable Automatic Locking Retractor (ALR) fea-
ture or any other seat belt function is not working
properly when checked according to the procedures
in the Service Manual.
• Failure to replace the seat belt assembly could in-
crease the risk of injury in collisions.
• Do not use the Automatic Locking Mode to restrain
occupants who are wearing the seat belt or children
who are using booster seats. The locked mode is only
used to install rear-facing or forward-facing child
restraints that have a harness for restraining the
child.
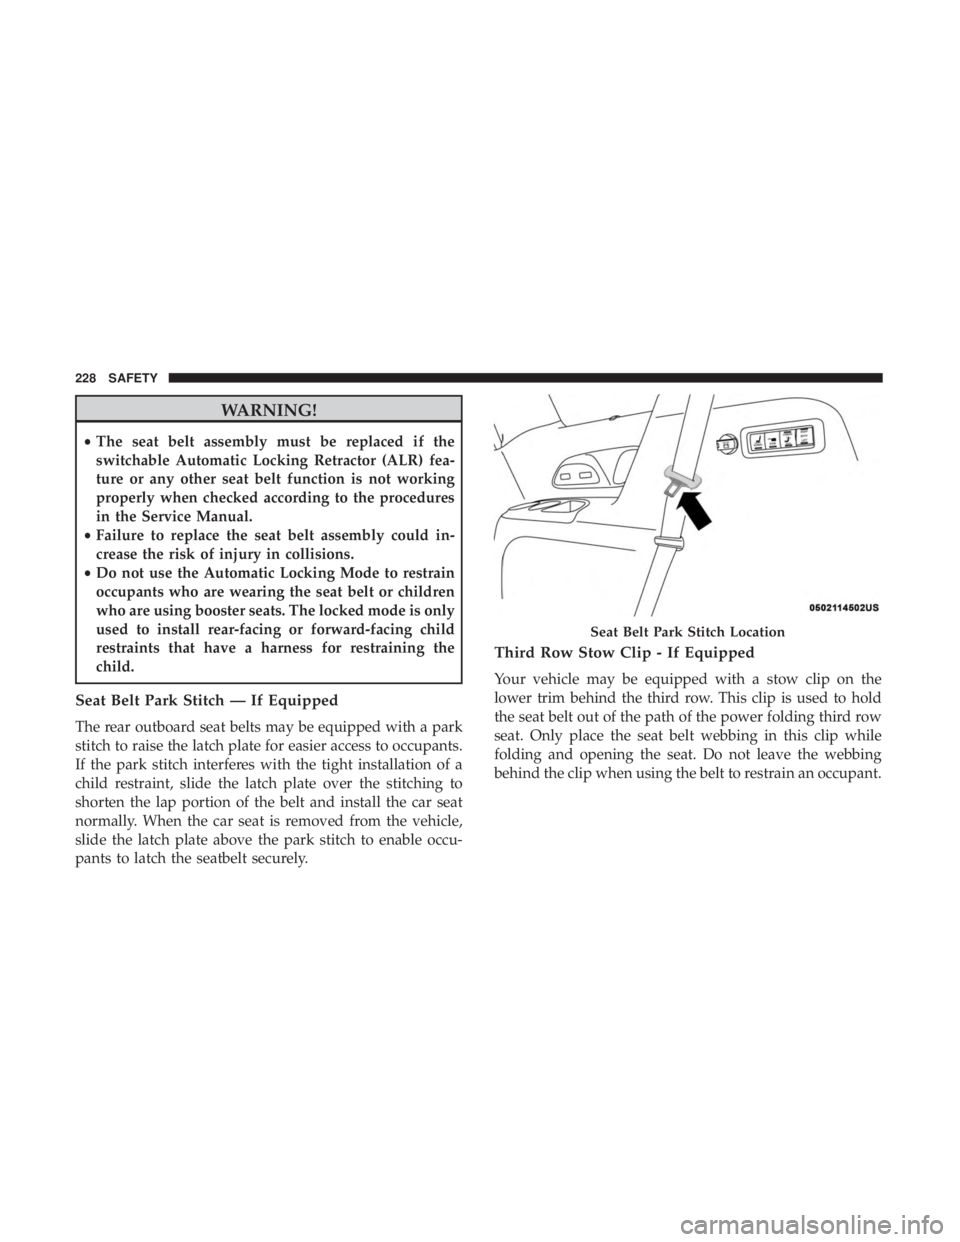
Seat Belt Park Stitch — If Equipped
The rear outboard seat belts may be equipped with a park
stitch to raise the latch plate for easier access to occupants.
If the park stitch interferes with the tight installation of a
child restraint, slide the latch plate over the stitching to
shorten the lap portion of the belt and install the car seat
normally. When the car seat is removed from the vehicle,
slide the latch plate above the park stitch to enable occu-
pants to latch the seatbelt securely.
Third Row Stow Clip - If Equipped
Your vehicle may be equipped with a stow clip on the
lower trim behind the third row. This clip is used to hold
the seat belt out of the path of the power folding third row
seat. Only place the seat belt webbing in this clip while
folding and opening the seat. Do not leave the webbing
behind the clip when using the belt to restrain an occupant.
Seat Belt Park Stitch Location
228 SAFETY
Page 244 of 614
SABICs may help reduce the risk of head and other injuries
to front and rear seat outboard occupants in certain side
impacts, in addition to the injury reduction potential
provided by the seat belts and body structure.
The SABIC deploys downward, covering the side win-
dows. An inflating SABIC pushes the outside edge of the
headliner out of the way and covers the window. The
SABICs inflate with enough force to injure occupants if
they are not belted and seated properly, or if items arepositioned in the area where the SABICs inflate. Children
are at an even greater risk of injury from a deploying air
bag.
The SABICs may help reduce the risk of partial or complete
ejection of vehicle occupants through side windows in
certain side impact events.
WARNING!
•
Do not mount equipment, or stack luggage or other
cargo up high enough to block the deployment of the
SABICs. The trim covering above the side windows
where the SABIC and its deployment path are lo-
cated should remain free from any obstructions.
• In order for the SABICs to work as intended, do not
install any accessory items in your vehicle which
could alter the roof. Do not add an aftermarket
sunroof to your vehicle. Do not add roof racks that
require permanent attachments (bolts or screws) for
installation on the vehicle roof. Do not drill into the
roof of the vehicle for any reason.
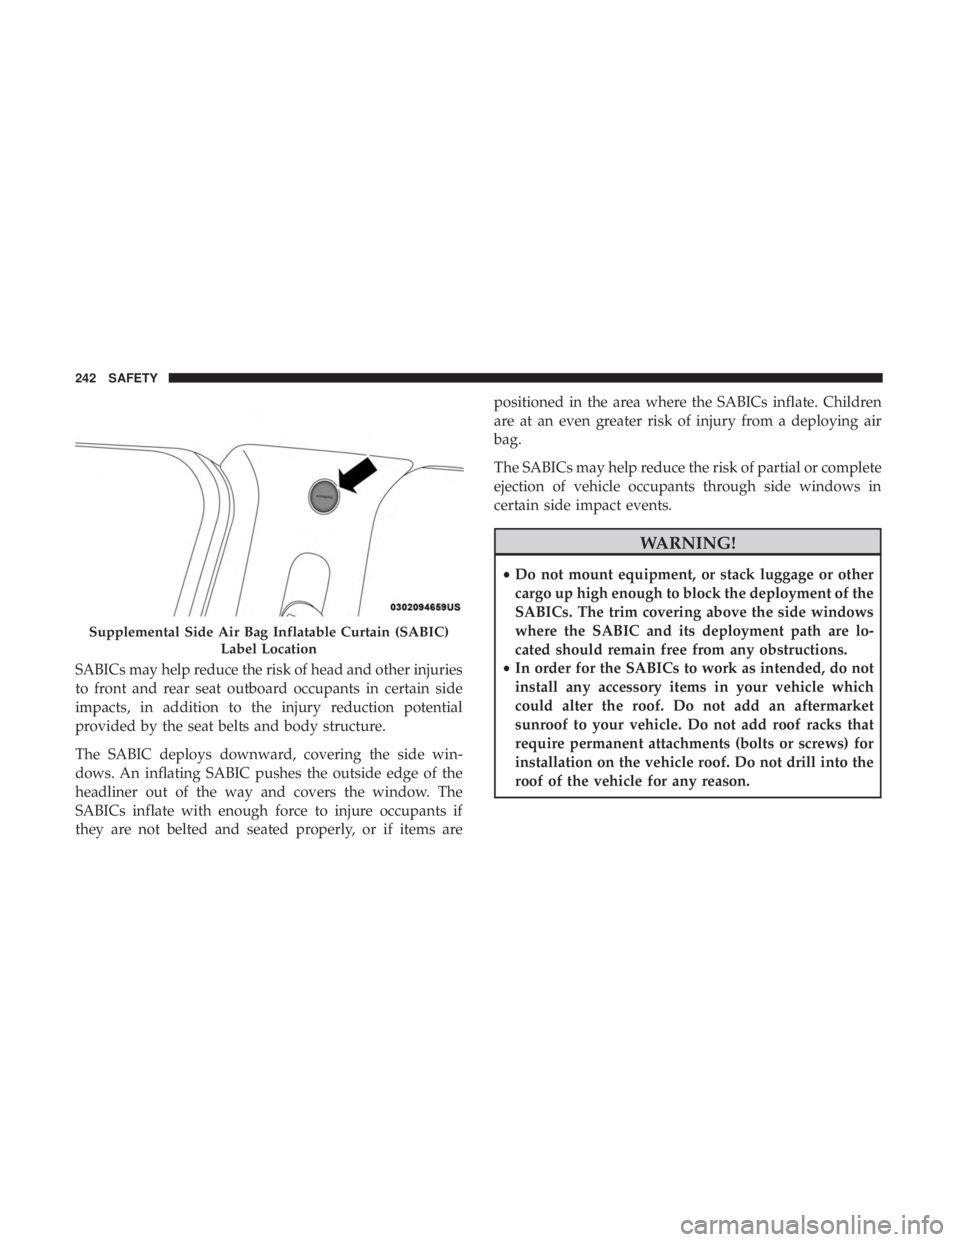
Supplemental Side Air Bag Inflatable Curtain (SABIC)
Label Location
242 SAFETY
Page 262 of 614
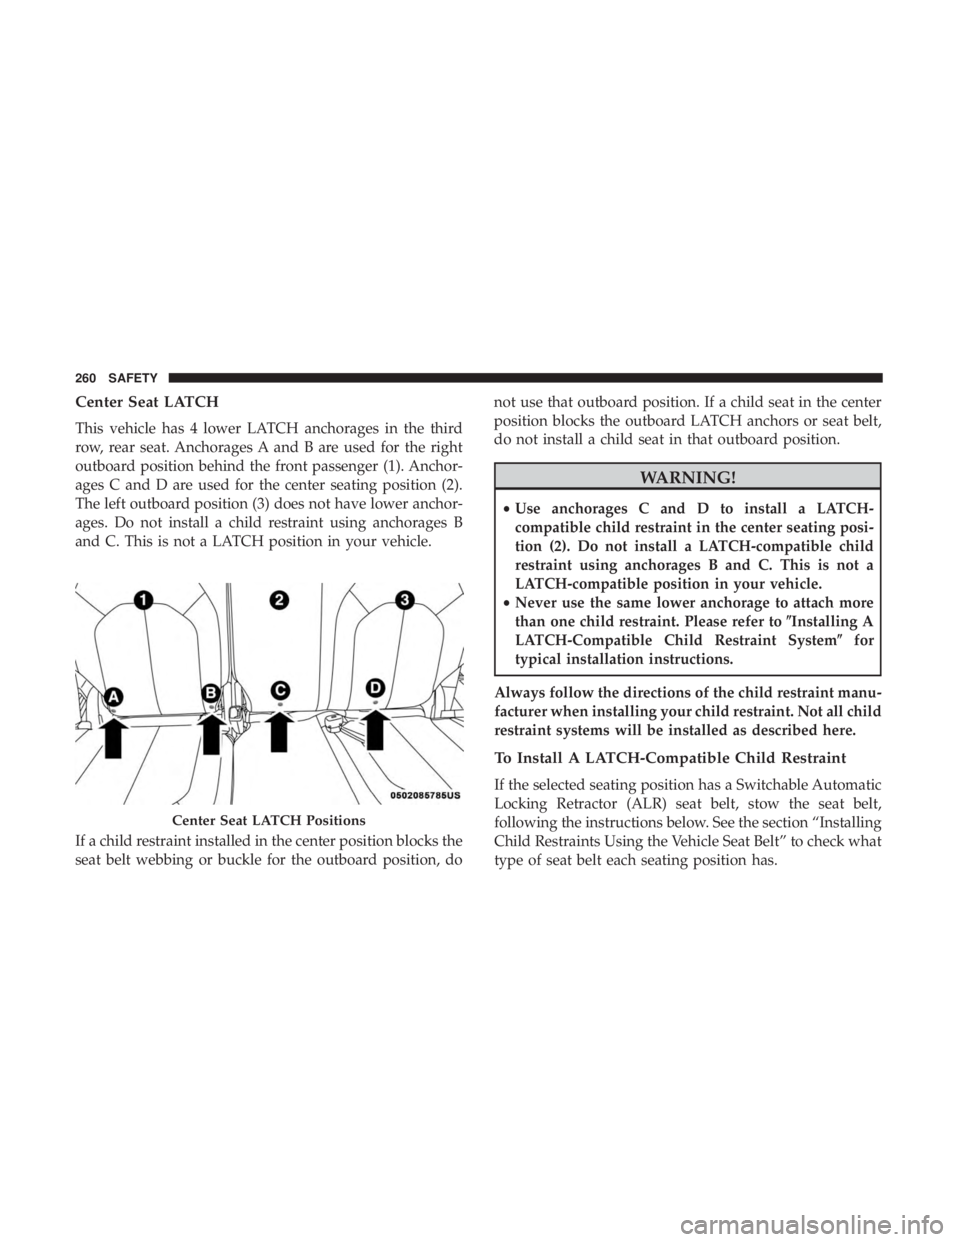
Center Seat LATCH
This vehicle has 4 lower LATCH anchorages in the third
row, rear seat. Anchorages A and B are used for the right
outboard position behind the front passenger (1). Anchor-
ages C and D are used for the center seating position (2).
The left outboard position (3) does not have lower anchor-
ages. Do not install a child restraint using anchorages B
and C. This is not a LATCH position in your vehicle.
If a child restraint installed in the center position blocks the
seat belt webbing or buckle for the outboard position, donot use that outboard position. If a child seat in the center
position blocks the outboard LATCH anchors or seat belt,
do not install a child seat in that outboard position.
WARNING!
•
Use anchorages C and D to install a LATCH-
compatible child restraint in the center seating posi-
tion (2). Do not install a LATCH-compatible child
restraint using anchorages B and C. This is not a
LATCH-compatible position in your vehicle.
• Never use the same lower anchorage to attach more
than one child restraint. Please refer to �Installing A
LATCH-Compatible Child Restraint System �for
typical installation instructions.
Always follow the directions of the child restraint manu-
facturer when installing your child restraint. Not all child
restraint systems will be installed as described here.
To Install A LATCH-Compatible Child Restraint
If the selected seating position has a Switchable Automatic
Locking Retractor (ALR) seat belt, stow the seat belt,
following the instructions below. See the section “Installing
Child Restraints Using the Vehicle Seat Belt” to check what
type of seat belt each seating position has.
Center Seat LATCH Positions
260 SAFETY