2018 CHRYSLER PACIFICA HYBRID brake light
[x] Cancel search: brake lightPage 192 of 614
and controls the wheel spin across a driven axle. If one
wheel on a driven axle is spinning faster than the other, the
system will apply the brake of the spinning wheel. This
will allow more vehicle torque to be applied to the wheel
that is not spinning. BLD may remain enabled even if TCS
and ESC are in a reduced mode.
Brake Assist System (BAS)
The BAS is designed to optimize the vehicle’s braking
capability during emergency braking maneuvers. The sys-
tem detects an emergency braking situation by sensing the
rate and amount of brake application and then applies
optimum pressure to the brakes. This can help reduce
braking distances. The BAS complements the anti-lock
brake system (ABS). Applying the brakes very quickly
results in the best BAS assistance. To receive the benefit of
the system, you must apply continuous braking pressure
during the stopping sequence, (do not “pump” the brakes).
Do not reduce brake pedal pressure unless braking is no
longer desired. Once the brake pedal is released, the BAS is
deactivated.
WARNING!
The Brake Assist System (BAS) cannot prevent the
natural laws of physics from acting on the vehicle, nor
can it increase the traction afforded by prevailing road
conditions. BAS cannot prevent collisions, including
those resulting from excessive speed in turns, driving
on very slippery surfaces, or hydroplaning. The capa-
bilities of a BAS-equipped vehicle must never be
exploited in a reckless or dangerous manner, which
could jeopardize the user’s safety or the safety of
others.
Brake System Warning Light
The red “Brake System Warning Light” will turn on when
the ignition is turned to the ON/RUN mode and may stay
on for as long as four seconds.
If the “Brake System Warning Light” remains on or comes
on while driving, it indicates that the brake system is not
functioning properly and that immediate service is re-
quired. If the “Brake System Warning Light” does not come
on when the ignition is turned to the ON/RUN mode, have
the light repaired as soon as possible.
190 SAFETY
Page 194 of 614

Electronic Stability Control (ESC)
This system enhances directional control and stability of
the vehicle under various driving conditions. ESC corrects
for oversteering or understeering of the vehicle by apply-
ing the brake of the appropriate wheel(s) to assist in
counteracting the oversteer or understeer condition. En-
gine power may also be reduced to help the vehicle
maintain the desired path.
ESC uses sensors in the vehicle to determine the vehicle
path intended by the driver and compares it to the actual
path of the vehicle. When the actual path does not match
the intended path, ESC applies the brake of the appropriate
wheel to assist in counteracting the oversteer or understeer
condition.
•Oversteer — when the vehicle is turning more than
appropriate for the steering wheel position.
• Understeer — when the vehicle is turning less than
appropriate for the steering wheel position.
The “ESC Activation/Malfunction Indicator Light” located
in the instrument cluster will start to flash as soon as the
ESC system becomes active. The “ESC Activation/
Malfunction Indicator Light” also flashes when the TCS is
active. If the “ESC Activation/Malfunction Indicator Light” begins to flash during acceleration, ease up on the
accelerator and apply as little throttle as possible. Be sure to
adapt your speed and driving to the prevailing road
conditions.
WARNING!
•
Electronic Stability Control (ESC) cannot prevent the
natural laws of physics from acting on the vehicle,
nor can it increase the traction afforded by prevailing
road conditions. ESC cannot prevent accidents, in-
cluding those resulting from excessive speed in
turns, driving on very slippery surfaces, or hydro-
planing. ESC also cannot prevent accidents resulting
from loss of vehicle control due to inappropriate
driver input for the conditions. Only a safe, attentive,
and skillful driver can prevent accidents. The capa-
bilities of an ESC equipped vehicle must never be
exploited in a reckless or dangerous manner which
could jeopardize the user ’s safety or the safety of
others.
• Vehicle modifications, or failure to properly main-
tain your vehicle, may change the handling charac-
teristics of your vehicle, and may negatively affect
(Continued)
192 SAFETY
Page 197 of 614
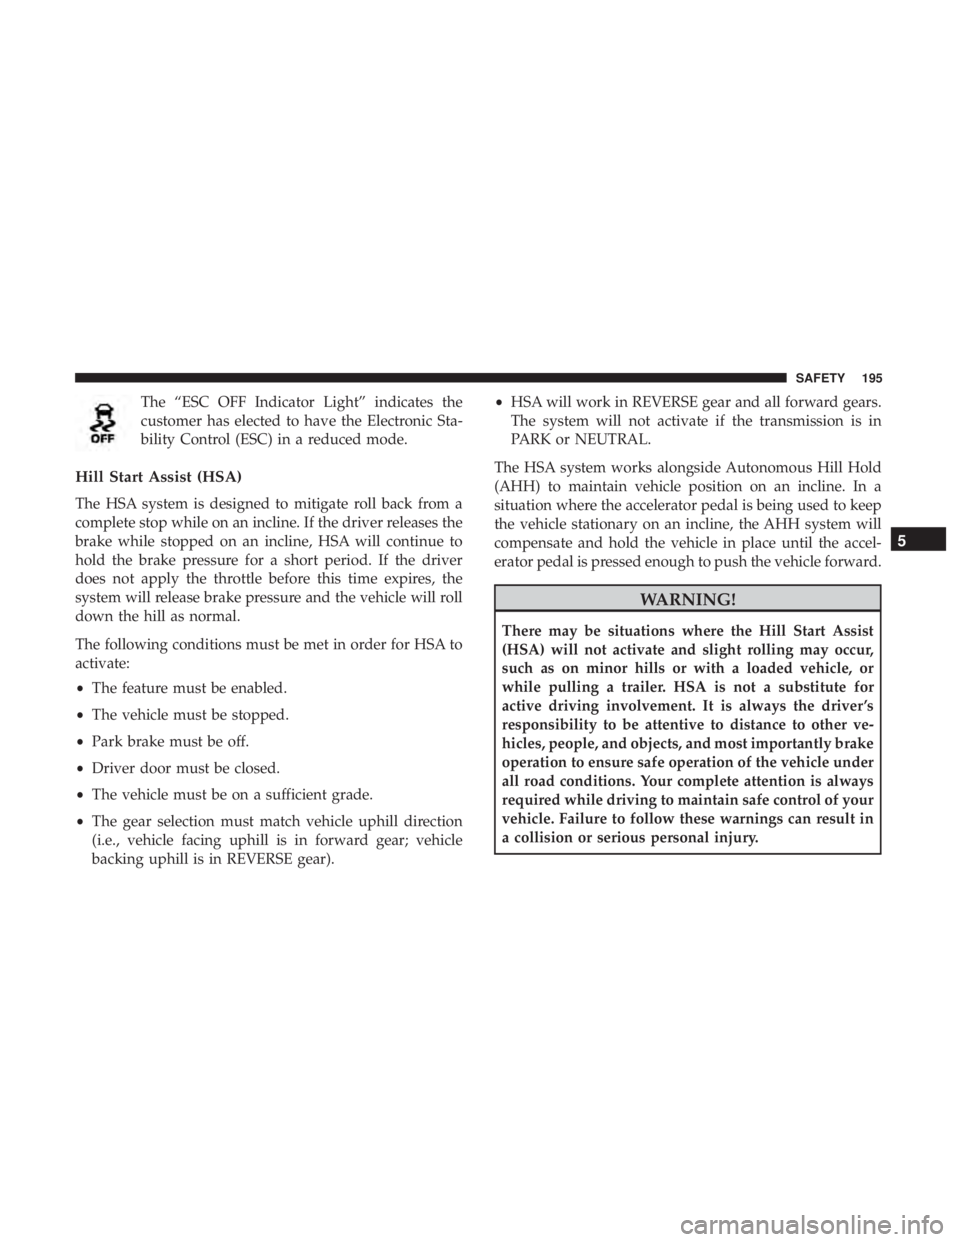
The “ESC OFF Indicator Light” indicates the
customer has elected to have the Electronic Sta-
bility Control (ESC) in a reduced mode.
Hill Start Assist (HSA)
The HSA system is designed to mitigate roll back from a
complete stop while on an incline. If the driver releases the
brake while stopped on an incline, HSA will continue to
hold the brake pressure for a short period. If the driver
does not apply the throttle before this time expires, the
system will release brake pressure and the vehicle will roll
down the hill as normal.
The following conditions must be met in order for HSA to
activate:
•The feature must be enabled.
• The vehicle must be stopped.
• Park brake must be off.
• Driver door must be closed.
• The vehicle must be on a sufficient grade.
• The gear selection must match vehicle uphill direction
(i.e., vehicle facing uphill is in forward gear; vehicle
backing uphill is in REVERSE gear). •
HSA will work in REVERSE gear and all forward gears.
The system will not activate if the transmission is in
PARK or NEUTRAL.
The HSA system works alongside Autonomous Hill Hold
(AHH) to maintain vehicle position on an incline. In a
situation where the accelerator pedal is being used to keep
the vehicle stationary on an incline, the AHH system will
compensate and hold the vehicle in place until the accel-
erator pedal is pressed enough to push the vehicle forward.
WARNING!
There may be situations where the Hill Start Assist
(HSA) will not activate and slight rolling may occur,
such as on minor hills or with a loaded vehicle, or
while pulling a trailer. HSA is not a substitute for
active driving involvement. It is always the driver ’s
responsibility to be attentive to distance to other ve-
hicles, people, and objects, and most importantly brake
operation to ensure safe operation of the vehicle under
all road conditions. Your complete attention is always
required while driving to maintain safe control of your
vehicle. Failure to follow these warnings can result in
a collision or serious personal injury.
5
SAFETY 195
Page 248 of 614

NOTE:
•Air bag covers may not be obvious in the interior trim,
but they will open during air bag deployment.
• After any collision, the vehicle should be taken to an
authorized dealer immediately.
Enhanced Accident Response System
In the event of an impact, if the communication network
remains intact, and the power remains intact, depending
on the nature of the event, the ORC will determine whether
to have the Enhanced Accident Response System perform
the following functions:
• Cut off fuel to the engine (If Equipped)
• Cut off battery power to the electric motor (If Equipped)
• Flash hazard lights as long as the battery has power
•
Turn on the interior lights, which remain on as long as the
battery has power or for 15 minutes from the intervention
of the Enhanced Accident Response System.
• Unlock the power door locks.
Your vehicle may also be designed to perform any of these
other functions in response to the Enhanced Accident
Response System: •
Turn off the Fuel Filter Heater, Turn off the HVAC
Blower Motor, Close the HVAC Circulation Door
• Cut off battery power to the:
• Engine
• Electric Motor (if equipped)
• Electric power steering
• Brake booster
• Electric park brake
• Automatic transmission gear selector
• Horn
• Front wiper
• Headlamp washer pump
NOTE: After an accident, remember to cycle the ignition to
the STOP (OFF/LOCK) position and remove the key from
the ignition switch to avoid draining the battery. Carefully
check the vehicle for fuel leaks in the engine compartment
and on the ground near the engine compartment and fuel
tank before resetting the system and starting the engine. If
there are no fuel leaks or damage to the vehicle electrical
devices (e.g. headlights) after an accident, reset the system
by following the procedure described below.
246 SAFETY
Page 275 of 614
Defroster
Check operation by selecting the defrost mode and place the
blower control on high speed. You should be able to feel the
air directed against the windshield. See your authorized
dealer for service if your defroster is inoperable.
Floor Mat Safety Information
Always use floor mats designed to fit your vehicle. Only
use a floor mat that does not interfere with the operation of
the accelerator, brake or clutch pedals. Only use a floor mat
that is securely attached using the floor mat fasteners so it
cannot slip out of position and interfere with the accelera-
tor, brake or clutch pedals or impair safe operation of your
vehicle in other ways.
WARNING!
An improperly attached, damaged, folded, or stacked
floor mat, or damaged floor mat fasteners may cause
your floor mat to interfere with the accelerator, brake,
or clutch pedals and cause a loss of vehicle control. To
prevent SERIOUS INJURY or DEATH:
•ALWAYS securely attach
your floor mat using the
floor mat fasteners. DO NOT install your floor mat
(Continued)
WARNING! (Continued)
upside down or turn your floor mat over. Lightly pull
to confirm mat is secured using the floor mat fasten-
ers on a regular basis.
• ALWAYS REMOVE THE EXISTING FLOOR MAT
FROM THE VEHICLE
before installing any other
floor mat. NEVER install or stack an additional floor
mat on top of an existing floor mat.
• ONLY install floor mats designed to fit your vehicle.
NEVER install a floor mat that cannot be properly
attached and secured to your vehicle. If a floor mat
needs to be replaced, only use a FCA approved floor
mat for the specific make, model, and year of your
vehicle.
• ONLY use the driver ’s side floor mat on the driver ’s
side floor area. To check for interference, with the
vehicle properly parked with the engine off, fully
depress the accelerator, the brake, and the clutch
pedal (if present) to check for interference. If your
floor mat interferes with the operation of any pedal,
or is not secure to the floor, remove the floor mat
from the vehicle and place the floor mat in your
trunk.
(Continued)
5
SAFETY 273
Page 276 of 614
WARNING!(Continued)
•ONLY use the passenger ’s side floor mat on the
passenger ’s side floor area.
• ALWAYS make sure objects cannot fall or slide into
the driver ’s side floor area when the vehicle is
moving. Objects can become trapped under accelera-
tor, brake, or clutch pedals and could cause a loss of
vehicle control.
• NEVER place any objects under the floor mat (e.g.,
towels, keys, etc.). These objects could change the
position of the floor mat and may cause interference
with the accelerator, brake, or clutch pedals.
• If the vehicle carpet has been removed and re-
installed, always properly attach carpet to the floor
and check the floor mat fasteners are secure to the
vehicle carpet. Fully depress each pedal to check for
interference with the accelerator, brake, or clutch
pedals then re-install the floor mats.
• It is recommended to only use mild soap and water
to clean your floor mats. After cleaning, always check
your floor mat has been properly installed and is
secured to your vehicle using the floor mat fasteners
by lightly pulling mat.
Periodic Safety Checks You Should Make Outside
The Vehicle
Tires
Examine tires for excessive tread wear and uneven wear
patterns. Check for stones, nails, glass, or other objects
lodged in the tread or sidewall. Inspect the tread for cuts
and cracks. Inspect sidewalls for cuts, cracks, and bulges.
Check the wheel nuts for tightness. Check the tires (includ-
ing spare) for proper cold inflation pressure.
Lights
Have someone observe the operation of brake lights and
exterior lights while you work the controls. Check turn
signal and high beam indicator lights on the instrument
panel.
Door Latches
Check for proper closing, latching, and locking.
Fluid Leaks
Check area under the vehicle after overnight parking for
fuel, coolant, oil, or other fluid leaks. Also, if gasoline
fumes are detected or if fuel, or brake fluid leaks are
suspected. The cause should be located and corrected
immediately.
274 SAFETY
Page 284 of 614
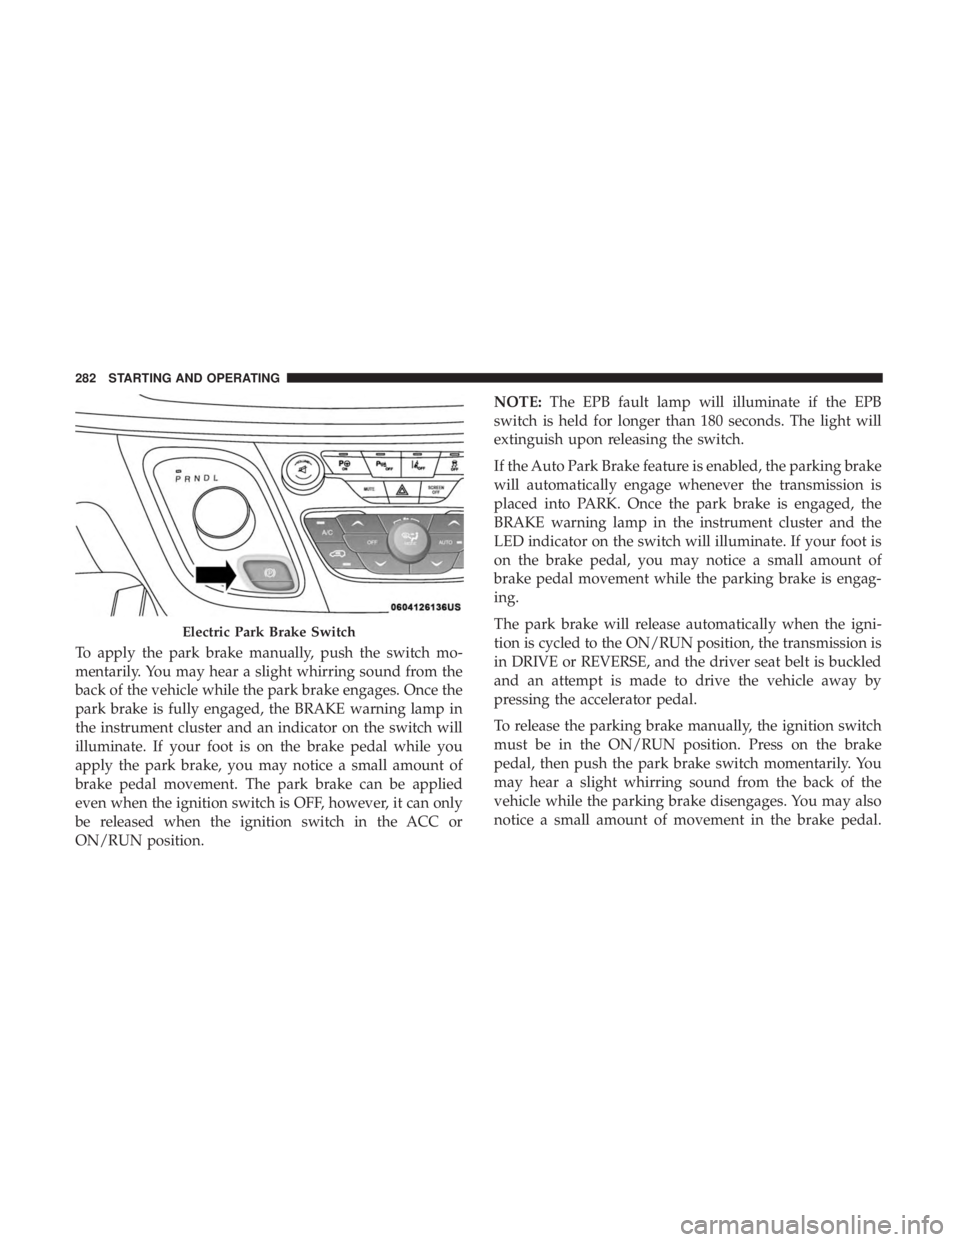
To apply the park brake manually, push the switch mo-
mentarily. You may hear a slight whirring sound from the
back of the vehicle while the park brake engages. Once the
park brake is fully engaged, the BRAKE warning lamp in
the instrument cluster and an indicator on the switch will
illuminate. If your foot is on the brake pedal while you
apply the park brake, you may notice a small amount of
brake pedal movement. The park brake can be applied
even when the ignition switch is OFF, however, it can only
be released when the ignition switch in the ACC or
ON/RUN position.NOTE:
The EPB fault lamp will illuminate if the EPB
switch is held for longer than 180 seconds. The light will
extinguish upon releasing the switch.
If the Auto Park Brake feature is enabled, the parking brake
will automatically engage whenever the transmission is
placed into PARK. Once the park brake is engaged, the
BRAKE warning lamp in the instrument cluster and the
LED indicator on the switch will illuminate. If your foot is
on the brake pedal, you may notice a small amount of
brake pedal movement while the parking brake is engag-
ing.
The park brake will release automatically when the igni-
tion is cycled to the ON/RUN position, the transmission is
in DRIVE or REVERSE, and the driver seat belt is buckled
and an attempt is made to drive the vehicle away by
pressing the accelerator pedal.
To release the parking brake manually, the ignition switch
must be in the ON/RUN position. Press on the brake
pedal, then push the park brake switch momentarily. You
may hear a slight whirring sound from the back of the
vehicle while the parking brake disengages. You may also
notice a small amount of movement in the brake pedal.
Electric Park Brake Switch
282 STARTING AND OPERATING
Page 286 of 614
WARNING!(Continued)
•Always fully apply the parking brake when leaving
your vehicle, or it may roll and cause damage or
injury. Also be certain to leave the transmission in
PARK. Failure to do so may allow the vehicle to roll
and cause damage or injury.
• Driving the vehicle with the parking brake engaged,
or repeated use of the parking brake to slow the
vehicle may cause serious damage to the brake
system.
CAUTION!
If the Brake System Warning Light remains on with the
parking brake released, a brake system malfunction is
indicated. Have the brake system serviced by an au-
thorized dealer immediately.
If exceptional circumstances should make it necessary to
engage the park brake while the vehicle is in motion, push
on the electric park brake switch for as long as engagement
is desired. The BRAKE warning lamp will illuminate, and
a continuous chime will sound. The rear stop lamps will
also be illuminated automatically while the vehicle re-
mains in motion. To disengage the park brake while the vehicle is in motion,
release the switch. If the vehicle is brought to a complete
stop using the park brake, when the vehicle reaches
approximately 3 mph (4.8 km/h), the park brake will
remain engaged.
In the unlikely event of a malfunction of the Electric Park
Brake system, a yellow EPB fault lamp will illuminate. This
may be accompanied by the BRAKE warning lamp flash-
ing. In this case, urgent service of the electric park brake
system is required. Do not rely on the park brake to hold
the vehicle stationary.
Auto Park Brake
The Electric Park Brake can be programmed to be applied
automatically whenever the vehicle is at a standstill and
the automatic transmission is placed in PARK. Auto Park
Brake is enabled and disabled by customer selection
through the “Customer Programmable Features” section of
the “Uconnect Settings”.
SafeHold
SafeHold is a safety feature of the Electric Park Brake
System that will engage the park brake automatically if the
vehicle is left unsecured. If the automatic transmission is
not in PARK, the seat belt is unbuckled, the driver door is
284 STARTING AND OPERATING