2018 CHEVROLET SILVERADO maintenance
[x] Cancel search: maintenancePage 365 of 501

Chevrolet Silverado Owner Manual (GMNA-Localizing-U.S./Canada/Mexico-
11349200) - 2018 - CRC - 2/27/18
364 Vehicle Care
When to Change Lubricant
Refer toMaintenance Schedule
0 443 to determine how often to
change the lubricant.
What to Use
Refer to Recommended Fluids and
Lubricants 0451 to determine what
kind of lubricant to use.
Front Axle
When to Check and Change
Lubricant
It is not necessary to regularly
check front axle fluid unless a leak
is suspected, or an unusual noise is
heard. A fluid loss could indicate a
problem. Have it inspected and
repaired. How to Check Lubricant
To get an accurate reading, the
vehicle should be on a level
surface.
1500 Series
1. Fill Plug
2. Drain Plug
All Except 1500 Series
1. Fill Plug
2. Drain Plug
.
When the differential is cold, add
enough lubricant to raise the
level from 0 mm (0 in) to 3.2 mm
(1/8 in) below the fill
plug (1) hole.
. When the differential is at
operating temperature (warm),
add enough lubricant to raise the
level to the bottom of the fill
plug (1) hole.
Page 367 of 501

Chevrolet Silverado Owner Manual (GMNA-Localizing-U.S./Canada/Mexico-
11349200) - 2018 - CRC - 2/27/18
366 Vehicle Care
fill plug hole, located on the rear
axle. Add only enough fluid to
reach the proper level.
. For all 6.0L 2500HD Series
applications, the proper level is
from 0 mm to 13 mm (0 to 0.5 in)
below the bottom of the fill plug
hole, located on the rear axle.
Add only enough fluid to reach
the proper level.
. For all 6.6L Duramax Diesel
2500HD Series applications and
all 3500 Series applications, the
proper level is from 17 mm to
21 mm (0.6 in to 0.8 in) below
the bottom of the fill plug hole,
located on the rear axle. Add
only enough fluid to reach the
proper level.
What to Use
Refer to Recommended Fluids and
Lubricants 0451 to determine what
kind of lubricant to use.
Noise Control System
Noise Emissions Warranty
General Motors warrants to the first
person who purchases this vehicle
for purposes other than resale and
to each subsequent purchaser that
this vehicle as manufactured by
General Motors, was designed, built
and equipped to conform at the time
it left General Motors’ s control with
all applicable U.S. EPA Noise
Control Regulations. This warranty
covers this vehicle as designed,
built and equipped by General
Motors, and is not limited to any
particular part, component or
system of the vehicle manufactured
by General Motors. Defects in
design, assembly or in any part,
component or system of the vehicle
as manufactured by General
Motors, which, at the time it left
General Motors’s control, caused
noise emissions to exceed Federal
standards, are covered by this
warranty for the life of the vehicle. The following information relates to
compliance with federal noise
emission standards for vehicles with
a Gross Vehicle Weight Rating
(GVWR) of more than 4 536 kg
(10,000 lb). The Maintenance
Schedule provides information on
maintaining the noise control system
to minimize degradation of the noise
emission control system during the
life of the vehicle. The noise control
system warranty is given in the
warranty manual.
These standards apply only to
vehicles sold in the United States.
TAMPERING WITH NOISE
CONTROL SYSTEM
PROHIBITED
Federal law prohibits the following
acts or the causing thereof:
1. The removal or rendering inoperative by any person,
other than for purposes of
maintenance, repair,
or replacement, of any device
or element of design
incorporated into any new
vehicle for the purpose of noise
Page 370 of 501

Chevrolet Silverado Owner Manual (GMNA-Localizing-U.S./Canada/Mexico-
11349200) - 2018 - CRC - 2/27/18
Vehicle Care 369
.To check the P (Park)
mechanism's holding ability:
With the engine running, shift to
P (Park). Then release the
parking brake followed by the
regular brake.
Contact your dealer if service is
required.
Wiper Blade Replacement
Windshield wiper blades should be
inspected for wear or cracking.
Replacement blades come in
different types and are removed in
different ways. For proper
windshield wiper blade length and
type, see Maintenance
Replacement Parts 0453.
Caution
Allowing the wiper arm to touch
the windshield when no wiper
blade is installed could damage
the windshield. Any damage that
occurs would not be covered by
(Continued)
Caution (Continued)
the vehicle warranty. Do not allow
the wiper arm to touch the
windshield.
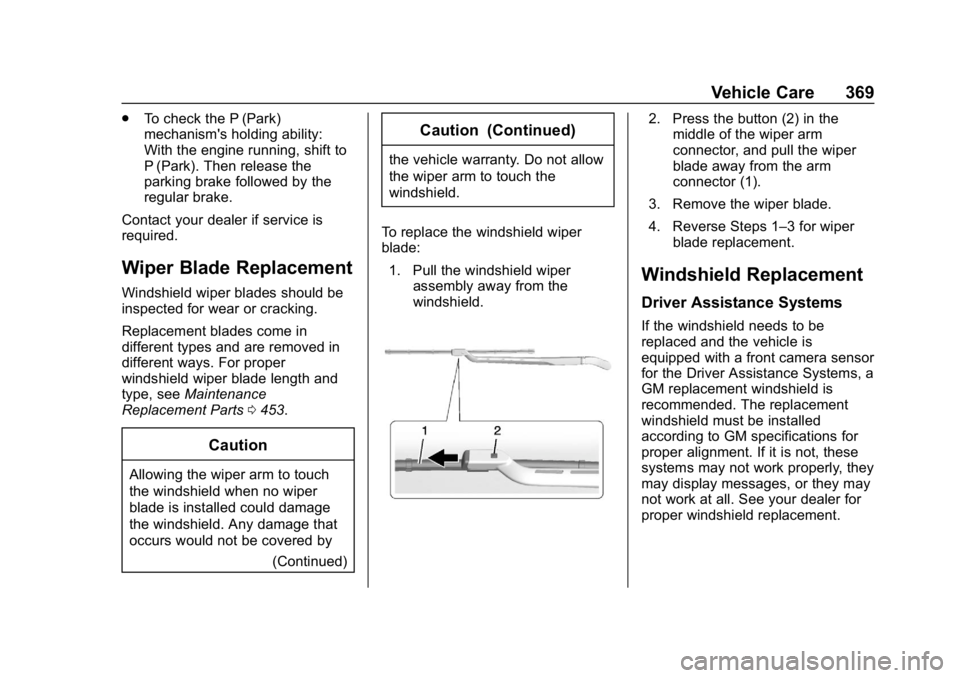
To replace the windshield wiper
blade: 1. Pull the windshield wiper assembly away from the
windshield.
2. Press the button (2) in themiddle of the wiper arm
connector, and pull the wiper
blade away from the arm
connector (1).
3. Remove the wiper blade.
4. Reverse Steps 1–3 for wiper blade replacement.
Windshield Replacement
Driver Assistance Systems
If the windshield needs to be
replaced and the vehicle is
equipped with a front camera sensor
for the Driver Assistance Systems, a
GM replacement windshield is
recommended. The replacement
windshield must be installed
according to GM specifications for
proper alignment. If it is not, these
systems may not work properly, they
may display messages, or they may
not work at all. See your dealer for
proper windshield replacement.
Page 371 of 501

Chevrolet Silverado Owner Manual (GMNA-Localizing-U.S./Canada/Mexico-
11349200) - 2018 - CRC - 2/27/18
370 Vehicle Care
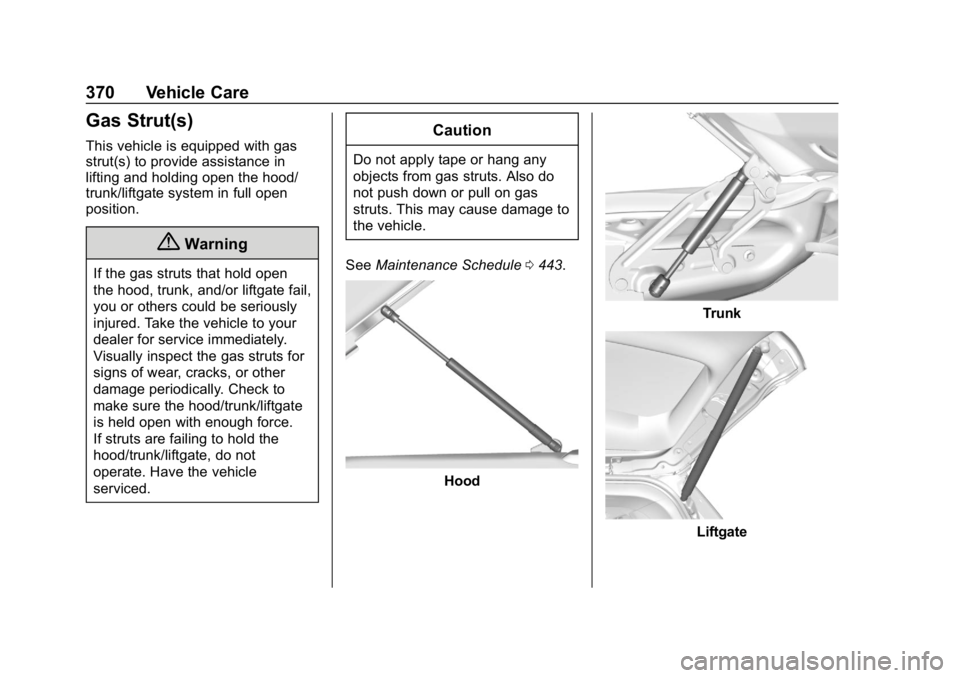
Gas Strut(s)
This vehicle is equipped with gas
strut(s) to provide assistance in
lifting and holding open the hood/
trunk/liftgate system in full open
position.
{Warning
If the gas struts that hold open
the hood, trunk, and/or liftgate fail,
you or others could be seriously
injured. Take the vehicle to your
dealer for service immediately.
Visually inspect the gas struts for
signs of wear, cracks, or other
damage periodically. Check to
make sure the hood/trunk/liftgate
is held open with enough force.
If struts are failing to hold the
hood/trunk/liftgate, do not
operate. Have the vehicle
serviced.
Caution
Do not apply tape or hang any
objects from gas struts. Also do
not push down or pull on gas
struts. This may cause damage to
the vehicle.
See Maintenance Schedule 0443.
Hood
Trunk
Liftgate
Page 396 of 501

Chevrolet Silverado Owner Manual (GMNA-Localizing-U.S./Canada/Mexico-
11349200) - 2018 - CRC - 2/27/18
Vehicle Care 395
As an added safety feature, your
vehicle has been equipped with a
tire pressure monitoring system
(TPMS) that illuminates a low tire
pressure telltale when one or more
of your tires is significantly
under-inflated.
Accordingly, when the low tire
pressure telltale illuminates, you
should stop and check your tires as
soon as possible, and inflate them
to the proper pressure. Driving on a
significantly under-inflated tire
causes the tire to overheat and can
lead to tire failure. Under-inflation
also reduces fuel efficiency and tire
tread life, and may affect the
vehicle's handling and stopping
ability.
Please note that the TPMS is not a
substitute for proper tire
maintenance, and it is the driver's
responsibility to maintain correct tire
pressure, even if under-inflation has
not reached the level to trigger
illumination of the TPMS low tire
pressure telltale.Your vehicle has also been
equipped with a TPMS malfunction
indicator to indicate when the
system is not operating properly.
The TPMS malfunction indicator is
combined with the low tire pressure
telltale. When the system detects a
malfunction, the telltale will flash for
approximately one minute and then
remain continuously illuminated.
This sequence will continue upon
subsequent vehicle start-ups as
long as the malfunction exists.
When the malfunction indicator is
illuminated, the system may not be
able to detect or signal low tire
pressure as intended. TPMS
malfunctions may occur for a variety
of reasons, including the installation
of replacement or alternate tires or
wheels on the vehicle that prevent
the TPMS from functioning properly.
Always check the TPMS malfunction
telltale after replacing one or more
tires or wheels on your vehicle to
ensure that the replacement or
alternate tires and wheels allow the
TPMS to continue to function
properly.See
Tire Pressure Monitor
Operation 0395.
See Radio Frequency Statement
0 471.
Tire Pressure Monitor
Operation
This vehicle may have a Tire
Pressure Monitor System (TPMS).
The TPMS is designed to warn the
driver when a low tire pressure
condition exists. TPMS sensors are
mounted onto each tire and wheel
assembly, excluding the spare tire
and wheel assembly. The TPMS
sensors monitor the air pressure in
the tires and transmit the tire
pressure readings to a receiver
located in the vehicle.
Page 397 of 501

Chevrolet Silverado Owner Manual (GMNA-Localizing-U.S./Canada/Mexico-
11349200) - 2018 - CRC - 2/27/18
396 Vehicle Care
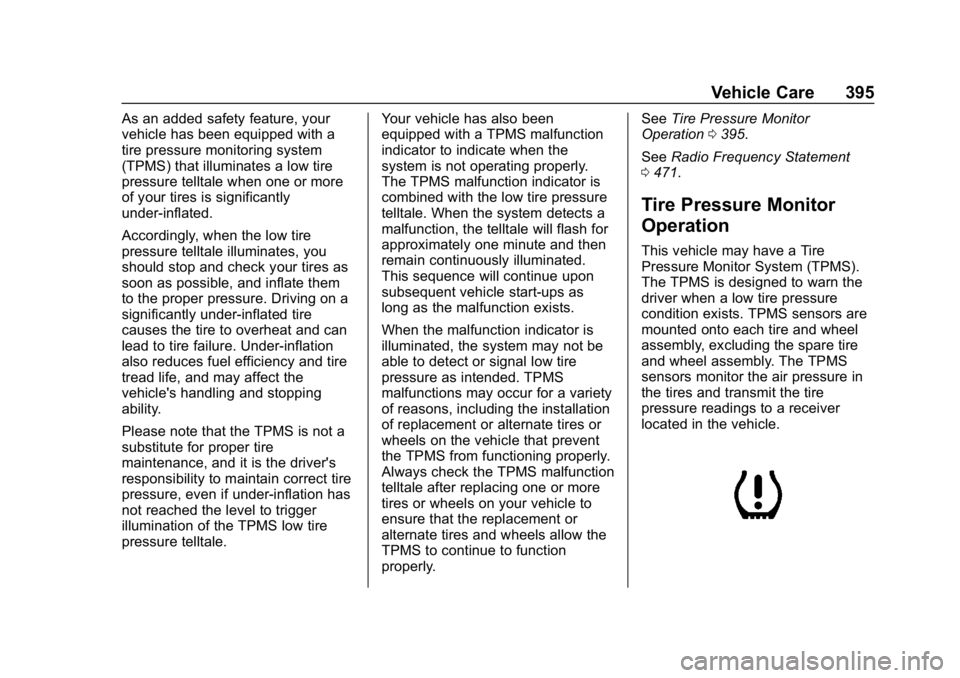
When a low tire pressure condition
is detected, the TPMS illuminates
the low tire pressure warning light
located on the instrument cluster.
If the warning light comes on, stop
as soon as possible and inflate the
tires to the recommended pressure
shown on the Tire and Loading
Information label. SeeVehicle Load
Limits 0239.
A message to check the pressure in
a specific tire displays in the Driver
Information Center (DIC). The low
tire pressure warning light and the
DIC warning message come on at
each ignition cycle until the tires are
inflated to the correct inflation
pressure. If the vehicle has DIC
buttons, tire pressure levels can be
viewed. For additional information
and details about the DIC operation
and displays, see Driver Information
Center (DIC) (Base Level) 0155 or
Driver Information Center (DIC)
(Uplevel) 0156.
The low tire pressure warning light
may come on in cool weather when
the vehicle is first started, and then
turn off as the vehicle is driven. This could be an early indicator that the
air pressure is getting low and
needs to be inflated to the proper
pressure.
A Tire and Loading Information label
shows the size of the original
equipment tires and the correct
inflation pressure for the tires when
they are cold. See
Vehicle Load
Limits 0239, for an example of the
Tire and Loading Information label
and its location. Also see Tire
Pressure 0392.
The TPMS can warn about a low
tire pressure condition but it does
not replace normal tire
maintenance. See Tire Inspection
0 399, Tire Rotation 0400 andTires
0 384.
Caution
Tire sealant materials are not all
the same. A non-approved tire
sealant could damage the TPMS
sensors. TPMS sensor damage
caused by using an incorrect tire
(Continued)
Caution (Continued)
sealant is not covered by the
vehicle warranty. Always use only
the GM approved tire sealant
available through your dealer or
included in the vehicle.
TPMS Malfunction Light and
Message
The TPMS will not function properly
if one or more of the TPMS sensors
are missing or inoperable. When the
system detects a malfunction, the
low tire pressure warning light
flashes for about one minute and
then stays on for the remainder of
the ignition cycle. A DIC warning
message also displays. The
malfunction light and DIC warning
message come on at each ignition
cycle until the problem is corrected.
Some of the conditions that can
cause these to come on are:
.One of the road tires has been
replaced with the spare tire. The
spare tire does not have a
TPMS sensor. The malfunction
Page 401 of 501

Chevrolet Silverado Owner Manual (GMNA-Localizing-U.S./Canada/Mexico-
11349200) - 2018 - CRC - 2/27/18
400 Vehicle Care
Tire Rotation
Tires should be rotated every
12 000 km (7,500 mi). See
Maintenance Schedule0443.
Tires are rotated to achieve a
uniform wear for all tires. The
first rotation is the most
important.
Anytime unusual wear is
noticed, rotate the tires as soon
as possible, check for proper tire
inflation pressure, and check for
damaged tires or wheels. If the
unusual wear continues after the
rotation, check the wheel
alignment. See When It Is Time
for New Tires 0402 andWheel
Replacement 0407.
Use this rotation pattern when
rotating the tires if the vehicle
has single rear wheels.
Dual Tire Rotation
When the vehicle is new,
or whenever a wheel, wheel
bolt, or wheel nut is replaced or
serviced, check the wheel nut
torque after 160, 1 600, and
10 000 km (100, 1,000, and
6,000 mi) of driving. For proper
torque and wheel nut tightening
information, see “Removing the
Flat Tire and Installing the Spare
Tire” under Tire Changing 0410 and
“Wheel Nut Torque” under
Capacities and Specifications
0 457.
The outer tire on a dual wheel
setup generally wears faster
than the inner tire. Tires last
longer and wear more evenly if
they are rotated. See Tire
Inspection 0399 and Tire
Rotation 0400. Also see
Maintenance Schedule 0443.
{Warning
If the vehicle is operated with a
tire that is underinflated, the tire
can overheat. An overheated tire
can lose air suddenly or catch
fire. You or others could be
injured. Properly inflate all tires,
including the spare.
See Tire Pressure 0392, for
information on proper tire
inflation.
Page 403 of 501

Chevrolet Silverado Owner Manual (GMNA-Localizing-U.S./Canada/Mexico-
11349200) - 2018 - CRC - 2/27/18
402 Vehicle Care
Warning (Continued)
wheel attaches to the vehicle. In
an emergency, a cloth or a paper
towel can be used; however, use
a scraper or wire brush later to
remove all rust or dirt.
Lightly coat the inner diameter of
the wheel hub opening with
wheel bearing grease after a
wheel change or tire rotation to
prevent corrosion or rust
build-up. Do not get grease on
the flat wheel mounting surface
or on the wheel nuts or bolts.
Reset the Tire Pressure Monitor
System (TPMS), if the vehicle
has one. SeeTire Pressure
Monitor Operation 0395.
Check that the spare tire, if the
vehicle has one, is stored
properly. Push, pull, and then try to rotate or turn the tire. If it
moves, tighten the cable. See
“Storing a Flat or Spare Tire and
Tools”
underTire Changing
0 410.
When It Is Time for New
Tires
Factors, such as maintenance,
temperatures, driving speeds,
vehicle loading, and road conditions
affect the wear rate of the tires.
Treadwear indicators are one way to
tell when it is time for new tires.
Treadwear indicators appear when
the tires have only 1.6 mm (1/16 in)
or less of tread remaining. Some
commercial truck tires may not have
treadwear indicators. See Tire
Inspection 0399 andTire Rotation
0 400 for additional information.
The rubber in tires ages over time.
This also applies to the spare tire,
if the vehicle has one, even if it is
never used. Multiple factors
including temperatures, loading
conditions, and inflation pressure
maintenance affect how fast aging
takes place. GM recommends that
tires, including the spare if
equipped, be replaced after six
years, regardless of tread wear. The
tire manufacture date is the last four
digits of the DOT Tire Identification
Number (TIN) which is molded into
one side of the tire sidewall. The
first two digits represent the week
(01-52) and the last two digits, the
year. For example, the third week of
the year 2010 would have a
four-digit DOT date of 0310.