2018 CHEVROLET SILVERADO maintenance
[x] Cancel search: maintenancePage 301 of 501
Chevrolet Silverado Owner Manual (GMNA-Localizing-U.S./Canada/Mexico-
11349200) - 2018 - CRC - 2/27/18
300 Driving and Operating
4. Stop and have someone pickup and store the chocks.
Maintenance when Trailer
Towing
The vehicle needs service more
often when pulling a trailer. See
Maintenance Schedule 0443.
Things that are especially important
in trailer operation are automatic
transmission fluid, engine oil, axle
lubricant, belts, cooling system, and
brake system. It is a good idea to
inspect these before and during
the trip.
Check periodically to see that all
hitch nuts and bolts are tight.
Engine Cooling When Trailer
Towing
The cooling system may temporarily
overheat during severe operating
conditions. See Engine Overheating
0 356.
Trailer Towing
If the vehicle has a diesel engine,
see the Duramax diesel
supplement.
Do not tow a trailer during break-in.
See New Vehicle Break-In 0247.
{Warning
The driver can lose control when
pulling a trailer if the correct
equipment is not used or the
vehicle is not driven properly. For
example, if the trailer is too heavy
or the trailer brakes are
inadequate for the load, the
vehicle may not stop as expected.
The driver and passengers could
be seriously injured. The vehicle
may also be damaged; the
resulting repairs would not be
covered by the vehicle warranty.
Pull a trailer only if all the steps in
this section have been followed.
Ask your dealer for advice and
information about towing a trailer
with the vehicle.
Caution
Pulling a trailer improperly can
damage the vehicle and result in
costly repairs not covered by the
vehicle warranty. To pull a trailer
correctly, follow the advice in this
section and see your dealer for
important information about
towing a trailer with the vehicle.
See Vehicle Load Limits 0239 for
more information about the vehicle's
maximum load capacity.
To identify the trailering capacity of
the vehicle, read the information in
“Weight of the Trailer” later in this
section.
Trailering is different than just
driving the vehicle by itself.
Trailering means changes in
handling, acceleration, braking,
durability, and fuel economy.
Successful, safe trailering takes
correct equipment, and it has to be
used properly.
Page 330 of 501
Chevrolet Silverado Owner Manual (GMNA-Localizing-U.S./Canada/Mexico-
11349200) - 2018 - CRC - 2/27/18
Driving and Operating 329
Warning (Continued)
(20-25 mph) and fully apply
the manual trailer brake
apply lever. Also check that
the trailer brake lamps and
other lamps are functioning
correctly.
. If the trailer brakes are not
operating properly at any
time, or if a DIC message
indicates problems with the
trailer connections or trailer
brakes, carefully pull the
vehicle over to the side of
the road when traffic
conditions allow.
Conversions and
Add-Ons
Add-On Electrical
Equipment
{Warning
The Data Link Connector (DLC) is
used for vehicle service
and Emission Inspection/
Maintenance testing. See
Malfunction Indicator Lamp
(Check Engine Light) 0147.
A device connected to the DLC —
such as an aftermarket fleet or
driver-behavior tracking device —
may interfere with vehicle
systems. This could affect vehicle
operation and cause a crash.
Such devices may also access
information stored in the vehicle’s
systems.
Caution
Some electrical equipment can
damage the vehicle or cause
components to not work and
would not be covered by the
vehicle warranty. Always check
with your dealer before adding
electrical equipment.
Add-on equipment can drain the
vehicle's 12-volt battery, even if the
vehicle is not operating.
The vehicle has an airbag system.
Before attempting to add anything
electrical to the vehicle, see
Servicing the Airbag-Equipped
Vehicle 090 and Adding Equipment
to the Airbag-Equipped Vehicle
0 90.
For information on wiring auxiliary
switches, see www.gmupfitter.com
or contact your dealer.
Page 338 of 501
Chevrolet Silverado Owner Manual (GMNA-Localizing-U.S./Canada/Mexico-
11349200) - 2018 - CRC - 2/27/18
Vehicle Care 337
Vehicle Checks
Doing Your Own
Service Work
{Warning
It can be dangerous to work on
your vehicle if you do not have
the proper knowledge, service
manual, tools, or parts. Always
follow owner’s manual procedures
and consult the service manual
for your vehicle before doing any
service work.
If doing some of your own service
work, use the proper service
manual. It tells you much more
about how to service the vehicle
than this manual can. To order the
proper service manual, see Service
Publications Ordering Information
0 470.
This vehicle has an airbag system.
Before attempting to do your own
service work, see Servicing the
Airbag-Equipped Vehicle 090. Keep a record with all parts receipts
and list the mileage and the date of
any service work performed. See
Maintenance Records
0455.
Caution
Even small amounts of
contamination can cause damage
to vehicle systems. Do not allow
contaminants to contact the fluids,
reservoir caps, or dipsticks.
Hood
To open the hood:
1. Pull the handle with this symbol
on it. It is inside the vehicle
under the steering wheel.
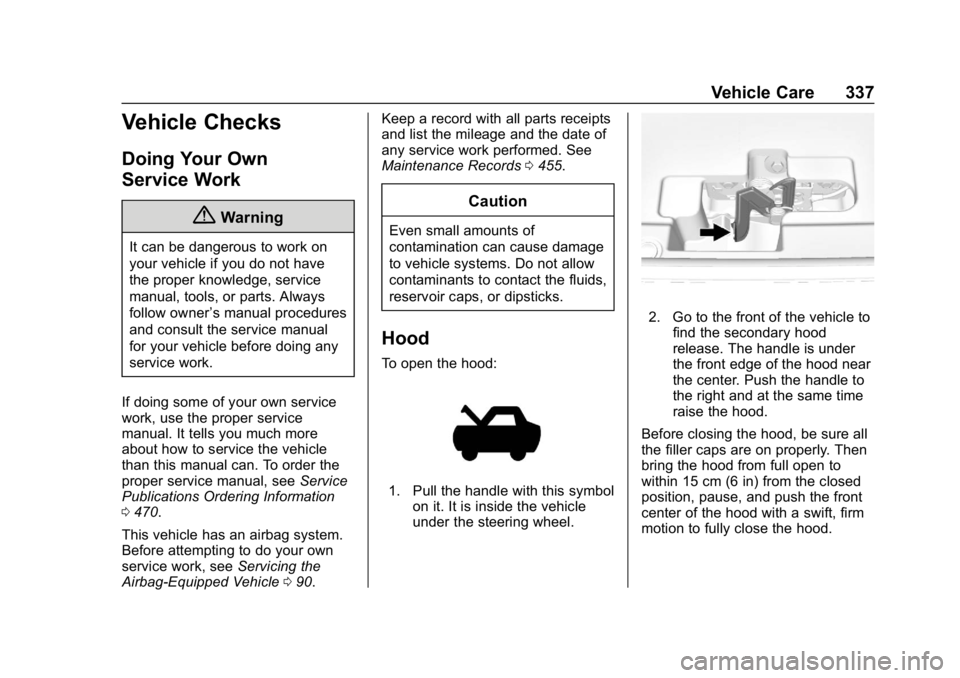
2. Go to the front of the vehicle tofind the secondary hood
release. The handle is under
the front edge of the hood near
the center. Push the handle to
the right and at the same time
raise the hood.
Before closing the hood, be sure all
the filler caps are on properly. Then
bring the hood from full open to
within 15 cm (6 in) from the closed
position, pause, and push the front
center of the hood with a swift, firm
motion to fully close the hood.
Page 348 of 501

Chevrolet Silverado Owner Manual (GMNA-Localizing-U.S./Canada/Mexico-
11349200) - 2018 - CRC - 2/27/18
Vehicle Care 347
1. Display the OIL LIFEREMAINING on the DIC. If the
vehicle does not have DIC
buttons, the vehicle must be in
P (Park) to access this display.
See Driver Information Center
(DIC) (Base Level) 0155 or
Driver Information Center (DIC)
(Uplevel) 0156.
2. Press and hold
V, or the trip
odometer reset stem if the
vehicle does not have DIC
buttons, for several seconds.
The oil life will change
to 100%.
The oil life system can also be reset
as follows:
1. Display the OIL LIFE REMAINING on the DIC.
See Driver Information Center
(DIC) (Base Level) 0155 or
Driver Information Center (DIC)
(Uplevel) 0156.
2. Fully press the accelerator pedal slowly three times within
five seconds. 3. Display the OIL LIFE
REMAINING on the DIC. If the
display shows 100%, the
system is reset.
If the vehicle has a CHANGE
ENGINE OIL SOON message and it
comes back on when the vehicle is
started and/or the OIL LIFE
REMAINING is near 0%, the engine
oil life system has not been reset.
Repeat the procedure.
Automatic Transmission
Fluid (6-Speed
Transmission)
When to Check and Change
Automatic Transmission Fluid
It is usually not necessary to check
the transmission fluid level. The only
reason for fluid loss is a
transmission leak or overheated
transmission. If a small leak is
suspected, then use the following
checking procedures to check the
fluid level. However, if there is a
large leak, then it may be necessary
to have the vehicle towed to a dealer service department and have
it repaired before driving the vehicle
further.
Caution
Use of the incorrect automatic
transmission fluid may damage
the vehicle, and the damage may
not be covered by the vehicle
warranty. Always use the
automatic transmission fluid listed
in
Recommended Fluids and
Lubricants 0451.
Change the fluid and filter at the
scheduled maintenance intervals
listed in Maintenance Schedule
0 443. Be sure to use the
transmission fluid listed in
Recommended Fluids and
Lubricants 0451.
Page 351 of 501
Chevrolet Silverado Owner Manual (GMNA-Localizing-U.S./Canada/Mexico-
11349200) - 2018 - CRC - 2/27/18
350 Vehicle Care
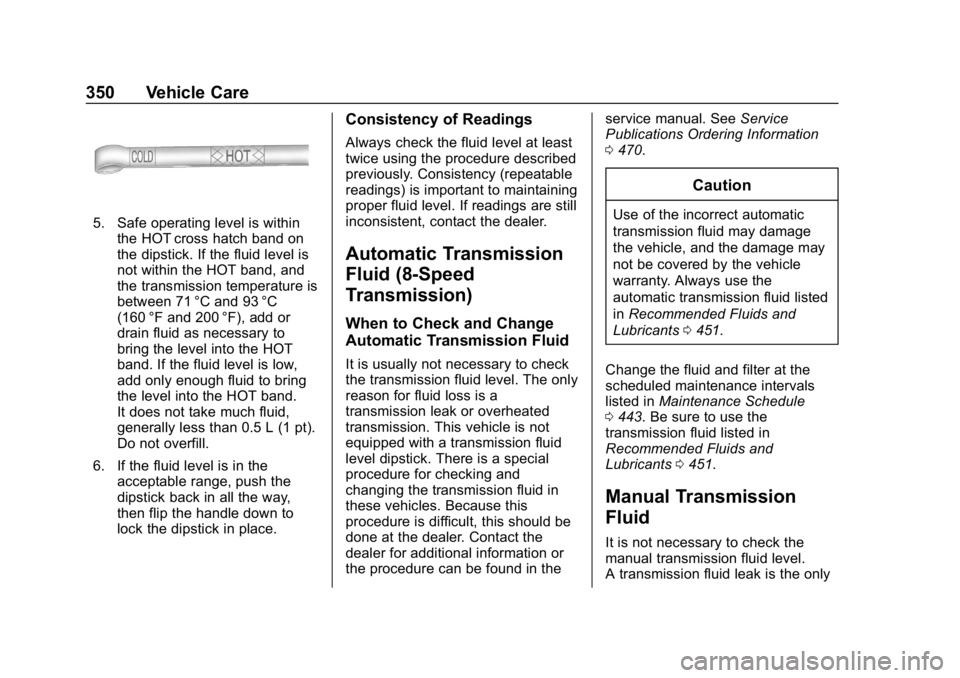
5. Safe operating level is withinthe HOT cross hatch band on
the dipstick. If the fluid level is
not within the HOT band, and
the transmission temperature is
between 71 °C and 93 °C
(160 °F and 200 °F), add or
drain fluid as necessary to
bring the level into the HOT
band. If the fluid level is low,
add only enough fluid to bring
the level into the HOT band.
It does not take much fluid,
generally less than 0.5 L (1 pt).
Do not overfill.
6. If the fluid level is in the acceptable range, push the
dipstick back in all the way,
then flip the handle down to
lock the dipstick in place.
Consistency of Readings
Always check the fluid level at least
twice using the procedure described
previously. Consistency (repeatable
readings) is important to maintaining
proper fluid level. If readings are still
inconsistent, contact the dealer.
Automatic Transmission
Fluid (8-Speed
Transmission)
When to Check and Change
Automatic Transmission Fluid
It is usually not necessary to check
the transmission fluid level. The only
reason for fluid loss is a
transmission leak or overheated
transmission. This vehicle is not
equipped with a transmission fluid
level dipstick. There is a special
procedure for checking and
changing the transmission fluid in
these vehicles. Because this
procedure is difficult, this should be
done at the dealer. Contact the
dealer for additional information or
the procedure can be found in the service manual. See
Service
Publications Ordering Information
0 470.
Caution
Use of the incorrect automatic
transmission fluid may damage
the vehicle, and the damage may
not be covered by the vehicle
warranty. Always use the
automatic transmission fluid listed
in Recommended Fluids and
Lubricants 0451.
Change the fluid and filter at the
scheduled maintenance intervals
listed in Maintenance Schedule
0 443. Be sure to use the
transmission fluid listed in
Recommended Fluids and
Lubricants 0451.
Manual Transmission
Fluid
It is not necessary to check the
manual transmission fluid level.
A transmission fluid leak is the only
Page 352 of 501
Chevrolet Silverado Owner Manual (GMNA-Localizing-U.S./Canada/Mexico-
11349200) - 2018 - CRC - 2/27/18
Vehicle Care 351
reason for fluid loss. If a leak
occurs, take the vehicle to your
dealer service department and have
it repaired as soon as possible. See
Recommended Fluids and
Lubricants0451 for the proper fluid
to use.
Hydraulic Clutch
For vehicles with a manual
transmission, it is not necessary to
regularly check clutch fluid unless
you suspect there is a leak in the
system. Adding fluid will not correct
a leak. A fluid loss in this system
could indicate a problem. Have the
system inspected and repaired.
When to Check and What
to Use
The hydraulic clutch fluid reservoir
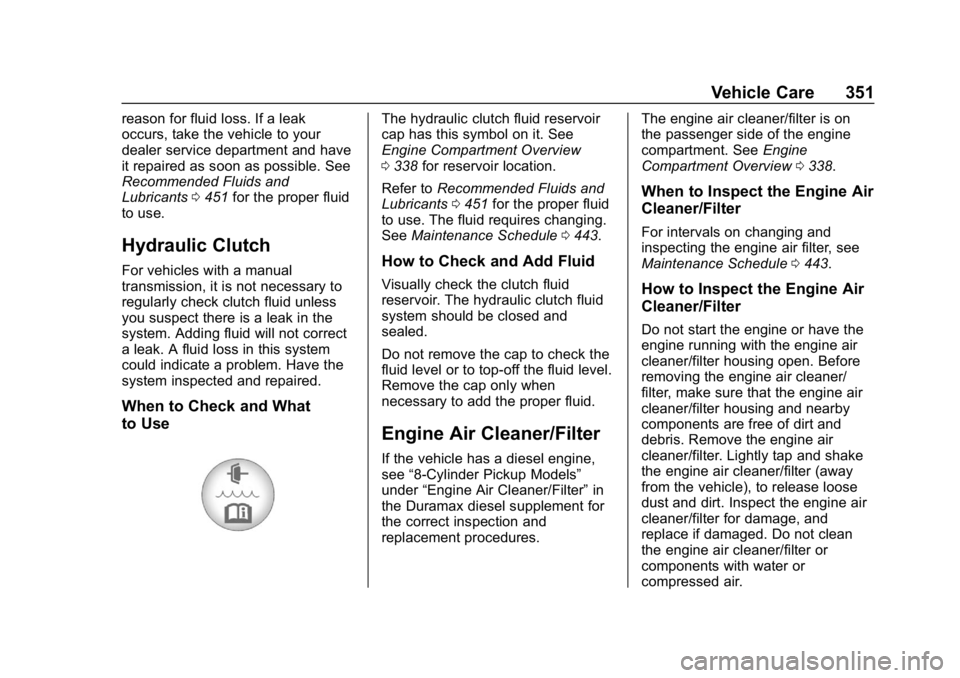
cap has this symbol on it. See
Engine Compartment Overview
0 338 for reservoir location.
Refer to Recommended Fluids and
Lubricants 0451 for the proper fluid
to use. The fluid requires changing.
See Maintenance Schedule 0443.
How to Check and Add Fluid
Visually check the clutch fluid
reservoir. The hydraulic clutch fluid
system should be closed and
sealed.
Do not remove the cap to check the
fluid level or to top-off the fluid level.
Remove the cap only when
necessary to add the proper fluid.
Engine Air Cleaner/Filter
If the vehicle has a diesel engine,
see “8-Cylinder Pickup Models”
under “Engine Air Cleaner/Filter” in
the Duramax diesel supplement for
the correct inspection and
replacement procedures. The engine air cleaner/filter is on
the passenger side of the engine
compartment. See
Engine
Compartment Overview 0338.
When to Inspect the Engine Air
Cleaner/Filter
For intervals on changing and
inspecting the engine air filter, see
Maintenance Schedule 0443.
How to Inspect the Engine Air
Cleaner/Filter
Do not start the engine or have the
engine running with the engine air
cleaner/filter housing open. Before
removing the engine air cleaner/
filter, make sure that the engine air
cleaner/filter housing and nearby
components are free of dirt and
debris. Remove the engine air
cleaner/filter. Lightly tap and shake
the engine air cleaner/filter (away
from the vehicle), to release loose
dust and dirt. Inspect the engine air
cleaner/filter for damage, and
replace if damaged. Do not clean
the engine air cleaner/filter or
components with water or
compressed air.
Page 363 of 501
Chevrolet Silverado Owner Manual (GMNA-Localizing-U.S./Canada/Mexico-
11349200) - 2018 - CRC - 2/27/18
362 Vehicle Care
Warning (Continued)
Add brake fluid only when work is
done on the brake hydraulic
system.
When the brake fluid falls to a low
level, the brake warning light comes
on. See Brake System Warning
Light 0149.
Brake fluid absorbs water over time.
Replace brake fluid at the specified
intervals to prevent increased
stopping distance. See Maintenance
Schedule 0443.
Checking Brake Fluid
Check brake fluid by looking at the
brake fluid reservoir. See Engine
Compartment Overview 0338.
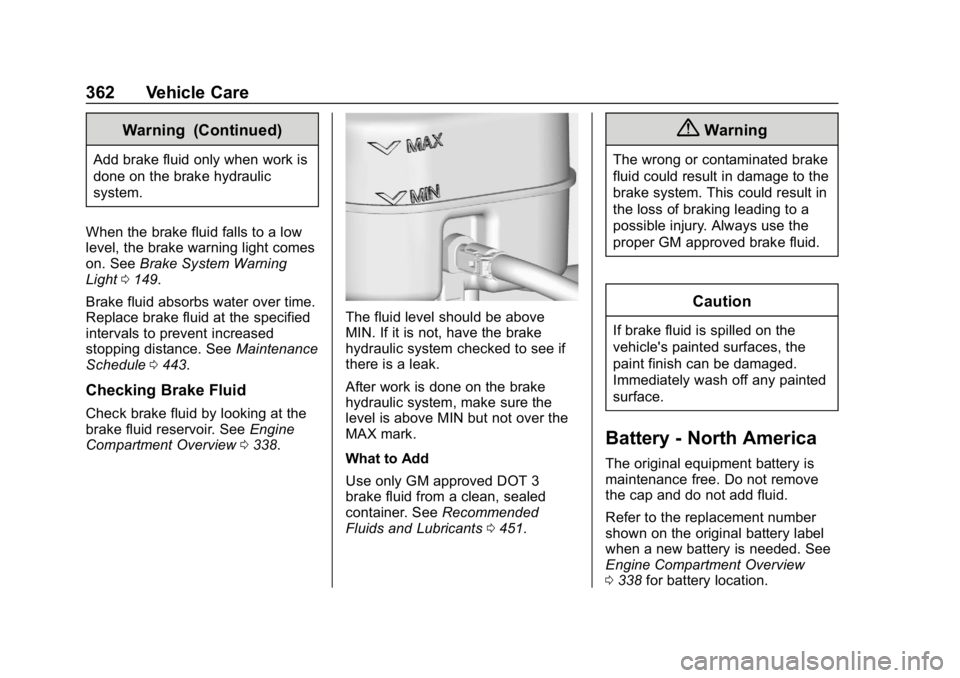
The fluid level should be above
MIN. If it is not, have the brake
hydraulic system checked to see if
there is a leak.
After work is done on the brake
hydraulic system, make sure the
level is above MIN but not over the
MAX mark.
What to Add
Use only GM approved DOT 3
brake fluid from a clean, sealed
container. See Recommended
Fluids and Lubricants 0451.
{Warning
The wrong or contaminated brake
fluid could result in damage to the
brake system. This could result in
the loss of braking leading to a
possible injury. Always use the
proper GM approved brake fluid.
Caution
If brake fluid is spilled on the
vehicle's painted surfaces, the
paint finish can be damaged.
Immediately wash off any painted
surface.
Battery - North America
The original equipment battery is
maintenance free. Do not remove
the cap and do not add fluid.
Refer to the replacement number
shown on the original battery label
when a new battery is needed. See
Engine Compartment Overview
0338 for battery location.
Page 364 of 501
Chevrolet Silverado Owner Manual (GMNA-Localizing-U.S./Canada/Mexico-
11349200) - 2018 - CRC - 2/27/18
Vehicle Care 363
{Warning
WARNING:Battery posts,
terminals, and related
accessories contain lead and lead
compounds, chemicals known to
the State of California to cause
cancer and birth defects or other
reproductive harm. Batteries also
contain other chemicals known to
the State of California to cause
cancer. WASH HANDS AFTER
HANDLING. For more information
go to www.P65Warnings.ca.gov/
passenger-vehicle.
See California Proposition
65 Warning 0336 and the back
cover.
Vehicle Storage
{Warning
Batteries have acid that can burn
you and gas that can explode.
You can be badly hurt if you are
(Continued)
Warning (Continued)
not careful. SeeJump Starting -
North America 0421 for tips on
working around a battery without
getting hurt.
Infrequent Usage: Remove the
black, negative (−) cable from the
battery to keep the battery from
running down.
Extended Storage: Remove the
black, negative (−) cable from the
battery or use a battery trickle
charger.
Four-Wheel Drive
Transfer Case
When to Check Lubricant
Refer to Maintenance Schedule
0 443 to determine when to check
the lubricant.
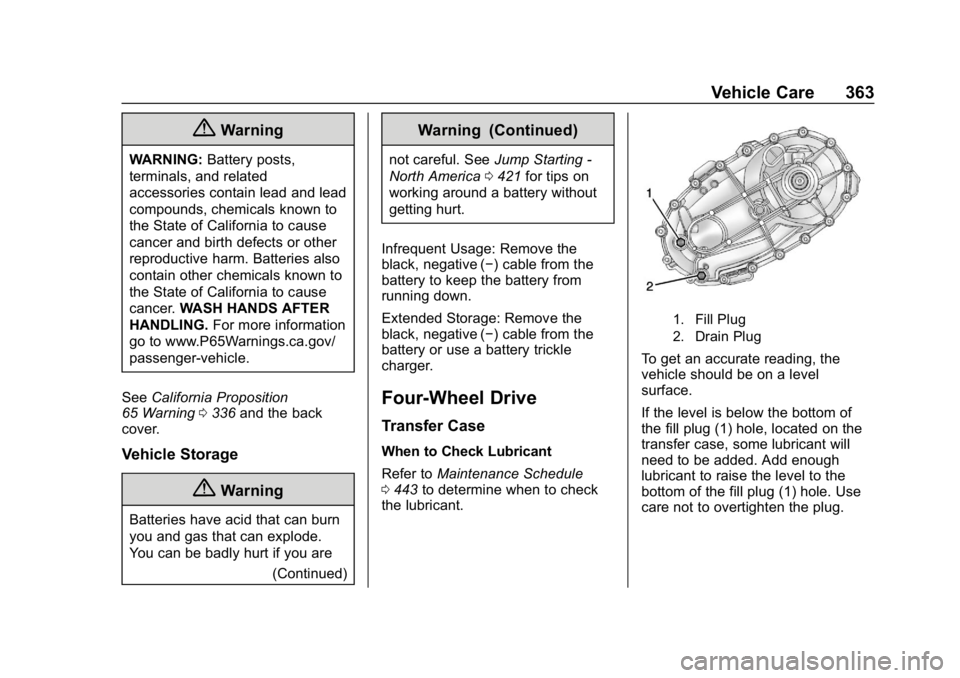
1. Fill Plug
2. Drain Plug
To get an accurate reading, the
vehicle should be on a level
surface.
If the level is below the bottom of
the fill plug (1) hole, located on the
transfer case, some lubricant will
need to be added. Add enough
lubricant to raise the level to the
bottom of the fill plug (1) hole. Use
care not to overtighten the plug.