2018 CHEVROLET CRUZE battery
[x] Cancel search: batteryPage 58 of 404
Chevrolet Cruze Owner Manual (GMNA-Localizing-U.S./Canada/Mexico-
11348462) - 2018 - crc - 5/15/17
Keys, Doors, and Windows 57
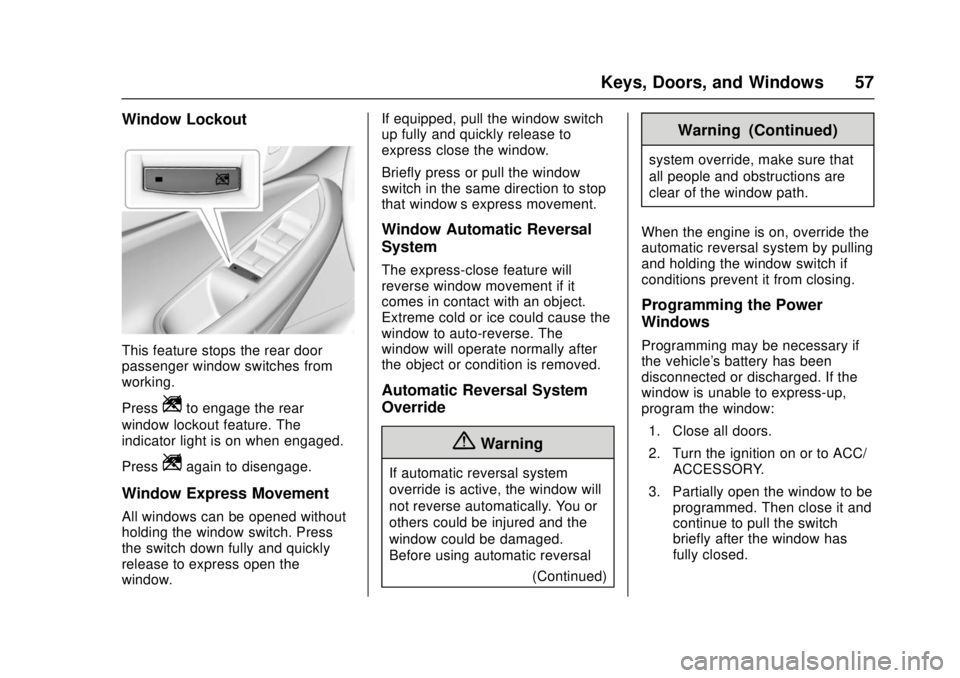
Window Lockout
This feature stops the rear door
passenger window switches from
working.
Press
Zto engage the rear
window lockout feature. The
indicator light is on when engaged.
Press
Zagain to disengage.
Window Express Movement
All windows can be opened without
holding the window switch. Press
the switch down fully and quickly
release to express open the
window. If equipped, pull the window switch
up fully and quickly release to
express close the window.
Briefly press or pull the window
switch in the same direction to stop
that window’s express movement.
Window Automatic Reversal
System
The express-close feature will
reverse window movement if it
comes in contact with an object.
Extreme cold or ice could cause the
window to auto-reverse. The
window will operate normally after
the object or condition is removed.
Automatic Reversal System
Override
{Warning
If automatic reversal system
override is active, the window will
not reverse automatically. You or
others could be injured and the
window could be damaged.
Before using automatic reversal
(Continued)
Warning (Continued)
system override, make sure that
all people and obstructions are
clear of the window path.
When the engine is on, override the
automatic reversal system by pulling
and holding the window switch if
conditions prevent it from closing.
Programming the Power
Windows
Programming may be necessary if
the vehicle's battery has been
disconnected or discharged. If the
window is unable to express-up,
program the window: 1. Close all doors.
2. Turn the ignition on or to ACC/ ACCESSORY.
3. Partially open the window to be programmed. Then close it and
continue to pull the switch
briefly after the window has
fully closed.
Page 87 of 404
Chevrolet Cruze Owner Manual (GMNA-Localizing-U.S./Canada/Mexico-
11348462) - 2018 - crc - 5/15/17
86 Seats and Restraints
{Warning
For up to 10 seconds after the
vehicle is turned off and the
battery is disconnected, an airbag
can still inflate during improper
service. You can be injured if you
are close to an airbag when it
inflates. Avoid yellow connectors.
They are probably part of the
airbag system. Be sure to follow
proper service procedures, and
make sure the person performing
work for you is qualified to do so.
Adding Equipment to the
Airbag-Equipped Vehicle
Adding accessories that change the
vehicle's frame, bumper system,
height, front end, or side sheet
metal may keep the airbag system
from working properly. The
operation of the airbag system can
also be affected by changing any
parts of the front seats, seat belts,
airbag sensing and diagnostic
module, steering wheel, instrument
panel, inner door seals including thespeakers, any of the airbag
modules, ceiling or pillar garnish
trim, overhead console, front
sensors, side impact sensors,
or airbag wiring.
Your dealer and the service manual
have information about the location
of the airbag sensors, sensing and
diagnostic module, and airbag
wiring.
In addition, the vehicle has a
passenger sensing system for the
front outboard passenger position,
which includes sensors that are part
of the passenger seat. The
passenger sensing system may not
operate properly if the original seat
trim is replaced with non-GM
covers, upholstery, or trim; or with
GM covers, upholstery, or trim
designed for a different vehicle. Any
object, such as an aftermarket seat
heater or a comfort-enhancing pad
or device, installed under or on top
of the seat fabric, could also
interfere with the operation of the
passenger sensing system. This
could either prevent proper
deployment of the passenger
airbag(s) or prevent the passengersensing system from properly
turning off the passenger airbag(s).
See
Passenger Sensing System
0 81.
If the vehicle has rollover roof-rail
airbags, see Different Size Tires
and Wheels 0314 for additional
important information.
If you have to modify your vehicle
because you have a disability and
have questions about whether the
modifications will affect the vehicle's
airbag system, or if you have
questions about whether the airbag
system will be affected if the vehicle
is modified for any other reason, call
Customer Assistance. See
Customer Assistance Offices 0369.Airbag System Check
The airbag system does not need
regularly scheduled maintenance or
replacement. Make sure the airbag
readiness light is working. See
Airbag Readiness Light 0128.
Page 116 of 404

Chevrolet Cruze Owner Manual (GMNA-Localizing-U.S./Canada/Mexico-
11348462) - 2018 - crc - 5/15/17
Instruments and Controls 115
2. Touch Set Time and touch«
orªto increase or decrease
hours, minutes, and AM or PM.
Touch 12–24 Hr for 12 or
24 hour clock.
3. Touch
}to go back to the
previous menu.
Auto Set requires an OnStar
service plan.
If auto timing is set, the time
displayed on the clock may not
update immediately when driving
into a new time zone.
To set the date: 1. Touch SETTINGS from the Home Page, then touch Time
and Date.
2. Touch Set Date and touch
«
orªto increase or decrease
month, day, or year.
3. Touch
}to go back to the
previous menu.
To set the clock display: 1. Touch SETTINGS and touch Time and Date. 2. Touch Clock Display and touch
OFF or ON to turn the clock
display off or on.
3. Touch
}to go back to the
previous menu.
The clock settings can also be
accessed by touching the time
display, then touching Set.
Power Outlets
Power Outlet 12-Volt Direct
Current
The accessory power outlet can be
used to plug in electrical equipment,
such as a cell phone or MP3 player.
There is an accessory power outlet
on the center console in front of the
shift lever. This outlet is powered
when the ignition is on or in ACC/
ACCESSORY, or until the driver
door is opened within 10 minutes of
turning off the vehicle. See Retained
Accessory Power (RAP) 0215.
Open the cover to access.
Caution
Leaving electrical equipment
plugged in for an extended period
of time while the vehicle is off will
drain the battery. Always unplug
electrical equipment when not in
use and do not plug in equipment
that exceeds the maximum
20 amp rating.
Certain electrical accessories may
not be compatible with the
accessory power outlet and could
overload vehicle or adapter fuses.
If a problem is experienced, see
your dealer.
When adding electrical equipment,
be sure to follow the installation
instructions included with the
equipment. See Add-On Electrical
Equipment 0257.
Page 131 of 404
Chevrolet Cruze Owner Manual (GMNA-Localizing-U.S./Canada/Mexico-
11348462) - 2018 - crc - 5/15/17
130 Instruments and Controls
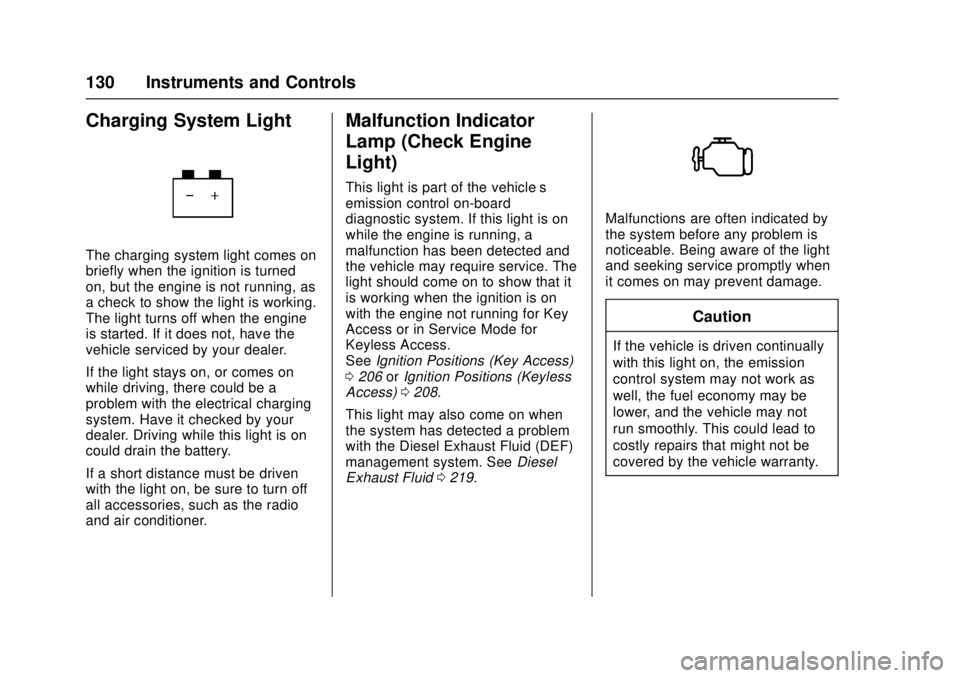
Charging System Light
The charging system light comes on
briefly when the ignition is turned
on, but the engine is not running, as
a check to show the light is working.
The light turns off when the engine
is started. If it does not, have the
vehicle serviced by your dealer.
If the light stays on, or comes on
while driving, there could be a
problem with the electrical charging
system. Have it checked by your
dealer. Driving while this light is on
could drain the battery.
If a short distance must be driven
with the light on, be sure to turn off
all accessories, such as the radio
and air conditioner.
Malfunction Indicator
Lamp (Check Engine
Light)
This light is part of the vehicle’s
emission control on-board
diagnostic system. If this light is on
while the engine is running, a
malfunction has been detected and
the vehicle may require service. The
light should come on to show that it
is working when the ignition is on
with the engine not running for Key
Access or in Service Mode for
Keyless Access.
SeeIgnition Positions (Key Access)
0 206 orIgnition Positions (Keyless
Access) 0208.
This light may also come on when
the system has detected a problem
with the Diesel Exhaust Fluid (DEF)
management system. See Diesel
Exhaust Fluid 0219.
Malfunctions are often indicated by
the system before any problem is
noticeable. Being aware of the light
and seeking service promptly when
it comes on may prevent damage.
Caution
If the vehicle is driven continually
with this light on, the emission
control system may not work as
well, the fuel economy may be
lower, and the vehicle may not
run smoothly. This could lead to
costly repairs that might not be
covered by the vehicle warranty.
Page 133 of 404
Chevrolet Cruze Owner Manual (GMNA-Localizing-U.S./Canada/Mexico-
11348462) - 2018 - crc - 5/15/17
132 Instruments and Controls
The vehicle may not pass
inspection if:
.The light is on when the engine
is running.
. The light does not come on
when the ignition is on with the
engine not running for Key
Access or in Service Mode for
Keyless Access.
. Critical emission control systems
have not been completely
diagnosed. If this happens, the
vehicle would not be ready for
inspection and might require
several days of routine driving
before the system is ready for
inspection. This can happen if
the 12-volt battery has recently
been replaced or run down, or if
the vehicle has been recently
serviced.
See your dealer if the vehicle will
not pass or cannot be made ready
for the test.Brake System Warning
Light
The vehicle brake system consists
of two hydraulic circuits. If one
circuit is not working, the remaining
circuit can still work to stop the
vehicle. For normal braking
performance, both circuits need to
be working.
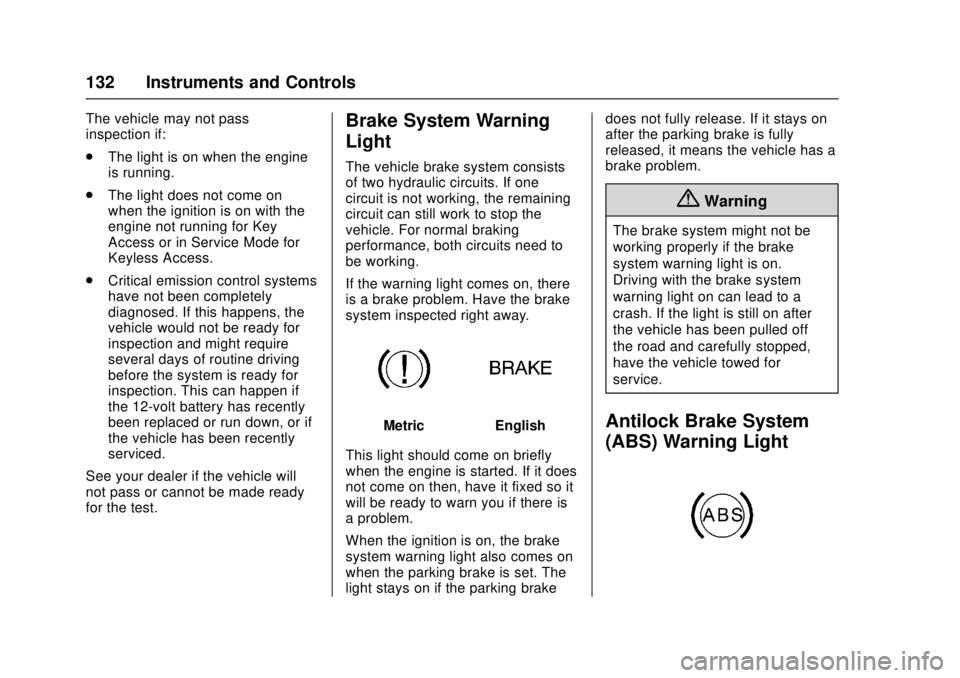
If the warning light comes on, there
is a brake problem. Have the brake
system inspected right away.
MetricEnglish
This light should come on briefly
when the engine is started. If it does
not come on then, have it fixed so it
will be ready to warn you if there is
a problem.
When the ignition is on, the brake
system warning light also comes on
when the parking brake is set. The
light stays on if the parking brake does not fully release. If it stays on
after the parking brake is fully
released, it means the vehicle has a
brake problem.
{Warning
The brake system might not be
working properly if the brake
system warning light is on.
Driving with the brake system
warning light on can lead to a
crash. If the light is still on after
the vehicle has been pulled off
the road and carefully stopped,
have the vehicle towed for
service.
Antilock Brake System
(ABS) Warning Light
Page 141 of 404
Chevrolet Cruze Owner Manual (GMNA-Localizing-U.S./Canada/Mexico-
11348462) - 2018 - crc - 5/15/17
140 Instruments and Controls
message will appear on the display.
Change the fuel filter as soon as
possible.
Diesel Exhaust Fluid (DEF)
Level :The DEF level will be
displayed as either OK, XX%,
or LOW. When LOW appears on the
display, add DEF as soon as
possible. See Diesel Exhaust Fluid
0 219.
Tire Pressure : Displays a vehicle
with the approximate pressures of
all four tires. Tire pressure is
displayed in either kilopascal (kPa)
or in pounds per square inch (psi).
See Tire Pressure Monitor System
0 307 andTire Pressure Monitor
Operation 0308.
Battery Voltage : Displays the
current battery voltage, if equipped.
Battery voltage changes are normal
while driving. See Charging System
Light 0130. If there is a problem
with the battery charging system,
the DIC will display a message.
Speed Warning : This display is
used to set the vehicle speed at
which the speed warning chime
sounds and the alert is displayed. The speed can be set by pressing
SET/CLR while the speed warning
display is showing.
Units :
Move
\to change between
Metric or US when the Unit display
is active. Press SET/CLR to confirm
the setting. This will change the
displays on the DIC to the type of
measurements you select.
ECO Drive Assist Menu (ECO)
Items
This menu is only available on some
vehicles. Press MENU on the turn
signal lever until the ECO menu is
displayed. Use
\to scroll through
the menu items. Not all items are
available on every vehicle. The
following is a list of all possible
menu items:
Best Average Fuel Economy : The
bottom displays the best average
fuel economy (AFE) achieved for a
selected distance. The top displays
a running average of fuel economy
for the most recently traveled
selected distance. The center bar
graph displays the instantaneous fuel economy. Quickly press SET/
CLR to change the settings for the
distance options.
When viewing best AFE, a several
second press and hold of SET/CLR
will reset the best value. The best
value will show
“- - -“until the
selected distance has been
traveled.
The display provides feedback on
how current driving behavior in the
bar graph affects the running
average in the top display and how
well recent driving compares to the
best that has been achieved.
Top Consumers : Shows a list of
the features that are currently
impacting the fuel economy, in order
from highest to lowest. If a feature is
turned off, it will be removed from
the list.
Economy Trend : Shows history of
the Average Fuel Economy from the
last 50 km (30 mi). Each bar
represents about 5 km (3 mi) of
driving. During driving the bars will
shift to always reflect the most
Page 144 of 404
Chevrolet Cruze Owner Manual (GMNA-Localizing-U.S./Canada/Mexico-
11348462) - 2018 - crc - 5/15/17
Instruments and Controls 143
approximate fuel economy that the
vehicle has right now and changes
frequently as driving conditions
change. This display cannot be
reset.
Average Vehicle Speed :Displays
the average vehicle speed of the
vehicle in kilometers per hour (km/h)
or miles per hour (mph). This
average is based on the various
vehicle speeds recorded since the
last reset. Reset the average speed
by pressing
Vwhen it is displayed.
Fuel Economy : The center
displays the approximate
instantaneous fuel economy as a
number and bar graph. Displayed
above the bar graph is a running
average of fuel economy for the
most recently traveled selected
distance. Displayed below the bar
graph is the best average fuel
economy that has been achieved for
the selected distance. The selected
distance is displayed at the top of
the page as “last xxx mi/km.” Press
pto select the distance or
reset best value. Use
wandxto
choose the distance and press
V.
Press
wandxto select “Reset
Best Score.” Press
Vto reset the
best average fuel economy. After
reset, the best value displays “-,-”
until the selected distance has been
traveled.
The display provides information on
how current driving behavior affects
the running average and how well
recent driving compares to the best
that has been achieved for the
selected distance.
Timer : This display can be used as
a timer. To start the timer, press
V
while this display is active. The
display will show the amount of time
that has passed since the timer was
last reset. To stop the timer, press
V
briefly while this display is active
and the timer is running. To reset
the timer to zero, press and hold
V
while this display is active, or presspand select reset. Following Distance Indicator :
The current follow time to the
vehicle ahead is displayed as a time
value on this page.
Battery Voltage :
Displays the
current battery voltage, if equipped.
Battery voltage changes are normal
while driving. See Charging System
Light 0130. If there is a problem
with the battery charging system,
the DIC will display a message.
Blank Page : Shows no
information.
Page 145 of 404
Chevrolet Cruze Owner Manual (GMNA-Localizing-U.S./Canada/Mexico-
11348462) - 2018 - crc - 5/15/17
144 Instruments and Controls
Vehicle Messages
Messages displayed on the DIC
indicate the status of the vehicle or
some action that may be needed to
correct a condition. Multiple
messages may appear one after
another.
The messages that do not require
immediate action can be
acknowledged and cleared by
pressing
V. The messages that
require immediate action cannot be
cleared until that action is
performed.
All messages should be taken
seriously; clearing the message
does not correct the problem.
If a SERVICE message appears,
see your dealer.
Follow the instructions given in the
messages. The system displays
messages regarding the following
topics:
. Service Messages
. Fluid Levels
. Vehicle Security .
Brakes
. Ride Control Systems
. Driver Assistance Systems
. Cruise Control
. Lighting and Bulb Replacement
. Wiper/Washer Systems
. Doors and Windows
. Seat Belts
. Airbag Systems
. Engine and Transmission
. Tire Pressure
. Battery
Engine Power Messages
ENGINE POWER IS REDUCED
This message displays when the
vehicle's propulsion power is
reduced. Reduced propulsion power
can affect the vehicle's ability to
accelerate. If this message is on,
but there is no observed reduction
in performance, proceed to your
destination. The performance may
be reduced the next time the vehicle
is driven. The vehicle may be driven while this message is on, but
maximum acceleration and speed
may be reduced. Anytime this
message stays on, or displays
repeatedly, the vehicle should be
taken to your dealer for service as
soon as possible.
Vehicle Speed Messages
SPEED LIMITED TO XXX
KM/H (MPH)
This message shows that the
vehicle speed has been limited to
the speed displayed. The limited
speed is a protection for various
propulsion and vehicle systems,
such as lubrication, thermal,
suspension, Teen Driver if
equipped, or tires.