Page 17 of 53
 - 2018 - CRC - 4/5/17
16 Driving and Operating
ModelAxleRoad course
cold starting
pressures (1)")
Chevrolet Camaro High Performance Owner Manual Supplemen (GMNA-
Localizing-U.S./Canada/Mexico-11348335) - 2018 - CRC - 4/5/17
16 Driving and Operating
ModelAxleRoad course
cold starting
pressures (1) Road course target
hot pressures (1) Drag strip cold
starting
pressures Sustained
high speed
cold starting
pressures (2)
ZL1 1LE Tire
Pressure Settings Front 180 kPa
(26 psi)220–240 kPa (32–
35 psi) N/A 300 kPa
(44 psi)
Rear 180 kPa (26 psi)220–240 kPa (32–
35 psi) N/A 300 kPa
(44 psi)
ZL1 Tire Pressure Settings Front 190 kPa
(28 psi)240–255 kPa (35–
37 psi) 220 kPa
(32 psi) 300 kPa
(44 psi)
Rear 190 kPa (28 psi)255–270 kPa (37–
39 psi) 180 kPa
(26 psi) 300 kPa
(44 psi)
SS 1LE Tire
Pressure Settings Front 190 kPa
(28 psi)240–255 kPa (35–
37 psi) N/A 300 kPa
(44 psi)
Rear 190 kPa (28 psi)255–270 kPa (37–
39 psi) N/A 300 kPa
(44 psi)
LS/LT 1LE Tire
Pressure Settings Front 210 kPa
(30 psi)250–260 kPa (36–
38 psi) N/A 280 kPa
(41 psi)
Rear 210 kPa (30 psi)250–260 kPa (36–
38 psi) N/A 280 kPa
(41 psi)
(
1) Value will vary based on driving
style, track, temperature, and
weather conditions. (2) Autobahn, standing mile, etc. Before leaving the track event, reset
tire pressures to the recommended
inflation pressures on the Tire and
Loading Information label.
Page 18 of 53
 - 2018 - CRC - 4/5/17
Driving and Operating 17
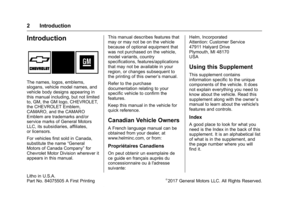
Front License Plate/Bracket
Removal (ZL1 Only)
Fo")
Chevrolet Camaro High Performance Owner Manual Supplemen (GMNA-
Localizing-U.S./Canada/Mexico-11348335) - 2018 - CRC - 4/5/17
Driving and Operating 17
Front License Plate/Bracket
Removal (ZL1 Only)
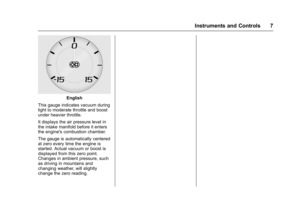
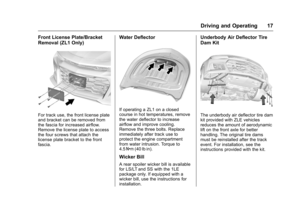
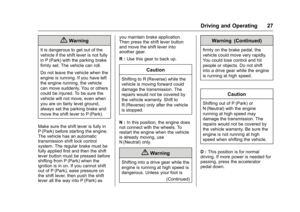
For track use, the front license plate
and bracket can be removed from
the fascia for increased airflow.
Remove the license plate to access
the four screws that attach the
license plate bracket to the front
fascia.
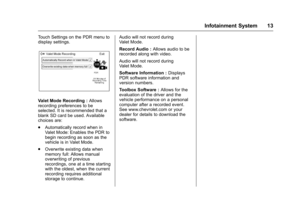
Water Deflector
If operating a ZL1 on a closed
course in hot temperatures, remove
the water deflector to increase
airflow and improve cooling.
Remove the three bolts. Replace
immediately after track use to
protect the engine compartment
from water intrusion. Torque to
4.5Y (40 lb in).
Wicker Bill
A rear spoiler wicker bill is available
for LS/LT and SS with the 1LE
package only. If equipped with a
wicker bill, use the instructions for
installation.
Underbody Air Deflector Tire
Dam Kit
The underbody air deflector tire dam
kit provided with ZLE vehicles
reduces the amount of aerodynamic
lift on the front axle for better
handling. The original tire dams
must be reinstalled after the track
event. For installation, see the
instructions provided with the kit.
Page 19 of 53
Chevrolet Camaro High Performance Owner Manual Supplemen (GMNA-
Localizing-U.S./Canada/Mexico-11348335) - 2018 - CRC - 4/5/17
18 Driving and Operating
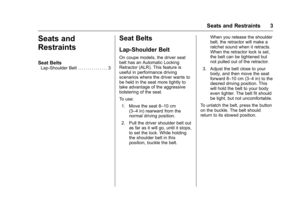
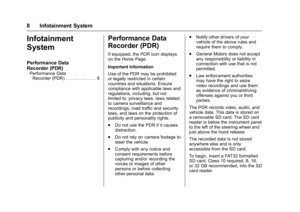
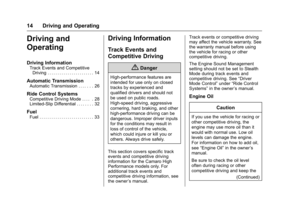
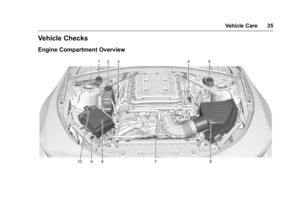
Adjustable Front Struts
(ZL1 1LE Only)
Camber Position for Track Events
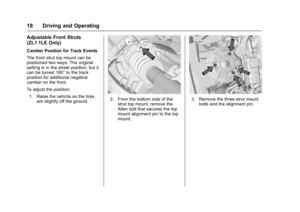
The front strut top mount can be
positioned two ways. The original
setting is in the street position, but it
can be turned 180° to the track
position for additional negative
camber on the front.
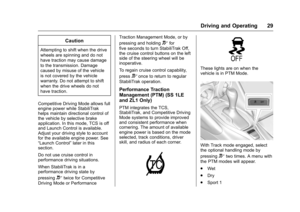
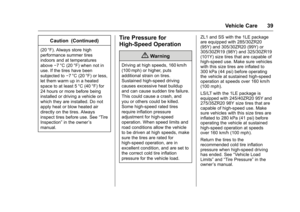
To adjust the position:1. Raise the vehicle so the tires are slightly off the ground.
2. From the bottom side of thestrut top mount, remove the
Allen bolt that secures the top
mount alignment pin to the top
mount.3. Remove the three strut mountbolts and the alignment pin.
Page 20 of 53
 - 2018 - CRC - 4/5/17
Driving and Operating 19
4. Using the hex feature on thetop of the mount,")
Chevrolet Camaro High Performance Owner Manual Supplemen (GMNA-
Localizing-U.S./Canada/Mexico-11348335) - 2018 - CRC - 4/5/17
Driving and Operating 19
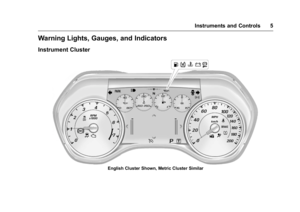
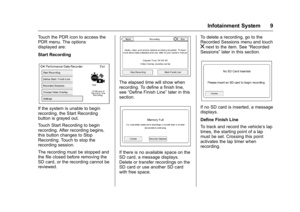
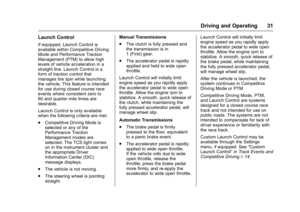
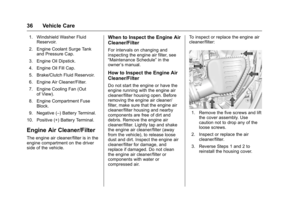
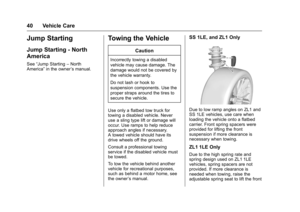
4. Using the hex feature on thetop of the mount, turn the top
mount 180° until the TRACK
CAMBER text is visible and the
second set of top mount holes
aligns with the strut tower
holes.
5. Reinstall the top mount bolts and torque to 29 Y
(21.4 lb ft). 6. Keep the top mount alignment
pin and bolt for reinstallation
when the struts are returned to
the street position following the
track event.
7. Verify and adjust the vehicle alignment per track alignment
specifications to optimize
vehicle performance for the
track event.
8. Verify and re-adjust the vehicle alignment as needed following
the track event.
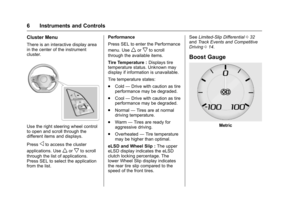
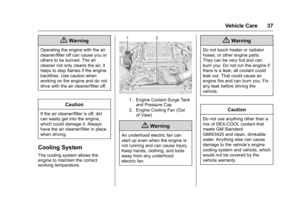
Strut Spring Seat Adjustment
The front struts have a threaded
spring seat that allows adjustment
of the preload on the front springs.
The vehicle corner weights and front
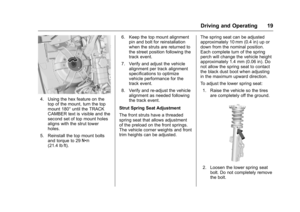
trim heights can be adjusted. The spring seat can be adjusted
approximately 10 mm (0.4 in) up or
down from the nominal position.
Each complete turn of the spring
perch will change the vehicle height
approximately 1.4 mm (0.06 in). Do
not allow the spring seat to contact
the black dust boot when adjusting
in the maximum upward direction.
To adjust the lower spring seat:
1. Raise the vehicle so the tires are completely off the ground.
2. Loosen the lower spring seatbolt. Do not completely remove
the bolt.
Page 21 of 53
 - 2018 - CRC - 4/5/17
20 Driving and Operating
3. Turn the spring perch upwardto increase spring")
Chevrolet Camaro High Performance Owner Manual Supplemen (GMNA-
Localizing-U.S./Canada/Mexico-11348335) - 2018 - CRC - 4/5/17
20 Driving and Operating
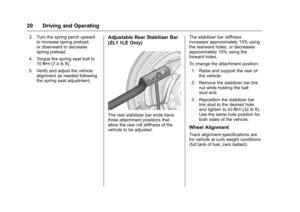
3. Turn the spring perch upwardto increase spring preload,
or downward to decrease
spring preload.
4. Torque the spring seat bolt to 10Y (7.4 lb ft).
5. Verify and adjust the vehicle alignment as needed following
the spring seat adjustment.Adjustable Rear Stabilizer Bar
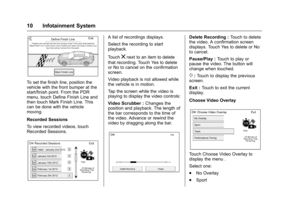
(ZL1 1LE Only)
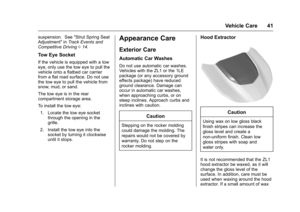
The rear stabilizer bar ends have
three attachment positions that
allow the rear roll stiffness of the
vehicle to be adjusted. The stabilizer bar stiffness
increases approximately 15% using
the rearward holes, or decreases
approximately 10% using the
forward holes.
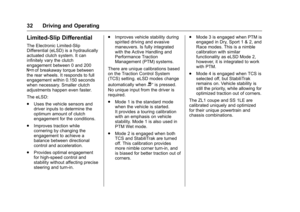
To change the attachment position:
1. Raise and support the rear of the vehicle.
2. Remove the stabilizer bar link nut while holding the ball
stud end.
3. Reposition the stabilizer bar link stud to the desired hole
and tighten to 43 Y(32 lb ft).
Use the same hole position for
both sides of the vehicle.
Wheel Alignment
Track alignment specifications are
for vehicle at curb weight conditions
(full tank of fuel, zero ballast).
Page 22 of 53
 - 2018 - CRC - 4/5/17
Driving and Operating 21
Racing and competitive driving wheel alignment se")
Chevrolet Camaro High Performance Owner Manual Supplemen (GMNA-
Localizing-U.S./Canada/Mexico-11348335) - 2018 - CRC - 4/5/17
Driving and Operating 21
Racing and competitive driving wheel alignment settings can be set as follows for increased handling performance:
Track Wheel Alignment Specifications
Model AxleCaster (Not
Adjustable) Camber Total Toe Steering
Wheel Angle Thrust Angle
Left Right Left Right (Left + Right) (Left −Right)/2
ZL1/1LE Track
Alignment Settings Front 7.9° 7.9°
−2.7°
± 0.15° −2.7°
± 0.15° 0.1° ± 0.05° 0.0° ± 3.5°
—
Rear — — −2.0°
± 0.15° −2.0°
± 0.15° 0.1° ± 0.05°
—0.0° ± 0.1°
ZL1 Track Alignment Settings Front 6.9° 6.9°
−2.0°
± 0.15° −2.0°
± 0.15° 0.1° ± 0.05° 0.0° ± 3.5°
—
Rear — — −1.5°
± 0.15° −1.5°
± 0.15° 0.1° ± 0.05°
—0.0° ± 0.1°
SS 1LE Track
Alignment Settings Front 6.9° 6.9°
−2.0°
± 0.15° −2.0°
± 0.15° 0.1° ± 0.05° 0.0° ± 3.5°
—
Rear — — −1.5°
± 0.15° −1.5°
± 0.15° 0.1° ± 0.05°
—0.0° ± 0.1°
LS/LT 1LE Track
Alignment Settings Front 7.2° 7.2°
−2.0°
± 0.15° −2.0°
± 0.15° 0.1° ± 0.05° 0.0° ± 3.5°
—
Rear — — –1.25°
± 0.15°–1.25°
± 0.15° 0.1° ± 0.05°
—0.0° ± 0.1°
Page 23 of 53
 - 2018 - CRC - 4/5/17
22 Driving and Operating
Caution
Using these wheel alignment
settings may")
Chevrolet Camaro High Performance Owner Manual Supplemen (GMNA-
Localizing-U.S./Canada/Mexico-11348335) - 2018 - CRC - 4/5/17
22 Driving and Operating
Caution
Using these wheel alignment
settings may cause excessive tire
wear. Only use these wheel
alignment settings for racing or
competitive driving. Excessive tire
wear is not covered under the
vehicle warranty.
Custom Launch Control
(ZL1 Only)
Custom Launch Control allows the
following parameters for Launch
Control to be modified:
.Launch RPM
. Slip Target (5%–15%)
. Surface Type
To adjust the Launch RPM, all of
these conditions must be met:
. The vehicle must be in Track
Mode. See “Track Mode” under
“Driver Mode Control” in the
owner ’s manual. .
Performance Traction
Management (PTM) Mode must
be enabled. For convertibles,
Competitive Driving Mode must
be enabled. See “Driver Mode
Control” in the owner ’s manual.
. The steering wheel must be
straight.
. The driver door must be closed.
. The transmission must be in a
gear other than R (Reverse).
It will work in P (Park) or
N (Neutral).
. The parking brake must not be
engaged.
For more information on
Competitive Driving Mode, see
Competitive Driving Mode 028.
1. Using the buttons on the right
side of the steering wheel,
press
oto open the top level
DIC menu. Use
xto scroll
down to Options and
press SEL.
2. Useworxto navigate to the
Launch Control menu.
Select the Surface using the
MODE switch on the center
console.
Page 24 of 53
Chevrolet Camaro High Performance Owner Manual Supplemen (GMNA-
Localizing-U.S./Canada/Mexico-11348335) - 2018 - CRC - 4/5/17
Driving and Operating 23
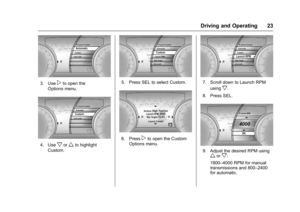
3. Usepto open the
Options menu.
4. Usexorwto highlight
Custom.
5. Press SEL to select Custom.
6. Presspto open the Custom
Options menu.
7. Scroll down to Launch RPM
using
x.
8. Press SEL.
9. Adjust the desired RPM usingworx:
1800–4000 RPM for manual
transmissions and 800–2400
for automatic.


 - 2018 - CRC - 4/5/17
18 Driving and Operating
Adjustable Front Struts
(ZL1 1LE Only)
Camber Pos")
 - 2018 - CRC - 4/5/17
Driving and Operating 23
3. Usepto open the
Options menu.
4. Usexorwto hig")