2018 Alfa Romeo Stelvio tow
[x] Cancel search: towPage 58 of 276

Caution!
Do not open the sun roof if a roof rack or
crossbars are fitted. Do not open the sun
roof if there is snow or ice on it: you may
damage it.
Closing
From the complete open position, push
the open/close button toward the front
of the vehicle. The roof will close
completely.
The automatic motion can be interrupted
in any position by pushing the open/close
button again.
Vent Opening
To bring the roof into vent position, push
and release the vent button.
This type of vent opening can be
activated regardless of the position of
the sunroof. When starting with the roof
in the closed position, pushing the vent
button automatically causes the sunroof
to open to the vent position. If the roof is
already open, the button must be held
until the roof reaches the vent-opening
position.
Pushing the vent button again during
automatic movement of the roof will stop
it.
Power Sun Shade
The sunshade is power operated.
Push the Power Shade open/close button
toward the rear of the vehicle to open the
sun shade.
Push the Power Shade open/close button
toward the front of the vehicle to close
the sun shade.
The automatic motion can be interrupted
in any position by pushing the Power
Shade on/off button again.
Pinch Protect Feature
The sunroof has an anti-pinch safety
system capable of detecting the
presence of an obstacle during the
closing movement. If an obstacle is
detected, the system intervenes and the
movement of the sunroof is immediately
reversed into opening.
Initialization Procedure
Automatic operation of the sunroof must
be initialized again in case of faulty
sunroof operation. It may also be
necessary to initialize the sunroof after
the vehicle’s battery as been
disconnected and then reconnected.Proceed as follows:
1. Push the open/close button to bring
the roof into the completely closed
position.
2. Cycle the ignition to STOP mode and
wait at least ten seconds.
3. Cycle the ignition to AVV mode. Refer
to “Ignition System” in this chapter for
further information.
4. Hold the open/close button down for
at least ten seconds. You should then
hear the mechanical stop of the roof
motor.
5. Within five seconds, hold the
open/close button down. The roof will
perform a complete opening and closing
cycle (to indicate that the initialization
procedure has been successful). If this
does not occur, the procedure must be
restarted from the beginning.
56
GETTING TO KNOW YOUR VEHICLE
Page 63 of 276

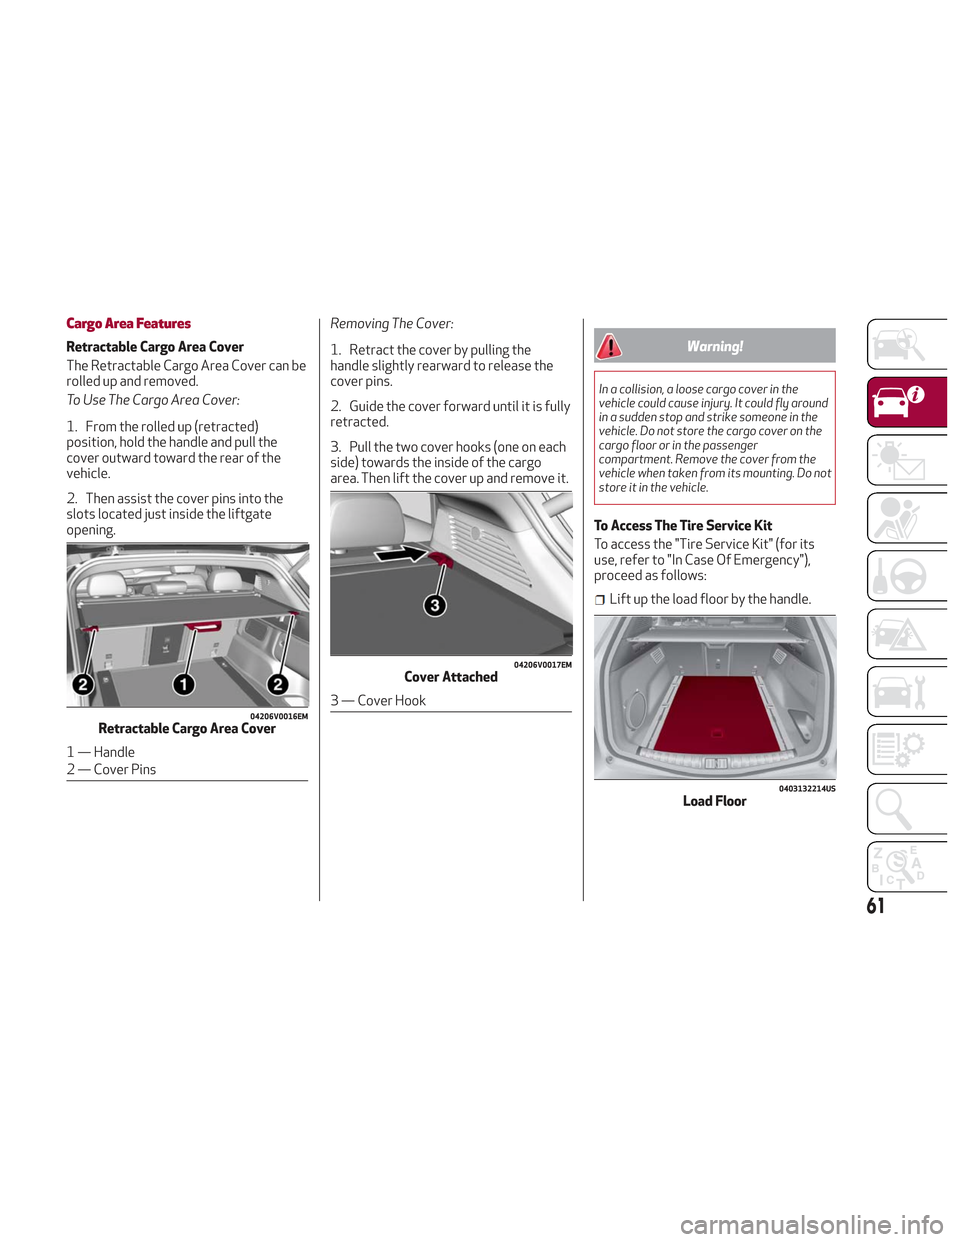
Cargo Area Features
Retractable Cargo Area Cover
The Retractable Cargo Area Cover can be
rolled up and removed.
To Use The Cargo Area Cover:
1. From the rolled up (retracted)
position, hold the handle and pull the
cover outward toward the rear of the
vehicle.
2. Then assist the cover pins into the
slots located just inside the liftgate
opening.Removing The Cover:
1. Retract the cover by pulling the
handle slightly rearward to release the
cover pins.
2. Guide the cover forward until it is fully
retracted.
3. Pull the two cover hooks (one on each
side) towards the inside of the cargo
area. Then lift the cover up and remove it.Warning!
In a collision, a loose cargo cover in the
vehicle could cause injury. It could fly around
in a sudden stop and strike someone in the
vehicle. Do not store the cargo cover on the
cargo floor or in the passenger
compartment. Remove the cover from the
vehicle when taken from its mounting. Do not
store it in the vehicle.
To Access The Tire Service Kit
To access the "Tire Service Kit" (for its
use, refer to "In Case Of Emergency"),
proceed as follows:
Lift up the load floor by the handle.
04206V0016EMRetractable Cargo Area Cover
1 — Handle
2 — Cover Pins
04206V0017EMCover Attached
3 — Cover Hook
0403132214USLoad Floor
61
Page 65 of 276

INTERNAL EQUIPMENT
Glove Compartment
To open the glove compartment proceed
as follows:
1. If equipped with a lock, unlock the
glove compartment by placing the
emergency key into the lock on the
handle.
2. Pull the handle to open the glove
compartment.
When the glove compartment is opened,
a light turns on to illuminate the inside of
the compartment.
Note:Do not insert large objects that
prevent the glove compartment from
closing completely. Always make sure
that the glove compartment is
completely closed when driving.
Sun Visors
The sun visors are located at the sides of
the interior rear view mirror. They can be
adjusted forward and sideways.
To direct the visor toward the passenger
side window, detach the visor from the
interior rear view mirror side hook and
turn it towards the side window.
From this position, the sun visor can also
be extended toward the rear of the
vehicle for additional blockage of
sunlight.
Courtesy mirrors with lights are fitted on
the back of the sun visors and can be
used even in poor light conditions.
Note: A rear facing child restraint
system should never be fitted in the front
passenger seat. Always comply with the
instructions on the sun visor. Refer to
"Child Restraints" in "Safety" for more
information.
Homelink
Description
Homelink is a fixed system installed on
the vehicle. It can sync up to three
different devices that activate garage
doors, gates, lighting systems, and home
or office alarm systems.
Programming
Warning!
Vehicle exhaust contains carbon
monoxide, a dangerous gas. Do not run your
vehicle in the garage while programming the
transceiver. Exhaust gas can cause serious
injury or death.
Your motorized door or gate will open and
close while you are programming the
universal transceiver. Do not program the
transceiver if people, pets or other objects
are in the path of the door or gate. Only use
this transceiver with a garage door opener
that has a “stop and reverse” feature as
required by Federal safety standards. This
includes most garage door opener models
manufactured after 1982. Do not use a
garage door opener without these safety
features. Call toll-free 1-800-355-3515 or,
on the Internet at HomeLink.com for safety
information or assistance.
Note: Without starting the engine,
activate the electric park brake and place
the ignition in the ON position.
0403132212USOpening The Glove Compartment
0403132210USRotate Sun Visor Toward Passenger Window
63
Page 88 of 276

Blue Telltale Indicator Light
Indicator LightWhat It Means What To Do
HIGH BEAM HEADLIGHTS
This indicator shows that the high beam headlights are on.
Push the multifunction control lever away from you to
switch the headlights to high beam. Push the lever a
second time to switch the headlights back to low beam.
Pull the lever toward you for a temporary high beam on,
“flash to pass” scenario.
Red Symbols
Warning LightWhat It Means What To Do
LOW ENGINE OIL PRESSURE
This telltale indicates low engine oil pressure. If the
telltale turns on while driving, stop the vehicle and shut
off the engine as soon as possible. A chime will sound
when this telltale turns on. Do not operate the vehicle
until the cause is corrected. This telltale does not indicate
how much oil is in the engine.
Note:Do not use the vehicle until the failure has been solved.
The illumination of the telltale does not indicate the
amount of oil in the engine: the oil level can be checked on
the display upon entering the vehicle and also by
activating the "Oil level" function on the Information and
Entertainment System.Contact an authorized dealer as soon as possible.
86
GETTING TO KNOW YOUR INSTRUMENT PANEL
Page 91 of 276

Warning LightWhat It Means What To Do
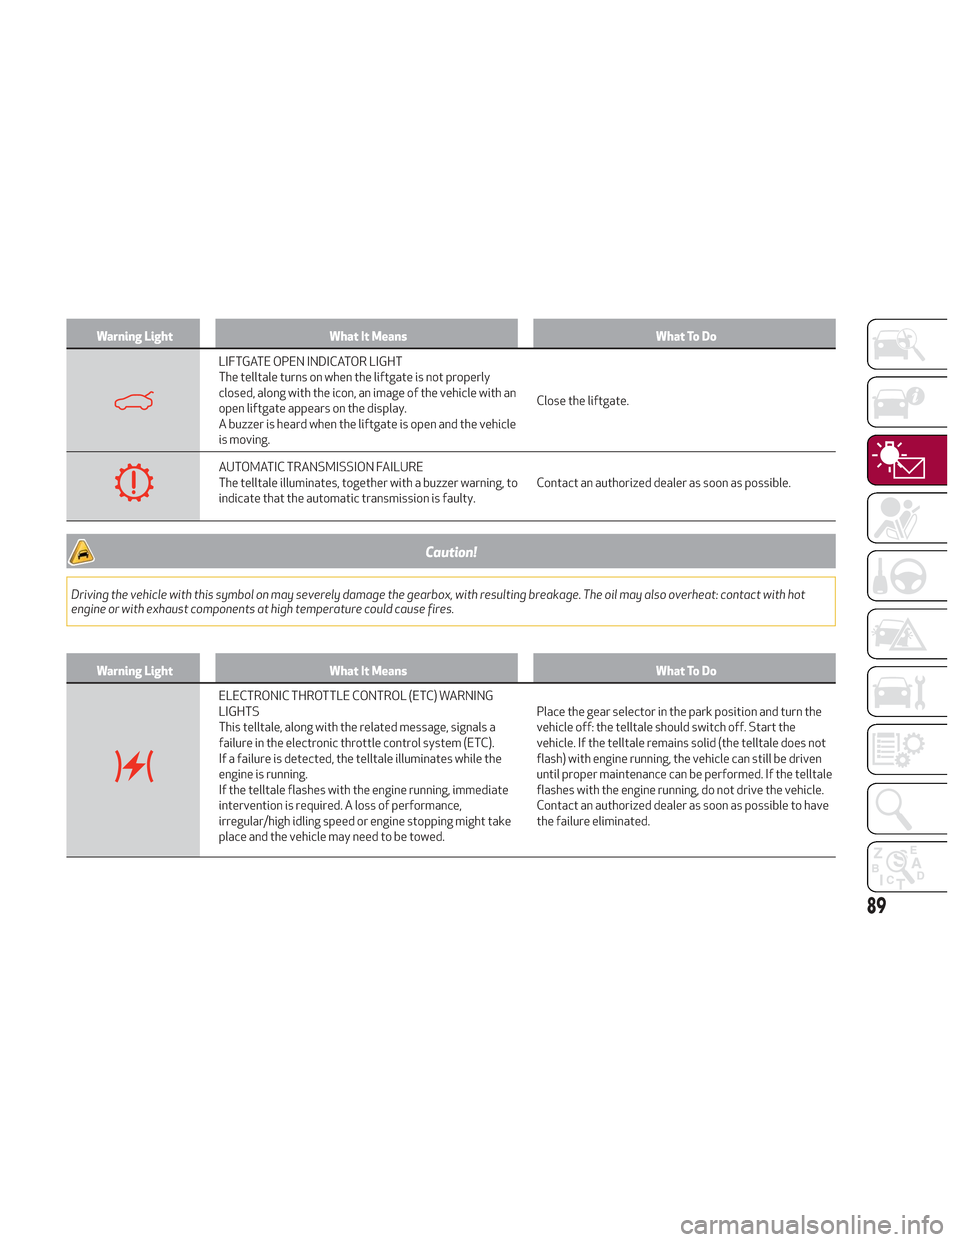
LIFTGATE OPEN INDICATOR LIGHT
The telltale turns on when the liftgate is not properly
closed, along with the icon, an image of the vehicle with an
open liftgate appears on the display.
A buzzer is heard when the liftgate is open and the vehicle
is moving.Close the liftgate.
AUTOMATIC TRANSMISSION FAILURE
The telltale illuminates, together with a buzzer warning, to
indicate that the automatic transmission is faulty.
Contact an authorized dealer as soon as possible.
Caution!
Driving the vehicle with this symbol on may severely damage the gearbox, with resulting breakage. The oil may also overheat: contact with hot
engine or with exhaust components at high temperature could cause fires.
Warning Light
What It Means What To Do
ELECTRONIC THROTTLE CONTROL (ETC) WARNING
LIGHTS
This telltale, along with the related message, signals a
failure in the electronic throttle control system (ETC).
If a failure is detected, the telltale illuminates while the
engine is running.
If the telltale flashes with the engine running, immediate
intervention is required. A loss of performance,
irregular/high idling speed or engine stopping might take
place and the vehicle may need to be towed.Place the gear selector in the park position and turn the
vehicle off: the telltale should switch off. Start the
vehicle. If the telltale remains solid (the telltale does not
flash) with engine running, the vehicle can still be driven
until proper maintenance can be performed. If the telltale
flashes with the engine running, do not drive the vehicle.
Contact an authorized dealer as soon as possible to have
the failure eliminated.
89
Page 110 of 276

When the engine is started, the warning
light illuminates briefly to signal the
driver that the system is active.
Sensors
The sensors are activated when any
forward gear is engaged at a speed
higher than approximately 6 mph
(10 km/h) or when REVERSE is engaged.
The sensors are temporarily deactivated
when the vehicle is stationary or the
vehicle is in PARK (P).
The detection area of the system covers
approximately a lane on both sides of the
vehicle which is around 9 feet (3 m).
This area begins from the door mirror and
extends for approximately 19 feet (6 m)
toward the rear part of the vehicle.
When the sensors are active, the system
monitors the detection areas on both
sides of the vehicle and warns the driver
about the possible presence of vehicles
in these areas.While driving, the system monitors the
detection area from three different input
points (side, rear and front) to check
whether an alert needs to be sent to the
driver. The system can detect the
presence of a vehicle in one of these
three areas.
Note:
The system does not alert the driver
of the presence of fixed objects (e.g.
safety barriers, poles, walls, etc.).
However, in some circumstances, the
system may activate in the presence of
these objects. This is normal and does
not indicate a system malfunction.
The system does not alert the driver
about the presence of vehicles coming
from the opposite direction, in the
adjacent lanes.
Warning!
The Blind Spot Monitoring system is only an
aid to help detect objects in the blind spot
zones. The BSM system is not designed to
detect pedestrians, bicyclists, or animals.
Even if your vehicle is equipped with the
BSM system, always check your vehicle’s
mirrors, glance over your shoulder, and use
your turn signal before changing lanes.
Failure to do so can result in serious injury or
death.
Note:
For the system to operate properly,
the rear bumper area where the radar
sensors are located must stay free from
snow, ice and dirt gathered from the
road surface.
Do not cover the rear bumper area
where the radar sensors are located with
any object (e.g. adhesives, bike rack,
etc.).
If you wish to install a rear tow eye
after purchasing the vehicle, you will
need to deactivate the system via the
Information and Entertainment System.
To access the function, select the
following items in sequence on the main
menu:
1. “Settings.”
2. “Safety.”
3. “Blind Spot Alert.”
Rear View
The system detects vehicles coming from
the rear part of your vehicle on both sides
and entering the rear detection area with
a difference in speed of less than 31 mph
(50 km/h) in relation to your vehicle.0434132127USBSM Indicator Light
108
SAFETY
Page 111 of 276

Overtaking Vehicles
If another vehicle is overtaken slowly,
with a difference in speed of less than
approximately 15 mph (25 km/h) and the
vehicle stays in the blind spot for
approximately 1.5 seconds, the warning
light on the door mirror of the
corresponding side illuminates.
If the difference in speed between the
two vehicles is greater than
approximately 15 mph (25 km/h), the
warning light does not illuminate.
Rear Cross Path Detection (RCP)
System
This system assists the driver during
reverse maneuvers in the case of reduced
visibility.
The RCP system monitors the rear
detection areas on both sides of the
vehicle to detect objects moving toward
the sides of the vehicle, with a minimum
speed between approximately 1 mph
(1 km/h) and 2 mph (3 km/h) and objects
moving at a maximum speed of 21 mph
(35 km/h), in areas such as parking lots.
The system activation is signaled to the
driver by an audible warning.
Note:If the sensors are covered by
objects or vehicles, the system may not
work as intended.
Warning!
Rear Cross Path Detection (RCP) is not a
back up aid system. It is intended to be used
to help a driver detect an oncoming vehicle in
a parking lot situation. Drivers must be
careful when backing up, even when using
RCP. Always check carefully behind your
vehicle, look behind you, and be sure to check
for pedestrians, animals, other vehicles,
obstructions, and blind spots before backing
up. Failure to do so can result in serious
injury or death.
Operating Mode
The system may be activated/
deactivated via the Information and
Entertainment System. To access the
function, select the following items on
the main menu in sequence:
1. “Settings.”
2. “Safety.”
3. “Blind Spot Alert.”
"Blind Spot Alert", "Visual" Mode
When the system is enabled, the warning
light within the door mirror on the side of
the detected object illuminates.
The visual warning on the mirror will blink
if the driver activates the turn signals,
thus indicating the intention to change
lane. The warning light will be constant if the
driver stays in the same lane.
"Blind Spot Alert" Function
Deactivation
When the system is deactivated ("Blind
Spot Alert" mode off), the BSM or RCP
systems will not emit neither an acoustic
nor visual warning.
The BSM system will store the operating
mode that was active when the engine
was stopped. Each time the engine is
started, the operating mode last set will
be recalled and used.
General Information
This vehicle has systems that operate on
radio frequency that comply with Part
15 of the Federal Communications
Commission (FCC) rules and with
Industry Canada Standards RSS-
GEN/210/220/310.
Operation is subject to the following two
conditions:
1. The device may not cause harmful
interference.
2. The device must accept any
interference received, including
interference that may cause undesired
operation of the device.
Changes or modifications to any of these
systems by other than an authorized
service facility could void authorization
to use this equipment.
109
Page 120 of 276

Seat Belt Systems
Buckle up even though you are an
excellent driver, even on short trips.
Someone on the road may be a poor
driver and could cause a collision that
includes you. This can happen far away
from home or on your own street.
Research has shown that seat belts save
lives, and they can reduce the
seriousness of injuries in a collision.
Some of the worst injuries happen when
people are thrown from the vehicle. Seat
belts reduce the possibility of ejection
and the risk of injury caused by striking
the inside of the vehicle. Everyone in a
motor vehicle should be belted at all
times.
Enhanced Seat Belt Use Reminder
System (BeltAlert)
Driver and Passenger BeltAlert (if
equipped)
BeltAlert is a feature intended to
remind the driver and outboard front
seat passenger (if equipped with
outboard front passenger seat BeltAlert)
to buckle their seat belts. The Belt Alert
feature is active whenever the ignition
switch is in the START or ON/RUN
position. Initial Indication
If the driver is unbuckled when the
ignition switch is first in the START or
ON/RUN position, a chime will signal for a
few seconds. If the driver or outboard
front seat passenger (if equipped with
outboard front passenger seat BeltAlert)
is unbuckled when the ignition switch is
first in the START or ON/RUN position
the Seat Belt Reminder Light will turn on
and remain on until both outboard front
seat belts are buckled. The outboard
front passenger seat BeltAlert is not
active when an outboard front passenger
seat is unoccupied.
BeltAlert Warning Sequence
The BeltAlert warning sequence is
activated when the vehicle is moving
above a specified vehicle speed range
and the driver or outboard front seat
passenger is unbuckled (if equipped with
outboard front passenger seat BeltAlert)
(the outboard front passenger seat
BeltAlert is not active when the outboard
front passenger seat is unoccupied). The
BeltAlert warning sequence starts by
blinking the Seat Belt Reminder Light and
sounding an intermittent chime. Once the
BeltAlert warning sequence has
completed, the Seat Belt Reminder Light
will remain on until the seat belts are
buckled. The BeltAlert warning sequence
may repeat based on vehicle speed until
the driver and occupied outboard front
seat passenger seat belts are buckled.The driver should instruct all occupants
to buckle their seat belts.
Change of Status
If the driver or outboard front seat
passenger (if equipped with outboard
front passenger seat BeltAlert)
unbuckles their seat belt while the
vehicle is traveling, the BeltAlert warning
sequence will begin until the seat belts
are buckled again.
The outboard front passenger seat
BeltAlert is not active when the outboard
front passenger seat is unoccupied.
BeltAlert may be triggered when an
animal or other items are placed on the
outboard front passenger seat or when
the seat is folded flat (if equipped). It is
recommended that pets be restrained in
the rear seat (if equipped) in pet
harnesses or pet carriers that are
secured by seat belts, and cargo is
properly stowed.Lap/Shoulder Belts
All seating positions in your vehicle are
equipped with lap/shoulder belts.
The seat belt webbing retractor will lock
only during very sudden stops or
collisions. This feature allows the
shoulder part of the seat belt to move
freely with you under normal conditions.
However, in a collision the seat belt will
lock and reduce your risk of striking the
inside of the vehicle or being thrown out
of the vehicle.
118
SAFETY