2018 Alfa Romeo Stelvio seats
[x] Cancel search: seatsPage 35 of 276
2. Place the seat belt so that it doesn't
impede the movement of the backrest
while tilting it.
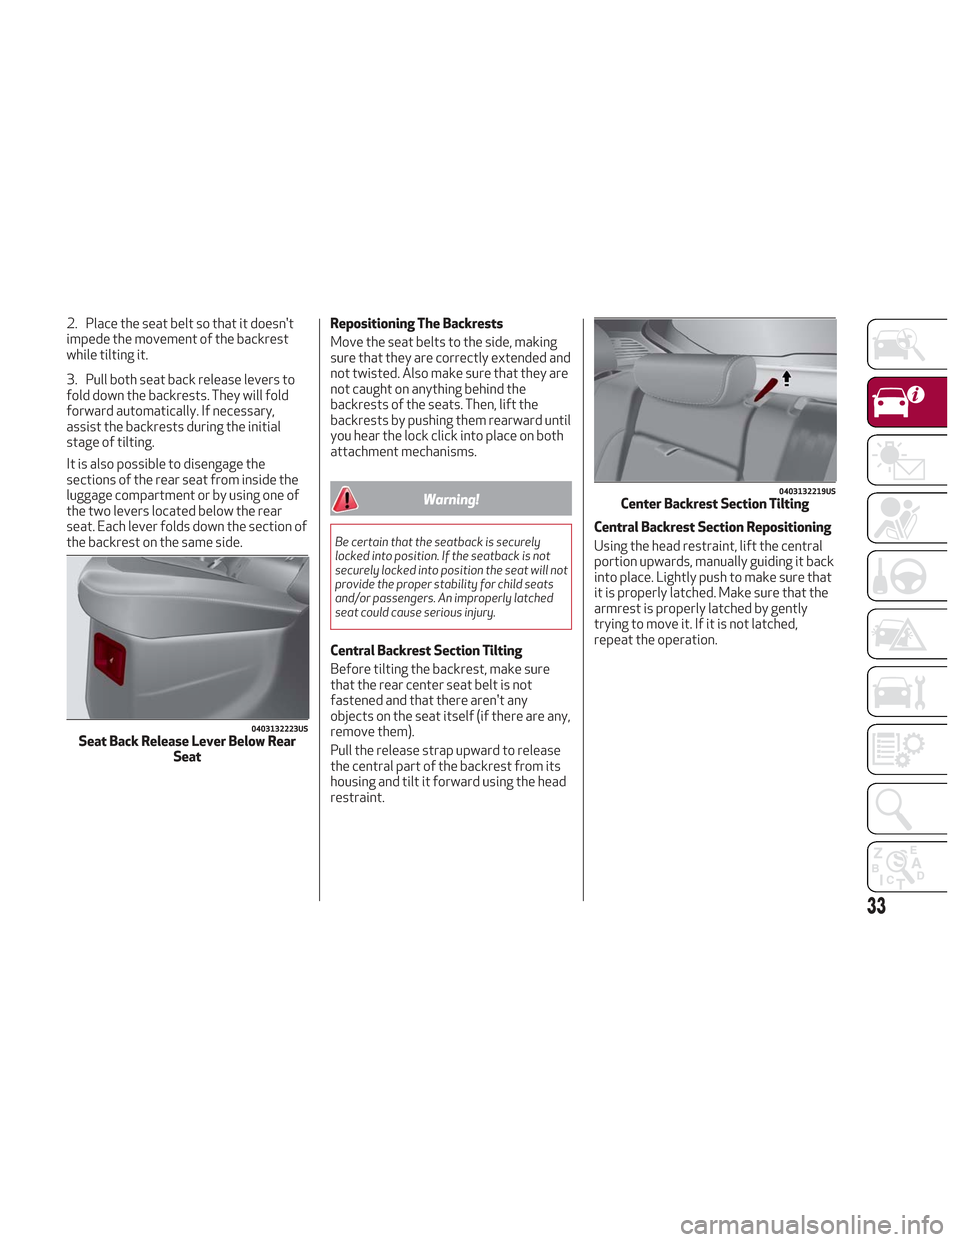
3. Pull both seat back release levers to
fold down the backrests. They will fold
forward automatically. If necessary,
assist the backrests during the initial
stage of tilting.
It is also possible to disengage the
sections of the rear seat from inside the
luggage compartment or by using one of
the two levers located below the rear
seat. Each lever folds down the section of
the backrest on the same side.Repositioning The Backrests
Move the seat belts to the side, making
sure that they are correctly extended and
not twisted. Also make sure that they are
not caught on anything behind the
backrests of the seats. Then, lift the
backrests by pushing them rearward until
you hear the lock click into place on both
attachment mechanisms.
Warning!
Be certain that the seatback is securely
locked into position. If the seatback is not
securely locked into position the seat will not
provide the proper stability for child seats
and/or passengers. An improperly latched
seat could cause serious injury.
Central Backrest Section Tilting
Before tilting the backrest, make sure
that the rear center seat belt is not
fastened and that there aren't any
objects on the seat itself (if there are any,
remove them).
Pull the release strap upward to release
the central part of the backrest from its
housing and tilt it forward using the head
restraint.Central Backrest Section Repositioning
Using the head restraint, lift the central
portion upwards, manually guiding it back
into place. Lightly push to make sure that
it is properly latched. Make sure that the
armrest is properly latched by gently
trying to move it. If it is not latched,
repeat the operation.
0403132223USSeat Back Release Lever Below Rear
Seat
0403132219USCenter Backrest Section Tilting
33
Page 36 of 276
HEAD RESTRAINTS
Head restraints are designed to reduce
the risk of injury by restricting head
movement in the event of a rear impact.
Head restraints should be adjusted so
that the top of the head restraint is
located above the top of your ear.
Warning!
A loose head restraint thrown forward in
a collision or hard stop could cause serious
injury or death to occupants of the vehicle.
Always securely stow removed head
restraints in a location outside the occupant
compartment.
ALL the head restraints MUST be
reinstalled in the vehicle to properly protect
the occupants. Follow the re-installation
instructions above prior to operating the
vehicle or occupying a seat.
Do not place items over the top of the
Reactive Head Restraint, such as coats,
seat covers or portable DVD players. These
items may interfere with the operation of
the Reactive Head Restraint in the event of
a collision and could result in serious injury
or death.
Front Head Restraints (Adjustments)
Note: If the vehicle is equipped with
Sparco Racing Seats, the head restraints
are not adjustable or removable.
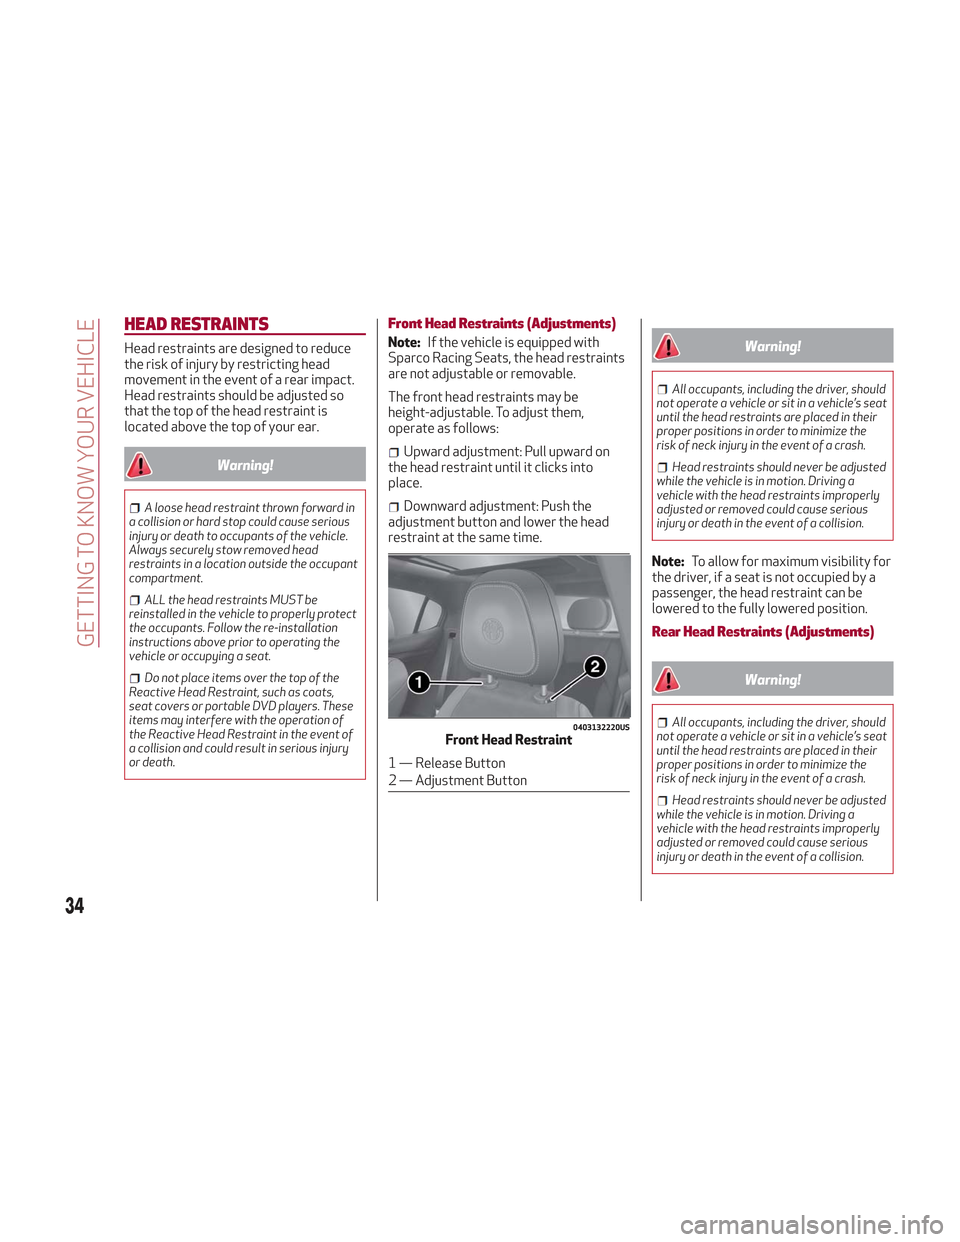
The front head restraints may be
height-adjustable. To adjust them,
operate as follows:
Upward adjustment: Pull upward on
the head restraint until it clicks into
place.
Downward adjustment: Push the
adjustment button and lower the head
restraint at the same time.
Warning!
All occupants, including the driver, should
not operate a vehicle or sit in a vehicle’s seat
until the head restraints are placed in their
proper positions in order to minimize the
risk of neck injury in the event of a crash.
Head restraints should never be adjusted
while the vehicle is in motion. Driving a
vehicle with the head restraints improperly
adjusted or removed could cause serious
injury or death in the event of a collision.
Note: To allow for maximum visibility for
the driver, if a seat is not occupied by a
passenger, the head restraint can be
lowered to the fully lowered position.
Rear Head Restraints (Adjustments)
Warning!
All occupants, including the driver, should
not operate a vehicle or sit in a vehicle’s seat
until the head restraints are placed in their
proper positions in order to minimize the
risk of neck injury in the event of a crash.
Head restraints should never be adjusted
while the vehicle is in motion. Driving a
vehicle with the head restraints improperly
adjusted or removed could cause serious
injury or death in the event of a collision.
0403132220USFront Head Restraint
1 — Release Button
2 — Adjustment Button
34
GETTING TO KNOW YOUR VEHICLE
Page 69 of 276
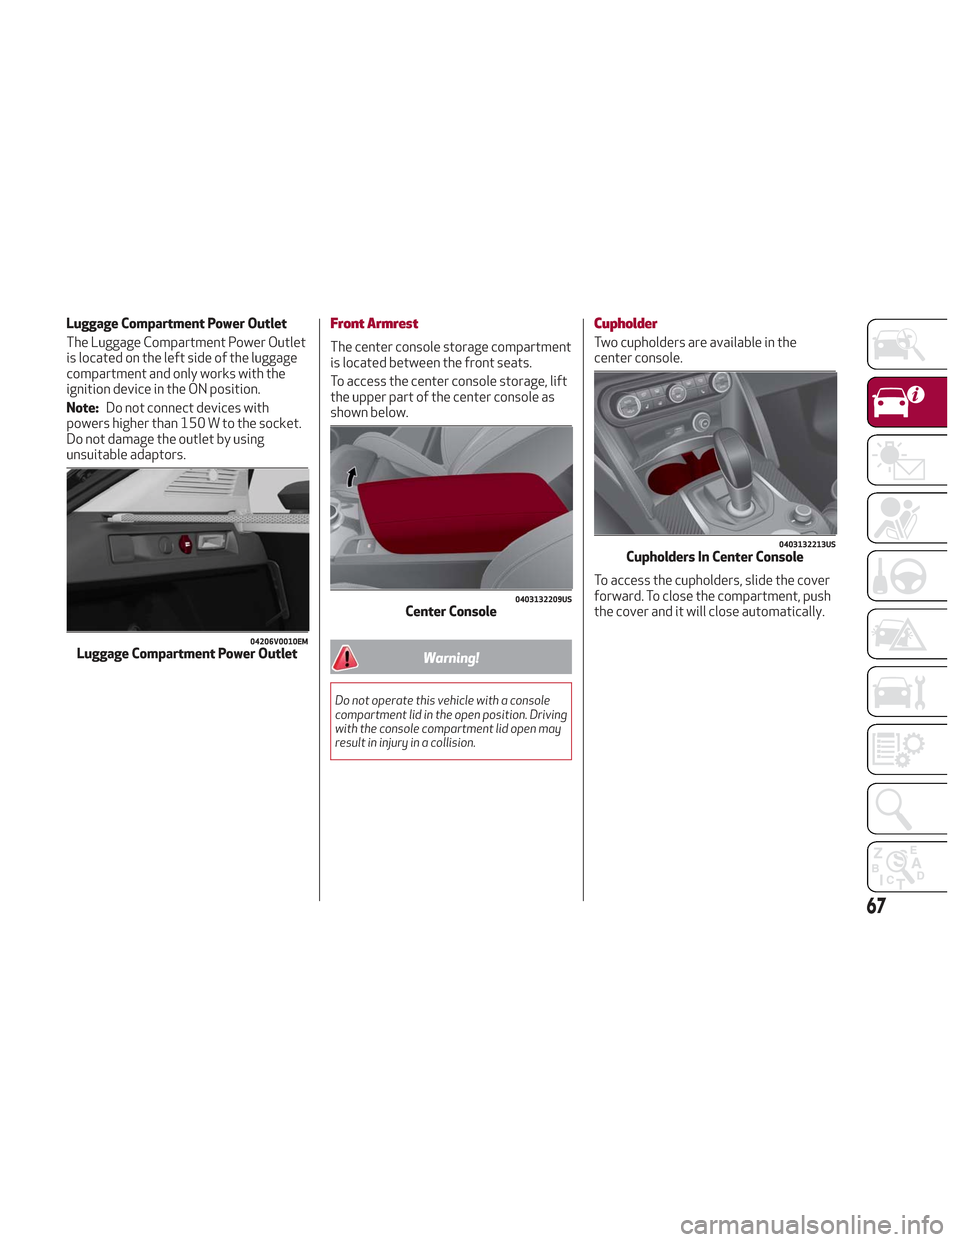
Luggage Compartment Power Outlet
The Luggage Compartment Power Outlet
is located on the left side of the luggage
compartment and only works with the
ignition device in the ON position.
Note:Do not connect devices with
powers higher than 150 W to the socket.
Do not damage the outlet by using
unsuitable adaptors.Front Armrest
The center console storage compartment
is located between the front seats.
To access the center console storage, lift
the upper part of the center console as
shown below.
Warning!
Do not operate this vehicle with a console
compartment lid in the open position. Driving
with the console compartment lid open may
result in injury in a collision.
Cupholder
Two cupholders are available in the
center console.
To access the cupholders, slide the cover
forward. To close the compartment, push
the cover and it will close automatically.
04206V0010EMLuggage Compartment Power Outlet
0403132209USCenter Console
0403132213USCupholders In Center Console
67
Page 119 of 276
OCCUPANT RESTRAINT
SYSTEMS
Some of the most important safety
features in your vehicle are the restraint
systems:
Occupant Restraint Systems Features
Seat Belt Systems
Supplemental Restraint Systems
(SRS) Air Bags
Child Restraints
Some of the safety features described in
this section may be standard equipment
on some models, or may be optional
equipment on others. If you are not sure,
ask your authorized dealer.
Important Safety Precautions
Please pay close attention to the
information in this section. It tells you
how to use your restraint system
properly, to keep you and your
passengers as safe as possible.
Here are some simple steps you can take
to minimize the risk of harm from a
deploying air bag:
1. Children 12 years old and under
should always ride buckled up in the rear
seat of a vehicle with a rear seat. 2. If a child from 2 to 12 years old (not in
a rear-facing child restraint) must ride in
the front passenger seat, move the seat
as far back as possible and use the
proper child restraint (refer to “Child
Restraints” in this section for further
information).
3. Children that are not big enough to
wear the vehicle seat belt properly (refer
to “Child Restraints” in this section for
further information) should be secured in
the rear seat of a vehicle with a rear seat
in child restraints or belt-positioning
booster seats. Older children who do not
use child restraints or belt-positioning
booster seats should ride properly
buckled up in the rear seat of a vehicle
with a rear seat.
4. Never allow children to slide the
shoulder belt behind them or under their
arm.
5. You should read the instructions
provided with your child restraint to
make sure that you are using it properly.
6. All occupants should always wear
their lap and shoulder belts properly.
7. The driver and front passenger seats
should be moved back as far as practical
to allow the front air bags room to inflate.
8. Do not lean against the door or
window. If your vehicle has side air bags,
and deployment occurs, the side air bags
will inflate forcefully into the space
between occupants and the door and
occupants could be injured.
9. If the air bag system in this vehicle
needs to be modified to accommodate a
disabled person, refer to the “Customer
Assistance” section for customer service
contact information.
Warning!
Never place a rear-facing child restraint in
front of an air bag. A deploying passenger
front air bag can cause death or serious
injury to a child 12 years or younger,
including a child in a rear-facing child
restraint.
Only use a rear-facing child restraint in
the rear seat of a vehicle with a rear seat.
117
Page 121 of 276
Warning!
Relying on the air bags alone could lead to
more severe injuries in a collision. The air
bags work with your seat belt to restrain
you properly. In some collisions, the air bags
won’t deploy at all. Always wear your seat
belt even though you have air bags.
In a collision, you and your passengers can
suffer much greater injuries if you are not
properly buckled up. You can strike the
interior of your vehicle or other passengers,
or you can be thrown out of the vehicle.
Always be sure you and others in your
vehicle are buckled up properly.
It is dangerous to ride in a cargo area,
inside or outside of a vehicle. In a collision,
people riding in these areas are more likely
to be seriously injured or killed.
Do not allow people to ride in any area of
your vehicle that is not equipped with seats
and seat belts.
Be sure everyone in your vehicle is in a
seat and using a seat belt properly.
Occupants, including the driver, should
always wear their seat belts whether or not
an air bag is also provided at their seating
position to minimize the risk of severe injury
or death in the event of a crash.
Wearing your seat belt incorrectly could
make your injuries in a collision much worse.
You might suffer internal injuries, or you
could even slide out of the seat belt. Follow
these instructions to wear your seat belt
safely and to keep your passengers safe,
too.
Two people should never be belted into a
single seat belt. People belted together can
crash into one another in a collision, hurting
one another badly. Never use a lap/shoulder
belt or a lap belt for more than one person,
no matter what their size.
Warning!
A lap belt worn too high can increase the
risk of injury in a collision. The seat belt
forces won’t be at the strong hip and pelvic
bones, but across your abdomen. Always
wear the lap part of your seat belt as low as
possible and keep it snug.
A twisted seat belt may not protect you
properly. In a collision, it could even cut into you.
Be sure the seat belt is flat against your body,
without twists. If you can’t straighten a seat
belt in your vehicle, take it to your authorized
dealer immediately and have it fixed.
A seat belt that is buckled into the wrong
buckle will not protect you properly. The lap
portion could ride too high on your body,
possibly causing internal injuries. Always buckle
your seat belt into the buckle nearest you.
A seat belt that is too loose will not protect
you properly. In a sudden stop, you could move
too far forward, increasing the possibility of
injury. Wear your seat belt snugly.
A seat belt that is worn under your arm is
dangerous. Your body could strike the inside
surfaces of the vehicle in a collision,
increasing head and neck injury. A seat belt
worn under the arm can cause internal injuries. Ribs aren’t as strong as shoulder
bones. Wear the seat belt over your
shoulder so that your strongest bones will
take the force in a collision.
A shoulder belt placed behind you will not
protect you from injury during a collision.
You are more likely to hit your head in a
collision if you do not wear your shoulder
belt. The lap and shoulder belt are meant to
be used together.
A frayed or torn seat belt could rip apart
in a collision and leave you with no
protection. Inspect the seat belt system
periodically, checking for cuts, frays, or
loose parts. Damaged parts must be
replaced immediately. Do not disassemble
or modify the seat belt system. Seat belt
assemblies must be replaced after a
collision.
Lap/Shoulder Belt Operating
Instructions
1. Enter the vehicle and close the door.
Sit back and adjust the seat.
2. The seat belt latch plate is above the
back of the front seat, and next to your
arm in the rear seat (for vehicles
equipped with a rear seat). Grasp the
latch plate and pull out the seat belt.
Slide the latch plate up the webbing as
far as necessary to allow the seat belt to
go around your lap.
3. When the seat belt is long enough to
fit, insert the latch plate into the buckle
until you hear a “click.”
119
Page 122 of 276
4. Position the lap belt so that it is snug
and lies low across your hips, below your
abdomen. To remove slack in the lap belt
portion, pull up on the shoulder belt. To
loosen the lap belt if it is too tight, tilt the
latch plate and pull on the lap belt. A snug
seat belt reduces the risk of sliding under
the seat belt in a collision.
5. Position the shoulder belt across the
shoulder and chest with minimal, if any
slack so that it is comfortable and not
resting on your neck. The retractor will
withdraw any slack in the shoulder belt.
6. To release the seat belt, push the red
button on the buckle. The seat belt will
automatically retract to its stowed
position. If necessary, slide the latch
plate down the webbing to allow the seat
belt to retract fully.
Lap/Shoulder Belt Untwisting
Procedure
Use the following procedure to untwist a
twisted lap/shoulder belt.
1. Position the latch plate as close as
possible to the anchor point.
2. At about 6 to 12 inches (15 to 30 cm)
above the latch plate, grasp and twist the
seat belt webbing 180 degrees to create
a fold that begins immediately above the
latch plate.
3. Slide the latch plate upward over the
folded webbing. The folded webbing
must enter the slot at the top of the latch
plate.
4. Continue to slide the latch plate up
until it clears the folded webbing and the
seat belt is no longer twisted.
Adjustable Upper Shoulder Belt
Anchorage
In the driver and front passenger seats,
the top of the shoulder belt can be
adjusted upward or downward to position
the seat belt away from your neck. Push
or squeeze the anchorage button to
release the anchorage, and move it up or
down to the position that serves you
best.As a guide, if you are shorter than
average, you will prefer the shoulder belt
anchorage in a lower position, and if you
are taller than average, you will prefer the
shoulder belt anchorage in a higher
position. After you release the anchorage
button, try to move it up or down to make
sure that it is locked in position.
Note:
The adjustable upper shoulder belt
anchorage is equipped with an Easy Up
feature. This feature allows the shoulder
belt anchorage to be adjusted in the
upward position without pushing or
squeezing the release button. To verify
the shoulder belt anchorage is latched,
pull downward on the shoulder belt
anchorage until it is locked into position.
0101132150USSeat Belt Latch Plate Inserted Into Seat Belt Buckle0101132173USAdjustable Upper Shoulder BeltAnchorage
4 — Adjustable Anchorage
120
SAFETY
Page 124 of 276

webbing to retract completely in this
case and then carefully pull out only the
amount of webbing necessary to
comfortably wrap around the occupant’s
mid-section. Slide the latch plate into the
buckle until you hear a "click."
In Automatic Locking Mode, the shoulder
belt is automatically pre-locked. The seat
belt will still retract to remove any slack
in the shoulder belt. Use the Automatic
Locking Mode anytime a child restraint is
installed in a seating position that has a
seat belt with this feature. Children
12 years old and under should always be
properly restrained in the rear seat of a
vehicle with a rear seat.
Warning!
Never place a rear-facing child restraint in
front of an air bag. A deploying passenger
front air bag can cause death or serious
injury to a child 12 years or younger,
including a child in a rear-facing child
restraint.
Only use a rear-facing child restraint in
the rear seat of a vehicle with a rear seat.
How To Engage The Automatic Locking
Mode
1. Buckle the combination lap and
shoulder belt. 2. Grasp the shoulder portion and pull
downward until the entire seat belt is
extracted.
3. Allow the seat belt to retract. As the
seat belt retracts, you will hear a clicking
sound. This indicates the seat belt is now
in the Automatic Locking Mode.
How To Disengage The Automatic
Locking Mode
Unbuckle the combination lap/shoulder
belt and allow it to retract completely to
disengage the Automatic Locking Mode
and activate the vehicle sensitive
(emergency) locking mode.
Warning!
The seat belt assembly must be replaced
if the switchable Automatic Locking
Retractor (ALR) feature or any other seat
belt function is not working properly when
checked according to the procedures in the
Service Manual.
Failure to replace the seat belt assembly
could increase the risk of injury in collisions.
Do not use the Automatic Locking Mode
to restrain occupants who are wearing the
seat belt or children who are using booster
seats. The locked mode is only used to
install rear-facing or forward-facing child
restraints that have a harness for
restraining the child.
Supplemental Restraint Systems
(SRS)
Some of the safety features described in
this section may be standard equipment
on some models, or may be optional
equipment on others. If you are not sure,
ask your authorized dealer.
The air bag system must be ready to
protect you in a collision. The Occupant
Restraint Controller (ORC) monitors the
internal circuits and interconnecting
wiring associated with the electrical Air
Bag System Components. Your vehicle
may be equipped with the following Air
Bag System Components:
Air Bag System Components
Occupant Restraint Controller (ORC)
Air Bag Warning Light
Steering Wheel and Column
Instrument Panel
Knee Impact Bolsters
Driver and Front Passenger Air Bags
Seat Belt Buckle Switch
Supplemental Side Air Bags
Supplemental Knee Air Bags
Front and Side Impact Sensors
Seat Belt Pretensioners
Seat Track Position Sensors
122
SAFETY
Page 128 of 276
Warning!
Do not drill, cut, or tamper with the knee
impact bolsters in any way.
Do not mount any accessories to the knee
impact bolsters such as alarm lights,
stereos, citizen band radios, etc.
Supplemental Driver And Front
Passenger Knee Air Bags
This vehicle is equipped with a
Supplemental Driver Knee Air Bag
mounted in the instrument panel below
the steering column and a Supplemental
Passenger Knee Air Bag mounted in the
instrument panel below the glove
compartment. The Supplemental Knee
Air Bags provide enhanced protection
during a frontal impact by working
together with the seat belts,
pretensioners, and front air bags.
Supplemental Side Air Bags
Supplemental Seat-Mounted Side Air
Bags (SABs)
This vehicle is equipped with
Supplemental Seat-Mounted Side Air
Bags (SABs).
Supplemental Seat-Mounted Side Air
Bags (SABs) are located in the outboard
side of the front seats. The SABs are
marked with “SRS AIRBAG” or “AIRBAG” on a label or on the seat trim on the
outboard side of the seats.
The SABs may help to reduce the risk of
occupant injury during certain side
impacts, in addition to the injury
reduction potential provided by the seat
belts and body structure.
When the SAB deploys, it opens the seam
on the outboard side of the seatback’s
trim cover. The inflating SAB deploys
through the seat seam into the space
between the occupant and the door. The
SAB moves at a very high speed and with
such a high force that it could injure
occupants if they are not seated
properly, or if items are positioned in the
area where the SAB inflates. Children are
at an even greater risk of injury from a
deploying air bag.
Warning!
Do not use accessory seat covers or place
objects between you and the Side Air Bags;
the performance could be adversely
affected and/or objects could be pushed into
you, causing serious injury.
Supplemental Side Air Bag Inflatable
Curtains (SABICs)
This vehicle is equipped with
Supplemental Side Air Bag Inflatable
Curtains (SABICs).
Supplemental Side Air Bag Inflatable
Curtains (SABICs) are located above the
side windows. The trim covering the
SABICs is labeled “SRS AIRBAG” or
“AIRBAG.”
0101132163USFront Supplemental Seat-Mounted Side
Air Bag
0101132180USSupplemental Side Air Bag InflatableCurtain (SABIC) Location
126
SAFETY