2018 Abarth 500 Owner handbook (in English)
-
 1
1 -
 2
2 -
 3
3 -
 4
4 -
 5
5 -
 6
6 -
 7
7 -
 8
8 -
 9
9 -
 10
10 -
 11
11 -
 12
12 -
 13
13 -
 14
14 -
 15
15 -
 16
16 -
 17
17 -
 18
18 -
 19
19 -
 20
20 -
 21
21 -
 22
22 -
 23
23 -
 24
24 -
 25
25 -
 26
26 -
 27
27 -
 28
28 -
 29
29 -
 30
30 -
 31
31 -
 32
32 -
 33
33 -
 34
34 -
 35
35 -
 36
36 -
 37
37 -
 38
38 -
 39
39 -
 40
40 -
 41
41 -
 42
42 -
 43
43 -
 44
44 -
 45
45 -
 46
46 -
 47
47 -
 48
48 -
 49
49 -
 50
50 -
 51
51 -
 52
52 -
 53
53 -
 54
54 -
 55
55 -
 56
56 -
 57
57 -
 58
58 -
 59
59 -
 60
60 -
 61
61 -
 62
62 -
 63
63 -
 64
64 -
 65
65 -
 66
66 -
 67
67 -
 68
68 -
 69
69 -
 70
70 -
 71
71 -
 72
72 -
 73
73 -
 74
74 -
 75
75 -
 76
76 -
 77
77 -
 78
78 -
 79
79 -
 80
80 -
 81
81 -
 82
82 -
 83
83 -
 84
84 -
 85
85 -
 86
86 -
 87
87 -
 88
88 -
 89
89 -
 90
90 -
 91
91 -
 92
92 -
 93
93 -
 94
94 -
 95
95 -
 96
96 -
 97
97 -
 98
98 -
 99
99 -
 100
100 -
 101
101 -
 102
102 -
 103
103 -
 104
104 -
 105
105 -
 106
106 -
 107
107 -
 108
108 -
 109
109 -
 110
110 -
 111
111 -
 112
112 -
 113
113 -
 114
114 -
 115
115 -
 116
116 -
 117
117 -
 118
118 -
 119
119 -
 120
120 -
 121
121 -
 122
122 -
 123
123 -
 124
124 -
 125
125 -
 126
126 -
 127
127 -
 128
128 -
 129
129 -
 130
130 -
 131
131 -
 132
132 -
 133
133 -
 134
134 -
 135
135 -
 136
136 -
 137
137 -
 138
138 -
 139
139 -
 140
140 -
 141
141 -
 142
142 -
 143
143 -
 144
144 -
 145
145 -
 146
146 -
 147
147 -
 148
148 -
 149
149 -
 150
150 -
 151
151 -
 152
152 -
 153
153 -
 154
154 -
 155
155 -
 156
156 -
 157
157 -
 158
158 -
 159
159 -
 160
160 -
 161
161 -
 162
162 -
 163
163 -
 164
164 -
 165
165 -
 166
166 -
 167
167 -
 168
168 -
 169
169 -
 170
170 -
 171
171 -
 172
172 -
 173
173 -
 174
174 -
 175
175 -
 176
176 -
 177
177 -
 178
178 -
 179
179 -
 180
180 -
 181
181 -
 182
182 -
 183
183 -
 184
184 -
 185
185 -
 186
186 -
 187
187 -
 188
188 -
 189
189 -
 190
190 -
 191
191
 SEATS
FRONT SEATS
Lengthwise adjustment
Lift lever 1 fig. 7 and push the seat
forwards or backwards: in the driving
position, you should be able to rest
your arms on the rim of the steering
wheel.
8)")
 Passenger side without position
memory
To bring back the seat in its initial
position proceed as follows:
slide the seat backwards pushing on
the backrest to the desired position
(movement D);
adjust")
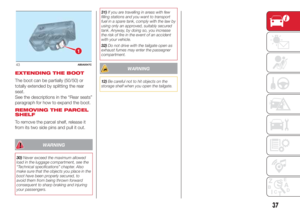
 Partial extension (50/50)
(where provided)
Proceed as follows:
remove the rear seat head restraints
(where provided);
remove the parcel shelf, by releasing
it from its two side pins and pulling it
out")
 10)Once you have released the
adjustment lever, always check that the
seat is locked on the guides by trying
to move it back and forth. Failure to lock
the seat in place could result in the seat
movin")
 WARNING
12)All adjustments must be carried out
only with the car stationary and engine off.
13)It is absolutely forbidden to carry out
any after-market operation involving
steering system or steering")
 WARNING
14)When driving, these mirrors must
always be in the open position.
15)As door mirrors are curved, they may
slightly alter the perception of distance.
EXTERIOR LIGHTS
DAYTIME RUNNING
LIGHTS (D")
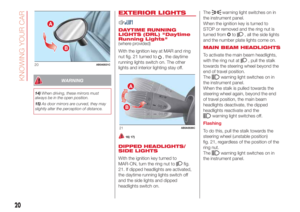
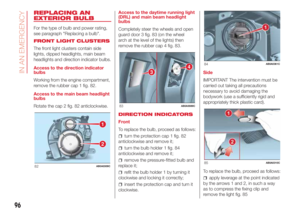
 DIRECTION INDICATORS
Bring the stalk to the (stable) position:
up (position A) fig. 21: activates
the right direction indicator;
down (position B): activates the left
direction indicator.
The
orwarnin")
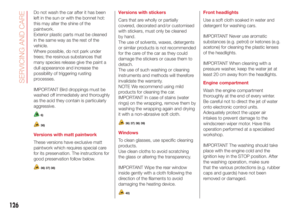
 HEADLAMP ALIGNMENT
CORRECTOR
With the ignition key in the MAR
position and the dipped headlights on,
press the+or–fig. 23 buttons to
adjust the headlight alignment.
The adjustment positions are show")