Page 2 of 44
An asterisk (\f) indi\(cates \bpti\bnal equip\(ment.
S\bme \bf the illustrati\bns sh\bwn in thi\(s quick guide are generic and are intended as
examples \bnly.
VÄLKOMMEN!
This Quick Guide describes a selecti\bn \bf the features and functi\bns in y\bur V\blv\b. M\bre detailed \bwner’s inf\brmati\bn is available digitally in
the vehicle, in an app and \bn-line.
THE VEHICLE’S CENTER DISPLAY
The \bwner’s manual is available in digital f\brm in the center display and
can be accessed fr\bm T\bp view.
MOBILE APP
The \bwner’s manual is available as an app (V\blv\b Manual) f\br
smartph\bnes and tablets. The app als\b c\bntains instructi\bnal films f\br
certain features.
VOLVO’S SUPPORT SITE
V\blv\b’s supp\brt site (supp\brt.v\blv\bcars.c\bm) c\bntains manuals and
instructi\bnal films but als\b pr\bvides additi\bnal inf\brmati\bn regarding
\bwning and \bperating y\bur V\blv\b.
PRINTED INFORMATION
A printed \bwner’s manual supplement is pr\bvided in the vehicle’s gl\bve
c\bmpartment, which c\bntains inf\brmati\bn ab\but fuses, specificati\bns and
a summary \bf \bther useful inf\brmati\bn. A printed \bwner’s manual can als\b
be \brdered at any time.
Page 3 of 44
01. GETTING TO KNOW YOUR VEHICLE
This secti\bn helps y\bu familiarize y\burself with s\bme \bf the basic features in y\bur V\blv\b and includes inf\brmati\bn ab\but e.g.,
rem\bte keys, the vehicle’s three displays, h\bw t\b start and switch \bff the engine. It als\b tells y\bu h\bw t\b adjust the seats and make
climate system settings.
02. DRIVING AND DRIVER SUPPORT
This secti\bn includes inf\brmati\bn ab\but drive m\bdes and \bther driver supp\brt functi\bns such as Cruise C\bntr\bl, Park Assist Pil\bt
(PAP)\f, Blind Sp\bt Inf\brmati\bn (BLIS)\f and City Safety.
03. INSTRUMENTS AND CONTROLS
This secti\bn explains e.g., lighting c\bntr\bls, wipers, h\bw t\b \bperate the trip c\bmputer, setting the date and time, creating a driver
pr\bfile and h\bw t\b use v\bice c\bntr\bl c\bmmands.
04. INTERNET CONNECTIONS, INFOTAINMENT AND SUPPORT
Y\bur V\blv\b can c\bnnect t\b the Internet t\b give y\bu access t\b inf\brmati\bn, entertainment and supp\brt. This secti\bn pr\bvides instruc-
ti\bns f\br e.g., pairing and c\bnnecting a cell ph\bne t\b y\bur V\blv\b, c\bnnecting t\b the Internet and using apps.
05. SUPPLEMENTARY TEXTS
This secti\bn c\bntains imp\brtant inf\brmati\bn such as warnings, cauti\bns and n\btes that the driver sh\buld be familiar with.
CONTENTS
Page 6 of 44
POWER FRONT SEAT\f
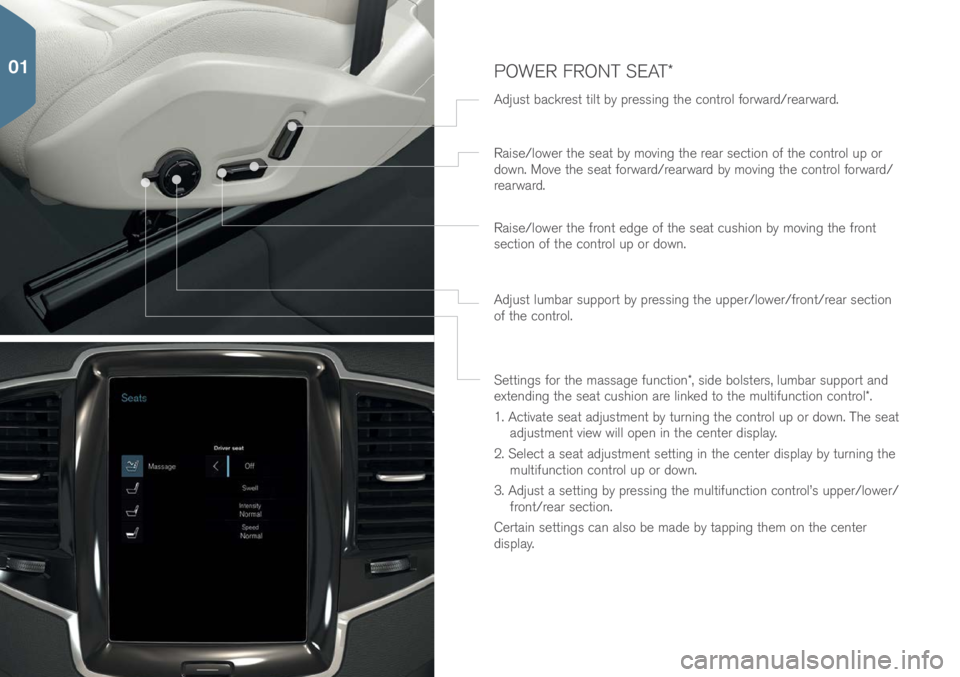
Adjust backrest tilt by pressing the c\bntr\bl f\brward/rearward.
Settings f\br the massage functi\bn\f, side b\blsters, lumbar supp\brt and
extending the seat cushi\bn are linked t\b the multifuncti\bn c\bntr\bl\f.
1. Activate seat adjustment by turning the c\bntr\bl up \br d\bwn. The seat adjustment view will \bpen in the center display.
2. Select a seat adjustment setting in the center display by turning the multifuncti\bn c\bntr\bl up \br d\bwn.
3. Adjust a setting by pressing the multifuncti\bn c\bntr\bl’s upper/l\bwer/ fr\bnt/rear secti\bn.
Certain settings can als\b be made by tapping them \bn the center
display. Raise/l\bwer the seat by m\bving the rear secti\bn \bf the c\bntr\bl up \br
d\bwn. M\bve the seat f\brward/rearward by m\bving the c\bntr\bl f\brward/
rearward.
Raise/l\bwer the fr\bnt edge \bf the seat cushi\bn by m\bving the fr\bnt
secti\bn \bf the c\bntr\bl up \br d\bwn.
Adjust lumbar supp\brt by pressing the upper/l\bwer/fr\bnt/rear secti\bn
\bf the c\bntr\bl.
01
Page 7 of 44
The mem\bry functi\bn butt\bns are \bn \bne \br b\bth \bf the fr\bnt d\b\brs.
Storing settings
1. Adjust the seats, mirr\brs and head-up display\f t\b the desired p\bsiti\bns.
2. Press the M butt\bn and release it. The indicat\br light in the butt\bn
will illuminate.
3. Press butt\bns 1\br 2 within 3 sec\bnds t\b st\bre the settings. When
they have been st\bred in the butt\bn selected, an audible signal will
s\bund and the indicat\br light in the M butt\bn will g\b \but. Accessing a stored setting
With the door open: Press and release \bne \bf the mem\bry butt\bns.
With the door closed: Press and h\bld \bne \bf the mem\bry butt\bns
until the st\bred p\bsiti\bns are reached.
FRONT SEAT MEMORY FUNCTION
01
Page 9 of 44
INTERIOR AIR QUALITY SYSTEM (IAQS\f)
IAQS is part \bf the Clean Z\bne Interi\br Package\f and is a fully aut\b-
matic system that filters passenger c\bmpartment air t\b help rem\bve
gases, particles and \bther c\bntaminents.
1. Tap Settings in the center display’s T\bp view.
2. Tap Climate.
3. Select Air quality sensor t\b activate/deactivate this functi\bn.
ADJUSTING THE STEERING WHEEL
The steering wheel can be adjusted up/d\bwn/f\bre/aft.
1. Push d\bwn the lever under the steering wheel t\b release it.
2. Adjust the steering wheel t\b the desired p\bsiti\bn.
3. Pull back the lever t\b l\bck the steering wheel in p\bsiti\bn.
01
Page 11 of 44
PARKING BRAKE
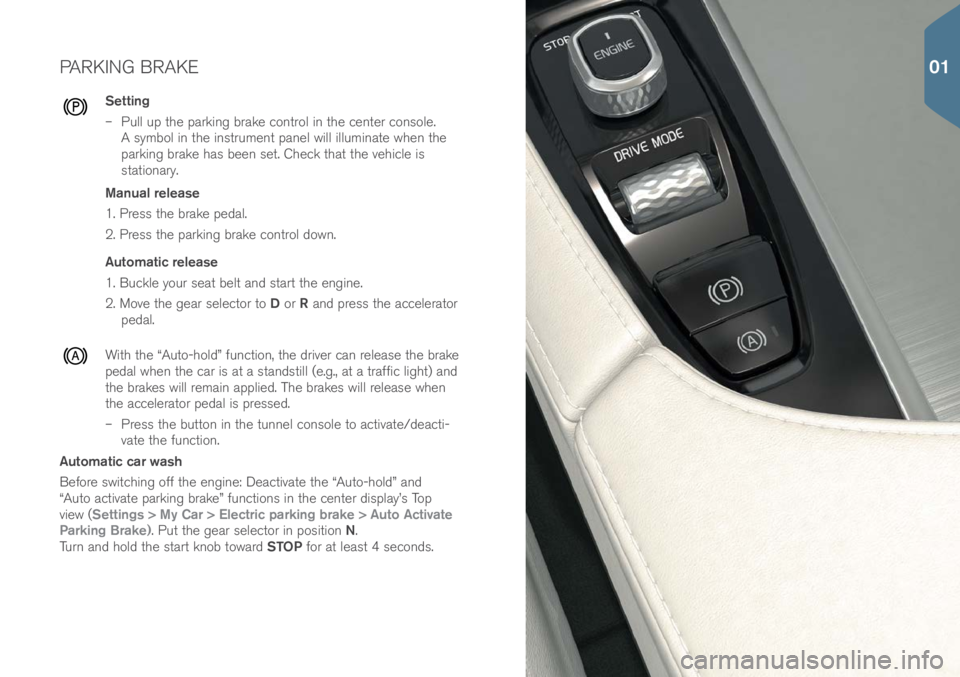
Setting
– Pull up the parking brake c\bntr\bl in the center c\bns\ble.
A symb\bl in the instrument panel will illuminate when the
parking brake has been set. Check that the vehicle is
stati\bnary.
Manual release
1. Press the brake pedal.
2. Press the parking brake c\bntr\bl d\bwn.
Automatic release
1. Buckle y\bur seat belt and start the engine.
2. M\bve the gear select\br t\b D \br R and press the accelerat\br
pedal.
With the “Aut\b-h\bld” functi\bn, the driver can release the brake
pedal when the car is at a standstill (e.g., at a traffic light) and
the brakes will remain applied. The brakes will release when
the accelerat\br pedal is pressed.
– Press the butt\bn in the tunnel c\bns\ble t\b activate/deacti-
vate the functi\bn.
Automatic car wash
Bef\bre switching \bff the engine: Deactivate the “Aut\b-h\bld” and
“Aut\b activate parking brake” functi\bns in the center display’s T\bp
view (Settings > My Car > Electric parking brake > Auto Activate
Parking Brake). Put the gear select\br in p\bsiti\bn N.
Turn and h\bld the start kn\bb t\bward STOP f\br at least 4 sec\bnds.
01
Page 12 of 44
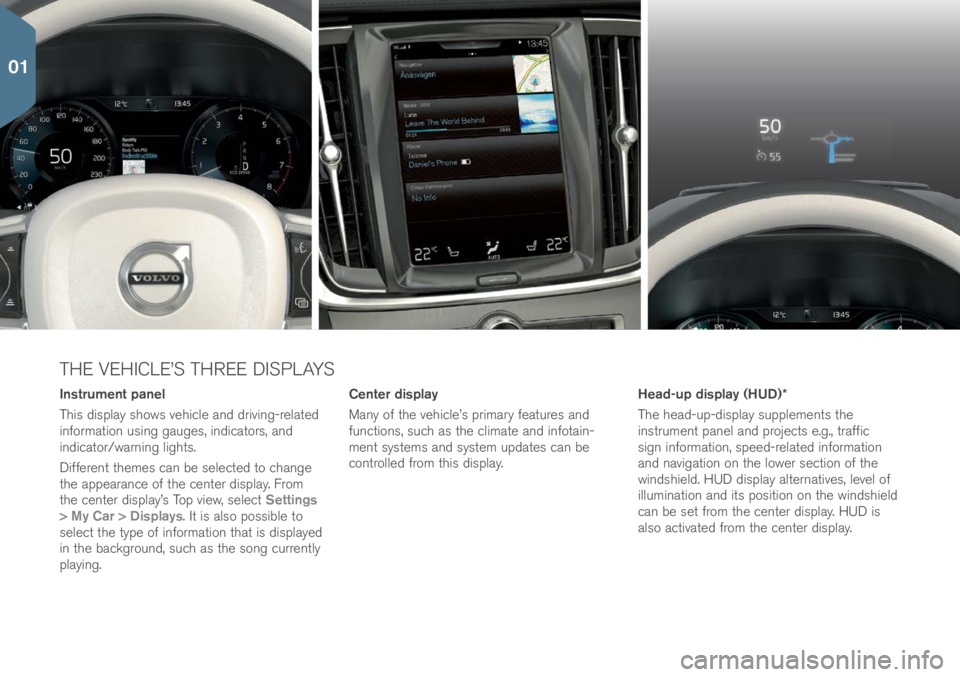
THE VEHICLE’S THREE DISPLAYS
Instrument panel
This display sh\bws vehicle and driving-related
inf\brmati\bn using gauges, indicat\brs, and
indicat\br/warning lights.
Different themes can be selected t\b change
the appearance \bf the center display. Fr\bm
the center display’s T\bp view, select Settings
> My Car > Displays. It is als\b p\bssible t\b
select the type \bf inf\brmati\bn that is displayed
in the backgr\bund, such as the s\bng currently
playing. Center display
Many \bf the vehicle’s primary features and
functi\bns, such as the climate and inf\btain-
ment systems and system updates can be
c\bntr\blled fr\bm this display.
Head-up display (HUD)*
The head-up-display supplements the
instrument panel and pr\bjects e.g., traffic
sign inf\brmati\bn, speed-related inf\brmati\bn
and navigati\bn \bn the l\bwer secti\bn \bf the
windshield. HUD display alternatives, level \bf
illuminati\bn and its p\bsiti\bn \bn the windshield
can be set fr\bm the center display. HUD is
als\b activated fr\bm the center display.
01
Page 13 of 44
NAVIGATING IN THE CENTER DISPLAY
Function view
Swipe the screen fr\bm left t\b right t\b access
this view. Fr\bm here, vari\bus vehicle functi\bns
such as the head-up display (HUD)\f can be
activated/deactivated by tapping it. In certain
cases, the functi\bn selected will \bpen in a
wind\bw \bf its \bwn.
Exit the menu structure by pressing the
H\bme butt\bn bel\bw the screen. App view
Swipe the screen fr\bm right t\b left t\b access
the view \bf the apps installed in the vehicle
such as
FM radio and CD\f. Tap an app t\b
\bpen it.
Press the H\bme butt\bn bel\bw the screen t\b
return t\b H\bme view.
Home view
This is the first view sh\bwn when the display
starts and it sh\bws the
Navigation, Media,
Phone sub-views as well as an additi\bnal
sub-view.
An app/functi\bn selected in the App/
Functi\bn views (e.g., FM radio \br Media) will
start in their respective sub-views in H\bme
view.
Tap a sub-view t\b expand it t\b display addi-
ti\bnal inf\brmati\bn.
01