Page 86 of 588
862. Instrument cluster
The indicators inform the driver of the operating state of the vehicle’s
various systems.
Indicators
Turn signal indicator
( →P. 191)*3, 4
(If equipped)
BSM outside rear view
mirror indicator
(→P. 222)
(U.S.A.)
Headlight indicator
(→P. 193) Security indicator
(
→P. 78, 80)
(Canada)
Tail light indicator
(→P. 193)*1
“AUTO LSD” indicator
(→P. 233, 236)
Headlight high beam
indicator ( →P. 194)
*1, 5
“AIR BAG ON” and
“AIR BAG OFF”
indicators ( →P. 50)
*6
Cruise control indicator
(→P. 204)
Cruise control “SET”
indicator ( →P. 204)
(4WD models)
“4HI” indicator ( →P. 230)
*1, 2
Slip indicator
(→P. 234, 236)
(4WD models)
“4LO” indicator ( →P. 230)
*1
VSC off indicator
(→P. 233, 236, 238, 239)
*6
(If equipped)
Trailer connection indica-
tor ( →P. 242)
“TOW HAUL” indicator
( →P. 187)
Page 101 of 588

1013-2. Opening, closing and locking the doors
3
Operation of each component
◆Wireless remote control (if equipped)
Locks all the doors
Check that the door is securely
locked.
Unlocks all the doors
Pressing the button unlocks the
driver’s door. Pressing the button
again within 3 seconds unlocks the
other doors.
Sounds the alarm
(press and hold) (→P. 101)
■Operation signals (vehicles with wireless remote control)
A buzzer sounds and the emergency flashers flash to indicate that the doors
have been locked/unlocked. (Locked: once; Unlocked: twice)
■ Door lock buzzer (vehicles with wireless remote control)
If an attempt to lock the doors is made when a door is not fully closed, a
buzzer sounds continuously for 5 seconds. Fully close the door to stop the
buzzer, and lock the vehicle once more.
■ Panic mode (vehicles with wireless remote control)
■ Security feature (vehicles with wireless remote control)
If a door is not opened within approximately 60 seconds after the vehicle is
unlocked, the security feature automatically locks the vehicle again.
■ Alarm (if equipped)
Using the wireless remote control to lock the doors will set the alarm system.
(→P. 80)
1
2
3
When is pressed for longer than about
1 second, an alarm will sound intermit-
tently and the vehicle lights will flash to
deter any person from trying to break into
or damage your vehicle.
To stop the alarm, press any button on the
wireless remote control.
Page 106 of 588
1063-2. Opening, closing and locking the doors
Tailgate
Unlock the tailgate
Lock the tailgate
Pull the handle
Open the tailgate slowly
The support cables will hold the
tailgate horizontal.
Lift and close the tailgate
After closing the tailgate, try pulling
it toward you to make sure it is
securely locked.
The tailgate can be opened using the tailgate handle. The tail-
gate can be locked/unlocked using a key.
Locking/unlocking the tailgate
1
2
Opening/closing the tailgate
1
2
3
Page 110 of 588

1103-2. Opening, closing and locking the doors
For rear end protection and easier
step-up loading.
To get on the rear step bumper,
use the shaded area in the illustra-
tion.
Rear step bumper
CAUTION
■Before removing the tailgate
Disconnect the wire harness between the back-up camera and the vehicle.
Failure to do so may result in serious personal injury or damage to the \
vehi-
cle components.
■ Caution while driving
Observe the following precautions.
Failure to do so may result in death or serious personal injury.
● Do not drive with the tailgate open.
● Do not allow others to get on the rear step bumper.
NOTICE
■To prevent damage to the tailgate wire harness
Do not pull out all of the tailgate wire harness before opening the tailgate.
■ To prevent damage to the camera lens
Store the removed tailgate with the back-up camera lens facing upward.
■ After closing the tailgate
Try pulling it toward you to make sure it is securely locked.
■ To prevent damage to the rear step bumper
Do not allow more than one person to get on the rear step bumper at a time.
Page 115 of 588

1153-3. Adjusting the seats
3
Operation of each component
CAUTION
■When raising the bottom cushion
Observe the following precautions.
Failure to do so may result in death or serious injury.
● Do not raise the bottom cushion while driving.
● Stop the vehicle on level ground, set the parking brake and shift the shift
lever to P.
■ When bottom cushion is raised
Do not allow passengers to sit on raised bottom cushion or place anything
on storage box (Double Cab models) while driving.
■ When returning the seats to their original position
Observe the following precautions.
Failure to do so may result in death or serious injury.
● Be careful not to get your hands or feet pinched in the seat.
● Make sure the bottom cushions are securely locked.
● Check that the seat belts are not twisted or caught in the seat.
● Arrange the seat belts in the proper positions for ready use.
● Make sure that there are no objects under the seat cushion or on the load-
ing floor.
NOTICE
■Before raising the bottom cushion
● Make sure that there are no objects, such as cushions, on the seat cush-
ion.
● The seat belts must be stowed.
Page 124 of 588
1243-4. Adjusting the steering wheel and mirrors
Steering wheel
Hold the steering wheel and
push the lever down.
Vehicles with front bench type seat
Adjust to the ideal position by
moving the steering wheel.
After adjustment, pull the lever up
to secure the steering wheel.
Vehicles with front separate type seats
Adjust to the ideal position by
moving the steering wheel hori-
zontally and vertically.
After adjustment, pull the lever up
to secure the steering wheel.
Adjustment procedure (manually adjustable type)
1
2
2
Page 125 of 588
1253-4. Adjusting the steering wheel and mirrors
3
Operation of each component
Operating the switch moves the steering wheel in the following direc-
tions:Up
Down
Toward the driver
Away from the driver
To sound the horn, press on or
close to the mark.
■ After adjusting the steering wh eel (manual adjustable type)
Make sure that the steering wheel is securely locked.
The horn may not sound if the steering wheel is not securely locked.
( →P. 124)
Adjustment procedure (power-adjustable type)
1
2
3
4
Horn
Page 126 of 588

1263-4. Adjusting the steering wheel and mirrors
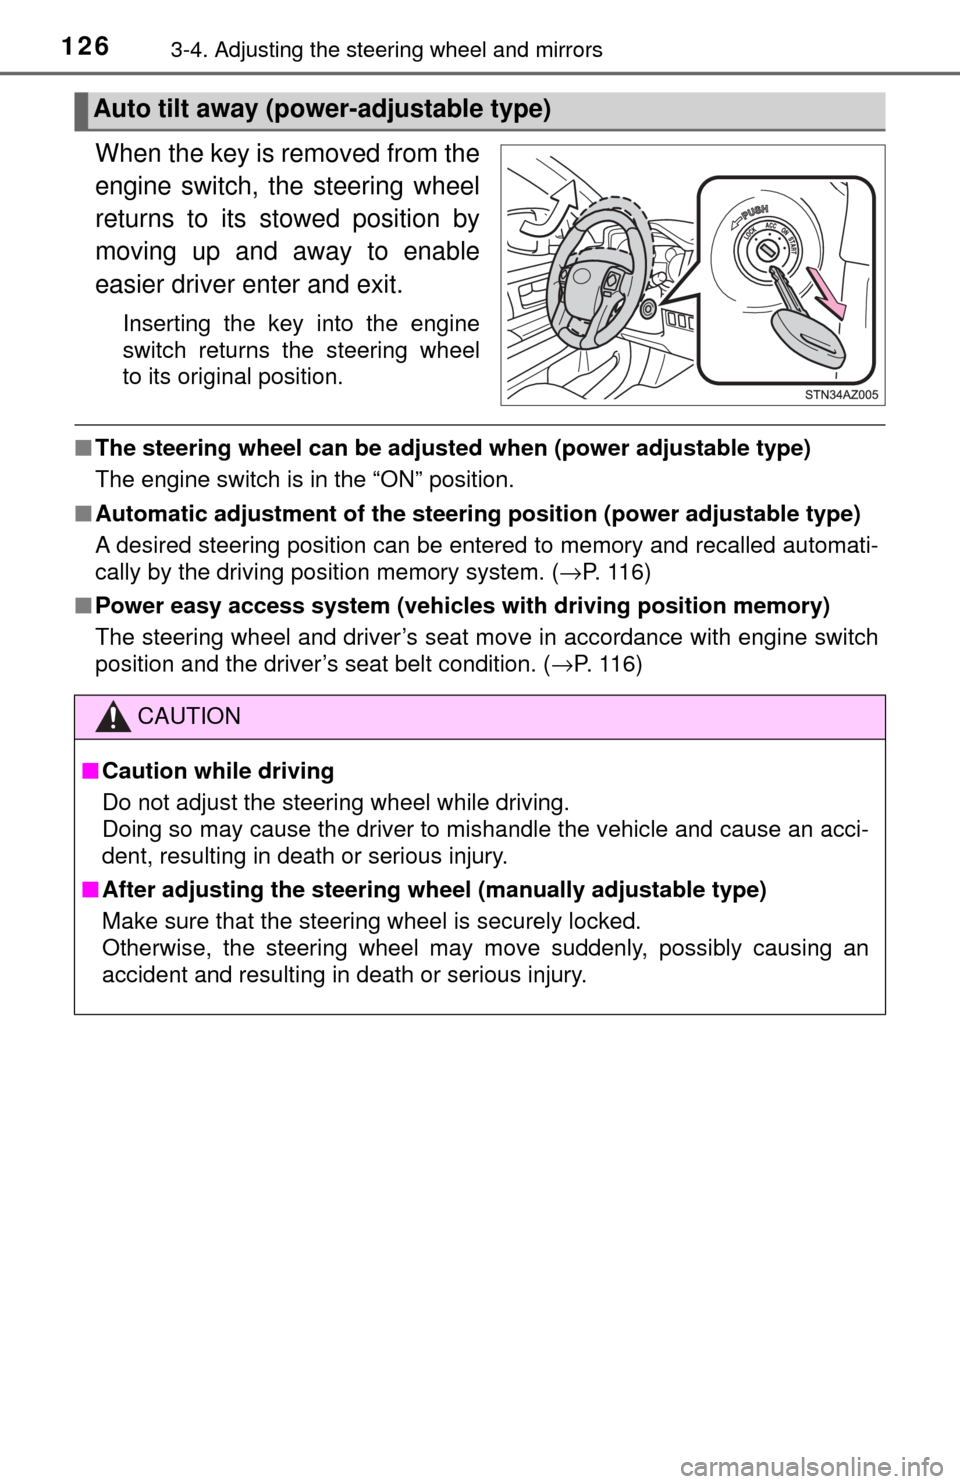
When the key is removed from the
engine switch, the steering wheel
returns to its stowed position by
moving up and away to enable
easier driver enter and exit.
Inserting the key into the engine
switch returns the steering wheel
to its original position.
■The steering wheel can be adjusted when (power adjustable type)
The engine switch is in the “ON” position.
■ Automatic adjustment of the steering position (power adjustable type)
A desired steering position can be entered to memory and recalled automati-
cally by the driving position memory system. ( →P. 116)
■ Power easy access system (vehicles with driving position memory)
The steering wheel and driver’s seat move in accordance with engine switch
position and the driver’s seat belt condition. ( →P. 116)
Auto tilt away (power-adjustable type)
CAUTION
■Caution while driving
Do not adjust the steering wheel while driving.
Doing so may cause the driver to mishandle the vehicle and cause an acci-
dent, resulting in death or serious injury.
■ After adjusting the steering wheel (manually adjustable type)
Make sure that the steering wheel is securely locked.
Otherwise, the steering wheel may move suddenly, possibly causing an
accident and resulting in death or serious injury.