Page 479 of 672
SIENNA_OM_OM08007U_(U)
4797-2. Maintenance
7
Maintenance and care
Vehicle exterior
ItemsCheck points
Doors• Do the doors operate smoothly?
Engine hood• Does the engine hood lock system workproperly?
Fluid leaks
• There should not be any signs of fluidleakage after the vehicle has been
parked.
Tires
• Is the tire inflatio n pressure correct?
• The tires should not be damaged or excessively worn.
• Have the tires been rotated according to the maintenance schedule?
• The wheel nuts should not be loose.
Windshield wipers/
rear window wiper
• The wiper blades should not show any
signs of cracking, splitting, wear, contam-
ination or deformation.
• The wiper blades should clear the wind- shield/rear window without streaking or
skipping.
WARNING
■If the engine is running
Turn the engine off and ensure that there is adequate ventilation before per-
forming maintenance checks.
Page 487 of 672
SIENNA_OM_OM08007U_(U)
4877-3. Do-it-yourself maintenance
7
Maintenance and care
With the engine at operating temperature and turned off, check the oil
level on the dipstick.
■Checking the engine oilPark the vehicle on level ground. After warming up the engine
and turning it off, wait more than 5 minutes for the oil to drain
back into the bottom of the engine.
Holding a rag under the end,
pull the dipstick out.
Wipe the dipstick clean.
Reinsert the dipstick fully.
Holding a rag under the end, pull the dipstick out and check the
oil level.
Low
Normal
Excessive
The shape of the dipstick may
differ depending on the type of
vehicle or engine.
Wipe the dipstick and reinsert it fully.
Engine oil
1
2
3
4
5
1
2
3
6
Page 488 of 672

488
SIENNA_OM_OM08007U_(U)
7-3. Do-it-yourself maintenance
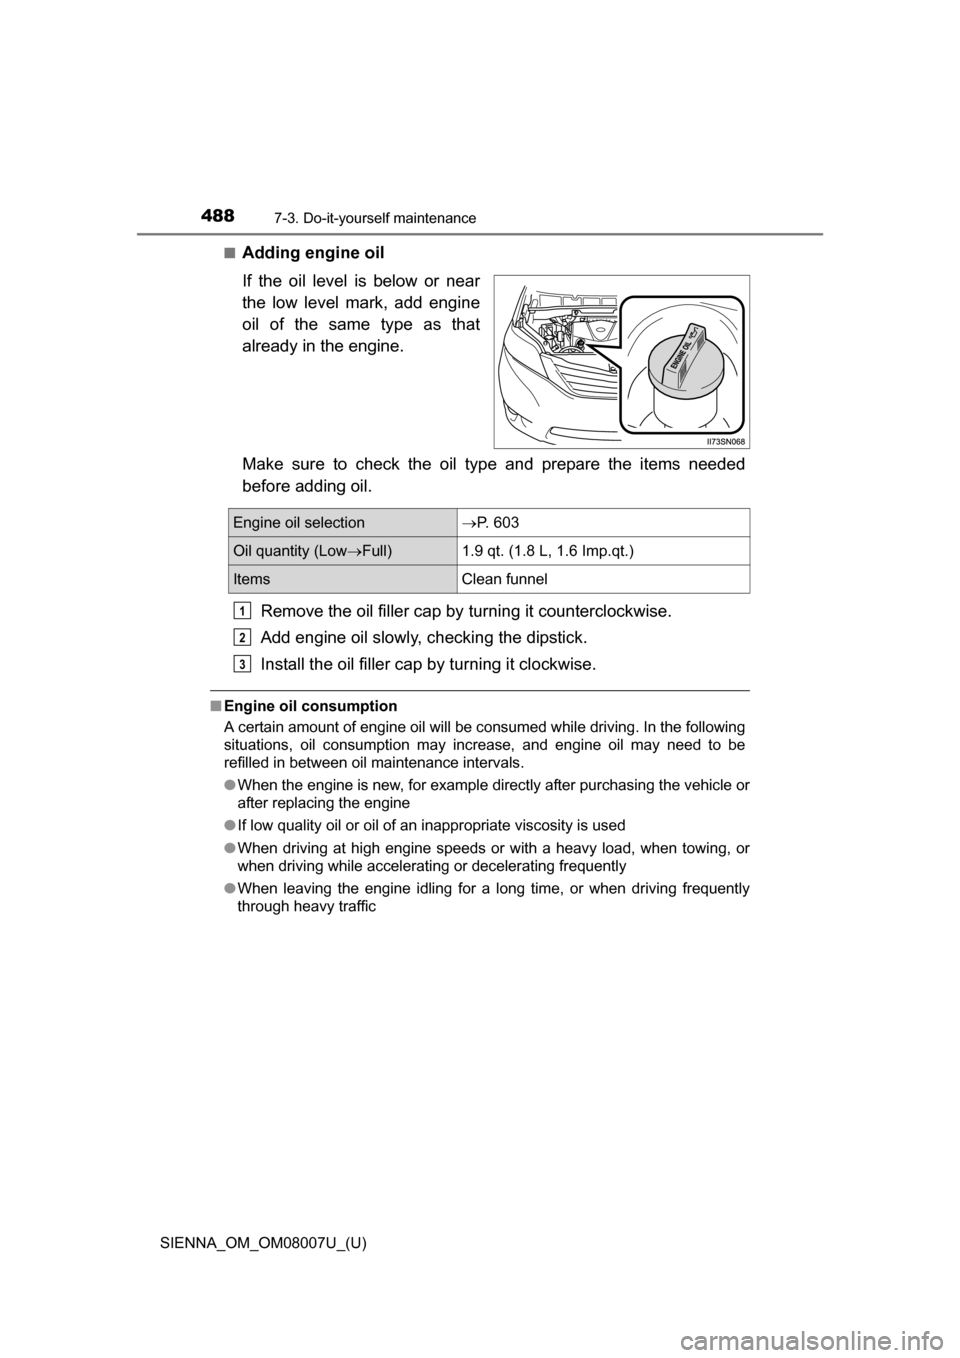
■Adding engine oil
If the oil level is below or near
the low level mark, add engine
oil of the same type as that
already in the engine.
Make sure to check the oil type and prepare the items needed
before adding oil.Remove the oil filler cap by turning it counterclockwise.
Add engine oil slowly, checking the dipstick.
Install the oil filler cap by turning it clockwise.
■Engine oil consumption
A certain amount of engine oil will be consumed while driving. In the following
situations, oil consumption may increase, and engine oil may need to be
refilled in between oil maintenance intervals.
●When the engine is new, for example directly after purchasing the vehicle or
after replacing the engine
● If low quality oil or oil of an inappropriate viscosity is used
● When driving at high engine speeds or with a heavy load, when towing, or
when driving while accelerating or decelerating frequently
● When leaving the engine idling for a long time, or when driving frequently
through heavy traffic
Engine oil selection P. 603
Oil quantity (LowFull) 1.9 qt. (1.8 L, 1.6 Imp.qt.)
Items Clean funnel
1
2
3
Page 489 of 672

SIENNA_OM_OM08007U_(U)
4897-3. Do-it-yourself maintenance
7
Maintenance and care
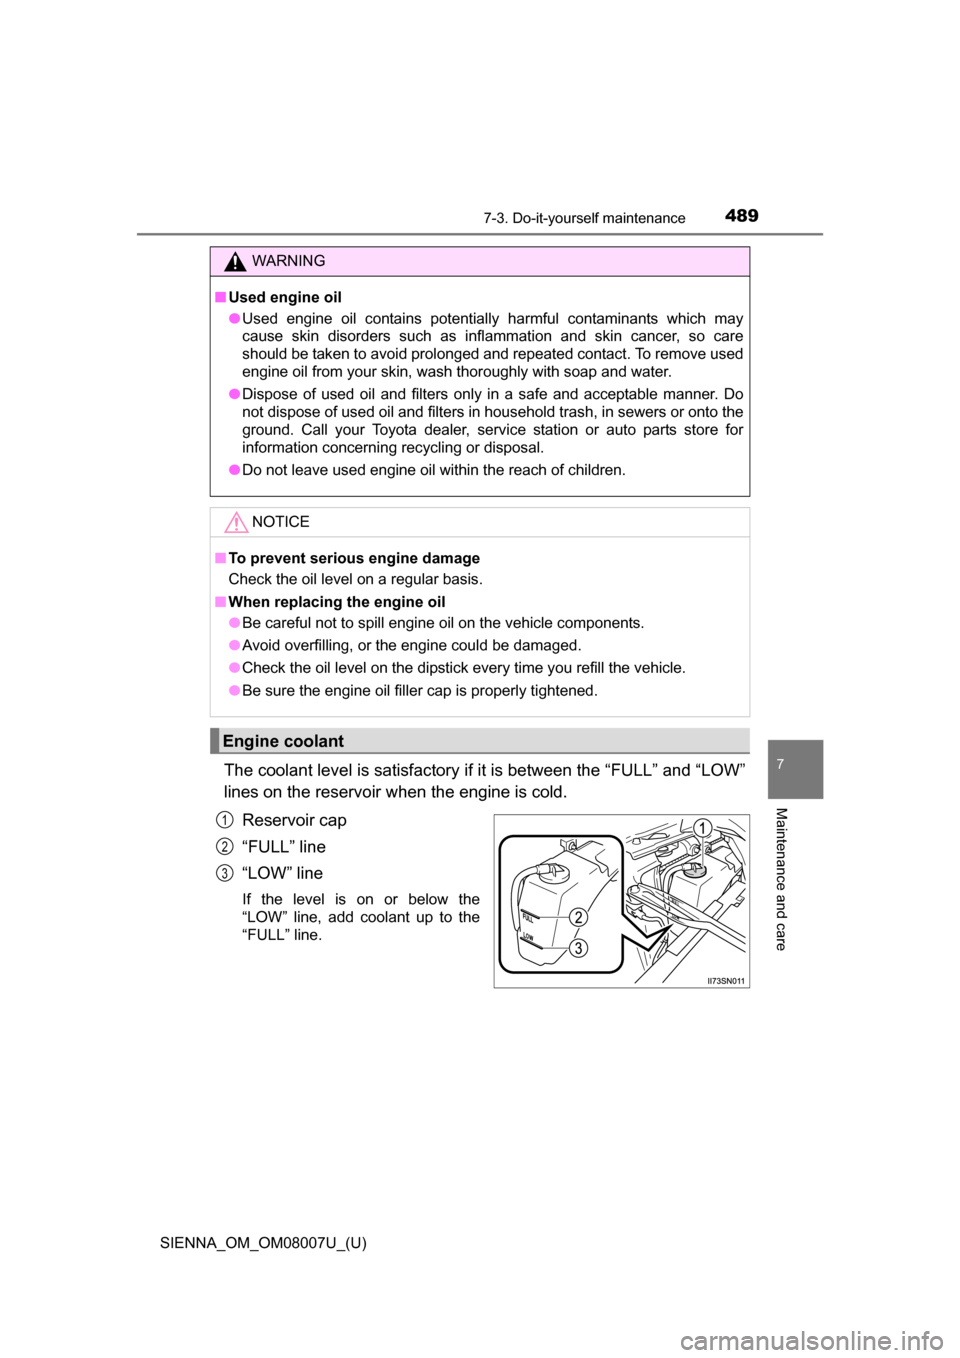
The coolant level is satisfactory if it is between the “FULL” and “LOW”
lines on the reservoir when the engine is cold.Reservoir cap
“FULL” line
“LOW” line
If the level is on or below the
“LOW” line, add coolant up to the
“FULL” line.
WARNING
■Used engine oil
●Used engine oil contains potentially harmful contaminants which may
cause skin disorders such as inflammation and skin cancer, so care
should be taken to avoid prolonged and repeated contact. To remove used
engine oil from your skin, wash thoroughly with soap and water.
● Dispose of used oil and filters only in a safe and acceptable manner. Do
not dispose of used oil and filters in household trash, in sewers or onto the
ground. Call your Toyota dealer, service station or auto parts store for
information concerning recycling or disposal.
● Do not leave used engine oil within the reach of children.
NOTICE
■To prevent serious engine damage
Check the oil level on a regular basis.
■ When replacing the engine oil
●Be careful not to spill engine oil on the vehicle components.
● Avoid overfilling, or the engine could be damaged.
● Check the oil level on the dipstick every time you refill the vehicle.
● Be sure the engine oil filler cap is properly tightened.
Engine coolant
1
2
3
Page 490 of 672

490
SIENNA_OM_OM08007U_(U)
7-3. Do-it-yourself maintenance
■Coolant selection
Only use “Toyota Super Long Life Coolant” or similar high quality ethylene
glycol based non-silicate, non-amine, non-nitrite, and non-borate coolant with
long-life hybrid organic acid technology.
U.S.A.:
“Toyota Super Long Life Coolant” is a mixture of 50% coolant and 50% deion-
ized water.
(Minimum temperature: -31 F [-35 C])
Canada:
“Toyota Super Long Life Coolant” is a mixture of 55% coolant and 45% deion-
ized water.
(Minimum temperature: -44 F [-42 C])
For more details about engine coolant, contact your Toyota dealer.
■ If the coolant level drops within a short time of replenishing
Visually check the radiator, hoses, engine coolant reservoir caps, drain cock
and water pump.
If you cannot find a leak, have your Toyota dealer test the cap and check for
leaks in the cooling system.
WARNING
■When the engine is hot
Do not remove the engine coolant reservoir cap.
The cooling system may be under pressure and may spray hot coolant if the
cap is removed, causing serious injuries, such as burns.
NOTICE
■When adding coolant
Coolant is neither plain water nor straight antifreeze. The correct mixture of
water and antifreeze must be used to provide proper lubrication, corrosion
protection and cooling. Be sure to read the antifreeze or coolant label.
■ If you spill coolant
Be sure to wash it off with water to prevent it from damaging parts or paint.
Page 491 of 672
SIENNA_OM_OM08007U_(U)
4917-3. Do-it-yourself maintenance
7
Maintenance and care
Check the radiator and condenser and clear away any foreign objects.
If either of the above parts is ex tremely dirty or you are not sure of
their condition, have yo ur vehicle inspected by your Toyota dealer.
■Checking fluid level
The brake fluid level should be
between the “MAX” and “MIN”
lines on the tank.
“MAX” line
“MIN” line
■Adding fluid
Lift the cover off.
Make sure to check the fluid ty pe and prepare the necessary item.
Radiator and condenser
WARNING
■When the engine is hot
Do not touch the radiator or condenser as they may be hot and cause seri-
ous injuries, such as burns.
Brake fluid
1
2
Fluid typeFMVSS No.116 DOT 3 or SAE J1703 brake fluid
ItemClean funnel
Page 514 of 672
514
SIENNA_OM_OM08007U_(U)
7-3. Do-it-yourself maintenance
Checking and replacing fuses
Turn the engine switch to the “LOCK” position (vehicles without a
smart key system) or off (vehic les with a smart key system).
Open the fuse box cover.
Remove the fuse.
Only type A fuses can be removed
using the pullout tool.
If any of the electrical components do not operate, a fuse may
have blown. If this happens, check and replace the fuses as nec-
essary.
1
2
Engine compartmentDriver’s side instrument panel
Push the tab in and lift the lid off. Remove the lid.
3
Page 524 of 672
524
SIENNA_OM_OM08007U_(U)
7-3. Do-it-yourself maintenance
Install a new light bulb.
Align the 3 tabs on the light bulb
with the mounting and insert.
Turn clockwise and secure
the bulb base.
Install the connector.
Shake the connector gently to
check that it is not loose, turn
the fog lights on once and visu-
ally confirm that no light is leak-
ing through the mounting.
When installing the engine under cover, reverse the step .
4
5
6
71