2017 TOYOTA HILUX transmission
[x] Cancel search: transmissionPage 3 of 720
3
1
9
8
6
5
4
3
2
HILUX_OM_OM0K322E_(EE)
7
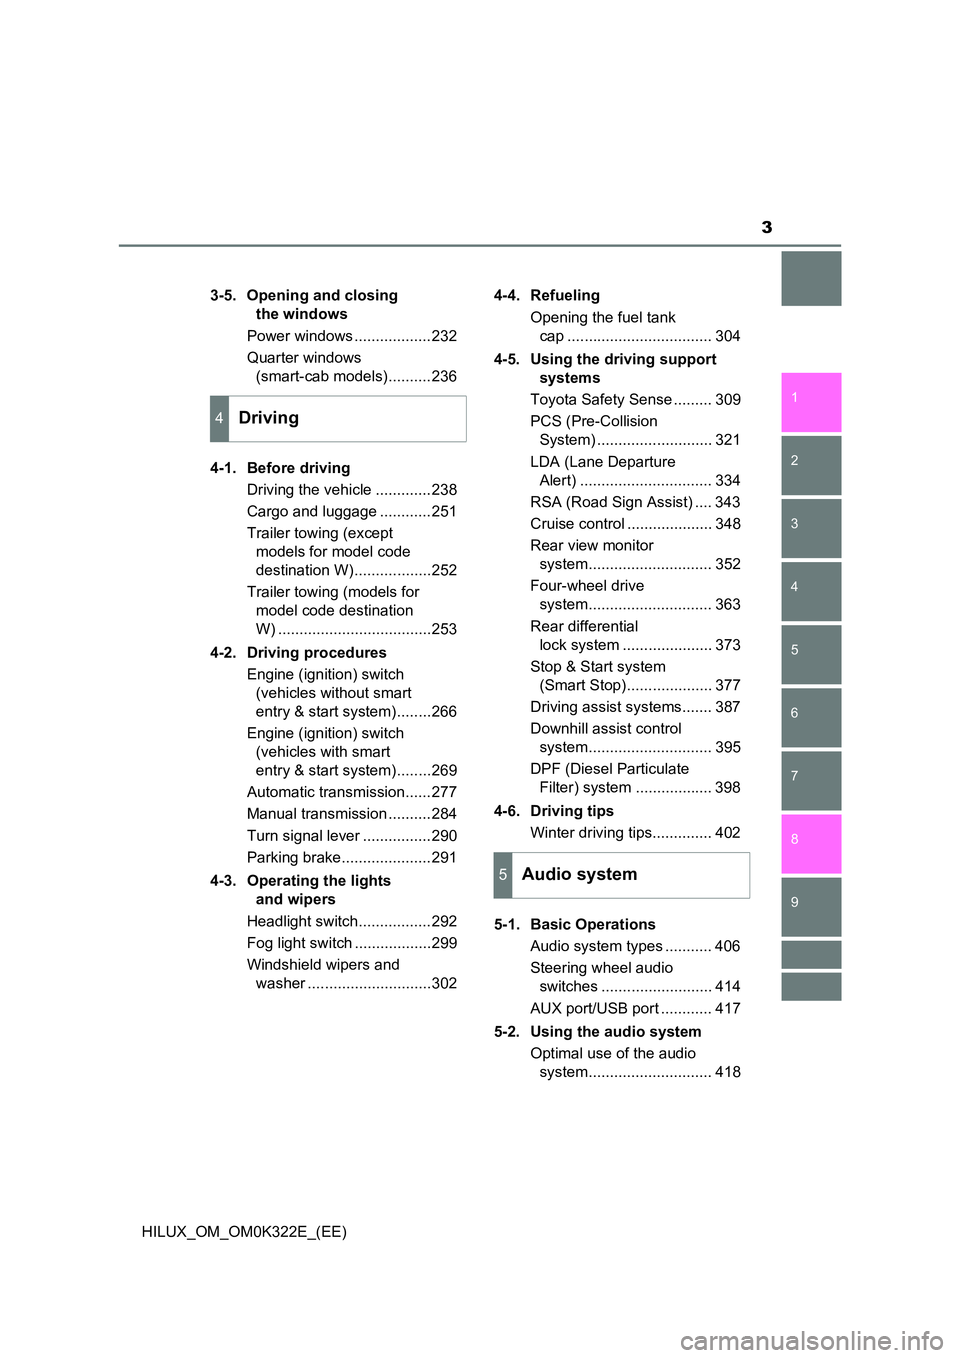
3-5. Opening and closing
the windows
Power windows ..................232
Quarter windows
(smart-cab models)..........236
4-1. Before driving
Driving the vehicle .............238
Cargo and luggage ............251
Trailer towing (except
models for model code
destination W)..................252
Trailer towing (models for
model code destination
W) ....................................253
4-2. Driving procedures
Engine (ignition) switch
(vehicles without smart
entry & start system)........266
Engine (ignition) switch
(vehicles with smart
entry & start system)........269
Automatic transmission......277
Manual transmission ..........284
Turn signal lever ................290
Parking brake.....................291
4-3. Operating the lights
and wipers
Headlight switch.................292
Fog light switch ..................299
Windshield wipers and
washer .............................302
4-4. Refueling
Opening the fuel tank
cap .................................. 304
4-5. Using the driving support
systems
Toyota Safety Sense ......... 309
PCS (Pre-Collision
System) ........................... 321
LDA (Lane Departure
Alert) ............................... 334
RSA (Road Sign Assist) .... 343
Cruise control .................... 348
Rear view monitor
system............................. 352
Four-wheel drive
system............................. 363
Rear differential
lock system ..................... 373
Stop & Start system
(Smart Stop).................... 377
Driving assist systems....... 387
Downhill assist control
system............................. 395
DPF (Diesel Particulate
Filter) system .................. 398
4-6. Driving tips
Winter driving tips.............. 402
5-1. Basic Operations
Audio system types ........... 406
Steering wheel audio
switches .......................... 414
AUX port/USB port ............ 417
5-2. Using the audio system
Optimal use of the audio
system............................. 418
4Driving
5Audio system
Page 12 of 720
12
HILUX_OM_OM0K322E_(EE)
Transmission type
T: Automatic transmission
M: 5-speed manual transmission
F: 6-speed manual transmission
Grade
H: HIGH
M: MID
S: STD
L: LOW
X: LOWEST
Destination
W: Models for European countries etc.
Blank: Models for Kazakhstan etc.
The model code appears on the manufacturer’s label or plate with the head-
ing “MODEL”.
5
6
7
Page 18 of 720

18Pictorial index
HILUX_OM_OM0K322E_(EE)
■Instrument panel (Left-hand drive vehicles)
Engine switch . . . . . . . . . . . . . . . . . . . . . . . . . . . . . . . . P. 266, 269
Starting the engine/changing the positions or modes . . . P. 266, 269
Emergency stop of the engine . . . . . . . . . . . . . . . . . . . . . . . . . P. 601
When the engine will not start . . . . . . . . . . . . . . . . . . . . . . . . . P. 642
Warning messages*1 . . . . . . . . . . . . . . . . . . . . . . . . . . . . . . . P. 618
Shift lever (Automatic transmission) . . . . . . . . . . . . . . . . . . P. 277
Changing the shift position . . . . . . . . . . . . . . . . . . . . . . . . . . . P. 277
Precautions against towing . . . . . . . . . . . . . . . . . . . . . . . . . . . P. 603
When the shift lever does not move . . . . . . . . . . . . . . . . . . . . P. 282
Shift lever (Manual transmission) . . . . . . . . . . . . . . . . . . . . P. 284
Changing the shift position . . . . . . . . . . . . . . . . . . . . . . . . . . . P. 284
Precautions against towing . . . . . . . . . . . . . . . . . . . . . . . . . . . P. 603
1
2
Page 26 of 720
26Pictorial index
HILUX_OM_OM0K322E_(EE)
■Instrument panel (Right-hand drive vehicles)
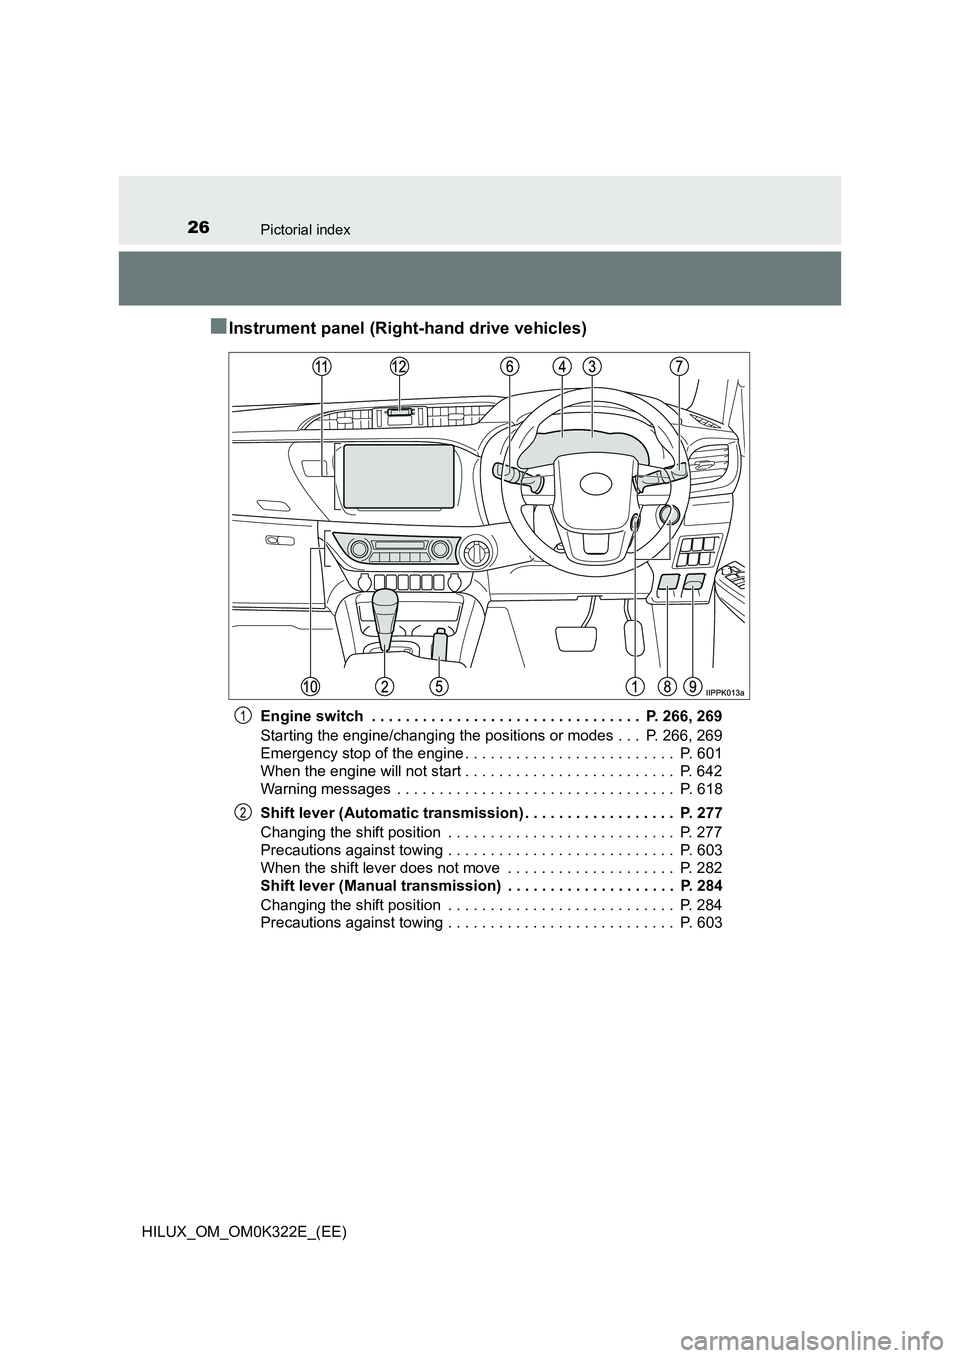
Engine switch . . . . . . . . . . . . . . . . . . . . . . . . . . . . . . . . P. 266, 269
Starting the engine/changing the positions or modes . . . P. 266, 269
Emergency stop of the engine . . . . . . . . . . . . . . . . . . . . . . . . . P. 601
When the engine will not start . . . . . . . . . . . . . . . . . . . . . . . . . P. 642
Warning messages . . . . . . . . . . . . . . . . . . . . . . . . . . . . . . . . . P. 618
Shift lever (Automatic transmission) . . . . . . . . . . . . . . . . . . P. 277
Changing the shift position . . . . . . . . . . . . . . . . . . . . . . . . . . . P. 277
Precautions against towing . . . . . . . . . . . . . . . . . . . . . . . . . . . P. 603
When the shift lever does not move . . . . . . . . . . . . . . . . . . . . P. 282
Shift lever (Manual transmission) . . . . . . . . . . . . . . . . . . . . P. 284
Changing the shift position . . . . . . . . . . . . . . . . . . . . . . . . . . . P. 284
Precautions against towing . . . . . . . . . . . . . . . . . . . . . . . . . . . P. 603
1
2
Page 37 of 720

371-1. For safe use
1
HILUX_OM_OM0K322E_(EE)
For safety and security
WARNING
Observe the following precautions.
Failure to do so may cause the driver’s floor mat to slip, possibly interfering
with the pedals while driving. An unexpectedly high speed may result or it may
become difficult to stop the vehicle. This could lead to an accident, resulting in
death or serious injury.
■ When installing the driver’s floor mat
● Do not use floor mats designed for other models or different model year
vehicles, even if they are Toyota Genuine floor mats.
● Only use floor mats designed for the driver’s seat.
● Always install the floor mat securely using the retaining hooks (clips) pro-
vided.
● Do not use two or more floor mats on top of each other.
● Do not place the floor mat bottom-side up or upside-down.
■ Before driving
●Check that the floor mat is securely
fixed in the correct place with all the
provided retaining hooks (clips). Be
especially careful to perform this check
after cleaning the floor.
● With the engine stopped and the shift
lever in P (automatic transmission) or N
(manual transmission), fully depress
each pedal to the floor to make sure it
does not interfere with the floor mat.
Page 130 of 720
1302. Instrument cluster
HILUX_OM_OM0K322E_(EE)
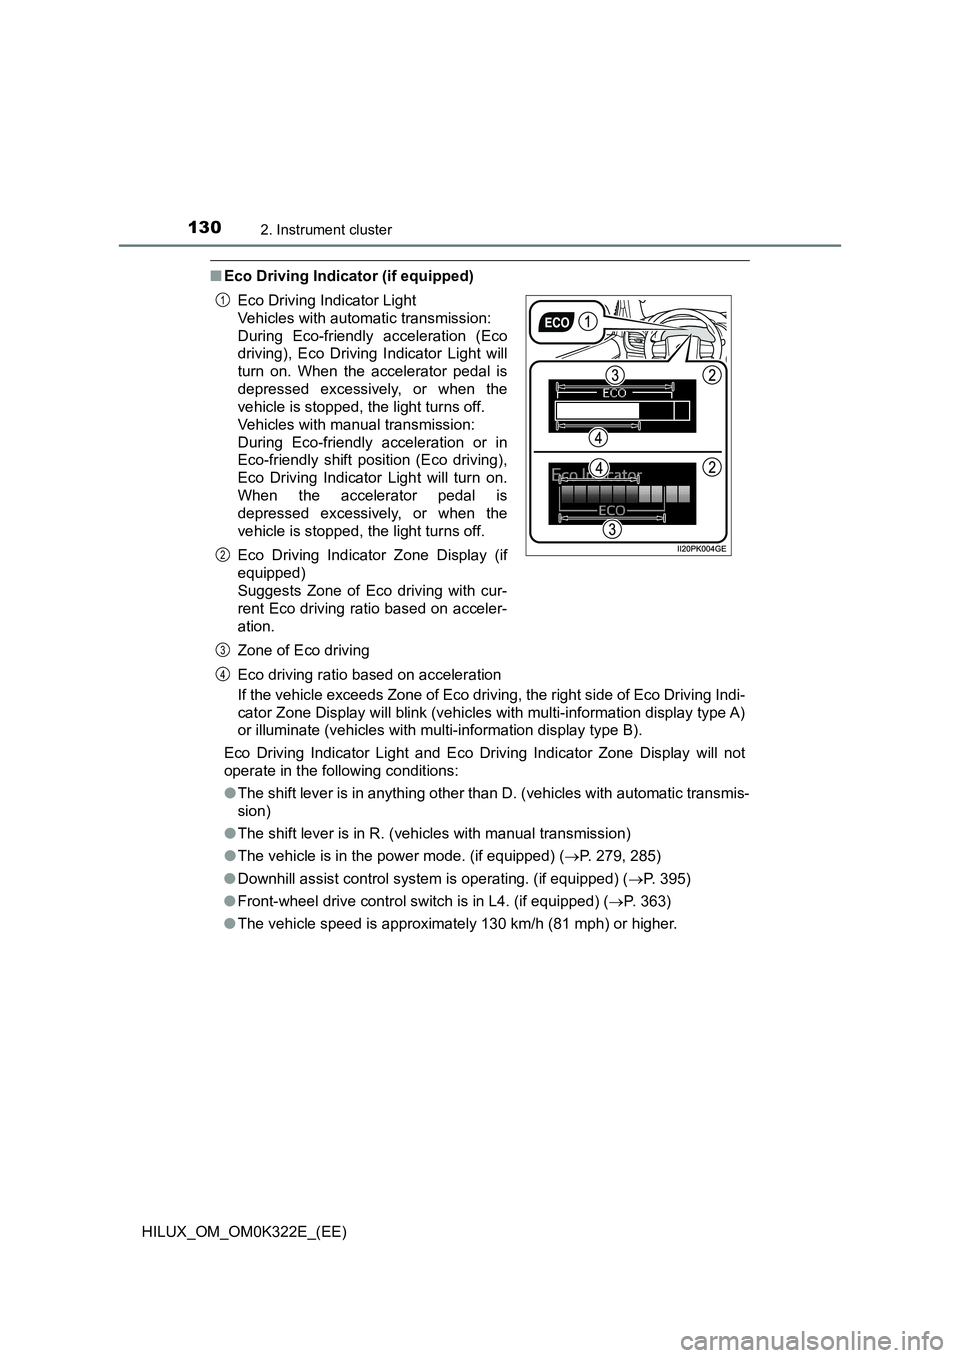
■Eco Driving Indicator (if equipped)
If the vehicle exceeds Zone of Eco driving, the right side of Eco Driving Indi-
cator Zone Display will blink (vehicles with multi-information display type A)
or illuminate (vehicles with multi-information display type B).
Eco Driving Indicator Light and Eco Driving Indicator Zone Display will not
operate in the following conditions:
● The shift lever is in anything other than D. (vehicles with automatic transmis-
sion)
● The shift lever is in R. (vehicles with manual transmission)
● The vehicle is in the power mode. (if equipped) (P. 279, 285)
● Downhill assist control system is operating. (if equipped) (P. 395)
● Front-wheel drive control switch is in L4. (if equipped) (P. 363)
● The vehicle speed is approximately 130 km/h (81 mph) or higher.
Eco Driving Indicator Light
Vehicles with automatic transmission:
During Eco-friendly acceleration (Eco
driving), Eco Driving Indicator Light will
turn on. When the accelerator pedal is
depressed excessively, or when the
vehicle is stopped, the light turns off.
Vehicles with manual transmission:
During Eco-friendly acceleration or in
Eco-friendly shift position (Eco driving),
Eco Driving Indicator Light will turn on.
When the accelerator pedal is
depressed excessively, or when the
vehicle is stopped, the light turns off.
Eco Driving Indicator Zone Display (if
equipped)
Suggests Zone of Eco driving with cur-
rent Eco driving ratio based on acceler-
ation.
Zone of Eco driving
Eco driving ratio based on acceleration
1
2
3
4
Page 134 of 720
1342. Instrument cluster
HILUX_OM_OM0K322E_(EE)
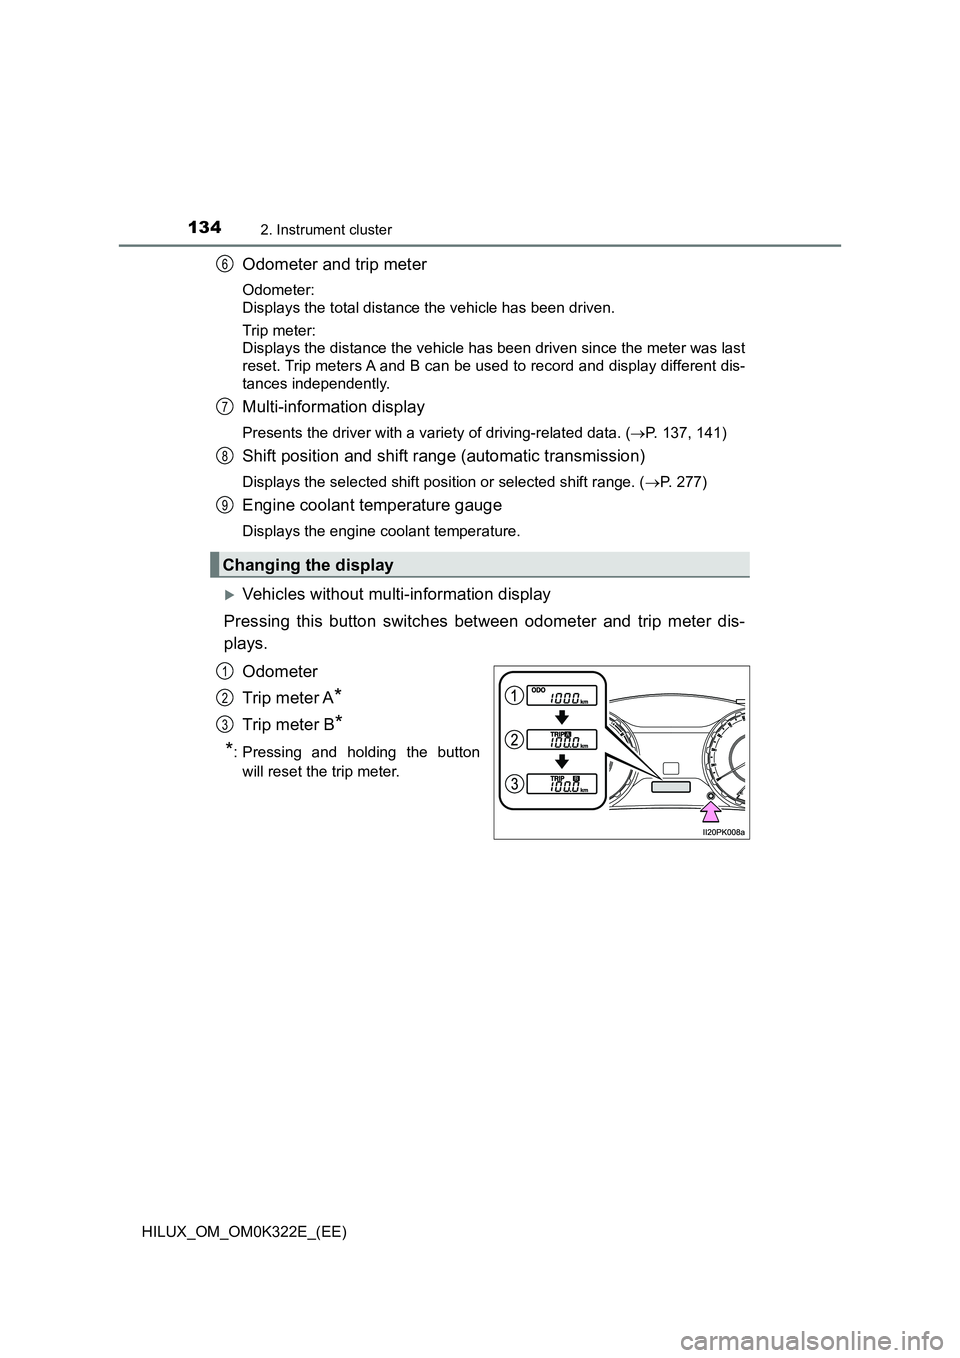
Odometer and trip meter
Odometer:
Displays the total distance the vehicle has been driven.
Trip meter:
Displays the distance the vehicle has been driven since the meter was last
reset. Trip meters A and B can be used to record and display different dis-
tances independently.
Multi-information display
Presents the driver with a variety of driving-related data. ( P. 137, 141)
Shift position and shift range (automatic transmission)
Displays the selected shift position or selected shift range. (P. 277)
Engine coolant temperature gauge
Displays the engine coolant temperature.
Vehicles without multi-information display
Pressing this button switches between odometer and trip meter dis-
plays.
Odometer
Trip meter A*
Trip meter B*
*: Pressing and holding the button
will reset the trip meter.
Changing the display
6
7
8
9
1
2
3
Page 136 of 720

1362. Instrument cluster
HILUX_OM_OM0K322E_(EE)
■ Outside temperature display
In the following situations, the correct outside temperature may not be dis-
played, or the display may take longer than normal to change:
● When the vehicle is stopped, or moving at low speeds (less than 20 km/h
[12 mph])
● When the outside temperature has changed suddenly (at the entrance/exit
of a garage, tunnel, etc.)
■ When “--” is displayed
The system may be malfunctioning. Take your vehicle to any authorized
Toyota retailer or Toyota authorized repairer, or any reliable repairer.
WARNING
■ The information display at low temperatures (vehicles with multi-infor-
mation display type B)
Allow the interior of the vehicle to warm up before using the liquid crystal
information display. At extremely low temperatures, the display monitor may
respond slowly, and display changes may be delayed.
For vehicles with automatic transmission: For example, there is a lag
between the driver’s shifting and the new gear number appearing on the
display. This lag could cause the driver to downshift again, causing rapid
and excessive engine braking and possibly an accident resulting in death or
injury.
NOTICE
■ To prevent damage to the engine and its components
● Do not let the indicator needle of the tachometer enter the red zone, which
indicates the maximum engine speed.
● The engine may be overheating if the engine coolant temperature gauge is
in the red zone (H). In this case, immediately stop the vehicle in a safe
place, and check the engine after it has cooled completely. ( P. 654)
■ The information display at low temperatures (vehicles with multi-infor-
mation display type A)
Allow the interior of the vehicle to warm up before using the liquid crystal
information display. At extremely low temperatures, the display monitor may
respond slowly, and display changes may be delayed.