2017 SUBARU LEGACY ECO mode
[x] Cancel search: ECO modePage 198 of 610

First menuSecond menu
Third menu Settings
Vehicle Setting Keyless Entry System Audible Signal*1ON/OFF
Hazard Warning Flasher ON/OFF
Driver Door Unlock
*1 *2Driver Door Only, All
Rear Gate Unlock
*1 *2 *3Rear Gate Only, All
Defogger —15 minutes/Continuous
Interior Light —10 seconds
–30 seconds, OFF
Auto Headlights Light SensitivityMax/Mid/Low/Min
Wiper Link ON/OFF
Welcome Lighting Approaching Time Set30 seconds
–90 seconds, OFF
Leaving Time Set 30 seconds
–90 seconds, OFF
Default Settings OK To Reset? —Yes/No
*1: The setting menu is available only for models with “keyless access with push-button start system ”.
*2: The setting can only be changed for the “keyless access ”entry function. For details, refer to “Door unlock selection function ”F 2-18.
*3: For Outback only Instruments and controls/Multi information display
–CONTINUED –
3-43
Page 200 of 610

!BSD/RCTA (if equipped)
After entering the “BSD/RCTA ”menu,
select the “Warning Volume ”menu. You
can set the volume of the warning buzzer
for RCTA (Rear Cross Traffic Alert). You
can select “Max”,“Mid ”or “Min ”.
! RAB (if equipped)
After entering the “RAB”menu, select one
of the following menus.
NOTE
For models with RAB (Reverse Auto-
matic Braking) system, refer to “Re-
verse Automatic Braking System ”F 7-
63.
!Warning Volume
The volume of the warning buzzer that
sounds when the RAB (Reverse Auto-
matic Braking) system is in operation can
be set in 3 stages (“Max ”,“Mid ”and “Min ”).
! Sonar Audible Alarm
When the RAB (Reverse Automatic Brak-
ing) system is in operation, the buzzer that
sounds if an obstacle is detected in the
rear or if detection is not possible can be
activated or deactivated. Select “On”to
activate the buzzer. Select “Off”to deac-
tivate the buzzer. !
Vehicle Setting
After entering the “Vehicle Setting”menu,
select one of the following menus.
!Keyless Entry System
After entering the “Keyless Entry System ”
menu, select one of the following menus.
. Audible Signal (models with “key-
less access with push-button start
system ”):
The audible signal can be activated or
deactivated. Select “On”to activate. Se-
lect “Off”to deactivate.
. Hazard Warning Flasher (all mod-
els):
The hazard warning flasher operation can
be activated or deactivated. Select “On”to
activate. Select “Off ”to deactivate.
. Driver Door Unlock (models with
“ keyless access with push-button start
system ”):
The door unlock selection function is
available for the “keyless access”entry
function. For details, refer to “Door
unlock
selection function ”F 2-18. On this setting
menu, the door unlock selection function
for the driver ’s door can be customized.
Select “Driver Door Only ”to set as
“Operational ”. Select “All”to set as “Non-
operational ”. .
Rear Gate Unlock (Outback with
“ keyless access with push-button start
system ”):
The door unlock selection function is
available for the “keyless access”entry
function. For details, refer to “Door unlock
selection function ”F 2-18. On this setting
menu, the door unlock selection function
for the rear gate can be customized.
Select “Rear Gate Only ”to set as “Opera-
tional ”. Select “All”to set as “Non-opera-
tional ”.
! Defogger
The defogger and deicer system can be
set for the continuous operation mode or
automatic shut-off mode. Select “Contin-
uous” to select the continuous operation
mode. Select “15 minutes”to select the
automatic shut-off mode.
!Interior Light
The setting for the period of time in which
the interior lights remain on (OFF delay
timer) after closing the doors and/or the
rear gate can be set or customized. Select
the preferred seconds to customize the
operation period. Select “Off”to deactivate
the OFF delay timer.
Instruments and controls/Multi information display
–CONTINUED –3-45
Page 201 of 610

Instruments and controls/Light control switch
!Auto Headlights
. Light Sensitivity:
The operational sensitivity of the auto on/
off headlights can be set. You can select
“ Max ”,“Mid ”,“Low ”or “Min ”.
. Wiper Link:
The automatic headlight turn on function
that is linked with the wiper operation can
be activated or deactivated. Select “On”to
activate. Select “Off”to deactivate.
! Welcome Lighting
After entering the “Welcome Lighting ”
menu, select either of the following me-
nus.
. Approaching Time Set:
The setting for the period of time in which
the low beam headlights remain on when
approaching the vehicle can be set or
customized. Select the preferred seconds
to customize the operation period. Select
“Off ”to deactivate the welcome lighting
function when approaching.
. Leaving Time Set:
The setting for the period of time in which
the low beam headlights remain on when
exiting the vehicle can be set or custo-
mized. Select the preferred seconds to
customize the operation period. Select
“Off ”to deactivate the welcome lighting function when exiting.
!
Default Settings
Select “Ye s”to use the menu screen to
restore customized settings to the factory
default settings. Select “No”to return to
the previous screen without restoring to
the factory default settings.Light control switch
CAUTION
. Use of any lights for a long period
of time while the engine is not
running can cause the battery to
discharge.
. Before leaving the vehicle, make
sure that the light control switch
is turned to the off position. If the
vehicle is left unattended for a
long time with the light control
switch set to a position other
than the off position, the battery
may be discharged.
Models with “keyless access with
push-button start system ”:
The light control switch operates when the
push-button ignition switch is in the “ACC”
or “ON ”position.
Regardless of the position of the light
control switch, the illuminated lights are
turned off when the push-button ignition
switch is turned off.
Models without “keyless access with
push-button start system ”:
The light control switch operates when the
key is inserted in the ignition switch.
3-46
Page 203 of 610

Instruments and controls/Light control switch
!Welcome lighting function
The welcome lighting function turns on the
low beam headlight for smooth approach-
ing to or exiting from the vehicle at night or
in a dark place.
The function is activated while all of the
following conditions are met.
. The light control switch is in the
“AUTO ”position
. It is dark enough to turn on the auto on/
off headlights
When approaching:
While the welcome lighting function is
activated, the low beam headlights will
automatically illuminate when unlocking
the doors (for Outback, including the rear
gate) by using the remote keyless entry
system.
The low beam headlights will remain
illuminated for 30 seconds
*1and then turn
off. However, if any of the following
operations is done, the low beam head-
lights will turn off.
. The doors are locked.
. The light control switch is turned to a
position other than “AUTO”.
. The ignition switch is turned to the “ON”
position. When exiting:
While the welcome lighting function is
activated, the low beam headlights will
remain illuminated even when either of the
following operation is done.
.
Thepush-buttonignitionswitchis
turned to the “OFF”status (models with
“ keyless access with push-button start
system ”)
. The key is pulled out from the ignition
switch (models without “keyless access
with push-button start system ”)
The low beam headlights will turn off
under any of the following conditions.
. 3 minutes have passed since the low
beam headlights were illuminated by the
welcome lighting function.
. 30 seconds have passed since the
door is opened and closed.
*1
. The light control switch is turned to a
position other than “AUTO”.
. The locking procedure is performed
twice. When performing the unlocking
procedure after performing the locking
procedure, perform the locking procedure
twice again.
*1: The setting for the period of time in which
the low beam headlights remain on by the
welcome lighting function can be changed by a
SUBARU dealer. Contact your SUBARU dealer for details. Also, you can change the setting by
operating the multi information display. For
details, refer to
“Welcome Lighting ”F3-46.
For models with the genuine SUBARU naviga-
tion system, you can change the setting by
using the navigation system. For details, refer to
the Owner ’s Manual supplement for the naviga-
tion system.
3-48
Page 207 of 610

Instruments and controls/Light control switch
–Press and hold the automatic
dimming on/off button for 15 to 20
seconds again.
! How to change the headlight
mode manually
Change to the low beam:
When you return the turn signal lever to
the center position, the high beam assist
function will turn off and the high beam
assist indicator will turn off.
Change to the high beam:
When you turn the light control switch to
the “
”position, the headlight mode will
be changed to the high beam.
At this time, the high beam assist function
will turn off, the high beam assist indicator
will turn off and the high beam indicator
light will turn on.
NOTE
. After manually changing the head-
light mode to the high beam, if you turn
on the high beam assist function,
return the light control switch to the
“ AUTO ”position.
. When manually changing the head-
light mode to the high beam, if you turn
the light control switch to the “
”
position, the parking lights, front side
marker lights, rear side marker lights,
tail lights and license plate lights will turn on.
! Tips for the high beam assist
system
. The high beam assist function recog-
nizes the condition surrounding the vehi-
cle based on the brightness of illumination
ahead of your vehicle, etc. Therefore, the
headlight mode may switch in some
situations that do not match to the driver ’s
sense.
. A bicycle or cargo cycle may not be
detected.
. Under the fo llowing situations, the
brightness of ambient illumination may
not be detected correctly and the high
beam assist function may not work prop-
erly. As a result, the glare of the high beam
may disturb the driving of an oncoming
vehicle or vehicle ahead. Also, the low
beam mode may continue although there
are no oncoming vehicles and vehicles
ahead. In the such cases, change the
headlight mode manually.
–In bad weather (fog, snow, sand
storm, heavy rain, etc.)
– When the windshield glass is dirty
or fogged
– When the windshield is cracked or
damaged
– Whentheinsidemirrororthe
camera is deformed or dirty –
If there are lights similar to the
headlights or the tail lights in the
surrounding area
– When an oncoming vehicle or ve-
hicle ahead is driven without its head-
lights and tail lights on
– If the headlights of an oncoming
vehicle or the tail lights of a vehicle
ahead are dirty or discolored, or if the
light beams are not aimed correctly
– When a rapid change of brightness
continues while driving
– When driving on a road with many
ups and downs or uneven surfaces
– When driving on a road with many
curves
– When there are some objects that
reflect light strongly, such as a road
sign or a mirror in vehicle ahead
– When the rear part of the vehicle
ahead, such as a container, reflects
light strongly
– When the headlights of your vehicle
are damaged or dirty
– When your vehicle is tilted, such as
in case the vehicle has a flat tire or is
being towed
. In the following conditions, the head-
light mode will not be automatically chan-
ged from the high beam to the low beam.
–When your vehicle passes an on-
coming vehicle suddenly in a blind
3-52
Page 208 of 610

curve
–When another vehicle passes in
front of your vehicle
– When an oncoming vehicle or ve-
hicle ahead comes in and out of view
because of continuous curves, median
strips, roadside trees, etc.
. If the camera detects the light of the
front fog lights of an oncoming vehicle, the
headlight mode may change from the high
beam to the low beam automatically.
. The headlight mode may change from
the high beam to the low beam, or the low
beam mode may continue, when affected
by a street light, traffic signal, illumination
of an advertisement board, or a reflective
object such as a road sign and signboard.
. The timing of the change of headlight
mode may differ due to the following
factors.
–the vehicle condition (e.g., number
of passengers or weight of loaded
cargo)
– surrounding situation (e.g., move-
ment and direction of an oncoming
vehicle or vehicle ahead)
– detection limitations of the camera
angle& Headlight flasher
CAUTION
Do not hold the lever in the flashing
position for more than just a few
seconds.
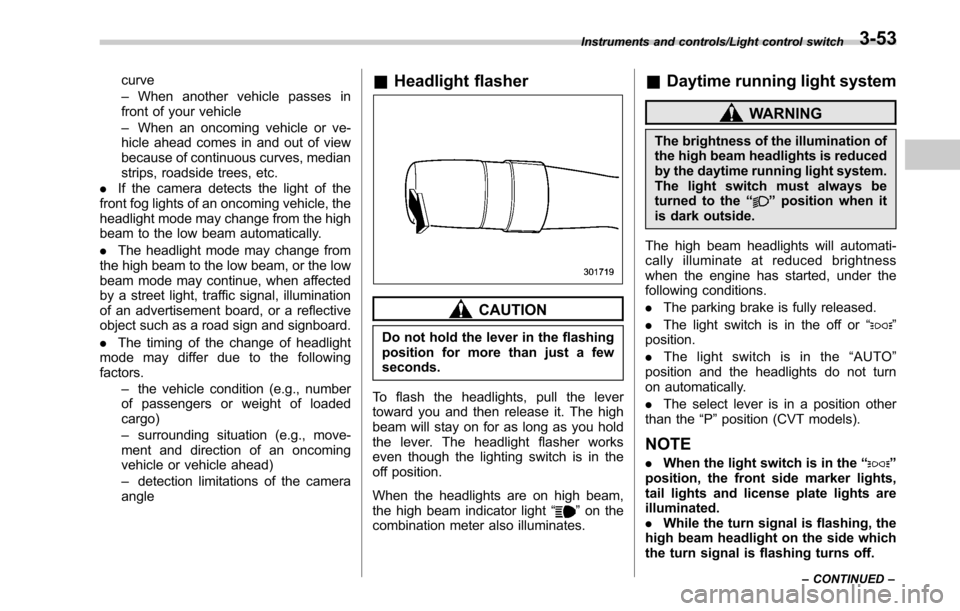
To flash the headlights, pull the lever
toward you and then release it. The high
beam will stay on for as long as you hold
the lever. The headlight flasher works
even though the lighting switch is in the
off position.
When the headlights are on high beam,
the high beam indicator light “
”on the
combination meter also illuminates.
& Daytime running light system
WARNING
The brightness of the illumination of
the high beam headlights is reduced
by the daytime running light system.
The light switch must always be
turned to the “
”position when it
is dark outside.
The high beam headlights will automati-
cally illuminate at reduced brightness
when the engine has started, under the
following conditions.
. The parking brake is fully released.
. The light switch is in the off or “
”
position.
. The light switch is in the “AUTO ”
position and the headlights do not turn
on automatically.
. The select lever is in a position other
than the “P”position (CVT models).
NOTE
. When the light switch is in the “”
position, the front side marker lights,
tail lights and license plate lights are
illuminated.
. While the turn signal is flashing, the
high beam headlight on the side which
the turn signal is flashing turns off.
Instruments and controls/Light control switch
–CONTINUED –3-53
Page 211 of 610

Instruments and controls/Front fog light switch
Front fog light switch
(if equipped)
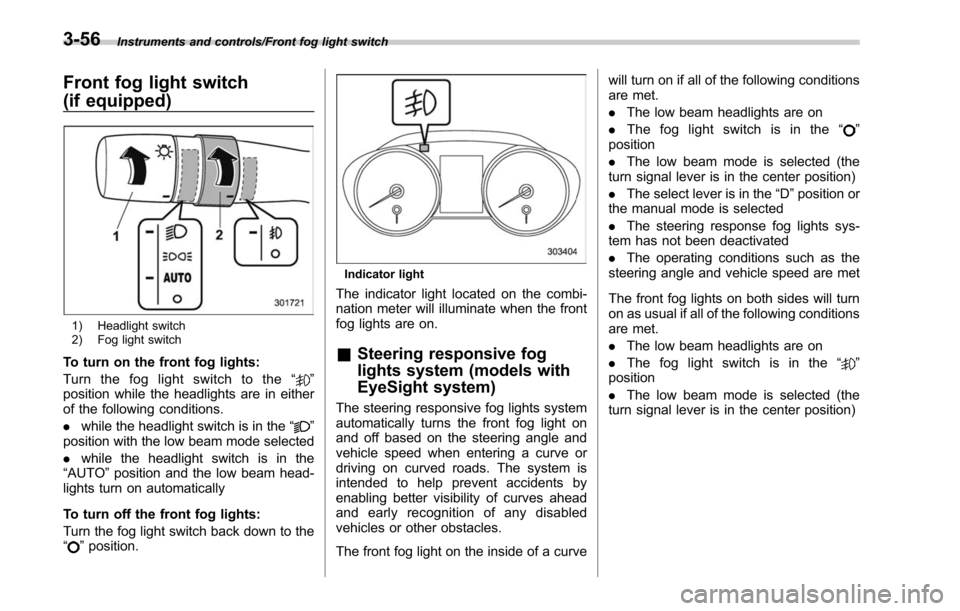
1) Headlight switch
2) Fog light switch
To turn on the front fog lights:
Turn the fog light switch to the“
”
position while the headlights are in either
of the following conditions.
. while the headlight switch is in the “
”
position with the low beam mode selected
. while the headlight switch is in the
“AUTO ”position and the low beam head-
lights turn on automatically
To turn off the front fog lights:
Turn the fog light switch back down to the
“
” position.
Indicator light
The indicator light located on the combi-
nation meter will illuminate when the front
fog lights are on.
& Steering responsive fog
lights system (models with
EyeSight system)
The steering responsive fog lights system
automatically turns the front fog light on
and off based on the steering angle and
vehicle speed when entering a curve or
driving on curved roads. The system is
intended to help prevent accidents by
enabling better visibility of curves ahead
and early recognition of any disabled
vehicles or other obstacles.
The front fog light on the inside of a curve will turn on if all of the following conditions
are met.
.
The low beam headlights are on
. The fog light switch is in the “
”
position
. The low beam mode is selected (the
turn signal lever is in the center position)
. The select lever is in the “D”position or
the manual mode is selected
. The steering response fog lights sys-
tem has not been deactivated
. The operating conditions such as the
steering angle and vehicle speed are met
The front fog lights on both sides will turn
on as usual if all of the following conditions
are met.
. The low beam headlights are on
. The fog light switch is in the “
”
position
. The low beam mode is selected (the
turn signal lever is in the center position)
3-56
Page 219 of 610

Instruments and controls/Mirrors
!Photosensors
The mirror has a photosensor attached on
both the front and back sides. During
nighttime driving, these sensors detect
distracting glare from vehicle headlights
behind you and automatically dim the
mirror to eliminate glare and preserve
your vision. For this reason, use care not
to cover the sensors with stickers, or other
similar items. Periodically wipe the sen-
sors clean using a piece of dry soft cotton
cloth or an applicator. !
Compass zone adjustmentCompass calibration zones
1. Refer to the “Compass calibration
zones” map shown above to verify that
the compass zone setting is correct for
your geographical location.
2. Press and hold the compass display
button for 3 seconds until the zone
selection comes up (a number will be
displayed in the mirror compass window).
3. Press the compass display button
repeatedly until the correct zone setting
for your location is displayed.
4. Releasing the button for 5 seconds will
exit the zone setting mode. !
Compass calibration
1. If a “C”is displayed in the compass
window, the compass needs to be cali-
brated.
2. Drive the vehicle in a circle at 5 mph (8
km/h) or less until the display reads a
direction.
3. You can also calibrate the compass by
driving your vehicle on your everyday
routine. The compass will be calibrated
once it has tracked a complete circle.
4. To recalibrate your compass, push and
hold the compass display button for 9
seconds until a “C ” appears in the
compass window.
5. Calibrate the compass according to
step 2 or step 3.
! HomeLink
®Wireless Control Sys-
tem
The HomeLink
®Wireless Control System
can be used to activate remote control
devices such as gate operators, garage
door openers, door locks, home lighting
and security systems.
There are three HomeLink
®buttons on the
mirror, each of which can be programmed
for operation of one desired device. For
details on the device types which can be
operated by this system, consult the
HomeLink
®website at:
3-64