2017 SUBARU LEGACY overheating
[x] Cancel search: overheatingPage 7 of 610
Chapter 4: Climate control
This chapter informs you how to operate
the climate control.
Chapter 5: Audio
This chapter informs you how to operate
your audio system.
Chapter 6: Interior equipment
This chapter informs you how to operate
interior equipment.
Chapter 7: Starting and operating
This chapter informs you how to start and
operate your SUBARU.
Chapter 8: Driving tips
This chapter informs you how to drive your
SUBARU in various conditions and ex-
plains some safety tips on driving.
Chapter 9: In case of emergency
This chapter informs you what to do if you
have a problem, such as a flat tire or
engine overheating.
Chapter 10: Appearance care
This chapter informs you how to keep your
SUBARU looking good.
Chapter 11: Maintenance and service
This chapter informs you when you need
to take your SUBARU to the dealer for
scheduled maintenance and informs you
how to keep your SUBARU running
properly.Chapter 12: Specifications
This chapter informs you about the dimen-
sions and capacities of your SUBARU.
Chapter 13: Consumer information and
Reporting safety defects
This chapter informs you about Tire
information, Uniform tire quality grading
standards and Reporting safety defects.
Chapter 14: Index
This is an alphabetical listing of all that’
sin
this manual. You can use it to quickly find
something you want to read.
For models with EyeSight system:
For details about the EyeSight system,
refer to the Owner ’s Manual supplement
for the EyeSight system.
& Safety warnings
You will find a number of WARNINGs,
CAUTIONs and NOTEs in this manual.
These safety warnings alert you to poten-
tial hazards that could result in injury to
you or others.
Please read these safety warnings as well
as all other portions of this manual care-
fully in order to gain a better understand-
ing of how to use your SUBARU vehicle
safely.
WARNING
A WARNING indicates a situation in
which serious injury or death could
result if the warning is ignored.
CAUTION
A CAUTION indicates a situation in
which injury or damage to your
vehicle, or both, could result if the
caution is ignored.
NOTE
A NOTE gives information or sugges-
tions how to make better use of your
vehicle.
2
Page 167 of 610

Instruments and controls/Meters and gauges
&Temperature gauge
1) Normal operating range
The temperature gauge shows engine
coolant temperature when the ignition
switch is in the “ON”position.
The coolant temperature will vary in
accordance with the outside temperature
and driving conditions.
We recommend that you drive moderately
until the pointer of the temperature gauge
reaches near the middle of the range.
Engine operation is optimum with the
engine coolant at this temperature range
and high revving operation when the
engine is not warmed up enough should
be avoided.
CAUTION
If the pointer exceeds the normal
operating range, safely stop the
vehicle as soon as possible.
Refer to “Engine overheating ”F9-
13.
& ECO gauge
1) U.S. spec. models
2) Except U.S. spec. models
The ECO gauge shows the difference
between the average rate of fuel con-
sumption since the trip meter was last
reset and the current rate of fuel con-
sumption.
The ECO gauge indicates the current fuel efficiency as shown in the following chart.
Displayed unit
Needle position
“ +” side “-” side
MPG Better Poorer
l/100km Poorer Better
NOTE
.
The ECO gauge shows only an
approximate indication.
. After resetting the trip meter, the
average rate of fuel consumption is not
shown until driving 0.6 mile (1 km).
Until that time, the ECO gauge does not
operate.
3-12
Page 178 of 610
damage to the engine.
&Door open indicator
When any of the doors, the rear gate
(Outback) or the trunk lid (Legacy) is not
fully closed, the door open indicator
appears. This function is effective even if
the ignition switch is in the“LOCK”/“OFF ”
or “ACC ”position (all models) or the key is
removed from the ignition switch (models
without “keyless access with push-button
start system ”).
The open door is indicated by the corre-
sponding part of the door open indicator.
Always make sure this indicator does not
appear before you start to drive.
&Windshield washer
fluid warning indicator
This indicator appears when the fluid level
in the windshield washer fluid tank de-
creases to the lower limit (approximately
0.6 US qt, 0.6 liter, 0.5 Imp qt).
&All-Wheel Drive warn-
ing light (CVT models)
WARNING
Continued driving with the AWD
warning light flashing can lead to
powertrain damage. If the AWD
warning light flashes, promptly park
in a safe location and then check
whether all four tires are the same
diameter and whether any of the
tires has a puncture or has lost air
pressure for some other reason.
NOTE
If the temporary spare tire is used, the
AWD warning light may flash. Use of
the temporary spare tire should there-
fore be restricted to the minimum time
necessary. Replace the temporary
spare tire with a conventional tire as
soon as possible.
This light flashes if the vehicle is driven
with tires of different diameters fitted on its
wheels or with the air pressure exces-
sively low in any of its tires.
&Power steering warn-
ing light
While the engine is running, this warning
light illuminates when a malfunction has
been detected in the electric power steer-
ing system.
CAUTION
When the power steering warning
light is illuminated, there may be
more resistance when the steering
wheel is operated. Drive carefully to
the nearest SUBARU dealer and
have the vehicle inspected immedi-
ately.
NOTE
If the steering wheel is operated in the
following ways, the power steering
control system may temporarily limit
the power assist in order to prevent the
system components, such as the con-
trol computer and drive motor, from
overheating.
. The steering wheel is operated fre-
quently and turned sharply while the
vehicle is maneuvered at extremely low
speeds, such as while frequently turn-
ing the steering wheel during parallel
parking.
Instruments and controls/Warning and indicator lights
–CONTINUED –3-23
Page 212 of 610
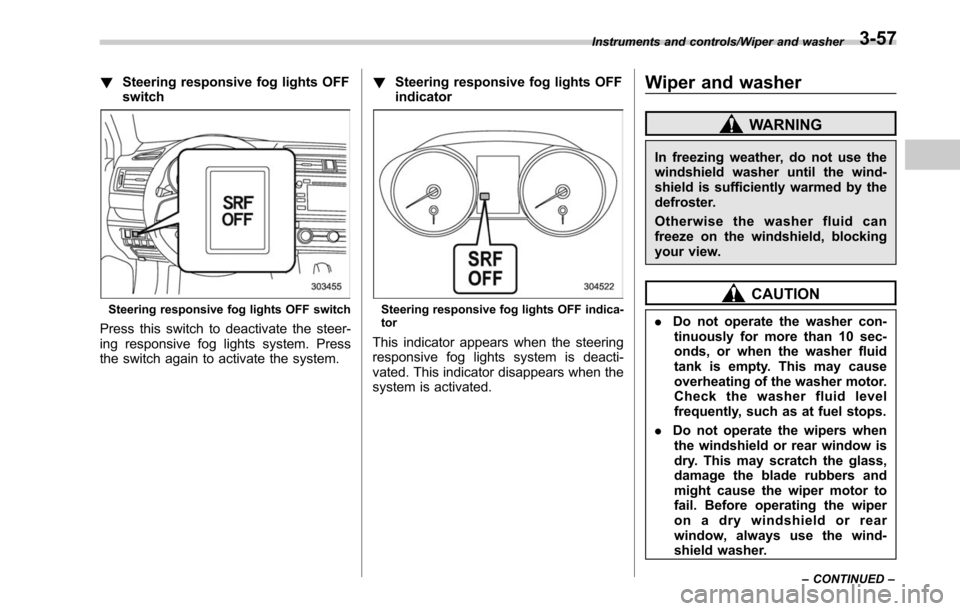
!Steering responsive fog lights OFF
switch
Steering responsive fog lights OFF switch
Press this switch to deactivate the steer-
ing responsive fog lights system. Press
the switch again to activate the system. !
Steering responsive fog lights OFF
indicator
Steering responsive fog lights OFF indica-
tor
This indicator appears when the steering
responsive fog lights system is deacti-
vated. This indicator disappears when the
system is activated.
Wiper and washer
WARNING
In freezing weather, do not use the
windshield washer until the wind-
shield is sufficiently warmed by the
defroster.
Otherwise the washer fluid can
freeze on the windshield, blocking
your view.
CAUTION
.Do not operate the washer con-
tinuously for more than 10 sec-
onds, or when the washer fluid
tank is empty. This may cause
overheating of the washer motor.
Check the washer fluid level
frequently, such as at fuel stops.
. Do not operate the wipers when
the windshield or rear window is
dry. This may scratch the glass,
damage the blade rubbers and
might cause the wiper motor to
fail. Before operating the wiper
on a dry windshield or rear
window, always use the wind-
shield washer.
Instruments and controls/Wiper and washer
–CONTINUED –3-57
Page 234 of 610

the device during the“cycling ”pro-
cess to prevent possible overheating.
Proceed with “Programming a New
HomeLink
®button ”step 4 to complete.
! Using HomeLink
®
To operate, simply press and release the
programmed HomeLink®button. Activa-
tion will now occur for the trained device
(i.e. garage door opener, gate operator,
security system, entry door lock, home/
office lighting, etc.). For convenience, the
hand-held remote of the device may also
be used at any time.
!Erasing HomeLink
®buttons
To erase programming from the three
buttons (individual buttons cannot be
erased but can be “reprogrammed”as
outlined below), follow the step noted:
Press and hold the two outer HomeLink
®buttons for at least 10 seconds. The LED
indicator will change from continuously lit
to rapidly flashing. Release both buttons.
Do not hold for longer than 20 seconds.
HomeLink
®is now ready to be pro-
grammed at any time beginning with
“Programming a New HomeLink
®button ”
- step 1. !
Reprogramming a Single
HomeLink
®button
To program a previously trained button,
follow these steps:
1. Press and hold the desired HomeLink
®button. DO NOT release the button.
2. The indicator light will begin to slowly
flash orange after 20 seconds. The
HomeLink
®button can be released at this
point. Proceed with “Programming a New
HomeLink
®button ”- step 3.
3. If you do not complete the program-
ming of a new device to the button, it will
revert to the previously stored program-
ming.
!Garage Door Two-Way Commu-
nication
HomeLink
®has the capability of commu-
nicating with your garage door opener.
HomeLink
®can receive and display “clos-
ing ”or “opening ”status messages from
compatible garage door opener systems.
At any time, HomeLink
®can also recall
and display the last recorded status
communicated by the garage door opener
to indicate your garage door being
“ closed ”or “opened ”.
HomeLink
®has the capability of receiving
this communication from the garage door
opener at a range up to 820 feet (250 m). Range may be reduced by obstacles such
as houses or trees. You may have to slow
your vehicle speed to successfully receive
the garage door opener communication.
!Programming Two-Way Commu-
nication
1) Status Indicators
Within 5 seconds after programming a
new HomeLink®button, both of Home-
Link ’s garage door status indicators will
flash rapidly green indicating that the
garage door two-way communication has
been enabled. If your garage door status
indicators flashed, two-way communica-
tion programming is complete.
If the garage door status indicators do not
flash, additional HomeLink
®information
and programming videos can be found
Instruments and controls/Mirrors
–CONTINUED –3-79
Page 402 of 610

&Driving tips
NOTE
If the accelerator and brake pedals are
depressed at the same time, driving
torque may be restrained. This is not a
malfunction.
. On a road surface where there is a risk
of wheelspin (for example, a snow- or
gravel-covered road), you can pull away
from a standstill safely and easily by first
selecting the 2nd gear of the manual
mode.
. Always apply the foot or parking brake
when the vehicle is stopped in the “D”or
“R ”position.
. Make sure to apply the parking brake
when parking your vehicle. Do not hold
the vehicle with only the transmission.
. Do not keep the vehicle in a stationary
position on an uphill grade by using the
“D ”position. Use the brake instead.
. The engine may, on rare occasions,
knock when the vehicle rapidly acceler-
ates or rapidly pulls away from a standstill.
This phenomenon does not indicate a
malfunction.
. A slight reduction in output torque may
occur in the models with a 3.6 L engine
before the engine warms up.
Power steering
Power steering warning light
The vehicle is equipped with an electric
power steering system. When the ignition
switch is turned to the “ON”position, the
power steering warning light on the
combination meter illuminates to inform
the driver that the warning system is
functioning properly. Then, if the engine
started, the warning light turns off to inform
the driver that the steering power assist is
operational.
CAUTION
While the power steering warning
light is illuminated, there may be
more resistance when the steering wheel is operated. Drive carefully to
the nearest SUBARU dealer and
have the vehicle inspected immedi-
ately.
NOTE
If the steering wheel is operated in the
following ways, the power steering
control system may temporarily limit
the power assist in order to prevent the
system components, such as the con-
trol computer and drive motor, from
overheating.
.
The steering wheel is operated fre-
quently and turned sharply while the
vehicle is maneuvered at extremely low
speeds, such as while frequently turn-
ing the steering wheel during parallel
parking.
. The steering wheel remains in the
fully turned position for a long period
of time.
At this time, there will be more resis-
tance when steering. However this is
not a malfunction. Normal steering
force will be restored after the steering
wheel is not operated for a while and
the power steering control system has
an opportunity to cool down. However,
if the power steering is operated in a
non-standard way which causes power
Starting and operating/Power steering
–CONTINUED –7-31
Page 403 of 610
Starting and operating/Braking
assist limitation to occur too fre-
quently, this may result in a malfunc-
tion of the power steering control
system.Braking
&Braking tips
WARNING
Never rest your foot on the brake
pedal while driving. This can cause
dangerous overheating of the
brakes and needless wear on the
brake pads and linings.
! When the brakes get wet
When driving in rain or after washing the
vehicle, the brakes may get wet. As a
result, brake stopping distance will be
longer. To dry the brakes, drive the vehicle
at a safe speed while lightly depressing
the brake pedal to heat up the brakes.
! Use of engine braking
Remember to make use of engine braking
in addition to foot braking. When descend-
ing a grade, if only the foot brake is used,
the brakes may start working improperly
because of brake fluid overheating,
caused by overheated brake pads. To
help prevent this, shift into a lower gear to
get stronger engine braking.
! Braking when a tire is punctured
Do not depress the brake pedal suddenly
when a tire is punctured. This could cause a loss of control of the vehicle. Keep
driving straight ahead while gradually
reducing speed. Then slowly pull off the
road to a safe place.&
Brake system
! Two separate circuits
Your vehicle has a dual circuit brake
system. Each circuit works diagonally
across the vehicle. If one circuit of the
brake system should fail, the other half of
the system still works. If one circuit fails,
the brake pedal will go down much closer
to the floor than usual and you will need to
press it down much harder. And a much
longer distance will be needed to stop the
vehicle.
! Brake booster
The brake booster uses engine manifold
vacuum to assist braking force. Do not
turn off the engine while driving because
that will turn off the brake booster, result-
ing in poor braking power.
The brakes will continue to work even
when the brake booster completely stops
functioning. If this happens, however, you
will have to depress the pedal much
harder than normal and the braking dis-
tance will increase.
7-32
Page 472 of 610
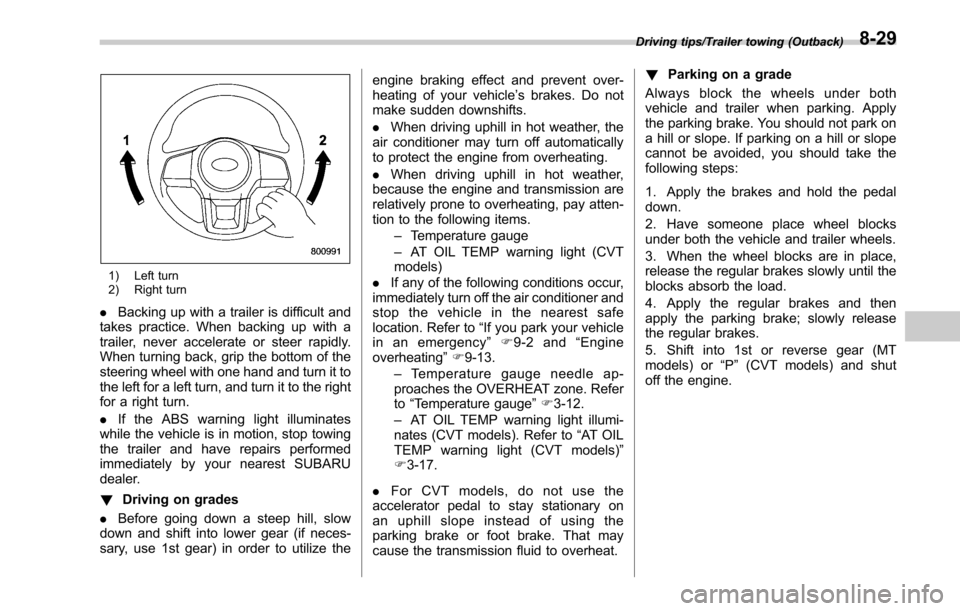
1) Left turn
2) Right turn
.Backing up with a trailer is difficult and
takes practice. When backing up with a
trailer, never accelerate or steer rapidly.
When turning back, grip the bottom of the
steering wheel with one hand and turn it to
the left for a left turn, and turn it to the right
for a right turn.
. If the ABS warning light illuminates
while the vehicle is in motion, stop towing
the trailer and have repairs performed
immediately by your nearest SUBARU
dealer.
! Driving on grades
. Before going down a steep hill, slow
down and shift into lower gear (if neces-
sary, use 1st gear) in order to utilize the engine braking effect and prevent over-
heating of your vehicle’
s brakes. Do not
make sudden downshifts.
. When driving uphill in hot weather, the
air conditioner may turn off automatically
to protect the engine from overheating.
. When driving uphill in hot weather,
because the engine and transmission are
relatively prone to overheating, pay atten-
tion to the following items.
–Temperature gauge
– AT OIL TEMP warning light (CVT
models)
. If any of the following conditions occur,
immediately turn off the air conditioner and
stop the vehicle in the nearest safe
location. Refer to “If you park your vehicle
in an emergency ”F9-2 and “Engine
overheating ”F 9-13.
– Temperature gauge needle ap-
proaches the OVERHEAT zone. Refer
to “Temperature gauge ”F 3-12.
– AT OIL TEMP warning light illumi-
nates (CVT models). Refer to “AT OIL
TEMP warning light (CVT models) ”
F 3-17.
. For CVT models, do not use the
accelerator pedal to stay stationary on
an uphill slope instead of using the
parking brake or foot brake. That may
cause the transmission fluid to overheat. !
Parking on a grade
Always block the wheels under both
vehicle and trailer when parking. Apply
the parking brake. You should not park on
a hill or slope. If parking on a hill or slope
cannot be avoided, you should take the
following steps:
1. Apply the brakes and hold the pedal
down.
2. Have someone place wheel blocks
under both the vehicle and trailer wheels.
3. When the wheel blocks are in place,
release the regular brakes slowly until the
blocks absorb the load.
4. Apply the regular brakes and then
apply the parking brake; slowly release
the regular brakes.
5. Shift into 1st or reverse gear (MT
models) or “P”(CVT models) and shut
off the engine.
Driving tips/Trailer towing (Outback)8-29