2017 SUBARU LEGACY change time
[x] Cancel search: change timePage 2 of 610
Foreword
Congratulations on choosing a SUBARU vehicle. This Owner’s
Manual has all the information necessary to keep your SUBARU in
excellent condition and to properly maintain the emission control
system for minimizing emission pollutants. We urge you to read
this manual carefully so that you may understand your vehicle and
its operation. For information not found in this Owner ’s Manual,
such as details concerning repairs or adjustments, please contact
the SUBARU dealer from whom you purchased your SUBARU or
the nearest SUBARU dealer.
The information, specifications and illustrations found in this
manual are those in effect at the time of printing. FUJI HEAVY
INDUSTRIES LTD. reserves the right to change specifications and
designs at any time without prior notice and without incurring any
obligation to make the same or similar changes on vehicles
previously sold. This Owner ’s Manual applies to all models and
covers all equipment, including factory installed options. Some
explanations, therefore may be for equipment not installed in your
vehicle.
Please leave this manual in the vehicle at the time of resale. The
next owner will need the information found herein.
FUJI HEAVY INDUSTRIES LTD., TOKYO, JAPAN
is a registered trademark of FUJI HEAVY INDUSTRIES LTD.
*CCopyright 2016 FUJI HEAVY INDUSTRIES LTD.
Page 8 of 610
&Safety symbol
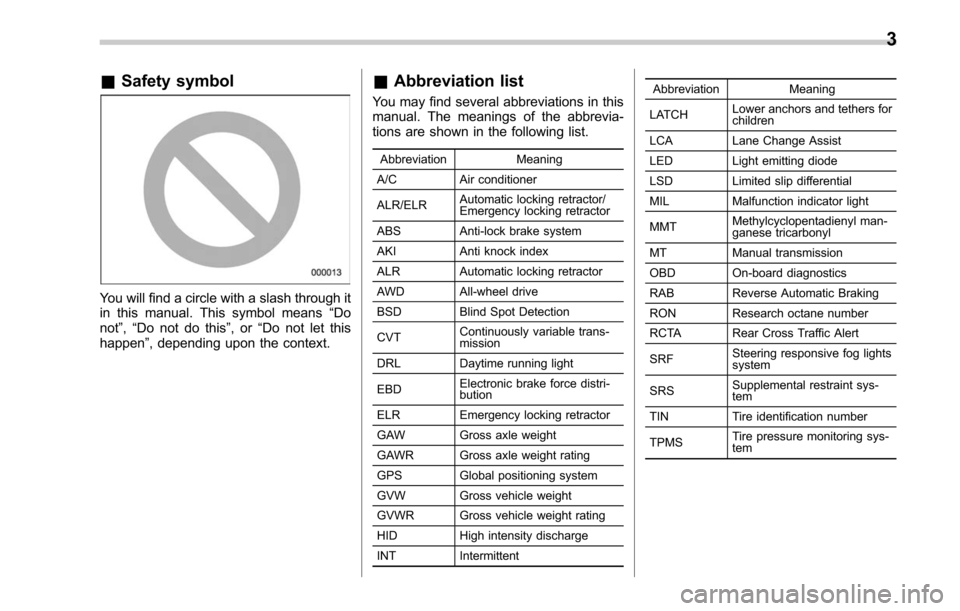
You will find a circle with a slash through it
in this manual. This symbol means “Do
not ”,“Do not do this ”,or“Do not let this
happen ”, depending upon the context.
&Abbreviation list
You may find several abbreviations in this
manual. The meanings of the abbrevia-
tions are shown in the following list.
Abbreviation Meaning
A/C Air conditioner
ALR/ELR Automatic locking retractor/
Emergency locking retractor
ABS Anti-lock brake system
AKI Anti knock index
ALR Automatic locking retractor
AWD All-wheel drive
BSD Blind Spot Detection
CVT Continuously variable trans-
mission
DRL Daytime running light
EBD Electronic brake force distri-
bution
ELR Emergency locking retractor
GAW Gross axle weight
GAWR Gross axle weight rating
GPS Global positioning system
GVW Gross vehicle weight
GVWR Gross vehicle weight rating
HID High intensity discharge
INT Intermittent Abbreviation
Meaning
LATCH Lower anchors and tethers for
children
LCA Lane Change Assist
LED Light emitting diode
LSD Limited slip differential
MIL Malfunction indicator light
MMT Methylcyclopentadienyl man-
ganese tricarbonyl
MT Manual transmission
OBD On-board diagnostics
RAB Reverse Automatic Braking
RON Research octane number
RCTA Rear Cross Traffic Alert
SRF Steering responsive fog lights
system
SRS Supplemental restraint sys-
tem
TIN Tire identification number
TPMS Tire pressure monitoring sys-
tem
3
Page 25 of 610
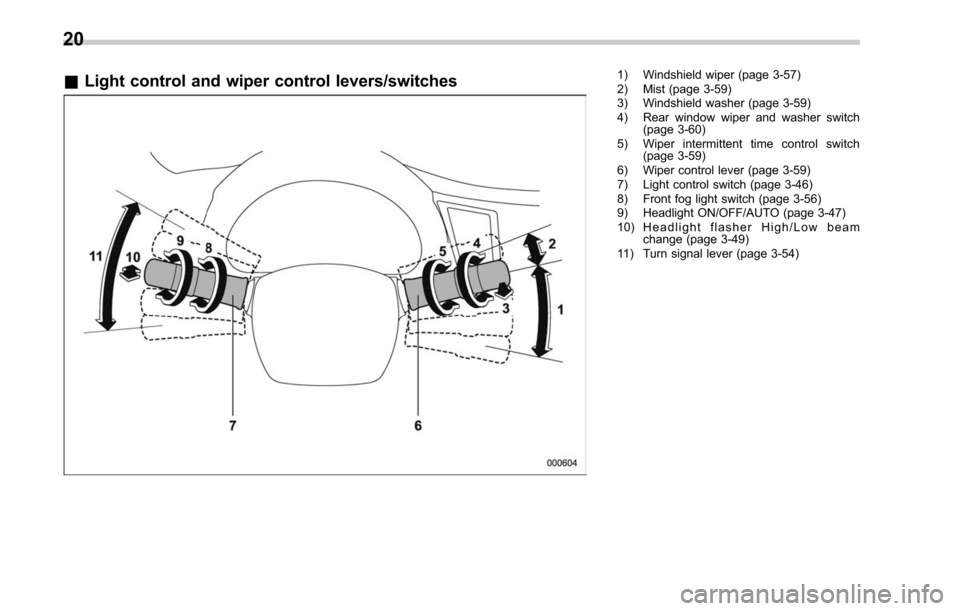
&Light control and wiper control levers/switches1) Windshield wiper (page 3-57)
2) Mist (page 3-59)
3) Windshield washer (page 3-59)
4) Rear window wiper and washer switch
(page 3-60)
5) Wiper intermittent time control switch (page 3-59)
6) Wiper control lever (page 3-59)
7) Light control switch (page 3-46)
8) Front fog light switch (page 3-56)
9) Headlight ON/OFF/AUTO (page 3-47)
10) Headlight flasher High/Low beam change (page 3-49)
11) Turn signal lever (page 3-54)
20
Page 32 of 610

Function settings
A SUBARU dealer can change the settings of the functions shown in the following table to meet your personal requirements. Contact
the nearest SUBARU dealer for details. Furthermore, some useful function settings are available using the multi information display.
For details, refer to“Menu screens”F3-41.
Item FunctionPossible settingsDefault setting Page
Alarm system Alarm systemOperation/Non-operation Operation 2-29
Monitoring start delay time
(after closing doors) 0 seconds/30 seconds 30 seconds
2-30
Impact sensor operation (only
models with shock sensors
(dealer option)) Operation/Non-operation Non-operation
2-33
Map light/Dome light/Cargo
area light illumination ON/OFF
OFF 2-29
Keyless access with push-
button start system
*1Audible signal*2ON/OFF ON 2-18, 2-47, 3-45
Audible signal volume*3Level 1 to 7 Level 5 2-18, 3-25, 3-45
Hazard warning flasher ON/OFF ON2-18, 3-45
Door unlock selection (driver ’s
door unlock) Driver
’s door only/All doors Driver ’s door only 2-18, 3-45
Door unlock selection (rear
gate unlock) Rear gate only, All doors Rear gate only
Remote keyless entry system Audible signal
*2ON/OFF ON 2-25, 2-27,
2-47, 3-45
Audible signal volume
*3Level 1 to 7 Level 5 2-25, 2-27, 3-45
Hazard warning flasher ON/OFF ON2-25, 2-27, 3-45
Key lock-in prevention Key lock-in prevention Operation/Non-operation Operation 2-9
– CONTINUED –
27
Page 33 of 610

ItemFunctionPossible settingsDefault setting Page
Defogger and deicer system Rear window defogger, out- side mirror defogger and
windshield wiper deicerOperation for 15 minutes/
Continuous operation
Operation for 15 minutes
3-61, 3-45
Map light/Dome light/Cargo
area light Operation of map light/dome
light/cargo area light OFF de-
lay timerOFF/Short/Normal/Long Long
6-4, 3-45
Battery drainage prevention
function Battery drainage prevention
functionOperation/Non-operation Operation
2-8
Auto on/off headlights Sensitivity of the operation of the auto on/off headlightsMin/Low/Mid/Max
Mid 3-47, 3-46
Windshield wiper Automatic headlight turn on
function that is linked with
wiper operation Operation/Non-operation Operation
3-47, 3-46
Auto dimmer cancel Sensitivity of the operation of
the auto dimmer cancel OFF/Min/Low/Mid/Hi/Max Mid
3-55
Welcome lighting function Welcome lighting function (when approaching)OFF/30 seconds/60 seconds/
90 seconds30 seconds
3-46, 3-48
Welcome lighting function
(when exiting) OFF/30 seconds/60 seconds/
90 seconds30 seconds
High beam assist function
*1High beam assist function Operation/Non-operation Operation 3-49
Reverse gear interlocked rear
wiper Reverse gear interlocked rear
wiper operationOperation/Non-operation U.S.-spec. models: Non-operation
Other models: Operation 3-60
One-touch lane changer Operation of the one-touch lane changerOperation/Non-operation Operation
3-55
*1: If equipped
*2: This setting also works as the ON/OFF setting of the power rear gate buzzer for starting operation. However, you cannot change the warning buzzer
setting for a detecting jam, etc.
*3: The audible signal volume cannot be set under level 5 for the warning chime.
28
Page 43 of 610
Seat, seatbelt and SRS airbags/Seat heater
&Front seat heater (if
equipped)
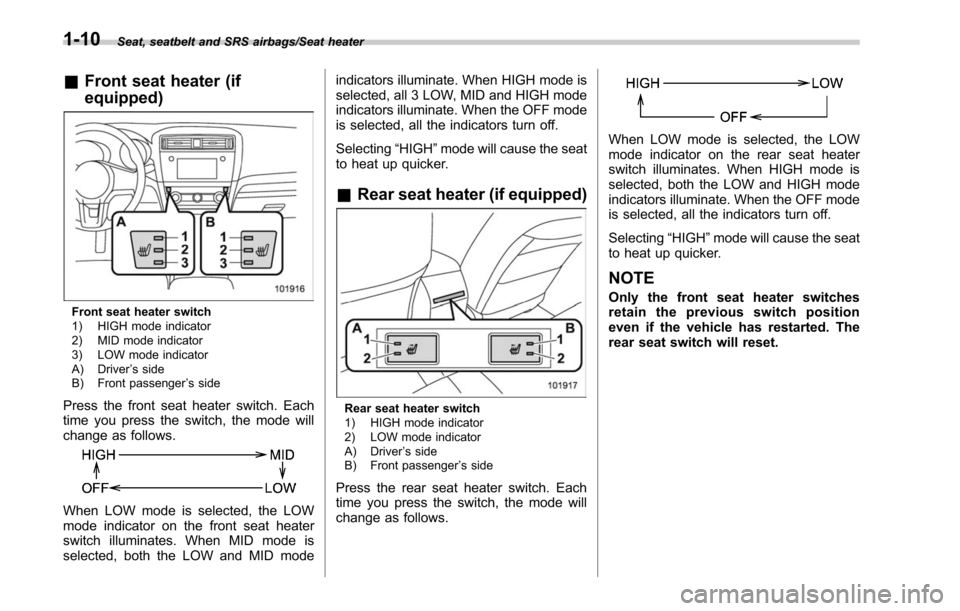
Front seat heater switch
1) HIGH mode indicator
2) MID mode indicator
3) LOW mode indicator
A) Driver ’s side
B) Front passenger ’s side
Press the front seat heater switch. Each
time you press the switch, the mode will
change as follows.
When LOW mode is selected, the LOW
mode indicator on the front seat heater
switch illuminates. When MID mode is
selected, both the LOW and MID mode indicators illuminate. When HIGH mode is
selected, all 3 LOW, MID and HIGH mode
indicators illuminate. When the OFF mode
is selected, all the indicators turn off.
Selecting
“HIGH”mode will cause the seat
to heat up quicker.
& Rear seat heater (if equipped)
Rear seat heater switch
1) HIGH mode indicator
2) LOW mode indicator
A) Driver ’s side
B) Front passenger ’s side
Press the rear seat heater switch. Each
time you press the switch, the mode will
change as follows.
When LOW mode is selected, the LOW
mode indicator on the rear seat heater
switch illuminates. When HIGH mode is
selected, both the LOW and HIGH mode
indicators illuminate. When the OFF mode
is selected, all the indicators turn off.
Selecting “HIGH”mode will cause the seat
to heat up quicker.
NOTE
Only the front seat heater switches
retainthepreviousswitchposition
even if the vehicle has restarted. The
rear seat switch will reset.
1-10
Page 66 of 610
CAUTION
Store the head restraint that has
been removed in the trunk or cargo
area. Avoid placing the head re-
straint in the passenger compart-
ment to prevent it from being thrown
around in the passenger compart-
ment in a sudden stop or a sharp
turn.
3. For the Outback, adjust the seatback
to the upright position.
4. Place the child restraint system in the
rear seating position.
WARNING
When you intend to install a child
restraint system on the rear center
seating position, if the child restraint
system does not fit snugly against
the contours of the rear center seat
cushion, install the child restraint
system on the window-side seating
position to be safe. For details, refer
to “Where to place a child restraint
system ”F 1-28.
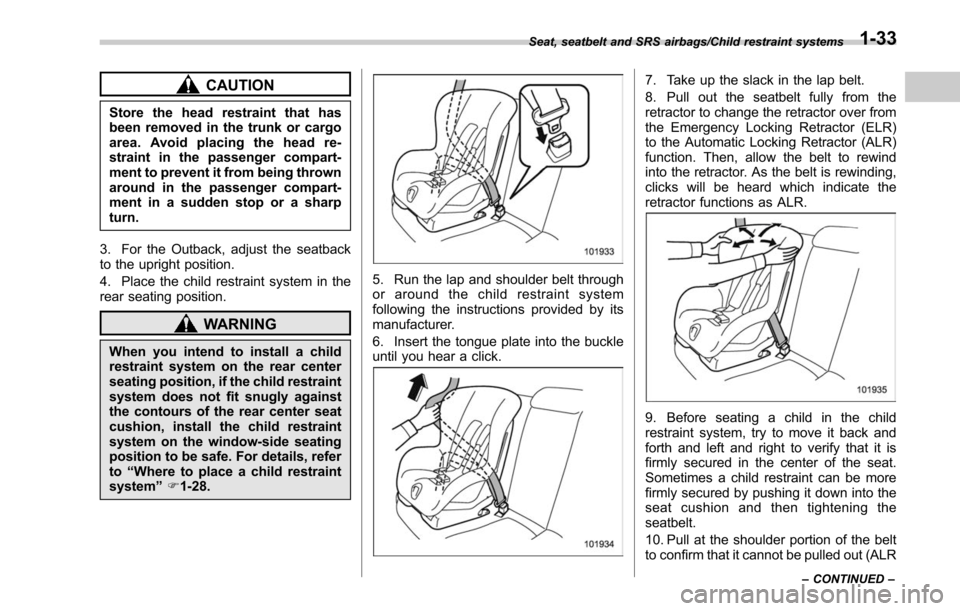
5. Run the lap and shoulder belt through
or around the child restraint system
following the instructions provided by its
manufacturer.
6. Insert the tongue plate into the buckle
until you hear a click.
7. Take up the slack in the lap belt.
8. Pull out the seatbelt fully from the
retractor to change the retractor over from
the Emergency Locking Retractor (ELR)
to the Automatic Locking Retractor (ALR)
function. Then, allow the belt to rewind
into the retractor. As the belt is rewinding,
clicks will be heard which indicate the
retractor functions as ALR.
9. Before seating a child in the child
restraint system, try to move it back and
forth and left and right to verify that it is
firmly secured in the center of the seat.
Sometimes a child restraint can be more
firmly secured by pushing it down into the
seat cushion and then tightening the
seatbelt.
10. Pull at the shoulder portion of the belt
to confirm that it cannot be pulled out (ALR
Seat, seatbelt and SRS airbags/Child restraint systems
–CONTINUED –1-33
Page 117 of 610
Keys and doors/Keyless access with push–button start system
following precautions to prevent
malfunctions or battery dis-
charge.
– Although you can replace the
battery of the access key by
yourself, it is recommended
that the battery be replaced by
a SUBARU dealer to avoid the
risk of damage at the time of
replacement.
– Do not get the access key wet.
If the access key gets wet,
wipe it off immediately and let
it dry completely.
– Do not apply strong impacts
to the access key.
– Keep the access key away
from magnetic sources.
– Never leave the access key in
direct sunlight or anywhere
that may become hot, such
as on the dashboard. It may
damage the battery or cause
circuit malfunctions.
– Do not wash the access key in
an ultrasonic washer.
– Do not leave the access key in
humid or dusty locations, or
near personal computers or
home electric appliances.NOTE
After the vehicle battery is discharged
or replaced, initialization of the steering
lock system may be required to start
the engine. In this case, perform the
following procedure to initialize the
steering lock.
1) Turn the push-button ignition
switch to the “OFF ”position. For de-
tails, refer to “Switching power status ”
F 3-7.
2) Open and close the driver ’s door.
3) Wait for approximately 10 seconds.
When the steering is locked, the initi-
alization is completed.
! Regarding access key
CAUTION
If the access key is dropped, the
integrated mechanical key inside
may become loose. Be careful not
to lose the mechanical key.
NOTE
.The access key is always commu-
nicating with the vehicle and is con-
tinuously using the battery. Although
the life of the battery varies depending
on the operating conditions, it is ap- proximately 1 to 2 years. If the battery
becomes fully discharged, replace it
with a new one.
.
If an access key is lost, it is
recommended that the access key be
reregistered. For reregistration of an
access key, contact a SUBARU dealer.
. Up to 7 access keys can be regis-
tered for one vehicle. For a spare
access key, contact a SUBARU dealer.
. Carefully store the key number plate
supplied with the access key. It is
necessary for vehicle repair and addi-
tional registration of access keys.
. Do not leave the access key in the
storage spaces inside the vehicle.
Vibrations may damage the key or turn
on the switch, possibly resulting in a
lockout.
! Regarding setting
NOTE
.The operational/non-operational
setting for the keyless access function
can be changed. For the setting proce-
dure, refer to “Disabling keyless ac-
cess function” F2-18. The setting can
also be changed by a SUBARU dealer.
For more details, contact a SUBARU
dealer.
. For detailed information about the
operation method for the push-button
2-12