2017 SUBARU LEGACY change time
[x] Cancel search: change timePage 203 of 610

Instruments and controls/Light control switch
!Welcome lighting function
The welcome lighting function turns on the
low beam headlight for smooth approach-
ing to or exiting from the vehicle at night or
in a dark place.
The function is activated while all of the
following conditions are met.
. The light control switch is in the
“AUTO ”position
. It is dark enough to turn on the auto on/
off headlights
When approaching:
While the welcome lighting function is
activated, the low beam headlights will
automatically illuminate when unlocking
the doors (for Outback, including the rear
gate) by using the remote keyless entry
system.
The low beam headlights will remain
illuminated for 30 seconds
*1and then turn
off. However, if any of the following
operations is done, the low beam head-
lights will turn off.
. The doors are locked.
. The light control switch is turned to a
position other than “AUTO”.
. The ignition switch is turned to the “ON”
position. When exiting:
While the welcome lighting function is
activated, the low beam headlights will
remain illuminated even when either of the
following operation is done.
.
Thepush-buttonignitionswitchis
turned to the “OFF”status (models with
“ keyless access with push-button start
system ”)
. The key is pulled out from the ignition
switch (models without “keyless access
with push-button start system ”)
The low beam headlights will turn off
under any of the following conditions.
. 3 minutes have passed since the low
beam headlights were illuminated by the
welcome lighting function.
. 30 seconds have passed since the
door is opened and closed.
*1
. The light control switch is turned to a
position other than “AUTO”.
. The locking procedure is performed
twice. When performing the unlocking
procedure after performing the locking
procedure, perform the locking procedure
twice again.
*1: The setting for the period of time in which
the low beam headlights remain on by the
welcome lighting function can be changed by a
SUBARU dealer. Contact your SUBARU dealer for details. Also, you can change the setting by
operating the multi information display. For
details, refer to
“Welcome Lighting ”F3-46.
For models with the genuine SUBARU naviga-
tion system, you can change the setting by
using the navigation system. For details, refer to
the Owner ’s Manual supplement for the naviga-
tion system.
3-48
Page 207 of 610
Instruments and controls/Light control switch
–Press and hold the automatic
dimming on/off button for 15 to 20
seconds again.
! How to change the headlight
mode manually
Change to the low beam:
When you return the turn signal lever to
the center position, the high beam assist
function will turn off and the high beam
assist indicator will turn off.
Change to the high beam:
When you turn the light control switch to
the “
”position, the headlight mode will
be changed to the high beam.
At this time, the high beam assist function
will turn off, the high beam assist indicator
will turn off and the high beam indicator
light will turn on.
NOTE
. After manually changing the head-
light mode to the high beam, if you turn
on the high beam assist function,
return the light control switch to the
“ AUTO ”position.
. When manually changing the head-
light mode to the high beam, if you turn
the light control switch to the “
”
position, the parking lights, front side
marker lights, rear side marker lights,
tail lights and license plate lights will turn on.
! Tips for the high beam assist
system
. The high beam assist function recog-
nizes the condition surrounding the vehi-
cle based on the brightness of illumination
ahead of your vehicle, etc. Therefore, the
headlight mode may switch in some
situations that do not match to the driver ’s
sense.
. A bicycle or cargo cycle may not be
detected.
. Under the fo llowing situations, the
brightness of ambient illumination may
not be detected correctly and the high
beam assist function may not work prop-
erly. As a result, the glare of the high beam
may disturb the driving of an oncoming
vehicle or vehicle ahead. Also, the low
beam mode may continue although there
are no oncoming vehicles and vehicles
ahead. In the such cases, change the
headlight mode manually.
–In bad weather (fog, snow, sand
storm, heavy rain, etc.)
– When the windshield glass is dirty
or fogged
– When the windshield is cracked or
damaged
– Whentheinsidemirrororthe
camera is deformed or dirty –
If there are lights similar to the
headlights or the tail lights in the
surrounding area
– When an oncoming vehicle or ve-
hicle ahead is driven without its head-
lights and tail lights on
– If the headlights of an oncoming
vehicle or the tail lights of a vehicle
ahead are dirty or discolored, or if the
light beams are not aimed correctly
– When a rapid change of brightness
continues while driving
– When driving on a road with many
ups and downs or uneven surfaces
– When driving on a road with many
curves
– When there are some objects that
reflect light strongly, such as a road
sign or a mirror in vehicle ahead
– When the rear part of the vehicle
ahead, such as a container, reflects
light strongly
– When the headlights of your vehicle
are damaged or dirty
– When your vehicle is tilted, such as
in case the vehicle has a flat tire or is
being towed
. In the following conditions, the head-
light mode will not be automatically chan-
ged from the high beam to the low beam.
–When your vehicle passes an on-
coming vehicle suddenly in a blind
3-52
Page 208 of 610
curve
–When another vehicle passes in
front of your vehicle
– When an oncoming vehicle or ve-
hicle ahead comes in and out of view
because of continuous curves, median
strips, roadside trees, etc.
. If the camera detects the light of the
front fog lights of an oncoming vehicle, the
headlight mode may change from the high
beam to the low beam automatically.
. The headlight mode may change from
the high beam to the low beam, or the low
beam mode may continue, when affected
by a street light, traffic signal, illumination
of an advertisement board, or a reflective
object such as a road sign and signboard.
. The timing of the change of headlight
mode may differ due to the following
factors.
–the vehicle condition (e.g., number
of passengers or weight of loaded
cargo)
– surrounding situation (e.g., move-
ment and direction of an oncoming
vehicle or vehicle ahead)
– detection limitations of the camera
angle& Headlight flasher
CAUTION
Do not hold the lever in the flashing
position for more than just a few
seconds.
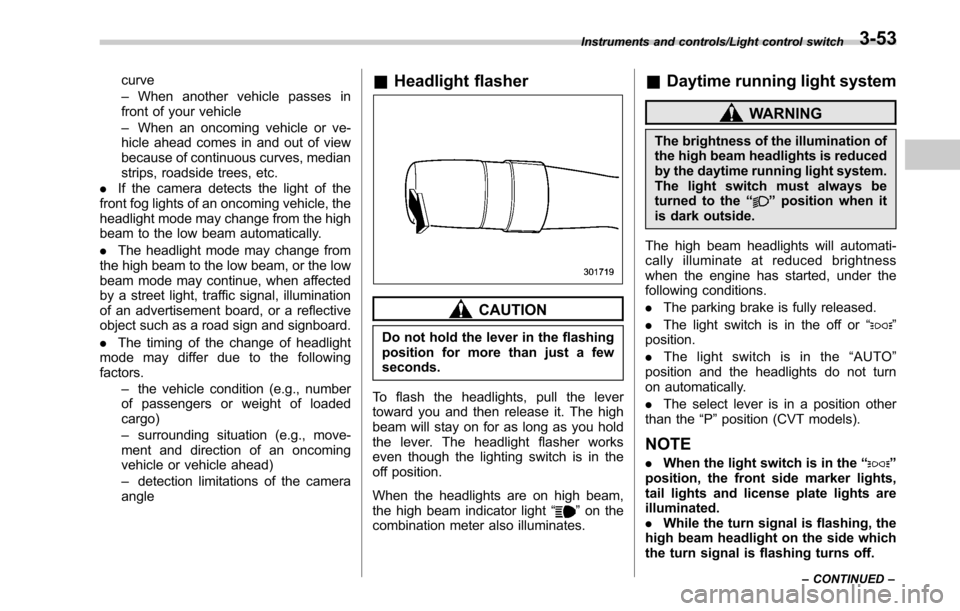
To flash the headlights, pull the lever
toward you and then release it. The high
beam will stay on for as long as you hold
the lever. The headlight flasher works
even though the lighting switch is in the
off position.
When the headlights are on high beam,
the high beam indicator light “
”on the
combination meter also illuminates.
& Daytime running light system
WARNING
The brightness of the illumination of
the high beam headlights is reduced
by the daytime running light system.
The light switch must always be
turned to the “
”position when it
is dark outside.
The high beam headlights will automati-
cally illuminate at reduced brightness
when the engine has started, under the
following conditions.
. The parking brake is fully released.
. The light switch is in the off or “
”
position.
. The light switch is in the “AUTO ”
position and the headlights do not turn
on automatically.
. The select lever is in a position other
than the “P”position (CVT models).
NOTE
. When the light switch is in the “”
position, the front side marker lights,
tail lights and license plate lights are
illuminated.
. While the turn signal is flashing, the
high beam headlight on the side which
the turn signal is flashing turns off.
Instruments and controls/Light control switch
–CONTINUED –3-53
Page 210 of 610
&One-touch lane changer
To flash the turn signal and turn signal
indicator light three times, push the turn
signal lever up or down slightly and
immediately release it.
The operational/non-operational setting of
the one-touch lane changer ’s can be
changed by a SUBARU dealer. Contact
the nearest SUBARU dealer for details.
Illumination brightness con-
trol
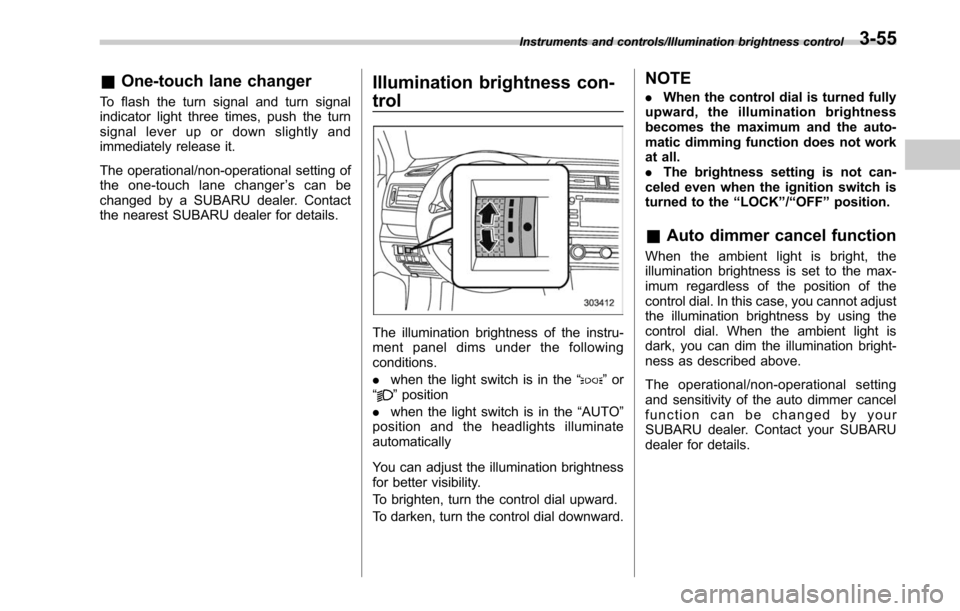
The illumination brightness of the instru-
ment panel dims under the following
conditions.
. when the light switch is in the “
”or
“” position
. when the light switch is in the “AUTO”
position and the headlights illuminate
automatically
You can adjust the illumination brightness
for better visibility.
To brighten, turn the control dial upward.
To darken, turn the control dial downward.
NOTE
. When the control dial is turned fully
upward, the illumination brightness
becomes the maximum and the auto-
matic dimming function does not work
at all.
. The brightness setting is not can-
celed even when the ignition switch is
turned to the “LOCK ”/“ OFF ”position.
& Auto dimmer cancel function
When the ambient light is bright, the
illumination brightness is set to the max-
imum regardless of the position of the
control dial. In this case, you cannot adjust
the illumination brightness by using the
control dial. When the ambient light is
dark, you can dim the illumination bright-
ness as described above.
The operational/non-operational setting
and sensitivity of the auto dimmer cancel
function can be changed by your
SUBARU dealer. Contact your SUBARU
dealer for details.
Instruments and controls/Illumination brightness control3-55
Page 232 of 610
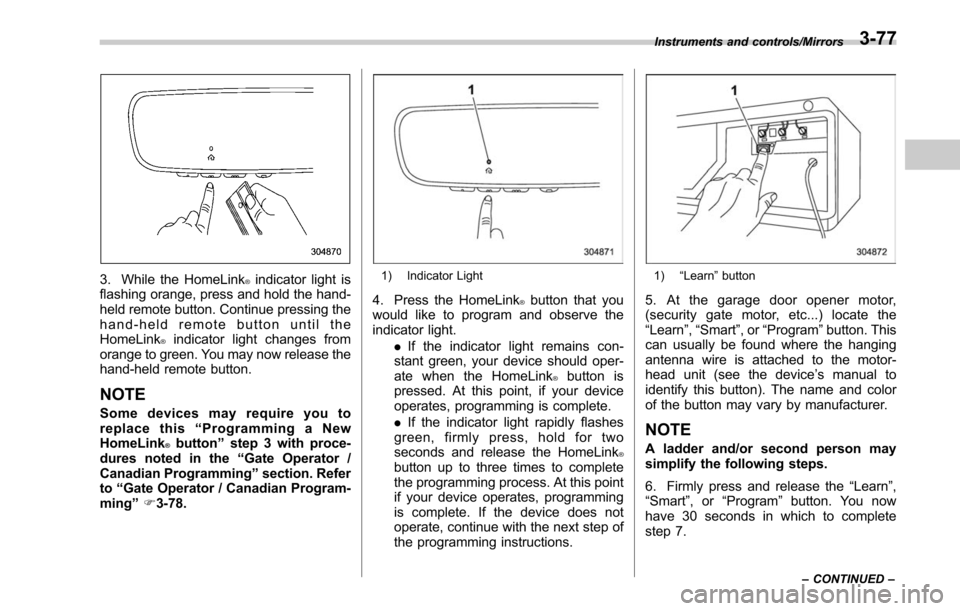
3. While the HomeLink®indicator light is
flashing orange, press and hold the hand-
held remote button. Continue pressing the
hand-held remote button until the
HomeLink
®indicator light changes from
orange to green. You may now release the
hand-held remote button.
NOTE
Some devices may require you to
replace this “Programming a New
HomeLink
®button ”step 3 with proce-
dures noted in the “Gate Operator /
Canadian Programming ”section. Refer
to “Gate Operator / Canadian Program-
ming ”F 3-78.
1) Indicator Light
4. Press the HomeLink®button that you
would like to program and observe the
indicator light.
.If the indicator light remains con-
stant green, your device should oper-
ate when the HomeLink
®button is
pressed. At this point, if your device
operates, programming is complete.
. If the indicator light rapidly flashes
green, firmly press, hold for two
seconds and release the HomeLink
®button up to three times to complete
the programming process. At this point
if your device operates, programming
is complete. If the device does not
operate, continue with the next step of
the programming instructions.
1) “Learn ”button
5. At the garage door opener motor,
(security gate motor, etc...) locate the
“Learn ”,“Smart ”,or “Program ”button. This
can usually be found where the hanging
antenna wire is attached to the motor-
head unit (see the device ’s manual to
identify this button). The name and color
of the button may vary by manufacturer.
NOTE
A ladder and/or second person may
simplify the following steps.
6. Firmly press and release the “Learn”,
“Smart ”,or“Program ”button. You now
have 30 seconds in which to complete
step 7.
Instruments and controls/Mirrors
–CONTINUED –3-77
Page 233 of 610
Instruments and controls/Mirrors
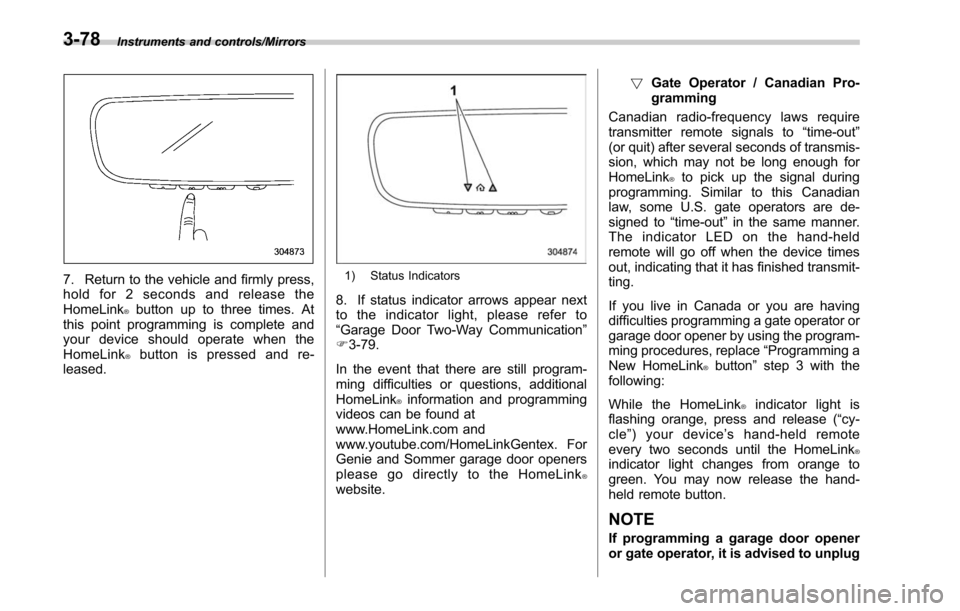
7. Return to the vehicle and firmly press,
hold for 2 seconds and release the
HomeLink
®button up to three times. At
this point programming is complete and
your device should operate when the
HomeLink
®button is pressed and re-
leased.
1) Status Indicators
8. If status indicator arrows appear next
to the indicator light, please refer to
“Garage Door Two-Way Communication ”
F 3-79.
In the event that there are still program-
ming difficulties or questions, additional
HomeLink
®information and programming
videos can be found at
www.HomeLink.com and
www.youtube.com/HomeLinkGentex. For
Genie and Sommer garage door openers
please go directly to the HomeLink
®website. !
Gate Operator / Canadian Pro-
gramming
Canadian radio-frequency laws require
transmitter remote signals to “time-out”
(or quit) after several seconds of transmis-
sion, which may not be long enough for
HomeLink
®to pick up the signal during
programming. Similar to this Canadian
law, some U.S. gate operators are de-
signed to “time-out”in the same manner.
The indicator LED on the hand-held
remote will go off when the device times
out, indicating that it has finished transmit-
ting.
If you live in Canada or you are having
difficulties programming a gate operator or
garage door opener by using the program-
ming procedures, replace “Programming a
New HomeLink
®button ”step 3 with the
following:
While the HomeLink
®indicator light is
flashing orange, press and release (“cy-
cle ”)yourdevice ’s hand-held remote
every two seconds until the HomeLink
®indicator light changes from orange to
green. You may now release the hand-
held remote button.
NOTE
If programming a garage door opener
or gate operator, it is advised to unplug
3-78
Page 234 of 610

the device during the“cycling ”pro-
cess to prevent possible overheating.
Proceed with “Programming a New
HomeLink
®button ”step 4 to complete.
! Using HomeLink
®
To operate, simply press and release the
programmed HomeLink®button. Activa-
tion will now occur for the trained device
(i.e. garage door opener, gate operator,
security system, entry door lock, home/
office lighting, etc.). For convenience, the
hand-held remote of the device may also
be used at any time.
!Erasing HomeLink
®buttons
To erase programming from the three
buttons (individual buttons cannot be
erased but can be “reprogrammed”as
outlined below), follow the step noted:
Press and hold the two outer HomeLink
®buttons for at least 10 seconds. The LED
indicator will change from continuously lit
to rapidly flashing. Release both buttons.
Do not hold for longer than 20 seconds.
HomeLink
®is now ready to be pro-
grammed at any time beginning with
“Programming a New HomeLink
®button ”
- step 1. !
Reprogramming a Single
HomeLink
®button
To program a previously trained button,
follow these steps:
1. Press and hold the desired HomeLink
®button. DO NOT release the button.
2. The indicator light will begin to slowly
flash orange after 20 seconds. The
HomeLink
®button can be released at this
point. Proceed with “Programming a New
HomeLink
®button ”- step 3.
3. If you do not complete the program-
ming of a new device to the button, it will
revert to the previously stored program-
ming.
!Garage Door Two-Way Commu-
nication
HomeLink
®has the capability of commu-
nicating with your garage door opener.
HomeLink
®can receive and display “clos-
ing ”or “opening ”status messages from
compatible garage door opener systems.
At any time, HomeLink
®can also recall
and display the last recorded status
communicated by the garage door opener
to indicate your garage door being
“ closed ”or “opened ”.
HomeLink
®has the capability of receiving
this communication from the garage door
opener at a range up to 820 feet (250 m). Range may be reduced by obstacles such
as houses or trees. You may have to slow
your vehicle speed to successfully receive
the garage door opener communication.
!Programming Two-Way Commu-
nication
1) Status Indicators
Within 5 seconds after programming a
new HomeLink®button, both of Home-
Link ’s garage door status indicators will
flash rapidly green indicating that the
garage door two-way communication has
been enabled. If your garage door status
indicators flashed, two-way communica-
tion programming is complete.
If the garage door status indicators do not
flash, additional HomeLink
®information
and programming videos can be found
Instruments and controls/Mirrors
–CONTINUED –3-79
Page 235 of 610

Instruments and controls/Mirrors
online at www.HomeLink.com and
www.youtube.com/HomeLinkGentex.!Using Two-Way Communication
1) Status Indicator
Recall and display (at any time) the last
recorded garage door status message
communicated to HomeLink
®by simulta-
neously pressing HomeLink®buttons 1
and 2 for 2 seconds. HomeLink®will
display the last recorded status for 3
seconds.
If two-way communication programming is
successful, HomeLink
®will display the
status of your garage door opener with
arrow indicators (see below).
1) Garage Door Opener CLOSING (Blink- ing Orange)
2) Garage Door Opener CLOSED (Solid Green)
3) Garage Door Opener OPENING (Blink- ing Orange)
4) Garage Door Opener OPENED (Solid Green)
!Certification
In the event that there are still program-
ming difficulties or questions, additional
HomeLink
®information and programming
videos can be found at
www.HomeLink.com,
www.youtube.com/HomeLinkGentex, or
by calling the toll-free HomeLink-hotline
at 1-800-355-3515. .
U.S.-spec. models
FCC ID: NZLAECHL5
CAUTION
FCC WARNING
Changes or modifications not ex-
pressly approved by the party re-
sponsible for compliance could void
the user ’s authority to operate the
equipment.
This device complies with part 15 of the
FCC Rules. Operation is subject to the
following two conditions: (1) This de-
vice may not cause harmful interfer-
ence, and (2) this device must accept
any interference received, including
interference that may cause undesired
operation.
3-80