2017 SUBARU FORESTER Top display
[x] Cancel search: Top displayPage 268 of 634
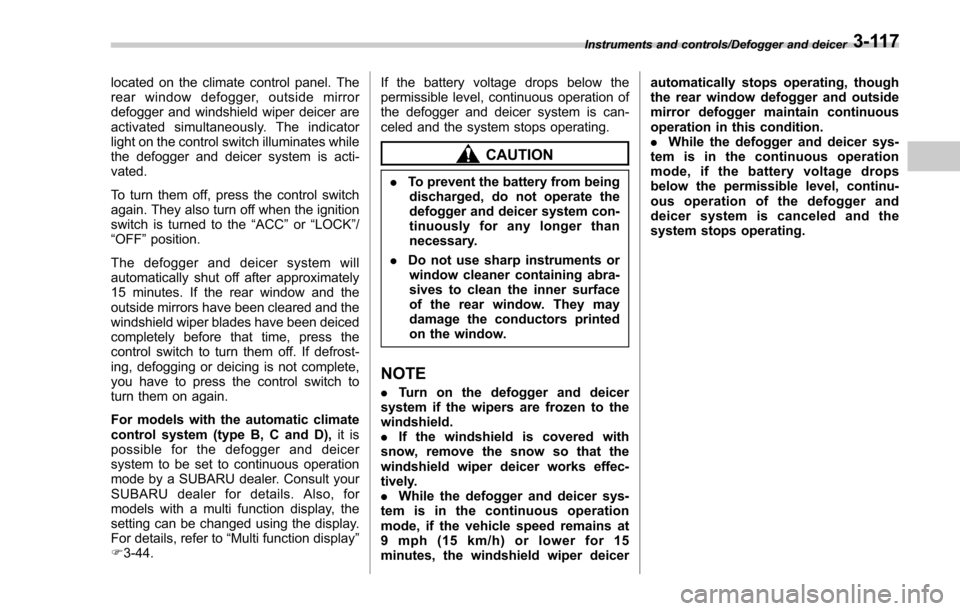
located on the climate control panel. The
rear window defogger, outside mirror
defogger and windshield wiper deicer are
activated simultaneously. The indicator
light on the control switch illuminates while
the defogger and deicer system is acti-
vated.
To turn them off, press the control switch
again. They also turn off when the ignition
switch is turned to the“ACC”or “LOCK” /
“ OFF ”position.
The defogger and deicer system will
automatically shut off after approximately
15 minutes. If the rear window and the
outside mirrors have been cleared and the
windshield wiper blades have been deiced
completely before that time, press the
control switch to turn them off. If defrost-
ing, defogging or deicing is not complete,
you have to press the control switch to
turn them on again.
For models with the automatic climate
control system (type B, C and D), it is
possible for the defogger and deicer
system to be set to continuous operation
mode by a SUBARU dealer. Consult your
SUBARU dealer for details. Also, for
models with a multi function display, the
setting can be changed using the display.
For details, refer to “Multi function display ”
F 3-44. If the battery voltage drops below the
permissible level, continuous operation of
the defogger and deicer system is can-
celed and the system stops operating.
CAUTION
.
To prevent the battery from being
discharged, do not operate the
defogger and deicer system con-
tinuously for any longer than
necessary.
. Do not use sharp instruments or
window cleaner containing abra-
sives to clean the inner surface
of the rear window. They may
damage the conductors printed
on the window.
NOTE
. Turn on the defogger and deicer
system if the wipers are frozen to the
windshield.
. If the windshield is covered with
snow, remove the snow so that the
windshield wiper deicer works effec-
tively.
. While the defogger and deicer sys-
tem is in the continuous operation
mode, if the vehicle speed remains at
9 mph (15 km/h) or lower for 15
minutes, the windshield wiper deicer automatically stops operating, though
the rear window defogger and outside
mirror defogger maintain continuous
operation in this condition.
.
While the defogger and deicer sys-
tem is in the continuous operation
mode, if the battery voltage drops
below the permissible level, continu-
ous operation of the defogger and
deicer system is canceled and the
system stops operating.
Instruments and controls/Defogger and deicer3-117
Page 281 of 634
Climate control/Manual climate control operation
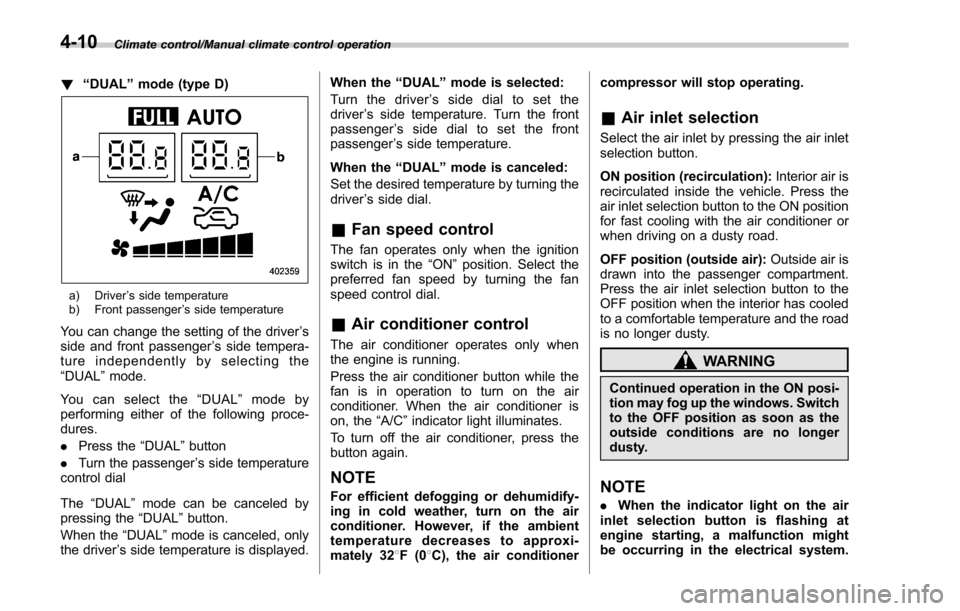
!“DUAL ”mode (type D)
a) Driver ’s side temperature
b) Front passenger ’s side temperature
You can change the setting of the driver ’s
side and front passenger ’s side tempera-
ture independently by selecting the
“DUAL ”mode.
You can select the “DUAL ”mode by
performing either of the following proce-
dures.
. Press the “DUAL”button
. Turn the passenger ’s side temperature
control dial
The “DUAL ”mode can be canceled by
pressing the “DUAL”button.
When the “DUAL”mode is canceled, only
the driver ’s side temperature is displayed. When the
“DUAL ”mode is selected:
Turn the driver ’s side dial to set the
driver ’s side temperature. Turn the front
passenger ’s side dial to set the front
passenger ’s side temperature.
When the “DUAL ”mode is canceled:
Set the desired temperature by turning the
driver ’s side dial.
& Fan speed control
The fan operates only when the ignition
switch is in the “ON”position. Select the
preferred fan speed by turning the fan
speed control dial.
& Air conditioner control
The air conditioner operates only when
the engine is running.
Press the air conditioner button while the
fan is in operation to turn on the air
conditioner. When the air conditioner is
on, the “A/C ”indicator light illuminates.
To turn off the air conditioner, press the
button again.
NOTE
For efficient defogging or dehumidify-
ing in cold weather, turn on the air
conditioner. However, if the ambient
temperature decreases to approxi-
mately 32 8F(0 8C), the air conditioner compressor will stop operating.
&
Air inlet selection
Select the air inlet by pressing the air inlet
selection button.
ON position (recirculation): Interior air is
recirculated inside the vehicle. Press the
air inlet selection button to the ON position
for fast cooling with the air conditioner or
when driving on a dusty road.
OFF position (outside air): Outside air is
drawn into the passenger compartment.
Press the air inlet selection button to the
OFF position when the interior has cooled
to a comfortable temperature and the road
is no longer dusty.
WARNING
Continued operation in the ON posi-
tion may fog up the windows. Switch
to the OFF position as soon as the
outside conditions are no longer
dusty.
NOTE
. When the indicator light on the air
inlet selection button is flashing at
engine starting, a malfunction might
be occurring in the electrical system.
4-10
Page 311 of 634
Audio/Audio set
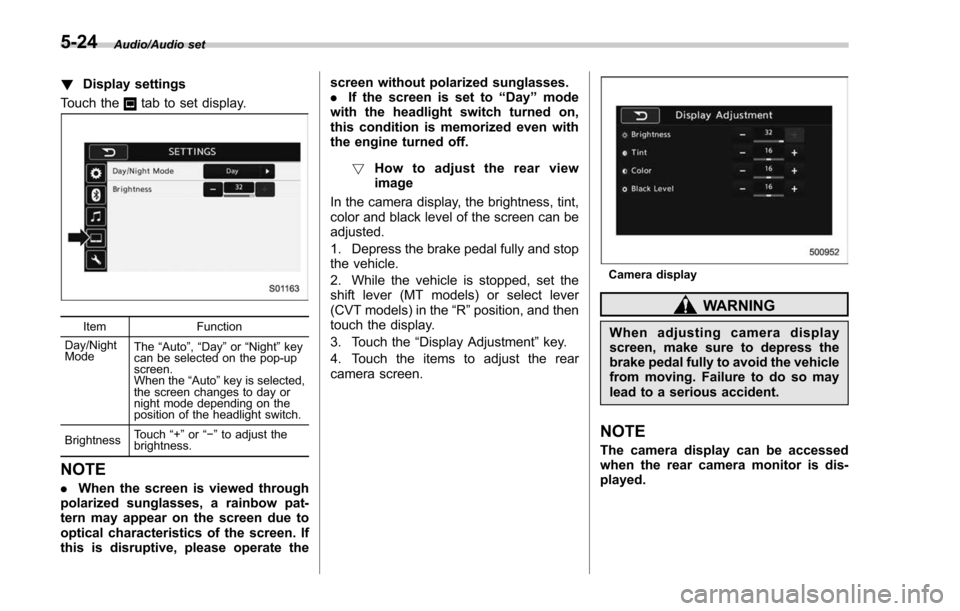
!Display settings
Touch the
tab to set display.
Item Function
Day/Night
Mode The
“Auto ”, “Day ”or “Night ”key
can be selected on the pop-up
screen.
When the “Auto ”key is selected,
the screen changes to day or
night mode depending on the
position of the headlight switch.
Brightness Touch
“+” or“−” to adjust the
brightness.
NOTE
. When the screen is viewed through
polarized sunglasses, a rainbow pat-
tern may appear on the screen due to
optical characteristics of the screen. If
this is disruptive, please operate the screen without polarized sunglasses.
.
If the screen is set to “Day”mode
with the headlight switch turned on,
this condition is memorized even with
the engine turned off.
! How to adjust the rear view
image
In the camera display, the brightness, tint,
color and black level of the screen can be
adjusted.
1. Depress the brake pedal fully and stop
the vehicle.
2. While the vehicle is stopped, set the
shift lever (MT models) or select lever
(CVT models) in the “R”position, and then
touch the display.
3. Touch the “Display Adjustment ”key.
4. Touch the items to adjust the rear
camera screen.
Camera display
WARNING
When adjusting camera display
screen, make sure to depress the
brake pedal fully to avoid the vehicle
from moving. Failure to do so may
lead to a serious accident.
NOTE
The camera display can be accessed
when the rear camera monitor is dis-
played.
5-24
Page 314 of 634
&AM/FM radio
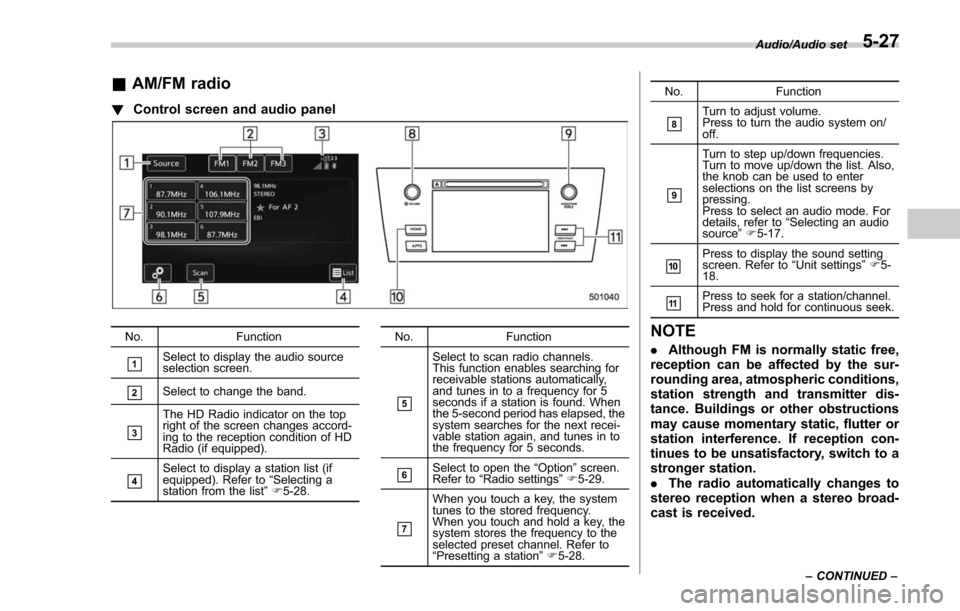
! Control screen and audio panel
No. Function
&1Select to display the audio source
selection screen.
&2Select to change the band.
&3
The HD Radio indicator on the top
right of the screen changes accord-
ing to the reception condition of HD
Radio (if equipped).
&4Select to display a station list (if
equipped). Refer to“Selecting a
station from the list ”F 5-28. No. Function
&5
Select to scan radio channels.
This function enables searching for
receivable stations automatically,
and tunes in to a frequency for 5
seconds if a station is found. When
the 5-second period has elapsed, the
system searches for the next recei-
vable station again, and tunes in to
the frequency for 5 seconds.
&6Select to open the
“Option ”screen.
Refer to “Radio settings ”F 5-29.
&7
When you touch a key, the system
tunes to the stored frequency.
When you touch and hold a key, the
system stores the frequency to the
selected preset channel. Refer to
“Presetting a station ”F 5-28. No. Function
&8Turn to adjust volume.
Press to turn the audio system on/
off.
&9
Turn to step up/down frequencies.
Turn to move up/down the list. Also,
the knob can be used to enter
selections on the list screens by
pressing.
Press to select an audio mode. For
details, refer to
“Selecting an audio
source ”F 5-17.
&10Press to display the sound setting
screen. Refer to “Unit settings ”F 5-
18.
&11Press to seek for a station/channel.
Press and hold for continuous seek.
NOTE
. Although FM is normally static free,
reception can be affected by the sur-
rounding area, atmospheric conditions,
station strength and transmitter dis-
tance. Buildings or other obstructions
may cause momentary static, flutter or
station interference. If reception con-
tinues to be unsatisfactory, switch to a
stronger station.
. The radio automatically changes to
stereo reception when a stereo broad-
cast is received.
Audio/Audio set
–CONTINUED –5-27
Page 317 of 634
Audio/Audio set
AM and FM broadcast sound quality is
now crystal clear, with AM sound quality
that virtually matches FM quality of the
past, and FM broadcasts that have near
CD-level sound quality.
HD Radio Technology manufactured un-
der license from iBiquity Digital Corpora-
tion. Foreign Patents. HD Radio
TMand the
HD, HD Radio, and “Arc ”logos are
proprietary trademarks of iBiquity Digital
Corp.
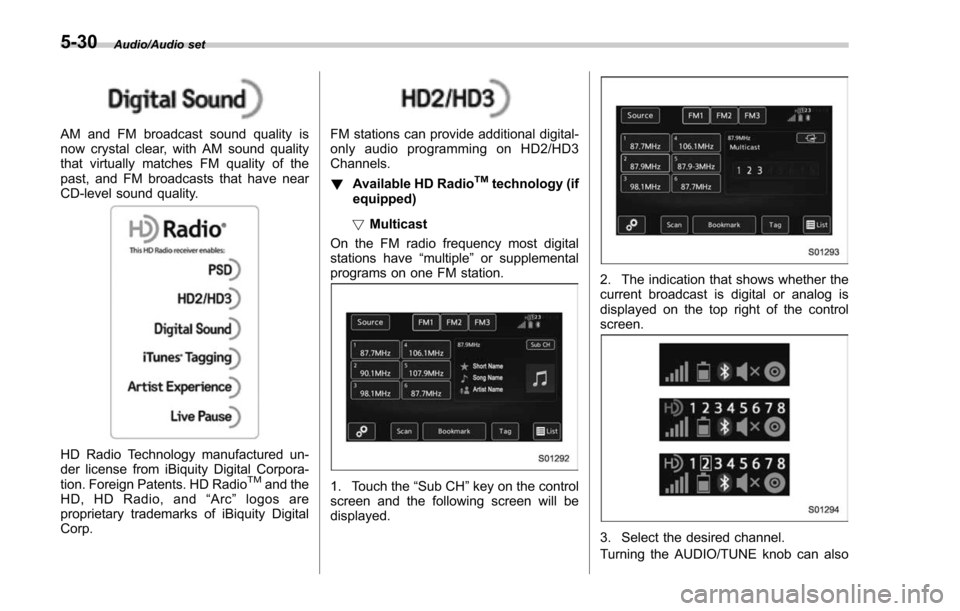
FM stations can provide additional digital-
only audio programming on HD2/HD3
Channels.
! Available HD Radio
TMtechnology (if
equipped)
! Multicast
On the FM radio frequency most digital
stations have “multiple”or supplemental
programs on one FM station.
1. Touch the “Sub CH”key on the control
screen and the following screen will be
displayed.
2. The indication that shows whether the
current broadcast is digital or analog is
displayed on the top right of the control
screen.
3. Select the desired channel.
Turning the AUDIO/TUNE knob can also
5-30
Page 333 of 634
Audio/Audio set
–Outside wireless communication
range, such as some countryside
areas
– Where the wireless communica-
tion network is congested, or where
communications are restricted
. Depending on the circumstances
and environment, the signal may be
weak or not be received. In such cases,
an error may occur.
. Top 35 entries in the preset station
list on the smartphone are displayed.
When there are more than 35 entries in
the preset station list, change the order
of the entries in the list on the smart-
phone. You can change the priority of
your preset stations within the aha
application (after disconnected from
this system) to modify the station list
shown on the screen. Please see your
smartphone aha application “Edit Pre-
sets (in Main menu) ”to modify this list.
. For operating the smartphone, see
the instruction manual that comes with
it.
. If there are multiple music files
stored on your iPhone or iPod touch,
it may take some time until playback
starts.
. Playback may be intermittent when
you switch to streaming Bluetooth
audio from aha on your smartphone device.
.
When connecting the device via
Bluetooth, the communication speed
may become slower than via USB.
! Before using aha application
In order to use the aha application on this
system, the application must be installed
on the smartphone.
! Settings required to use aha
application
. Search and download the aha applica-
tion from your smartphone app store.
–iPhone and iPod touch: Apple App
Store via iTunes
– Android device: Google Play Store
. Create an account and login to the aha
application on the smartphone.
NOTE
Please use the latest version of the aha
application.
!About app-based connected con-
tent
Requirements for using the connected
content services of the aha application
on this system.
. Latest version of the system is compa-
tible with connected content application(s)
for the smartphone, available from aha, downloaded to your smartphone.
.
A current account with a wireless
content service provider.
. A smartphone data plan: If the data
plan for your smartphone does not provide
for unlimited data usage, additional
charges from your carrier may apply for
accessing app-based connected content
via 3G, 4G, Wi-Fi or 4G LTE wireless
networks.
. Connection to the internet via 3G, 4G,
Wi-Fi or 4G LTE networks.
NOTE
. Changes to product specifications
may result in differences between the
content of the manual and features of
the product.
. Be careful not to exceed the data
usage limits for your smartphone.
Doing so will result in additional data
usage charges from your phone car-
rier.
. Access to app-based connected
content will depend on the availability
of wireless cell and/or Wi-Fi network
coverage for the purpose of allowing
your smartphone to connect to the
internet.
. Service availability may be geogra-
phically limited by region. Consult the
wireless connected content service
5-46
Page 335 of 634
Audio/Audio set
necting an Android device: Refer to
“Registering/connecting Bluetooth®
device ”F 5-65.
NOTE
When iPhone/iPod touch and Android
devices are connected at the same
time, iPhone/iPod touch is prioritized.
! How to change the source
. Select the “aha”key on the source
select screen. Refer to “Basic operation ”
F 5-17.
. Select the “aha”key on the APPS
screen. Refer to “SUBARU STARLINK ”
F 5-25.
NOTE
When starting-up “aha ”,thereare
some smartphone models for which
“ aha ”application does not start up
automatically. !
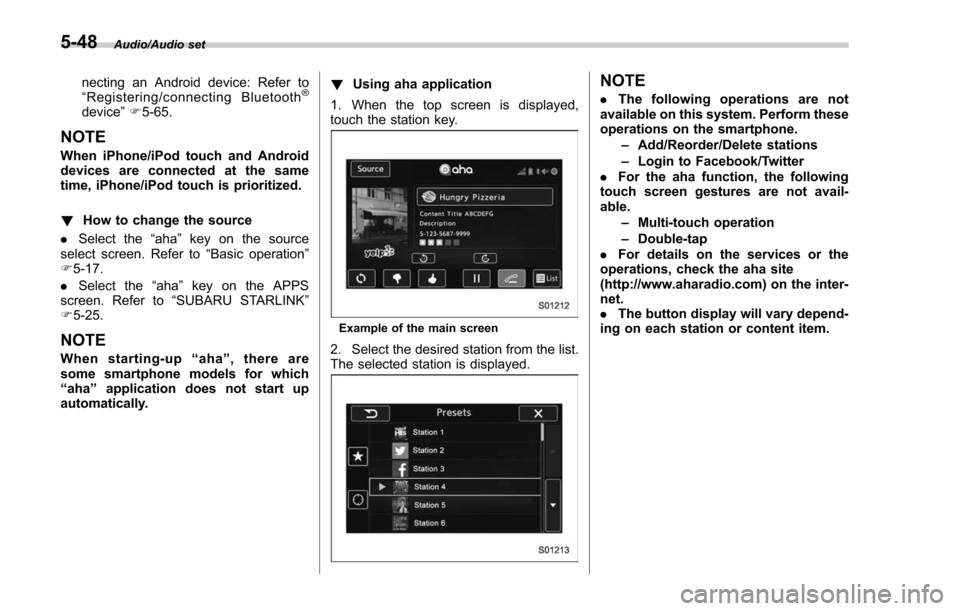
Using aha application
1. When the top screen is displayed,
touch the station key.
Example of the main screen
2. Select the desired station from the list.
The selected station is displayed.
NOTE
. The following operations are not
available on this system. Perform these
operations on the smartphone.
–Add/Reorder/Delete stations
– Login to Facebook/Twitter
. For the aha function, the following
touch screen gestures are not avail-
able.
–Multi-touch operation
– Double-tap
. For details on the services or the
operations, check the aha site
(http://www.aharadio.com) on the inter-
net.
. The button display will vary depend-
ing on each station or content item.
5-48
Page 338 of 634
NOTE
When starting-up Pandora, there are
some smartphone models for which
Pandora application does not start up
automatically.
!Registering Bookmarks
You can register the music and artist now
being played in Bookmark.
1. Touch the
tab.
2. Select the desired key. The following
items are appeared on the screen.
Item Function
Track When selected after the Book-
mark key is pressed, the current
track is bookmarked.
Artist When selected after the Book-
mark key is pressed, the current
artist is bookmarked.
Cancel Select to cancel the bookmark
operation.
!
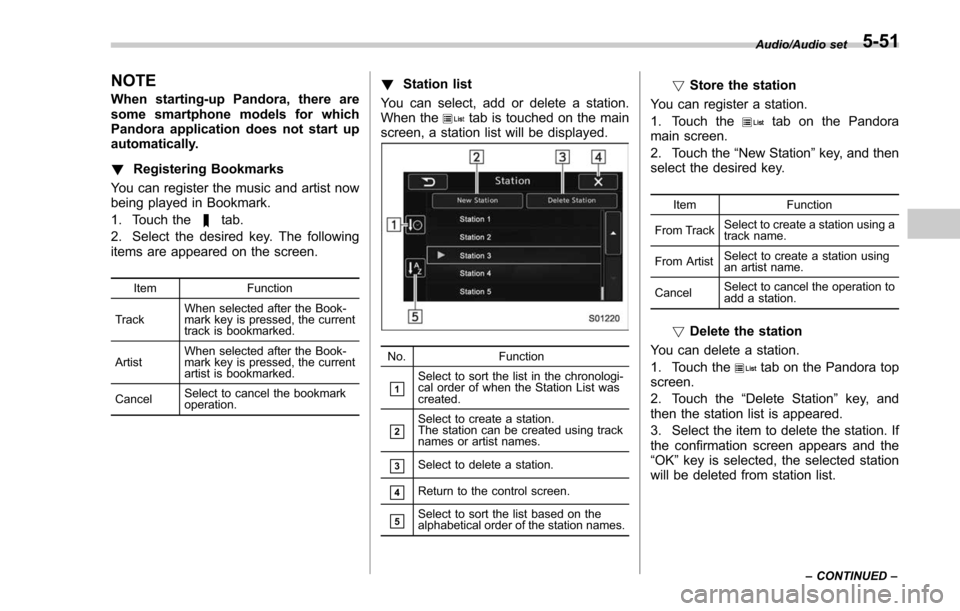
Station list
You can select, add or delete a station.
When the
tab is touched on the main
screen, a station list will be displayed.
No. Function
&1Select to sort the list in the chronologi-
cal order of when the Station List was
created.
&2Select to create a station.
The station can be created using track
names or artist names.
&3Select to delete a station.
&4Return to the control screen.
&5Select to sort the list based on the
alphabetical order of the station names.
!Store the station
You can register a station.
1. Touch the
tab on the Pandora
main screen.
2. Touch the “New Station”key, and then
select the desired key.
Item Function
From Track Select to create a station using a
track name.
From Artist Select to create a station using
an artist name.
Cancel Select to cancel the operation to
add a station.
!
Delete the station
You can delete a station.
1. Touch the
tab on the Pandora top
screen.
2. Touch the “Delete Station ”key, and
then the station list is appeared.
3. Select the item to delete the station. If
the confirmation screen appears and the
“OK ”key is selected, the selected station
will be deleted from station list.
Audio/Audio set
–CONTINUED –5-51