2017 SUBARU FORESTER odometer
[x] Cancel search: odometerPage 162 of 634

position.
The trip meter shows the distance that the
vehicle has been driven since you last set
it to zero.
If you press the trip knob when the ignition
switch is in the“LOCK”/ “OFF”or “ACC ”
position, the odometer/trip meter will light
up. It is possible to switch between the A
trip meter and B trip meter indications
while the odometer/trip meter is lit up. If
you do not press the trip knob within 10
seconds of illumination of the odometer/
trip meter, the odometer/trip meter will turn
off.
Also, if you open and close the driver ’s
door within 10 seconds of illumination of
the odometer/trip meter, the odometer/trip
meter will turn off.
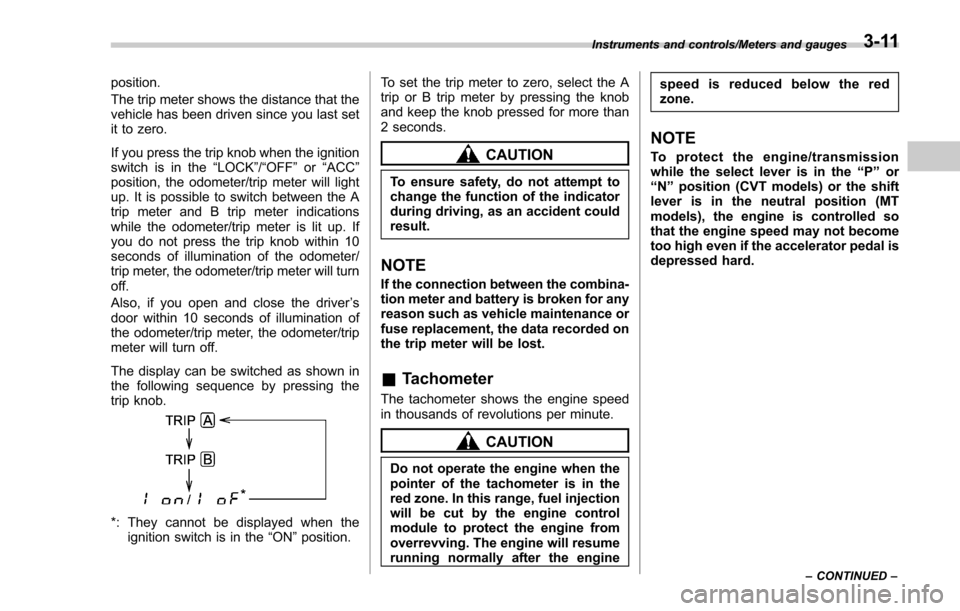
The display can be switched as shown in
the following sequence by pressing the
trip knob.
*: They cannot be displayed when the ignition switch is in the “ON ”position. To set the trip meter to zero, select the A
trip or B trip meter by pressing the knob
and keep the knob pressed for more than
2 seconds.
CAUTION
To ensure safety, do not attempt to
change the function of the indicator
during driving, as an accident could
result.
NOTE
If the connection between the combina-
tion meter and battery is broken for any
reason such as vehicle maintenance or
fuse replacement, the data recorded on
the trip meter will be lost.
&
Tachometer
The tachometer shows the engine speed
in thousands of revolutions per minute.
CAUTION
Do not operate the engine when the
pointer of the tachometer is in the
red zone. In this range, fuel injection
will be cut by the engine control
module to protect the engine from
overrevving. The engine will resume
running normally after the engine speed is reduced below the red
zone.
NOTE
To protect the engine/transmission
while the select lever is in the
“P ” or
“ N ” position (CVT models) or the shift
lever is in the neutral position (MT
models), the engine is controlled so
that the engine speed may not become
too high even if the accelerator pedal is
depressed hard.
Instruments and controls/Meters and gauges
–CONTINUED –3-11
Page 191 of 634

Instruments and controls/Multi information display (models with type B combination meter)
5) Select lever/gear position indicator (refer to“Select lever/gear position indicator
(CVT models) ”F 3-31.)
6) Odometer (refer to “Odometer ”F 3-10.)/
double trip meter (refer to “Double trip
meter ”F 3-10.)
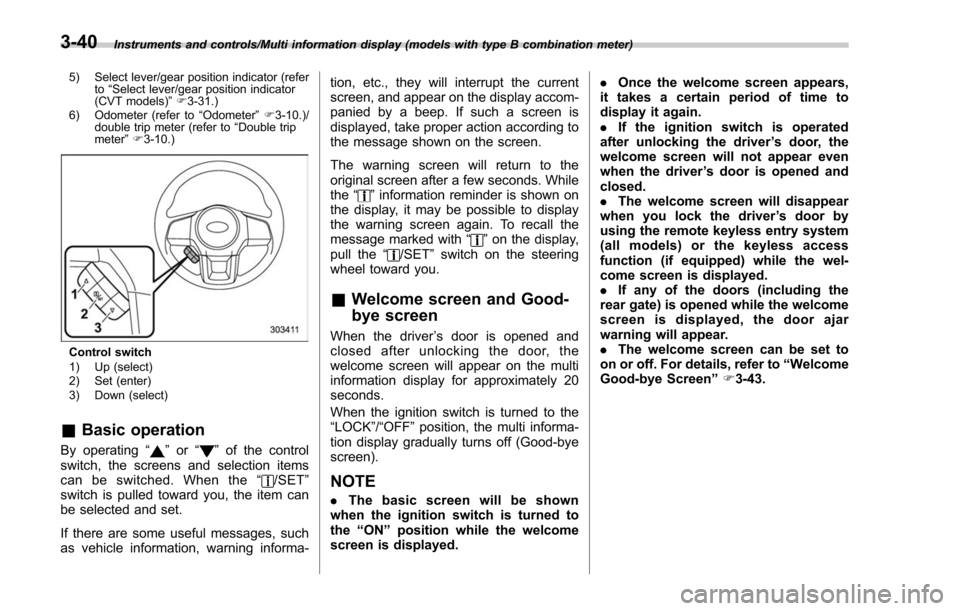
Control switch
1) Up (select)
2) Set (enter)
3) Down (select)
& Basic operation
By operating “”or “”of the control
switch, the screens and selection items
can be switched. When the “
/SET”
switch is pulled toward you, the item can
be selected and set.
If there are some useful messages, such
as vehicle information, warning informa- tion, etc., they will interrupt the current
screen, and appear on the display accom-
panied by a beep. If such a screen is
displayed, take proper action according to
the message shown on the screen.
The warning screen will return to the
original screen after a few seconds. While
the
“
”information reminder is shown on
the display, it may be possible to display
the warning screen again. To recall the
message marked with “
”on the display,
pull the “/SET”switch on the steering
wheel toward you.
& Welcome screen and Good-
bye screen
When the driver ’s door is opened and
closed after unlocking the door, the
welcome screen will appear on the multi
information display for approximately 20
seconds.
When the ignition switch is turned to the
“LOCK”/ “OFF ”position, the multi informa-
tion display gradually turns off (Good-bye
screen).
NOTE
. The basic screen will be shown
when the ignition switch is turned to
the “ON ”position while the welcome
screen is displayed. .
Once the welcome screen appears,
it takes a certain period of time to
display it again.
. If the ignition switch is operated
after unlocking the driver ’s door, the
welcome screen will not appear even
when the driver ’s door is opened and
closed.
. The welcome screen will disappear
when you lock the driver ’s door by
using the remote keyless entry system
(all models) or the keyless access
function (if equipped) while the wel-
come screen is displayed.
. If any of the doors (including the
rear gate) is opened while the welcome
screen is displayed, the door ajar
warning will appear.
. The welcome screen can be set to
on or off. For details, refer to “Welcome
Good-bye Screen ”F 3-43.
3-40
Page 482 of 634

Driving tips for AWD models
WARNING
.Always maintain a safe driving
speed according to the road and
weather conditions in order to
avoid having an accident on a
sharp turn, during sudden brak-
ing or under other similar condi-
tions.
. Always use the utmost care in
driving –overconfidence be-
cause you are driving an All-
Wheel Drive vehicle could easily
lead to a serious accident.
. When replacing or installing tire
(s), all four tires must be the
same for the following items.
(a) Size
(b) Circumference
(c) Speed symbol
(d) Load index
(e) Construction
(f) Manufacturer
(g) Brand (tread pattern)
(h) Degrees of wear
For the items (a) to (d), you must
obey the specification that is printed on the tire placard. The
tire placard is located on the
bottom of driver
’s door pillar.
If all of four tires are not the same
in items (a) to (h), it may lead to
serious mechanical damage to
the drive train of your car and
affect the following factors.
— Ride
— Handling
— Braking
— Speedometer/Odometer
calibration
— Clearance between the body
and tires
It also may be dangerous and
lead to loss of vehicle control,
and it can lead to an accident.
CAUTION
If you use a temporary spare tire to
replace a flat tire, be sure to use the
original temporary spare tire stored
in the vehicle. Using other sizes may
result in severe mechanical damage
to the drive train of your vehicle.
All-Wheel Drive distributes the engine
power to all four wheels. AWD models
provide better traction when driving on
slippery, wet or snow-covered roads and
when moving out of mud, dirt and sand.
By shifting power between the front and
rear wheels, SUBARU AWD can also
provide added traction during acceleration
and added engine braking force during
deceleration.
Therefore, your SUBARU AWD vehicle
may handle differently than an ordinary
two wheel drive vehicle and it contains
some features unique to AWD. For safety
purposes as well as to avoid damaging
the AWD system, you should keep the
following tips in mind.
. An AWD model is better able to climb
steeper roads under snowy or slippery
Driving tips/Driving tips for AWD models
–CONTINUED –8-5
Page 488 of 634

CAUTION
During high-speed driving, non-
freezing type wiper blades may not
perform as well as standard wiper
blades. If this happens, reduce the
vehicle speed.
NOTE
When the season requiring non-freez-
ing type wiper blades is over, replace
them with standard wiper blades.
&Corrosion protection
Refer to “Corrosion protection ”F 10-4.
& Snow tires
WARNING
. When replacing or installing tire
(s), all four tires must be the
same for the following items.
(a) Size
(b) Circumference
(c) Speed symbol
(d) Load index
(e) Construction
(f) Manufacturer (g) Brand (tread pattern)
(h) Degrees of wear
For the items (a) to (d), you must
obey the specification that is
printed on the tire placard. The
tire placard is located on the
bottom of driver
’s door pillar.
If all of four tires are not the same
in items (a) to (h), it may lead to
serious mechanical damage to
the drive train of your car and
affect the following factors.
— Ride
— Handling
— Braking
— Speedometer/Odometer
calibration
— Clearance between the body
and tires
It also may be dangerous and
lead to loss of vehicle control,
and it can lead to an accident.
. Do not use a combination of
radial, belted bias or bias tires
since it may cause dangerous
handling characteristics and lead
to an accident.
Your vehicle is equipped with “all season
tires ”as original equipment, which are designed to provide an adequate measure
of traction, handling and braking perfor-
mance in year-round driving. In winter, it
may be possible to enhance performance
through use of tires designed specifically
for winter driving conditions.
When you choose to install winter tires on
your vehicle, be sure to use the correct tire
size and type. You must install four winter
tires that are of the same size, construc-
tion, brand and load range and you should
never mix radial, belted bias or bias tires
since this may result in dangerous hand-
ling characteristics. When you choose a
tire, make sure that there is enough
clearance between the tire and vehicle
body.
Remember to drive with care at all times
regardless of the type of tires on your
vehicle.&
Tire chains
CAUTION
Tire chains cannot be used on your
vehicle because of the lack of
clearance between the tires and
vehicle body.
Driving tips/Winter driving
–CONTINUED –8-11
Page 560 of 634

Tire wear varies from wheel to wheel.
Move the tires to the positions shown in
the illustration each time they are rotated.
For the tire rotation schedule, refer to the
“Warranty and Maintenance Booklet”.
Replace any damaged or unevenly worn
tires at the time of rotation. After tire
rotation, adjust the tires pressures and
make sure the wheel nuts are correctly
tightened.
After driving approximately 600 miles
(1,000 km), check the wheel nuts again
and retighten any nut that has become
loose.
& Tire replacement
The wheels and tires are important and
integral parts of your vehicle’ s design;
they cannot be changed arbitrarily. The
tires fitted as standard equipment are
optimally matched to the characteristics
of the vehicle and were selected to give
the best possible combination of running
performance, ride comfort, and service
life. It is essential for every tire to have a
size and construction matching those
shown on the tire placard and to have a
speed symbol and load index matching
those shown on the tire placard.
Using tires of a non-specified size detracts from controllability, ride comfort, braking
performance, speedometer accuracy and
odometer accuracy. It also creates incor-
rect body-to-tire clearances and inappro-
priately changes the vehicle
’s ground
clearance.
All four tires must be the same in terms of
manufacturer, brand (tread pattern), con-
struction, and size. You are advised to
replace the tires with new ones that are
identical to those fitted as standard equip-
ment.
For safe vehicle operation, SUBARU
recommends replacing all four tires at
the same time.WARNING
. When replacing or installing tire
(s), all four tires must be the
same for the following items.
(a) Size
(b) Circumference
(c) Speed symbol
(d) Load index
(e) Construction
(f) Manufacturer
(g) Brand (tread pattern)
(h) Degrees of wear For the items (a) to (d), you must
obey the specification that is
printed on the tire placard. The
tire placard is located on the
bottom of driver
’s door pillar.
If all of four tires are not the same
in items (a) to (h), it may lead to
serious mechanical damage to
the drive train of your car and
affect the following factors.
— Ride
— Handling
— Braking
— Speedometer/Odometer
calibration
— Clearance between the body
and tires
It also may be dangerous and
lead to loss of vehicle control,
and it can lead to an accident.
. Use only radial tires. Do not use
radial tires together with belted
bias tires and/or bias-ply tires.
Doing so can dangerously re-
duce controllability, resulting in
an accident.
Maintenance and service/Tires and wheels
–CONTINUED –11-29
Page 623 of 634

14-8Index
Mirror defogger......................................................... 3-116
Mirrors .................................................................... 3-107
Moonroof .................................................................. 2-45
Multi function display .................................................. 3-44
Multi information display .............................................. 3-39
N
New vehicle break-in driving .......................................... 8-2
O
Odometer .................................................................. 3-10
Oil filter .................................................................... 11-11
Oil level
Engine ................................................................. 11-10
Front differential gear ............................................ 11-17
Manual transmission .............................................. 11-17
Rear differential gear ............................................. 11-17
Warning light ......................................................... 3-18
Oil pressure warning light ............................................ 3-18
On-road and off-road driving ...................................... 8, 8-6
Outside Mirror defogger ..................................................... 3-116
Mirrors ................................................................. 3-115
Temperature indicator ..................................... 3-34, 3-49
Overhead console ........................................................ 6-7
Overheating engine .................................................... 9-12
P
Parking Brake ................................................................... 7-47
Brake stroke ......................................................... 11-23 Tips ...................................................................... 7-48
Periodic inspections ..................................................... 8-4
Petrol fuel ................................................................... 7-3
PIN Code Access ....................................................... 2-19
Power Door locking switch .................................................. 2-8
Outlets ................................................................... 6-9
Outside mirrors .................................................... 3-115
Rear gate ...................................................... 2-39, 9-19
Seat ....................................................................... 1-5
Steering ................................................................ 7-34
Steering warning light .............................................. 3-23
Precautions against vehicle modification ................ 1-29, 1-72
Preparing to drive ........................................................ 7-8
Push-button Ignition switch ......................................................... 3-6
Starting and stopping engine .................................... 7-12
R
RCTA........................................................................\
7-59
Rear Combination lights ................................................ 11-42
Differential gear oil ........................................ 11-17, 12-7
Gate ............................................................. 2-38, 9-18
Turn signal light .................................................... 11-42
Rear seat .................................................................. 1-11
Folding down ......................................................... 1-13
Head restraint adjustment ........................................ 1-12
Heater ................................................................... 1-10
Reclining ............................................................... 1-15
Rear view camera ......................................................
6-17