Page 83 of 334
Navigation 81
Read First
Navigation Menu
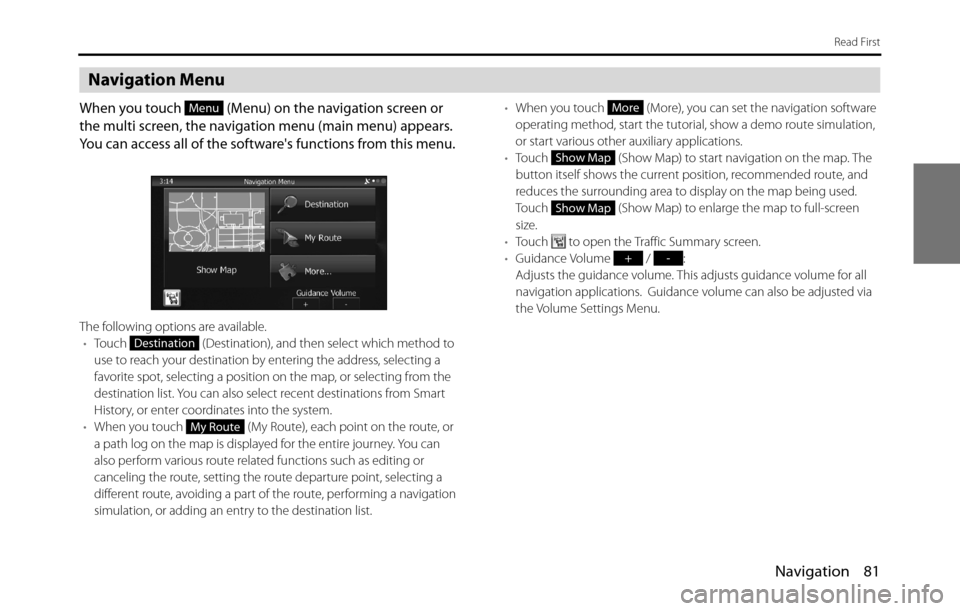
When you touch (Menu) on the navigation screen or
the multi screen, the navigation menu (main menu) appears.
You can access all of the software's functions from this menu.
The following options are available.
•Touch (Destination), and then select which method to
use to reach your destination by entering the address, selecting a
favorite spot, selecting a position on the map, or selecting from the
destination list. You can also select recent destinations from Smart
History, or enter coordinates into the system.
•When you touch (My Route), each point on the route, or
a path log on the map is displayed for the entire journey. You can
also perform various route related functions such as editing or
canceling the route, setting the route departure point, selecting a
different route, avoiding a part of the route, performing a navigation
simulation, or adding an entry to the destination list.•When you touch (More), you can set the navigation software
operating method, start the tutorial, show a demo route simulation,
or start various other auxiliary applications.
•Touch (Show Map) to start navigation on the map. The
button itself shows the current position, recommended route, and
reduces the surrounding area to display on the map being used.
Touch (Show Map) to enlarge the map to full-screen
size.
•Touch to open the Traffic Summary screen.
•Guidance Volume / :
Adjusts the guidance volume. This adjusts guidance volume for all
navigation applications. Guidance volume can also be adjusted via
the Volume Settings Menu.
Menu
Destination
My Route
More
Show Map
Show Map
+-
Page 84 of 334
82 Navigation
Read First
On-screen Buttons and Other buttons
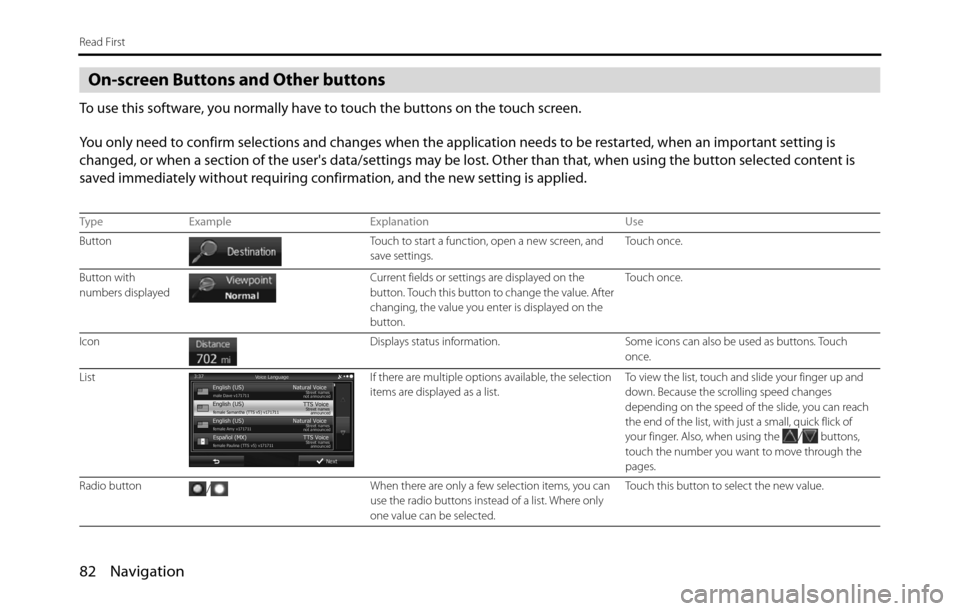
To use this software, you normally have to touch the buttons on the touch screen.
You only need to confirm selections and changes when the application needs to be restarted, when an important setting is
changed, or when a section of the user's data/settings may be lost. Other than that, when using the button selected content is
saved immediately without requiring confirmation, and the new setting is applied.
Type Example Explanation Use
Button Touch to start a function, open a new screen, and
save settings.Touch once.
Button with
numbers displayed Current fields or settings are displayed on the
button. Touch this button to change the value. After
changing, the value you enter is displayed on the
button.Touch once.
Icon Displays status information. Some icons can also be used as buttons. Touch
once.
List If there are multiple options available, the selection
items are displayed as a list.To view the list, touch and slide your finger up and
down. Because the scrolling speed changes
depending on the speed of the slide, you can reach
the end of the list, with just a small, quick flick of
your finger. Also, when using the
/ buttons,
touch the number you want to move through the
pages.
Radio button
/When there are only a few selection items, you can
use the radio buttons instead of a list. Where only
one value can be selected.Touch this button to select the new value.
Page 85 of 334
Navigation 83
Read First
Check Box
/If there are only two choices available, you can
enable or disable the function by entering a check
mark.Touch to turn the switch On or Off.
Virtual keyboard Keyboard for entering text and numbers. Each key represents a button on the touch screen. Type Example Explanation Use
Page 86 of 334
84 Navigation
Read First
Using the Keyboard
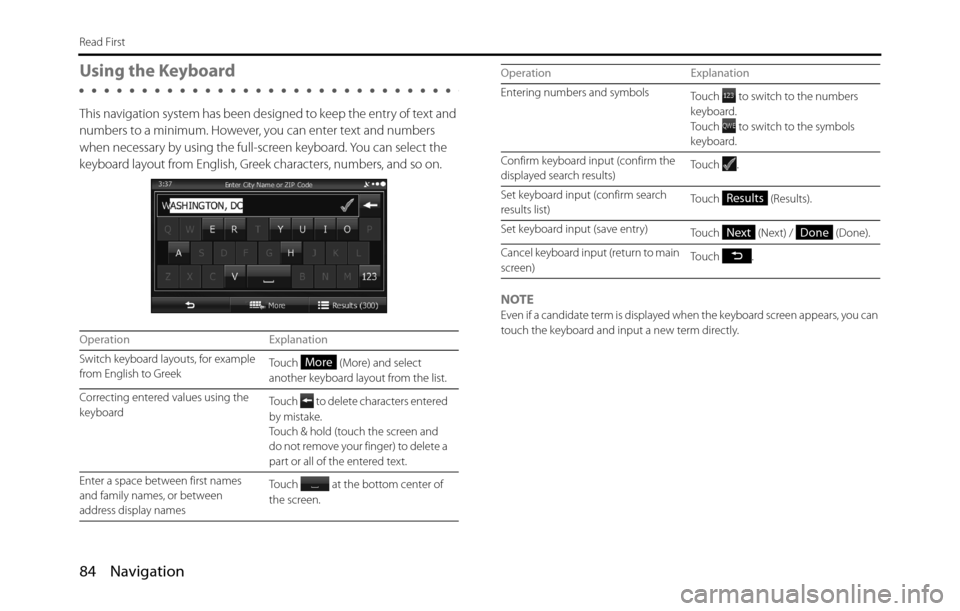
This navigation system has been designed to keep the entry of text and
numbers to a minimum. However, you can enter text and numbers
when necessary by using the full-screen keyboard. You can select the
keyboard layout from English, Greek characters, numbers, and so on.
NOTE
Even if a candidate term is displayed when the keyboard screen appears, you can
touch the keyboard and input a new term directly.
Operation Explanation
Switch keyboard layouts, for example
from English to GreekTouch (More) and select
another keyboard layout from the list.
Correcting entered values using the
keyboardTouch to delete characters entered
by mistake.
Touch & hold (touch the screen and
do not remove your finger) to delete a
part or all of the entered text.
Enter a space between first names
and family names, or between
address display namesTouch at the bottom center of
the screen.
More
Entering numbers and symbols
Touch to switch to the numbers
keyboard.
Touch to switch to the symbols
keyboard.
Confirm keyboard input (confirm the
displayed search results)Touch .
Set keyboard input (confirm search
results list)Touch (Results).
Set keyboard input (save entry)
Touch (Next) / (Done).
Cancel keyboard input (return to main
screen)Touch . Operation Explanation
Results
NextDone
Page 87 of 334
Navigation 85
Read First
Screen Operations Other than Single Touch
Normally, you only need to touch the screen once (single touch) to
perform an operation. However, you can make use of convenient
functions by combining different touch operations on the touch
screen. The following touch combinations are available.
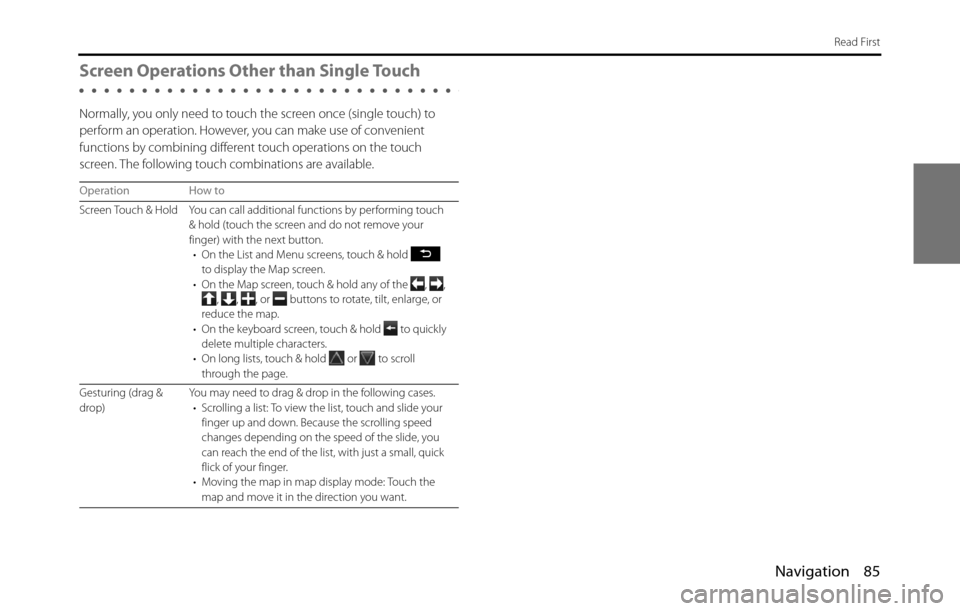
Operation How to
Screen Touch & Hold You can call additional functions by performing touch
& hold (touch the screen and do not remove your
finger) with the next button.
• On the List and Menu screens, touch & hold
to display the Map screen.
• On the Map screen, touch & hold any of the , ,
, , , or buttons to rotate, tilt, enlarge, or
reduce the map.
• On the keyboard screen, touch & hold
to quickly
delete multiple characters.
• On long lists, touch & hold
or to scroll
through the page.
Gesturing (drag &
drop)You may need to drag & drop in the following cases.
• Scrolling a list: To view the list, touch and slide your
finger up and down. Because the scrolling speed
changes depending on the speed of the slide, you
can reach the end of the list, with just a small, quick
flick of your finger.
• Moving the map in map display mode: Touch the
map and move it in the direction you want.
Page 88 of 334
86 Navigation
Read First
Map Screen
Navigating on the Map
In the navigation menu startup screen, the currently active map is
reduced and displayed in (Show Map).
To enlarge the map, touch (Show Map) to open the Map
screen.
This map shows the current position (shown as the vehicle marked as a
blue arrow), recommended routes (orange lines), and the immediate
surrounding area.
When GPS positioning is not active, the vehicle marker is clear. The
latest confirmed position is displayed. Colored spots are displayed on the circle around the satellite icon in the
top left corner. The more spots there are on the circle, the higher the
accuracy of the GPS positioning.
When GPS positioning is active, the vehicle marker is displayed in
full-color, and the current position is shown.
Show Map
Show Map
Page 89 of 334
Navigation 87
Read First
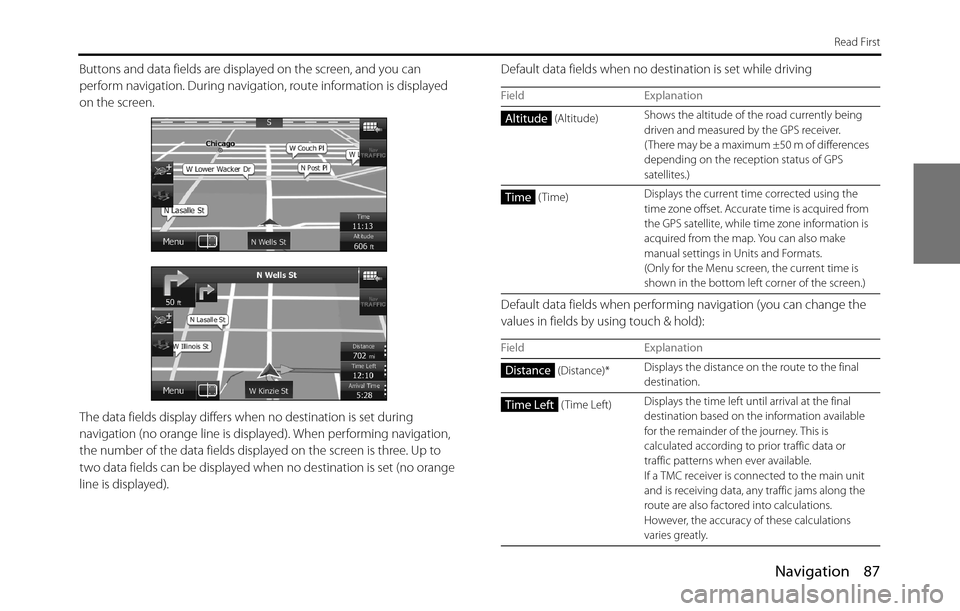
Buttons and data fields are displayed on the screen, and you can
perform navigation. During navigation, route information is displayed
on the screen.
The data fields display differs when no destination is set during
navigation (no orange line is displayed). When performing navigation,
the number of the data fields displayed on the screen is three. Up to
two data fields can be displayed when no destination is set (no orange
line is displayed). Default data fields when no destination is set while driving
Default data fields when performing navigation (you can change the
values in fields by using touch & hold):
Field Explanation
(Altitude)Shows the altitude of the road currently being
driven and measured by the GPS receiver.
( There may be a maximum ±50 m of differences
depending on the reception status of GPS
satellites.)
(Time)Displays the current time corrected using the
time zone offset. Accurate time is acquired from
the GPS satellite, while time zone information is
acquired from the map. You can also make
manual settings in Units and Formats.
(Only for the Menu screen, the current time is
shown in the bottom left corner of the screen.)
Field Explanation
(Distance)*Displays the distance on the route to the final
destination.
(Time Left)Displays the time left until arrival at the final
destination based on the information available
for the remainder of the journey. This is
calculated according to prior traffic data or
traffic patterns when ever available.
If a TMC receiver is connected to the main unit
and is receiving data, any traffic jams along the
route are also factored into calculations.
However, the accuracy of these calculations
varies greatly.
Altitude
Time
Distance
Time Left
Page 90 of 334
88 Navigation
Read First
* Time and distance to the destination cannot be displayed when your vehicle is
located in the place other than roads and Highways. After the vehicle returns
to a road or Highway, time and distance are displayed.
Position Marker
■Vehicle Marker and Lock-on-Road
If GPS positioning is available, the current position is shown using the
vehicle marker.
•When any vehicle is selected, the vehicle marker may not display an
accurate GPS position and direction of travel. If there is a road nearby,
the GPS positioning error is corrected based on the shortest distance
to the road to, and the direction of the icon is adjusted to match the
direction of the road.
■Selected map location (cursor)
Use one of the following methods to mark a map location.
•Touch the map during navigation.
•Touch the map when the destination you want is displayed in the
search results.
•Touch the map in “Find on Map”. (See Page 128.)
After selecting a map location, a cursor is displayed at the point
selected on the map. The cursor is displayed as a red point ( ) and can
be checked at all zoom levels.
You can use the cursor's position as the route's destination, search for
locations around the cursor, and save the position in the destination list.
(Arrival
Time)*Displays the estimated arrival time at the final
destination based on the information available
for the remainder of the journey. This is
calculated according to prior traffic data or
traffic patterns when ever available.
If a TMC receiver is connected to the main unit
and is receiving data, any traffic jams along the
route are also factored into calculations.
However, the accuracy of these calculations
varies greatly.
(Time)Displays the current time corrected using the
time zone offset. Accurate time is acquired from
the GPS satellite, while time zone information is
acquired from the map. You can also make
manual settings in Units and Formats.
(Only for the Menu screen, the current time is
shown in the bottom left corner of the screen.)
(Altitude)Shows the altitude of the road currently being
driven and measured by the GPS receiver.
( There may be a maximum ±50 m of differences
depending on the reception status of GPS
satellites.) Field ExplanationArrival Time
Time
Altitude