Page 9 of 28

Audio mode
Audio mode
R a
dio mode
Intr
oduction The radio system is supplied in different ver-
sion
s
depending on the country and model in
which it is installed and the vehicle equip-
ment. Some units are also equipped with a
DAB radio receiver ››› page 10. The control
overview shows the possible versions of the
equipment ›››
page 2. Note
● Be ar in mind th
at being underground, in
tunnels, in areas with tall buildings or moun-
tains can interfere with radio signals.
● Foil or metal-coated stickers attached to
the window
s may affect reception on vehicles
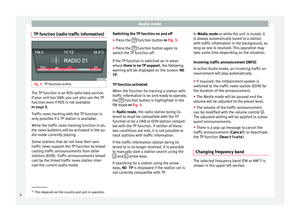
with a window aerial. RADIO main menu
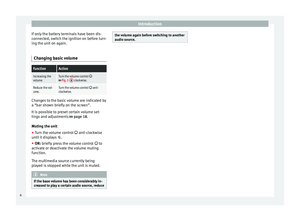
Fig. 2
RADIO main menu: Selecting the fre-
quency b and. ●
Press the RADIO button in order to start Ra-
dio mode.
Af t
er
you switch to Radio mode, the available
frequency bands (FM, AM 1)
and DAB 1)
) are in-
itially displayed in the bottom line of the
screen ››› Fig. 10. If the RADIO unit button is
pr e
s
sed again, more features for the radio re-
ceiver will be displayed.
You can use any of the following:
● Searching for the next station.
● Turning a stored station back on.
● Switching on the TP function ›››
page 8.
● Store the selected station ›››
page 10.
The station that you are currently listening to
is shown in the middle of the screen. For sta- tions compatible with RDS, if the reception
quality is
sufficient, the station name may be
displayed instead of its frequency, e.g. RA-
DIO 21.
RDS and automatic station tracking RDS is a radio data service that allows the
dis
p
lay of the station name, automatic sta-
tion tracking and the TP function (traffic infor-
mation station ››› page 8).
With the automatic station tracking the unit
always switches to the frequency that offers
the best reception of the current radio station
as the vehicle travels from one area to the
next. If the reception is poor, the unit may be
muted for a short time as it searches for alter-
native frequencies (AF).
RDS is not available everywhere or on every
FM radio station.
Depending on the country and the unit, the
RDS and switching to alternative frequencies
(AF) may be deactivated in the system set-
tings ›››
page 18. 1)
This depends on the country and unit in question.
7
Page 10 of 28
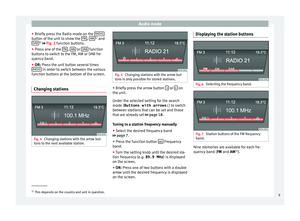
 Fig. 3
TP function active. The TP function is an RDS radio data service.
If
y
our unit has DAB, you can also use the TP
function even if RDS is no")
Audio mode
TP function (radio traffic information) Fig. 3
TP function active. The TP function is an RDS radio data service.
If
y
our unit has DAB, you can also use the TP
function even if RDS is not available
››› page 8.
Traffic news tracking with the TP function is
only possible if a TP station is available.
While the traffic news tracking function is on,
the news bulletins will be activated in the au-
dio mode currently playing.
Some stations that do not have their own
traffic news support the TP function by broad-
casting traffic announcements from other
stations (EON). Traffic announcements broad-
cast by the linked traffic news station inter-
rupt the current audio mode. Switching the TP function on and off
● Press the TP function button
››
›
Fig. 3.
● Press the TP function button again to
sw it
c
h the TP function off.
If the TP function is switched on in areas
where there is no TP support , the following
warning will be displayed on the screen: NO
TP .
TP function activated
When the function for tracking a station with
traffic information is on and ready to operate,
the TP function button is highlighted in the
FM mode ››
›
Fig. 3.
In Radio mode, the radio station being lis-
tened to must be compatible with the TP
function or be a DAB or EON station compati-
ble with the TP function. If neither of these
two conditions are met, it is not possible to
track stations with traffic information.
If the traffic information station being lis-
tened to is no longer received, it is possible
to manually start a station search using the and
arrow keys.
If se
ar
ching for a station using the arrow
keys, NO TP is displayed if the station set is
not currently compatible with TP. In Media mode or while the unit is muted, it
is
always automatically tuned to a station
with traffic information in the background, as
long as one is received. This operation may
take some time depending on the situation.
Incoming traffic announcement (INFO)
In active Audio mode, an incoming traffic an-
nouncement will play automatically.
● If required, the infotainment system is
switc
hed to the traffic news station (EON) for
the duration of the announcement.
● The Media mode will be paused and the
volume w
ill be adjusted to the preset level.
● The volume of the traffic announcement
can be modified with the
volume control .
The adjusted setting will be applied to subse-
quent announcements.
● There is a pop-up message to cancel the
traffic annou
ncement (Cancel) or deactivate
the TP function ( Deactivate).
Changing frequency band The selected frequency band (FM or AM
1)
) i s
sho wn in the up
per left section.1)
This depends on the country and unit in question.
8
Page 11 of 28

and
DAB 1)
›› ›
Fig. 2 function buttons.
● Press one of the FM ,
AM or
D
AB fun")
Audio mode
● Briefly pr
e
ss the Radio mode on the RADIObutton of the unit to show the
FM ,
AM 1)
and
DAB 1)
›› ›
Fig. 2 function buttons.
● Press one of the FM ,
AM or
D
AB function
b utt
on
s to switch to the FM, AM or DAB fre-
quency band.
● OR: Press the unit button several times
RADIO in order to switch between the various
f u
nction b
uttons at the bottom of the screen.
Changing stations Fig. 4
Changing stations with the arrow but-
t on
s
to the next available station. Fig. 5
Changing stations with the arrow but-
ton s
is only possible for stored stations. ●
Briefly press the arrow button or
on
the unit .
Under the sel
ected setting for the search
mode (Buttons with arrows: ) to switch
between stations that can be set and those
that are already set ››› page 18.
Tuning to a station frequency manually ● Select the desired frequency band
›› ›
page 7.
● Press the function button Frequency
b and.
● Turn the settin
g knob until the desired sta-
tion frequency (e.
g. 89.9 MHz) is displayed
on the screen.
● OR: Press one of two buttons with a double
arro
w until the desired frequency is displayed
on the screen. Displaying the station buttons
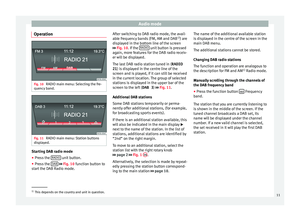
Fig. 6
Selecting the frequency band. Fig. 7
Station buttons of the FM frequency
b and. Nine memories are available for each fre-
quency
b
and ( FM
and AM1)
). 1)
This depends on the country and unit in question.
9
Page 12 of 28

Audio mode
Storing stations on the station but-
t on
s Fig. 8
Selecting the frequency band. Fig. 9
Station buttons display. When storing a station to a station button,
an
y
s
tation already stored to the same sta-
tion button in the same memory level will be
overwritten.
Assigning individual station buttons manual-
ly
● Select the frequency band.
● Select the station. ●
Switc
h to Station buttons.
● Press and hold the chosen s
tation button
until you hear a tone.
● The station currently playing ( RADIO 1)
wi
ll then be stored to that station button.
The station button to which the station cur-
rently playing is assigned is displayed high-
lighted on the screen ››› Fig. 8.
In the AM or DAB mode, it is possible to up-
date the station list by pressing down and
holding the function button ››› Fig. 8.
Tuning in to stored stations ●
Select the frequency band with the stored
s t
ation
you are looking for.
● Briefly press the station b
utton to which
the desired station is stored.
Depending on the settings it is possible to
switch between stations of a frequency band
with the arrow buttons and
(Buttons
with arrows: › ›
›
page 18).
A stored station can only be played if it can
be received at your current location. Digital radio mode (DAB, DAB+
and audio DMB)*
Introduction Some units are equipped with an additional
DAB r
a
dio receiver.
The DAB radio receiver supports the DAB,
DAB+ and DMB-Audio broadcasting stand-
ards.
In Europe, digital radio is transmitted via
Band III frequencies (174 MHz to 240 MHz)
and the L Band (1452 MHz to 1492 MHz).
The frequencies of the two bands are referred
to as “channels” and each has a channel
name e.g. 12 A .
Several DAB stations are combined into one
channel with the additional services availa-
ble in a “block”.
DAB is currently not available in all areas . In
areas without DAB, is displayed in DAB ra-
dio mode. The system and functions settings
allow in this case a change of FM station
››› page 18. In the system and functions
settings there is the configuration of other
settings for the tracking of stations and for
playing DAB notifications. Note
The radio stations are responsible for the
cont ent
of the information sent.10
Page 13 of 28

Audio mode
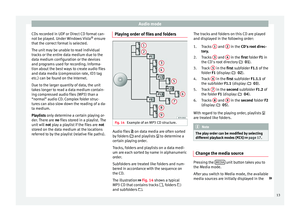
Operation Fig. 10
RADIO main menu: Selecting the fre-
quency b and. Fig. 11
RADIO main menu: Station buttons
di s
p
layed. Starting DAB radio mode
● Press the RADIO unit button.
● Press the D
AB
› ›
› Fig. 10
function button to
start the DAB Radio mode. After switching to DAB radio mode, the avail-
able fr
equency bands (FM, AM and DAB 1)
) are
displayed in the bottom line of the screen
››› Fig. 10. If the RADIO unit button is pressed
ag ain, mor
e f
eatures for the DAB radio receiv-
er will be displayed.
The last DAB radio station tuned in ( RADIO
21 ) is displayed in the centre line of the
screen and is played, if it can still be received
in the current location. The group of selected
stations is displayed in the upper bar of the
screen to the left ( DAB 3) ››› Fig. 11 .
Additional DAB stations
Some DAB stations temporarily or perma-
nently offer additional stations, (for example,
for broadcasting sports events).
If there is an additional station available, this
will also be indicated in the main display
next to the name of the station. In the list of
stations, additional stations are identified by
“2nd” on the right margin.
To move to an additional station, select the
station list with the right rotary knob
››› page 2 ››› Fig. 1 14 .
A lt
ern
atively, the selection is made by repeat-
edly pressing the station button correspond-
ing to the main station ››› page 10. The name of the additional available station
is di
splayed in the centre of the screen in the
main DAB menu.
The additional stations cannot be stored.
Changing DAB radio stations
The function and operation are analogous to
the description for FM and AM 1)
Radio mode.
Manually scrolling through the channels of
the DAB frequency band
● Press the function button Frequency
b and.
The s t
ation that you are currently listening to
is shown in the middle of the screen. If the
tuned channel broadcasts a DAB set, its
name will be displayed under the channel
number. If a new valid channel is selected,
the set received in it will play the first DAB
station. 1)
This depends on the country and unit in question.
11
Page 14 of 28

Audio mode
Starting a DAB stations update Fig. 12
DAB station list with updating capa-
bi lity
. Fig. 13
The updating of stations is active. While the stations are being updated, the
u
nit
se
arches the dial for available ensem-
bles in the region.
The infotainment system automatically up-
dates the list of stations in the background if
DAB is not currently the active audio source
or if it is not possible to receive audio via DAB in DAB mode. If you still want to manual-
ly updat
e the channel list, do the following:
● Press the button to show the list of sta-
tion s.
● Pr e
ss the
› ››
Fig. 12
f
unction button and
a notice will be displayed on updating sta-
tions in the top row of the screen. ››› Fig. 13.
● Updating the stations may take several sec-
onds.
Durin
g the station updating the infotainment
system is muted.
Media mode
Introduction “M
edia sources” are audio sources contain-
in g audio fi
les on various different data me-
dia (e.g. CD, external MP3 player). These au-
dio files can be played by the respective data
media or by the radio input sockets.
Requirements for media sources and
audio file
s Factory-fitted CD players conform to safety
c
l
a
ss 1 according to DIN IEC 76 (CO)
6/ VDE 0837.
The unit only accepts standard 12-cm CDs.
Media sourceRequirements for playing in
the unit
Audio CDs (up
to 80 minutes).– CD Digital Audio specification.
CD-ROM, CD-R,
CD-RW up to max.
700 MB (mega-
bytes) in accord-
ance with ISO
9660 or Joliet file
system.
– MP3 files (.mp3) with bitrates of
between 48 and 320 kbit/s or with
variable bitrate.
– Playlists in the formats PLS and
M3U.
– Playlists no larger than 20 kB
and containing no more than 250
links.
– Max. 32 playlists on a data medi-
um.
– File names not longer than 64
characters.
– Folder structures with a maxi-
mum of 10 levels.
– Max. 120 folders and
max. 500 files on a data medium.
AUX : External au-
dio source.– 3.5-mm connector jack for the
emission of connectable audio
››› page 16. Restrictions and notes
C
ont
amin
ation, exposure to high tempera-
tures and mechanical damage may render a
data medium unusable. Please observe the
manufacturer's instructions.
Variations in the quality of data media pro-
duced by different manufacturers can lead to
problems during playback.
Please observe copyright laws.
12
Page 15 of 28

Audio mode
CDs recorded in UDF or Direct CD format can-
not be p
l
ayed. Under Windows Vista ®
ensure
that the correct format is selected.
The unit may be unable to read individual
tracks or the entire data medium due to the
data medium configuration or the devices
and programs used for recording. Informa-
tion about the best ways to create audio files
and data media (compression rate, ID3 tag
etc.) can be found on the Internet.
Due to the larger quantity of data, the unit
takes longer to read a data medium contain-
ing compressed audio files (MP3) than a
“normal” audio CD. Complex folder struc-
tures can also slow down the reading of a da-
ta medium.
Playlists only determine a certain playing or-
der. There are no files stored in a playlist. The
unit will not play a playlist if the files are not
stored on the data medium at the locations
referred to by the playlist (relative file paths). Playing order of files and folders
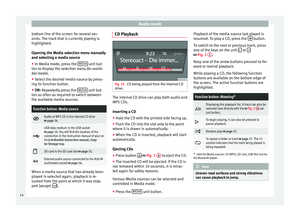
Fig. 14
Example of an MP3 CD structure. Audio files
on dat
a medi
a are often sorted
by folders and playlists to determine a
certain playing order.
Tracks, folders and playlists on a data medi-
um are each sorted by name in alphanumeric
order.
Subfolders are treated like folders and num-
bered in accordance with the sequence on
the CD.
The illustration ›››
Fig. 14 shows a typical
MP3 CD that contains tracks , folders
and subfolders . The tracks and folders on this CD are played
and disp
layed in the following order:
Tracks 1 and
2 in the CD's
root direc-
t or
y.
Tracks 3 and
4 in the fir
st folder F1 in
the CD's r
oot directory 01).
Track 5 in the fir
st subfolder F1.1 of the
f o
lder F1 (display: 02).
Track 6 in the fir
st subfolder F1.1.1 of
the s ubf
older F1.1 (display: 03).
Track 7 in the sec
ond subfolder F1.2 of
the f o
lder F1 (display: 04).
Tracks 8 and
9 in the sec
ond folder F2
(di s
play: 05).
With regard to the playing order, playlists
are treated like folders. Note
The play order can be modified by selecting
differ ent
playback modes ( MIX) ››› page 17. Change the media source
Pressing the
MEDIA unit button takes you to
the M edi
a mode.
Af
ter you switch to Media mode, the available
media sources are initially displayed in the »
1.
2.
3.
4.
5.
6.
13
Page 16 of 28

Audio mode
bottom line of the screen for several sec-
ond s.
The tr
ack that is currently playing is
highlighted.
Opening the Media selection menu manually
and selecting a media source
● In Media mode, press the MEDIA unit but-
t on t
o di
splay the selection menu for availa-
ble media.
● Select the desired media source by press-
ing its f
unction button.
● OR: Repeatedly press the MEDIA unit but-
t on a
s
often as required to switch between
the available media sources.
Function button: Media source
Audio or MP3 CD in the internal CD drive
››› page 14.
USB data medium in the USB socket
››› page 15. You will find the location of the
connection in the instruction manual of your ve-
hicle ››› Booklet Instruction manual, chap-
ter Storage tray.
SD card in the SD card slot
››› page 15.
External audio source connected to the AUX-IN
multimedia socket
››› page 16. When a media source that has already been
p
l
a
yed is selected again, playback is re-
sumed from the point at which it was stop-
ped (except: ). CD Playback
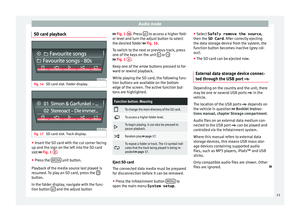
Fig. 15
CD being played from the internal CD
drive. The internal CD drive can play both audio and
MP3 CD
s.
In ser
ting a CD
● Hold the CD with the printed side facing up.
● Push the CD into the slot only to the point
where it i
s drawn in automatically.
● When the CD is inserted, playback will start
automatic
ally.
Ejecting CDs
● Press button
› ›
› Fig. 1 6 to eject the CD.
● The inserted CD will be ejected. If the CD is
not r
emo
ved within 10 seconds, it is retrac-
ted again for safety reasons.
Various Media sources can be selected and
controlled in Media mode.
● Press the MEDIA unit button.Playback of the media source last played is
r
e
s
umed. To play a CD, press the button.
T o sw
it
ch to the next or previous track, press
one of the keys on the unit or
›››
Fig. 1 1 .
K eep one of
the arr
ow buttons pressed to for-
ward or rewind playback.
While playing a CD, the following function
buttons are available on the bottom edge of
the screen. The active function buttons are
highlighted.
Function button: Meaning a)
Displaying the playback list. A track can also be
selected here directly with the
››› Fig. 1 14 ad-
just button.
To begin playing. It can also be pressed to
pause playback.
Random play
››› page 17.
To repeat a folder or track
››› page 17. The symbol indicates that the track being played is
being repeated.
a)
Valid for Media sources: CD (MP3), SD Card, USB Port and Au-
dio Bluetooth player. Note
Uneven road surfaces and strong vibrations
can c au
se playback to jump.14