Page 81 of 328

Transporting children safely
light up, with the word ’üÉ’üü’üō
’üō’üģ’üÄ’üć’üģ’üÆ ’üü’üē’üÆ ’üé’üü’üć ’üÅ’üå’üå
’Ć╣ in the centre part of the dash panel.
ŌĆō The warning lamp ’üÅ’üÄ ’éČ is
illuminated for
60 seconds in the centre part of the dash
panel.
Control lamp with the word ’üÉ’üü’üō’üō’üģ’üÄ’üć’üģ’üÆ ’üü’üē’üÆ ’üé’üü’üć
’üÅ’üå’üå ’Ć╣ (front passenger airbag disabled)
If the front passenger front airbag is disa-
bled, after switching on the ignition, the con-
trol lamp will light up for several seconds,
then it will switch off for about 1 s and then
switch on again.
If the control lamp is flashing, there is a fault
in the disabling of the airbag system ŌĆ║ŌĆ║ŌĆ║ .
Pl e
ase go immediately to an Official Service. WARNING
ŌŚÅ The driv er of
the vehicle is responsible for
disabling or switching on the airbag.
ŌŚÅ Always switch off the ignition before disa-
blin
g the front passenger airbag! Failure to do
so could result in a fault in the airbag deacti-
vation system.
ŌŚÅ Never leave the key in the airbag disabling
swit
ch as it could get damaged or enable or
disable the airbag during driving.
ŌŚÅ If the ’üÅ’üå’üå ’Ć╣ (airbag di
sabled) control lamp
flashes, the front passenger front airbag will
not trigger in the event of an accident! Have
the system immediately checked by an Offi-
cial Service. Transporting children safely
Saf ety
for children
Introduction For safety reasons, as we have learned from
ac
c
ident statistics, we recommend that chil-
dren under 12 years of age travel in the rear
seats. Depending on their age, height and
weight, children travelling in rear seats must
use a child seat or a seat belt. For safety rea-
sons, the child seat should be installed in the
rear seat, behind the front passenger seat or
in the centre back seat.
The physical laws involved and the forces
acting in a collision apply also to children
ŌĆ║ŌĆ║ŌĆ║ page 70. But unlike adults, children do not
have fully developed muscle and bone struc-
tures. This means that children are subject to
a greater risk of injury.
To reduce the risk of injuries, children must
always use special child restraint systems
when travelling in the vehicle.
We recommend the use of child safety prod-
ucts from the SEAT Original Accessories Pro-
gramme, which includes systems for all ages
made by ŌĆ£PekeŌĆØ (not for all countries) (see
www.seat.com). These systems have been especially de-
s
igned and ap
proved, complying with the
ECE-R44. regulation.
SEAT recommends securing the child seats
shown on the website as described below:
ŌŚÅ Child seats in the opposite direction of
trav
el (group 0+): ISOFIX and support bracket
(Peke G0 Plus + ISOFIX Base (RWF)).
ŌŚÅ Child seats in the direction of travel (group
1): ISOFIX and
Top Tether (Peke G1 ISOFIX
DUO Plus).
ŌŚÅ Child seats in the direction of travel (group
2): seat
belt and ISOFIX (Peke G3 KIDFIX).
ŌŚÅ Child seats in the direction of travel (group
3): with se
at belt (Peke G3 KIDFIX).
Follow the manufacturer's instructions and
observe any statutory requirements when in-
stalling and using child seats. Always read
and note ŌĆ║ŌĆ║ŌĆ║ page 79.
We recommend you always carry the manu-
facturer's Child Seat Instruction Manual to-
gether with the on-board documentation.
Important information regarding the
front
passenger's airbag Read the additional information carefully
ŌĆ║ ŌĆ║
ŌĆ║ ’Ć© page 17. ┬╗
79
Technical data
Advice
Operation
Emergencies
Safety
Page 82 of 328

Safety
Read and always observe the safety informa-
tion inc luded in the f
ollowing chapters:
ŌŚÅ Safety distance with respect to the passen-
ger airb
ag ŌĆ║ŌĆ║ŌĆ║ page 73.
ŌŚÅ Objects between the passenger and the
pa
ssenger side airbag ŌĆ║ŌĆ║ŌĆ║ in Front airbags
on p ag
e 75.
The passenger side front airbag, when ena-
bled, is a serious risk for a child that is facing
backward since the airbag can strike the seat
with such force that it can cause serious or
fatal injuries. Children up to 12 years old
should always travel on the rear seat.
Therefore we strongly recommend you to
transport children on the rear seats. This is
the safest location in the vehicle. Alternative-
ly, the front passenger airbag can be disa-
bled with a key-operated switch ŌĆ║ŌĆ║ŌĆ║ page 78.
When transporting children, use a child seat
suitable for the age and size of each child
ŌĆ║ŌĆ║ŌĆ║ page 81. WARNING
ŌŚÅ If a c
hild seat is secured to the front pas-
senger seat, the risk to the child of sustain-
ing critical or fatal injuries in the event of an
accident increases.
ŌŚÅ An inflating front passenger airbag can
strik
e the rear-facing child seat and project it
with great force against the door, the roof or
the backrest. ŌŚÅ
Nev er in
stall a child seat facing backwards
on the front passenger seat unless the front
passenger front airbag has been disabled.
Risk of potentially fatal injuries to the child!
However, if it is necessary, in exceptional ca-
ses, to transport a child in the front passen-
ger seat, the front passenger front airbag
must always be disabled ŌĆ║ŌĆ║ŌĆ║ page 77. If the
passenger seat has a height adjustment op-
tion, move it to the highest, most upright po-
sition. If you have a fixed seat, do not install
any child restraint system in this location.
ŌŚÅ For those vehicles that do not include a key
lock
switch to deactivate the airbag, the vehi-
cle must be taken to a technical service. Do
not forget to reconnect the airbag when an
adult wants to sit in the front passenger seat.
ŌŚÅ All vehicle occupants, especially children,
mus
t assume the proper sitting position and
be properly belted in while travelling.
ŌŚÅ Never hold children or babies on your lap,
this
can result in potentially fatal injuries to
the child!
ŌŚÅ Never allow a child to be transported in a
vehic
le without being properly secured, or to
stand up or kneel on a seat while travelling.
In an accident, the child could be flung
through the vehicle, causing possibly fatal in-
juries to themselves and to the other vehicle
occupants.
ŌŚÅ If children assume an improper sitting posi-
tion when the v
ehicle is moving, they expose
themselves to greater risk of injury in the
event of a sudden braking manoeuvre or in an
accident. This is particularly important if the child is travelling on the front passenger seat
and the airb
ag sy
stem is triggered in an acci-
dent; as this could cause serious injury or
even death.
ŌŚÅ A suitable child seat can protect your child!
ŌŚÅ Never leave a child alone in the child seat
or ins
ide the vehicle because depending on
the season, very high temperatures may be
reached inside a parked vehicle, which could
be fatal.
ŌŚÅ Children who are less than 1.5 metres tall
mus
t not wear a normal seat belt without a
child seat, as this could cause injuries to the
abdominal and neck areas during a sudden
braking manoeuvre or in an accident.
ŌŚÅ Do not allow the seat belt to become twis-
ted and the se
at belt should be properly in
place ŌĆ║ŌĆ║ŌĆ║ page 68.
ŌŚÅ Only one child may occupy a child seat
ŌĆ║ŌĆ║
ŌĆ║ page 80, Child seats.
ŌŚÅ When a child seat is mounted in the rear
seat
s, the door child-proof lock should be ac-
tivated ŌĆ║ŌĆ║ŌĆ║ page 120. Child seats
Saf ety
instructions Read the additional information carefully
ŌĆ║ ŌĆ║
ŌĆ║ ’Ć© page 17.
80
Page 83 of 328

Transporting children safely
WARNING
When travelling, children must be secured in
the v
ehicle with a restraint system suitable
for age, weight and size.
ŌŚÅ Read and always observe information and
warnin
gs concerning the use of child seats
ŌĆ║ŌĆ║ŌĆ║ page 79. WARNING
The retaining rings are designed only for use
w ith ŌĆ£ISOFIXŌĆØ and T
op Tether* system child
seats.
ŌŚÅ Never secure other child seats that do not
hav
e the ŌĆ£ISOFIXŌĆØ or Top Tether* system, or
retaining belts or objects to the fastening
rings - this can result in potentially fatal inju-
ries to the child.
ŌŚÅ Ensure that the child seat is secured cor-
rectly
using the ŌĆ£ISOFIXŌĆØ and Top Tether* se-
curing rings. WARNING
An undue installation of the safety seat will
inc r
ease the risk of injury in the event of a
crash.
ŌŚÅ Never tie the retainer strap to a hook in the
lugg
age compartment.
ŌŚÅ Never secure or tie luggage or other items
to the lo
wer anchorages (ISOFIX) or the upper
ones (Top Tether). Categorisation of child seats into
gr
oup
s Use only child seats that are officially ap-
pr
o
ved and suitable for the child.
These seats are subject to the ECE-R 44 or
ECE-R 129 standard. ECE-R stands for: Eco-
nomic Commission for Europe Regulation.
The child seats are grouped into 5 catego-
ries:
Group 0: Up to 10 kg (up to around 9
months)
Group 0+: Up to 13 kg (up to around 18
months)
Group 1: from 9 to 18 kg (up to approx. 4
years old)
Group 2: from 15 to 25 kg (up to approx. 7
years old)
Group 3: From 22 to 36 kg (over around 7
years old)
Child seats that have been tested and ap-
proved under the ECE-R 44 or ECE-R 129
standard bear the test mark ECE-R 44 or ECE-
R 129 on the seat (the letter E in a circle with
the test number below it).
Follow the manufacturer's instructions and
observe any statutory requirements when in-
stalling and using child seats. We recommend you to always include the
m
anuf
acturer's Child Seat Instruction Manual
together with the on-board documentation.
SEAT recommends you use child seats from
the Original Accessories Catalogue . These
child seats have been designed and tested
for use in SEAT vehicles. You can find the
right child seat for your model and age group
at SEAT dealers.
Child seats by approval category
Child seats may have the approval category
of universal, semi-universal, vehicle specific
(all according to the ECE-R 44 standard) or i-
Size (according to the ECE-R 129 standard).
ŌŚÅ Universal: Chil
d seats with universal appro-
val can be installed in all vehicles. There is
no need to consult any list of models. In the
case of universal approval for ISOFIX, the
child seat is additionally provided with a Top
Tether belt.
ŌŚÅ Semi-universal: semi-univ
ersal approval, in
addition to the standard requirements of uni-
versal approval, requires safety devices to
lock the child seat, which require additional
testing. Child seats with semi-universal ap-
proval include a list of vehicle models for
which they can be installed.
ŌŚÅ Vehicle-specific: v
ehicle-specific approval
requires a dynamic test of the child seat for
each vehicle model separately. Child seats
with vehicle-specific approval also include a ┬╗
81
Technical data
Advice
Operation
Emergencies
Safety
Page 84 of 328

Safety
list of vehicle models for which they can be
in s
talled.
ŌŚÅ i-Size: Child seats with i-Size approval must
meet
the requirements prescribed in the ECE-
R 129 standard in relation to installation and
safety. Child seat manufacturers can tell you
which seats have i-Size approval for this vehi-
cle.
Attachment systems Depending on the country, different attach-
ment
sy
stems are used for safely installing
child seats.
Attachment systems overview
ŌŚÅ ISOFIX: ISOFIX i
s a standardised attach-
ment system allowing quick and safe attach-
ment of child seats in the vehicle. ISOFIX at-
tachment establishes a rigid connection be-
tween the child seat and the car body.
The child seat has two rigid attachment clips,
called connectors. These connectors are fit-
ted into the ISOFIX attachment rings found
between the seat cushion and the backrest of
the vehicle's back seat (on the sides). ISOFIX
attachment systems are used mainly in Eu-
rope ŌĆ║ŌĆ║ŌĆ║
’Ć© page 19. If necessary, ISOFIX at-
tachment may have to be supplemented with
a Top Tether belt or a support bracket. ŌŚÅ
Autom
atic three-point seat belt . Whenever
possible, it is preferable to attach the child
seats with the ISOFIX system rather than at-
taching them with an automatic three-point
seat belt ŌĆ║ŌĆ║ŌĆ║
’Ć© page 18.
Additional attachment:
ŌŚÅ Top Tether : The Top Tether belt is guided
o
ver the back of the rear seat and attached to
an anchor point with a hook. Anchor points
are located at the back of the rear seat back-
rest on the boot side ŌĆ║ŌĆ║ŌĆ║
’Ć© page 22
. The
rings for retaining the Top Tether belt are
marked with an anchor symbol.
ŌŚÅ Support bracket : Some c
hild seats rest on
the floor of the vehicle with a support brack-
et. The support bracket prevents the child
seat from tipping forward in the event of im-
pact. Child seats fitted with a support bracket
should only be used in the passenger seat
and side rear seats ŌĆ║ŌĆ║ŌĆ║ . For the assembly of
thi s
type of seat you should also consult the
list of approved vehicles for this assembly,
available in the instructions for child restraint
systems.
Recommended systems for attaching child
seats
SEAT recommends attaching child seats as
follows: ŌŚÅ
Bab
y carriers or child seats in the opposite
direction of travel: ISOFIX and support brack-
et or iSize.
ŌŚÅ Child seats in the direction of travel: ISO-
FIX and
Top Tether. WARNING
Incorrect use of the support bracket can
c au
se serious or fatal injury.
ŌŚÅ Make sure the support bracket is correctly
and saf
ely installed.82
Page 85 of 328

Self-help
Emergencies
Self -help
V
ehicle tool kit, anti-puncture kit* The tools and anti-puncture kit* are stored
u
nder the floor p
anel in the luggage compart-
ment.
To access the vehicle tools:
ŌĆō Lift up the floor surface by the plastic han-
dl e u
ntil it is fastened to the tabs on both
sides.
Depending on the vehicle equipment, the an-
ti-puncture kit* is located under the floor
panel in the luggage compartment.
The tool kit includes:
ŌŚÅ Jack*
ŌŚÅ Wire hook for pulling off the wheel cov-
er*/wheel bo
lt cap clip.
ŌŚÅ Box spanner for wheel bolts*
ŌŚÅ Towline anchorage
ŌŚÅ Adapter for the anti-theft wheel bolts*
ŌŚÅ Towing bracket device
Some of the it
ems listed are only provided in
certain model versions, or are optional ex-
tras. Note
The jack does not generally require any main-
t en
ance. If required, it should be greased us-
ing universal type grease. Tyre repair
TM S
(Tyre Mobility System)* Read the additional information carefully
ŌĆ║ ŌĆ║
ŌĆ║ ’Ć© page 53
The Anti-puncture kit* (Tyre Mobility System)
will reliably seal punctures caused by the
penetration of a foreign body of up to about
4 mm in diameter. Do not remove foreign ob-
jects, e.g. screws or nails, from the tyre.
After inserting the sealant residue in the tyre,
you must again check the tyre pressure about
10 minutes after starting the engine.
You should only use the tyre mobility set if
the vehicle is parked in a safe place, you are
familiar with the procedure and you have the
necessary tyre mobility set! Otherwise, you
should seek professional assistance.
Do not use the tyre sealant in the following
cases:
ŌŚÅ If the wheel rim has been damaged.
ŌŚÅ In outside temperatures below -20┬░C (-4┬░F). ŌŚÅ
In the ev ent
of cuts or perforations in the
tyre greater than 4 mm.
ŌŚÅ If you have been driving with very low pres-
sur
e or a completely flat tyre.
ŌŚÅ If the sealant bottle has passed its use by
dat
e. WARNING
Using the tyre mobility system can be dan-
g er
ous, especially when filling the tyre at the
roadside. Please observe the following rules
to minimise the risk of injury:
ŌŚÅ Stop the vehicle safely as soon as possible.
Park
it at a safe distance from surrounding
traffic to fill the tyre.
ŌŚÅ Ensure the ground on which you park is flat
and solid.
ŌŚÅ A
ll passengers and particularly children
mus
t keep a safe distance from the work area.
ŌŚÅ Turn on the hazard warning lights to warn
other ro
ad users.
ŌŚÅ Use the tyre mobility system only if you are
fami
liar with the necessary procedures. Oth-
erwise, you should seek professional assis-
tance.
ŌŚÅ The tyre mobility set is intended for tempo-
rar
y emergency use only until you can reach
the nearest specialised workshop.
ŌŚÅ Replace the repaired tyre with the tyre mo-
bi
lity set as soon as possible. ┬╗ 83
Technical data
Advice
Operation
Emergencies
Safety
Page 86 of 328

Emergencies
ŌŚÅ
The se a
lant is a health hazard and must be
cleaned immediately if it comes into contact
with the skin.
ŌŚÅ Always keep the tyre mobility set out of the
re
ach of small children.
ŌŚÅ Never use an equivalent jack, even if it has
been appr
oved for your vehicle.
ŌŚÅ Always stop the engine, apply the hand-
brak
e lever firmly and engage gear if using a
manual gearbox, in order to reduce the risk of
vehicle involuntary movement. WARNING
A tyre filled with sealant does not have the
s ame per
formance properties as a conven-
tional tyre.
ŌŚÅ Never drive faster than 80 km/h (50 mph).
ŌŚÅ Avoid heavy acceleration, hard braking and
fa
st cornering.
ŌŚÅ Drive for only 10 minutes at a maximum
speed of
80 km/h (50 mph) and then check
the tyre. For the sake of the environment
Dispose of used or expired sealant observing
an y
legal requirements. Note
A new bottle of sealant can be purchased at
S EA
T dealerships. Note
Take into account the separate instruction
m anua
l of the tyre mobility set* manufactur-
er. Contents of the tyre mobility system*
Fig. 95
Standard representation: contents of
the anti-p u
ncture kit. The anti-puncture kit is located underneath
the floor c
o
vering in the luggage compart-
ment. It includes the following components
ŌĆ║ŌĆ║ŌĆ║ Fig. 95:
Tyre valve remover
Sticker indicating maximum speed ŌĆ£max.
80 km/hŌĆØ or ŌĆ£max. 50 mphŌĆØ
Filler tube with cap
1 2
3 Air compressor
T
ube f
or inflating tyres
Warning provided by tyre pressure moni-
toring system (it can also be integrated in
the compressor).
Air bleed screw (in its place, the compres-
sor may have a button).
ON/OFF switch
12 volt connector
Bottle of sealant
Spare tyre valve
The valve insert remover 1 has a gap at the
lo w
er end for a valve insert. The valve insert
can only be screwed or unscrewed in this
way. This also applies to its replacement part 11 .
WARNING
When inflating the wheel, the air compressor
and the infl at
or tube may become hot.
ŌŚÅ Protect hands and skin from hot parts.
ŌŚÅ Do not place the hot flexible inflator tube or
hot air c
ompressor on flammable material.
ŌŚÅ Allow them to cool before storing the de-
vic
e.
ŌŚÅ If it is not possible to inflate the tyre to at
le
ast 2.0 bars (29 psi / 200 kPa), the tyre is
too badly damaged. The sealant is not in a
good condition to seal the tyre. Do not con-
tinue driving. Seek specialist assistance. 4
5
6
7
8
9
10
11
84
Page 87 of 328

Self-help
CAUTION
Switch off the air compressor after a maxi-
mum of 8 oper
ational minutes to avoid over-
heating! Before switching on the air compres-
sor again, let it cool for several minutes. Check after 10 minutes of driving
Screw the inflator tube
ŌĆ║ŌĆ║
ŌĆ║ Fig. 95 5 again
and c hec
k the pressure on the gauge 6 .
1.3 b ar (19 p
si / 130 kPa) and lower:
ŌŚÅ Stop the vehicle! The tyr
e cannot be sealed
sufficiently with the tyre mobility set.
ŌŚÅ You should obtain professional assistance
ŌĆ║ŌĆ║
ŌĆ║ .
1.4 b ar (20 p
si / 140 kPa) and higher:
ŌŚÅ Set the tyre pressure to the correct value
again.
ŌŚÅ C
arefully resume your journey until you
re
ach the nearest specialised workshop with-
out exceeding 80 km/h (50 mph).
ŌŚÅ Have the damaged tyre replaced. WARNING
Driving with an unsealed tyre is dangerous
and c an c
ause accidents and serious injury.
ŌŚÅ Do not continue driving if the tyre pressure
is
1.3 bar (19 psi / 130 kPa) and lower. ŌŚÅ
Seek s
pecialist assistance. Manual unlocking/locking
Intr oduction Read the additional information carefully
ŌĆ║ ŌĆ║
ŌĆ║ ’Ć© page 10,
ŌĆ║ŌĆ║ŌĆ║
’Ć© page 11.
The doors, rear lid and panoramic tilting sun-
roof can be locked manually and partially
opened, for example if the key or the central
locking is damaged. WARNING
Opening and closing doors carelessly can
c au
se serious injury.
ŌŚÅ If the vehicle is locked from outside, the
doors
and windows cannot be opened from
the inside.
ŌŚÅ Never leave children or disabled people
alone in the c
ar. They could be trapped in the
car in an emergency and will not be able to
get themselves to safety.
ŌŚÅ Depending on the time of the year, temper-
atur
es inside a locked and closed vehicle can
be extremely high or extremely low resulting
in serious injuries and illness or even death,
particularly for young children. WARNING
Getting in the way of the doors and the rear
lid i s
dangerous and can lead to serious in-
jury.
ŌŚÅ Open and close the doors and the rear lid
only
when there is nobody in the way. CAUTION
When opening and closing in an emergency,
c ar
efully disassemble components and then
reassemble them carefully to avoid damage
to the vehicle. Changing the windscreen wiper
b
l
ades
Changing the windscreen and rear
window wiper blades Read the additional information carefully
ŌĆ║ ŌĆ║
ŌĆ║ ’Ć© page 61.
The windscreen wiper blades are supplied as
standard with a layer of graphite. This layer is
responsible for ensuring that the wipe is si-
lent. If the graphite layer is damaged, the
noise of the water as it is wiped across the
windscreen will be louder.
Check the condition of the wiper blades regu-
larly. If the wipers scrape across the glass ,┬╗
85
Technical data
Advice
Operation
Emergencies
Safety
Page 88 of 328

Emergencies
they should be changed if they are damaged,
or c l
eaned if they are dirty ŌĆ║ŌĆ║ŌĆ║ .
Dam ag
ed wiper blades should be replaced
immediately. These are available from quali-
fied workshops. WARNING
Worn or dirty wiper blades reduce visibility
and inc r
ease the risk of accident and serious
injury.
ŌŚÅ Always replace damaged or worn blades or
bl
ades which do not clean the windscreen
correctly. CAUTION
ŌŚÅ Dam ag
ed or dirty windscreen wipers could
scratch the glass.
ŌŚÅ If products containing solvents, rough
spon
ges or sharp objects are used to clean
the blades, the graphite layer will be dam-
aged.
ŌŚÅ Never use fuel, nail varnish remover, paint
thinner or simi
lar products to clean the win-
dows.
ŌŚÅ In icy conditions, always check that the
wiper b
lades are not frozen to the glass be-
fore using the wipers. In cold weather, it may
help to leave the vehicle parked with the wip-
ers in service position ŌĆ║ŌĆ║ŌĆ║
’Ć© page 60. CAUTION
ŌŚÅ To pr
event damage to the bonnet and the
wiper arms, only leave them in the service
position.
ŌŚÅ Before driving, always lower the wiper
arms. Tow-starting and towing
Intr oduction Tow-starting me
an
s starting the engine of
the vehicle while another pulls it.
Towing means one vehicle pulling another
that is not roadworthy.
Always consider the legal provisions relating
to tow-starting and towing.
For technical reasons, towing a vehicle with a
discharged battery is not allowed. The jump
start should be used instead ŌĆ║ŌĆ║ŌĆ║
’Ć© page 58.
If the vehicle comes with the Keyless Access
system, towing is only allowed with the igni-
tion on!
The vehicle battery drains if the vehicle is
towed with the engine switched off and the
ignition connected. Depending on the battery
charge status, the drop in voltage may be so
large, even after just a few minutes, that no
electrical device in the vehicle may work e.g. the hazard warning lights. In vehicles with
the Keyl
ess Access system, the steering
wheel could lock ŌĆ║ŌĆ║ŌĆ║ .
WARNING
A vehicle with no power should never be tow-
ed.
ŌŚÅ During towing, never switch off the ignition
w ith the s
tarter button. Otherwise, the elec-
tronic lock of the steering column could sud-
denly get blocked and it would be impossible
to steer the vehicle. This could cause an acci-
dent, serious injury and loss of control of the
vehicle.
ŌŚÅ If during towing the vehicle runs out of
pow
er, stop towing immediately and request
the assistance of specialist personnel. WARNING
Vehicle handling and braking capacity
c h
ange considerably during towing. Please
observe the following instructions to mini-
mise the risk of serious accidents and injury:
ŌŚÅ As the driver of the vehicle being towed:
ŌĆō You shou
ld depress the brake much hard-
er as the brake servo does not operate.
Pay the utmost attention to avoid crash-
ing into the towing vehicle.
ŌĆō More strength is required at the steering
wheel as the power steering does not op-
erate when the engine is switched off.
ŌŚÅ As the driver of the towing vehicle: 86
 1
1 2
2 3
3 4
4 5
5 6
6 7
7 8
8 9
9 10
10 11
11 12
12 13
13 14
14 15
15 16
16 17
17 18
18 19
19 20
20 21
21 22
22 23
23 24
24 25
25 26
26 27
27 28
28 29
29 30
30 31
31 32
32 33
33 34
34 35
35 36
36 37
37 38
38 39
39 40
40 41
41 42
42 43
43 44
44 45
45 46
46 47
47 48
48 49
49 50
50 51
51 52
52 53
53 54
54 55
55 56
56 57
57 58
58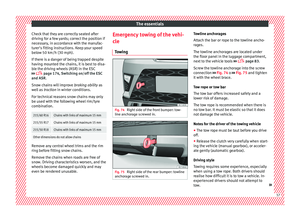 59
59 60
60 61
61 62
62 63
63 64
64 65
65 66
66 67
67 68
68 69
69 70
70 71
71 72
72 73
73 74
74 75
75 76
76 77
77 78
78 79
79 80
80 81
81 82
82 83
83 84
84 85
85 86
86 87
87 88
88 89
89 90
90 91
91 92
92 93
93 94
94 95
95 96
96 97
97 98
98 99
99 100
100 101
101 102
102 103
103 104
104 105
105 106
106 107
107 108
108 109
109 110
110 111
111 112
112 113
113 114
114 115
115 116
116 117
117 118
118 119
119 120
120 121
121 122
122 123
123 124
124 125
125 126
126 127
127 128
128 129
129 130
130 131
131 132
132 133
133 134
134 135
135 136
136 137
137 138
138 139
139 140
140 141
141 142
142 143
143 144
144 145
145 146
146 147
147 148
148 149
149 150
150 151
151 152
152 153
153 154
154 155
155 156
156 157
157 158
158 159
159 160
160 161
161 162
162 163
163 164
164 165
165 166
166 167
167 168
168 169
169 170
170 171
171 172
172 173
173 174
174 175
175 176
176 177
177 178
178 179
179 180
180 181
181 182
182 183
183 184
184 185
185 186
186 187
187 188
188 189
189 190
190 191
191 192
192 193
193 194
194 195
195 196
196 197
197 198
198 199
199 200
200 201
201 202
202 203
203 204
204 205
205 206
206 207
207 208
208 209
209 210
210 211
211 212
212 213
213 214
214 215
215 216
216 217
217 218
218 219
219 220
220 221
221 222
222 223
223 224
224 225
225 226
226 227
227 228
228 229
229 230
230 231
231 232
232 233
233 234
234 235
235 236
236 237
237 238
238 239
239 240
240 241
241 242
242 243
243 244
244 245
245 246
246 247
247 248
248 249
249 250
250 251
251 252
252 253
253 254
254 255
255 256
256 257
257 258
258 259
259 260
260 261
261 262
262 263
263 264
264 265
265 266
266 267
267 268
268 269
269 270
270 271
271 272
272 273
273 274
274 275
275 276
276 277
277 278
278 279
279 280
280 281
281 282
282 283
283 284
284 285
285 286
286 287
287 288
288 289
289 290
290 291
291 292
292 293
293 294
294 295
295 296
296 297
297 298
298 299
299 300
300 301
301 302
302 303
303 304
304 305
305 306
306 307
307 308
308 309
309 310
310 311
311 312
312 313
313 314
314 315
315 316
316 317
317 318
318 319
319 320
320 321
321 322
322 323
323 324
324 325
325 326
326 327
327