Page 97 of 130
6.1
Vehicle
Ambient lighting . . . . . . . . . . . . . . . . . . . . . . . . . . . . . . . . . . . . \
. . . . . . . . . . . . . . . . . . . . . . . . . . . . . 6.2
Seats . . . . . . . . . . . . . . . . . . . . . . . . . . . . . . . . . . . . \
. . . . . . . . . . . . . . . . . . . . . . . . . . . . . . . . . . . . . 6.3
multi-Sense . . . . . . . . . . . . . . . . . . . . . . . . . . . . . . . . . . . .\
. . . . . . . . . . . . . . . . . . . . . . . . . . . . . . . . 6.6
Driving aids . . . . . . . . . . . . . . . . . . . . . . . . . . . . . . . . . . . .\
. . . . . . . . . . . . . . . . . . . . . . . . . . . . . . . . 6.8
Parking aids . . . . . . . . . . . . . . . . . . . . . . . . . . . . . . . . . . . . \
. . . . . . . . . . . . . . . . . . . . . . . . . . . . . . . . 6.10
Driving eco2. . . . . . . . . . . . . . . . . . . . . . . . . . . . . . . . . . . . \
. . . . . . . . . . . . . . . . . . . . . . . . . . . . . . . . 6.13
Trip computer and warning system . . . . . . . . . . . . . . . . . . . . . . . . . . . . . . . . . . . . \
. . . . . . . . . . . . . . 6.17
Take care . . . . . . . . . . . . . . . . . . . . . . . . . . . . . . . . . . . . \
. . . . . . . . . . . . . . . . . . . . . . . . . . . . . . . . . . 6.18
Tyre pressure. . . . . . . . . . . . . . . . . . . . . . . . . . . . . . . . . . . . \
. . . . . . . . . . . . . . . . . . . . . . . . . . . . . . . 6.19
User settings . . . . . . . . . . . . . . . . . . . . . . . . . . . . . . . . . . . .\
. . . . . . . . . . . . . . . . . . . . . . . . . . . . . . . 6.20
Page 101 of 130
6.5
SEATS (3/3)
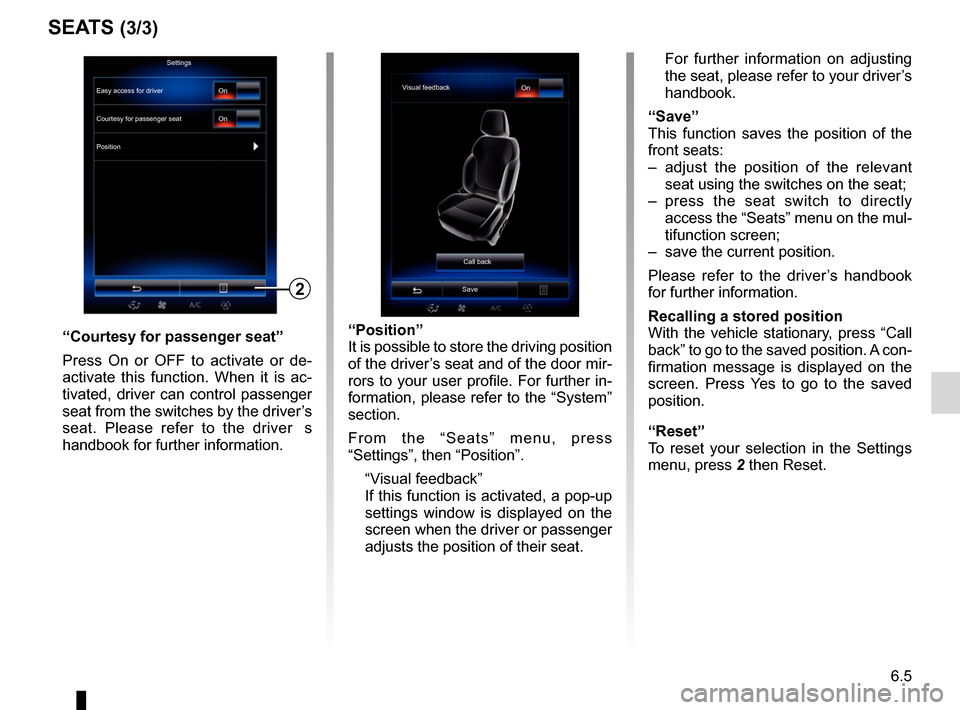
“Position”
It is possible to store the driving position
of the driver’s seat and of the door mir-
rors to your user profile. For further in-
formation, please refer to the “System”
section.
From the “Seats” menu, press
“Settings”, then “Position”.
“Visual feedback”
If this function is activated, a pop-up settings window is displayed on the
screen when the driver or passenger
adjusts the position of their seat. For further information on adjusting
the seat, please refer to your driver’s
handbook.
“Save”
This function saves the position of the
front seats:
– adjust the position of the relevant seat using the switches on the seat;
– press the seat switch to directly access the “Seats” menu on the mul-
tifunction screen;
– save the current position.
Please refer to the driver’s handbook
for further information.
Recalling a stored position
With the vehicle stationary, press “Call
back” to go to the saved position. A con-
firmation message is displayed on the
screen. Press Yes to go to the saved
position.
“Reset”
To reset your selection in the Settings
menu, press 2 then Reset.“Courtesy for passenger seat”
Press On or OFF to activate or de-
activate this function. When it is ac-
tivated, driver can control passenger
seat from the switches by the driver’s
seat. Please refer to the driver�s
handbook for further information.
2
Visual feedback On
Call back
Save
Settings
Courtesy for passenger seat
Position On
On
Easy access for driver
Page 102 of 130
6.6
MULTI-SENSE (1/2)
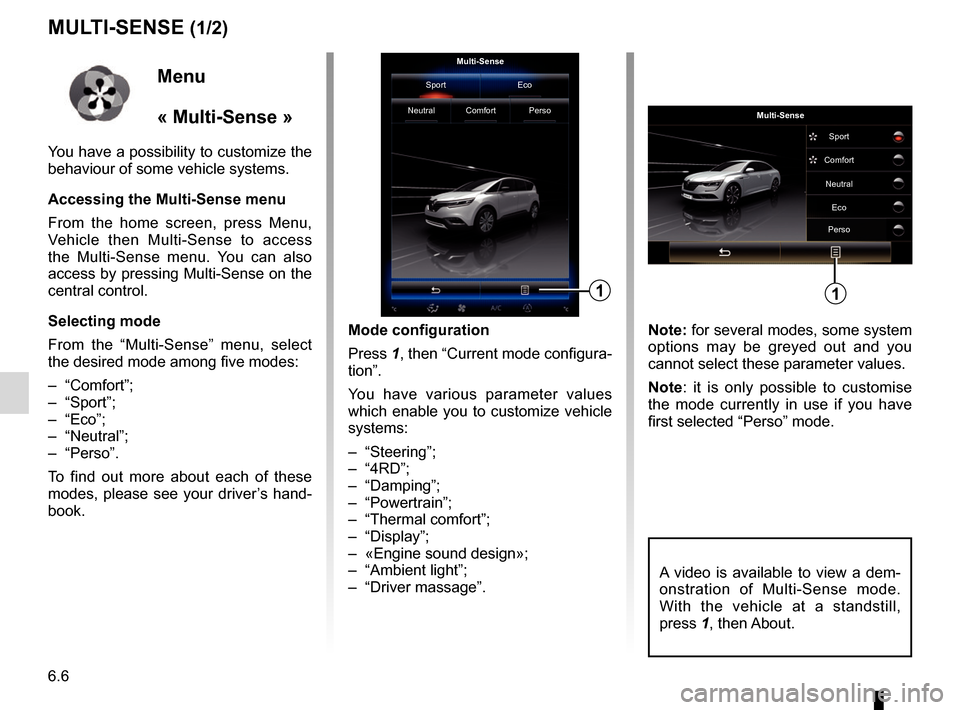
Mode configuration
Press 1, then “Current mode configura-
tion”.
You have various parameter values
which enable you to customize vehicle
systems:
– “Steering”;
– “4RD”;
– “Damping”;
– “Powertrain”;
– “Thermal comfort”;
– “Display”;
– «Engine sound design»;
– “Ambient light”;
– “Driver massage”. Note: for several modes, some system
options may be greyed out and you
cannot select these parameter values.
Note: it is only possible to customise
the mode currently in use if you have
first selected “Perso” mode.
Multi-Sense
Sport Eco
Neutral Comfort Perso
1
Menu
« Multi-Sense »
You have a possibility to customize the
behaviour of some vehicle systems.
Accessing the Multi-Sense menu
From the home screen, press Menu,
Vehicle then Multi-Sense to access
the Multi-Sense menu. You can also
access by pressing Multi-Sense on the
central control.
Selecting mode
From the “Multi-Sense” menu, select
the desired mode among five modes:
– “Comfort”;
– “Sport”;
– “Eco”;
– “Neutral”;
– “Perso”.
To find out more about each of these
modes, please see your driver’s hand-
book.
Multi-Sense Sport
Eco
Neutral
Comfort
Perso
1
A video is available to view a dem-
onstration of Multi-Sense mode.
With the vehicle at a standstill,
press 1, then About.
Page 104 of 130
6.8
DRIVING AIDS (1/2)
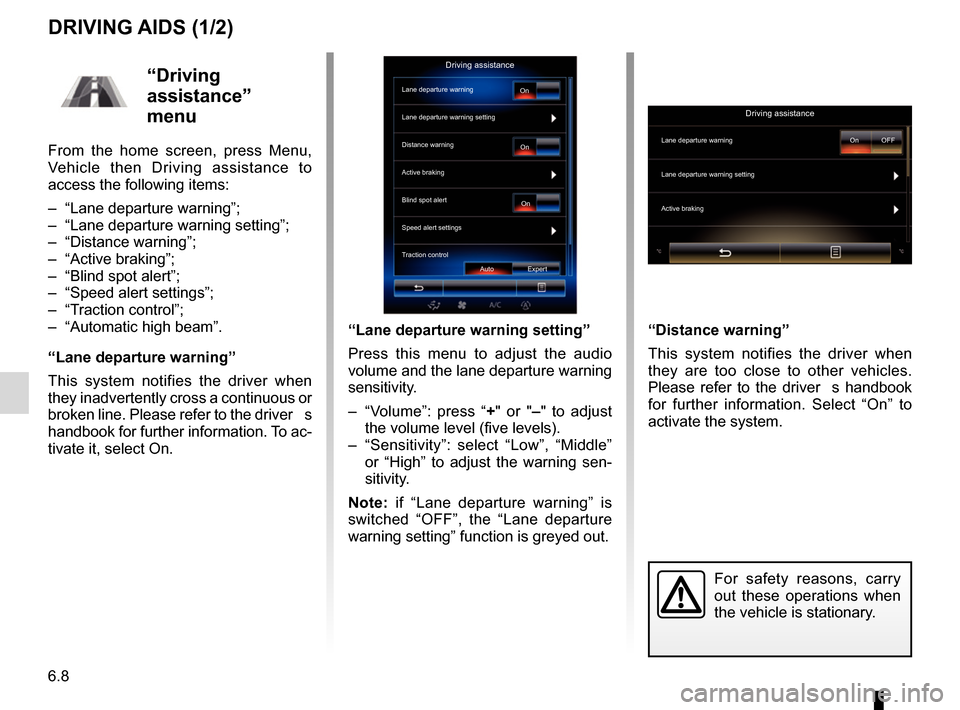
“Lane departure warning setting”
Press this menu to adjust the audio
volume and the lane departure warning
sensitivity.
– “Volume”: press “+" or "– " to adjust
the volume level (five levels).
– “Sensitivity”: select “Low”, “Middle” or “High” to adjust the warning sen-
sitivity.
Note: if “Lane departure warning” is
switched “OFF”, the “Lane departure
warning setting” function is greyed out. “Distance warning”
This system notifies the driver when
they are too close to other vehicles.
Please refer to the driver�s handbook
for further information. Select “On” to
activate the system.
For safety reasons, carry
out these operations when
the vehicle is stationary.
“Driving
assistance”
menu
From the home screen, press Menu,
Vehicle then Driving assistance to
access the following items:
– “Lane departure warning”;
– “Lane departure warning setting”;
– “Distance warning”;
– “Active braking”;
– “Blind spot alert”;
– “Speed alert settings”;
– “Traction control”;
– “Automatic high beam”.
“Lane departure warning”
This system notifies the driver when
they inadvertently cross a continuous or
broken line. Please refer to the driver�s
handbook for further information. To ac-
tivate it, select On.
Driving assistance
Lane departure warning
Lane departure warning setting
On
On On
Auto Expert
Distance warning
Active braking
Blind spot alert
Speed alert settings
Traction control
Driving assistance
Lane departure warning
Lane departure warning setting
Active braking
On OFF
Page 105 of 130
6.9
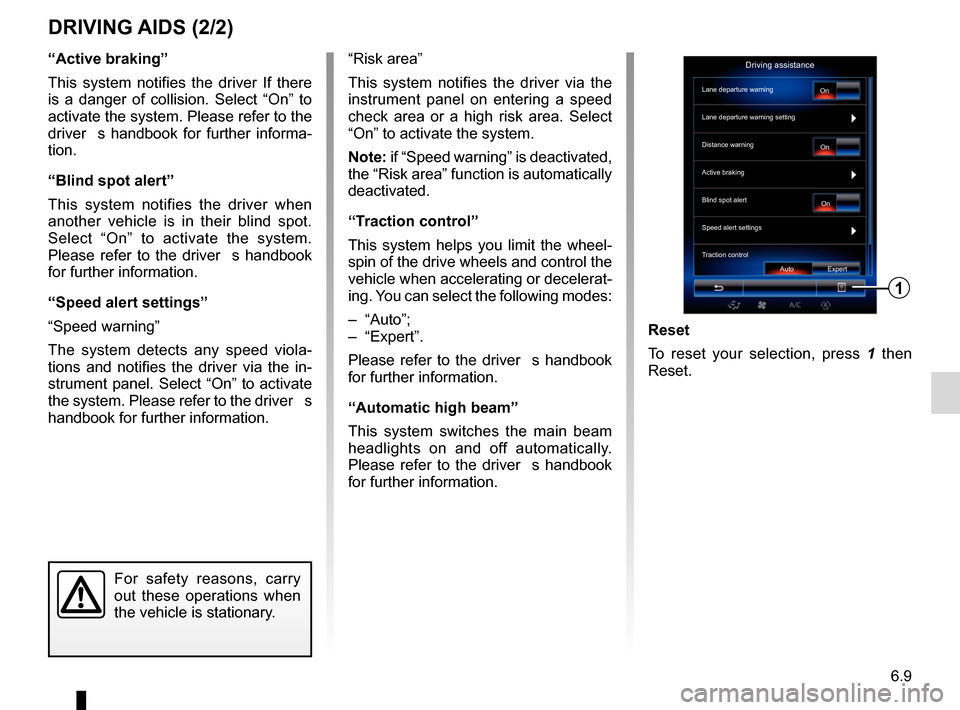
“Active braking”
This system notifies the driver If there
is a danger of collision. Select “On” to
activate the system. Please refer to the
driver�s handbook for further informa-
tion.
“Blind spot alert”
This system notifies the driver when
another vehicle is in their blind spot.
Select “On” to activate the system.
Please refer to the driver�s handbook
for further information.
“Speed alert settings”
“Speed warning”
The system detects any speed viola-
tions and notifies the driver via the in-
strument panel. Select “On” to activate
the system. Please refer to the driver�s
handbook for further information.
DRIVING AIDS (2/2)
For safety reasons, carry
out these operations when
the vehicle is stationary.
Reset
To reset your selection, press 1 then
Reset.
“Risk area”
This system notifies the driver via the
instrument panel on entering a speed
check area or a high risk area. Select
“On” to activate the system.
Note: if “Speed warning” is deactivated,
the “Risk area” function is automatically
deactivated.
“Traction control”
This system helps you limit the wheel-
spin of the drive wheels and control the
vehicle when accelerating or decelerat-
ing. You can select the following modes:
– “Auto”;
– “Expert”.
Please refer to the driver�s handbook
for further information.
“Automatic high beam”
This system switches the main beam
headlights on and off automatically.
Please refer to the driver�s handbook
for further information.
Driving assistance
Lane departure warning
Lane departure warning setting
On
On On
Auto Expert
Distance warning
Active braking
Blind spot alert
Speed alert settings
Traction control
1
Page 107 of 130
6.11
PARKING AIDS (2/3)
Rear view camera
Image setting
Rear view camera
GuidelineOn
"Rear view camera"
Select “On” or “OFF” rear view
camera to activate or deactivate the
system.
"Guideline"
The guides are an additional aid for
parking.
From the Rear view camera menu,
press Guideline, then select On or
OFF to activate or deactivate the
guides. "Image setting"
From “Rear view camera” menu,
press “Image setting”, then adjust the
following settings:
– brightness
2;
– contrast 3;
– colour 4.
Adjust each setting by pressing “ +”
or “–”.
Note: This setting is available when
the reversing camera is connected.
Image setting
234
For safety reasons, carry
out these operations when
the vehicle is stationary.
Colour Contrast
Brightness
Image setting
Page 115 of 130
6.19
TYRE PRESSURE
Reset
This function allows the user to reset
by pressing “Reset”. When the reset is
finished, a confirmation message is dis-
played on the screen. For more infor-
mation on tyre pressure, please refer to
your driver�s handbook.
Tyre pressureReset
“Tyre pressure”
menu
From the main menu, press “Vehicle”,
then “Tyre pressure”.
Tyre pressure status
The system informs the driver via
touchscreen that the tyres are suffi-
ciently inflated and warns if they are
underinflated or if there is a puncture.
Please refer to the driver’s handbook
for further information.
Tyre pressure Reset
x.x
x.x
x.x
x.x
x.x
x.x
x.x
x.x
Page 117 of 130
7.1
System
System. . . . . . . . . . . . . . . . . . . . . . . . . . . . . . . . . \
. . . . . . . . . . . . . . . . . . . . . . . . . . . . . . . . . . . . . . . 7.2
Operating faults . . . . . . . . . . . . . . . . . . . . . . . . . . . . . . . . . . . . \
. . . . . . . . . . . . . . . . . . . . . . . . . . . . . 7.8