2017 RENAULT ESPACE display
[x] Cancel search: displayPage 39 of 130
2.7
“Previous destinations”
This menu enables you to select
a destination from the list of ad-
dresses last used. These are au-
tomatically stored.
From the “Navigation” menu:
– select “Destination” then “Previous destinations”.
– From the list of stored destina- tions, select an address to start
navigating.
ENTERING A DESTINATION (2/7)
For safety reasons, carry
out these operations when
the vehicle is stationary.
Note: The system will store the
last towns/cities entered in its
memory. You can directly select
one of these towns.
Note: Only addresses known to
the system through the digital
map are authorised.
Note: The system displays the
country and town/city correspond-
ing to your final destination by de-
fault. You can directly enter the
street name if the requested des-
tination is in the same town/city as
the final destination entered. Using voice recognition to enter an
address
From the Destination and Itinerary
screens, press the voice recognition
button, then state a town/city, street
name and/or number after the beep.
Page 40 of 130
2.8
“Points of interest”
A point of interest (POI) is a serv-
ice, establishment or even a tour-
ist area close to a location (start
point, destination city, en route,
etc.).
Points of Interest are listed by cat-
egory: restaurants, museums, car
parks, etc.
Select “Destination” from the
“Navigation” menu, then “Points
of interest” to select a destination
from the points of interest.
“Name search”
A list is displayed in which you can consult all POIs found
along the route (if there are
any) or around your current po-
sition. You can filter the list of
POIs using the keypad. Select
a POI from the list of results or
enter the name/type of POI that
you want to look for using the
keypad.
ENTERING A DESTINATION (3/7)
For safety reasons, carry
out these operations when
the vehicle is stationary.
“Location search”
This function enables you to search for POIs in a town/city
or along a route, by selecting a
point of interest from a list or by
typing it using the keypad.
Select the search area from among the following catego-
ries:
– “In a city”;
– “Nearby”;
– “Along Route” (if any);
– “Near destination” (if any).
After selecting a search area, the screen displays the POIs
available by category (All,
Airport, Automobile, etc.).
Select a category.
All POIs in this category are displayed in a search area.
Select the desired POI to start
guidance. Categories
(service station/car park/restau-
rant/accommodation)
Search for points of interest by
selecting categories from the
“Points of interest” menu.
On this screen, you can launch a quick search using four types
of preset POIs:
– “Petrol Station” along a route, if there are any.
– “Parking” near the destina- tion, if there are any.
– “Restaurant” along a route, if there are any.
– “Accommodation” near the destination, if there are any.
If you currently do not have a route or destination, these
POIs are searched around your
current or last known position.
Page 42 of 130

2.10
ENTERING A DESTINATION (5/7)
Confirming the destination
Once your destination information has
been entered, the system displays a
route summary for confirmation. Press
Select at the bottom of the screen to
confirm. The system will make the cal-
culation.
Note: The calculation criteria can be
modified in the route settings.
At the end of the calculation, the system
displays a navigation summary.
Note: if you do not touch the screen,
this page will close after ten seconds
and guidance will start automatically
if there is no restriction affecting your
journey.
To confirm your destination and acti-
vate guidance, press button Go.
On mapSelect
2
For safety reasons, carry
out these operations when
the vehicle is stationary.
Move around the map to position
the cursor on your destination,
then confirm by pressing “Select”:
the system calculates the route.
Pop-up menu 2
Select a destination as described
previously and then press 2 to
access the following functions:
– “Places around the cursor”;
– “Add to address book”;
– “Information”. “Places around cursor”
This function enables you to find
points of interest around the se-
lected position. You can search,
filter, sort and view all the results
found by the system on the map.
“Add to address book”
This function allows you to save
the selected position in the ad-
dress book.
“Information”
This function enables you to fund
details (address, latitude and lon-
gitude) on the selected position.
Page 44 of 130
2.12
Latest map guarantee
Once your new vehicle has been de-
livered, you will have a limited time in
which to update the map for free. Once
this time has elapsed, you will need to
pay for updates.
For further information, please contact
an Authorised Dealer of brand.Route
Route Planning Method
Short.
Motorways
Period charge
Toll roads
Ferries Unpaved
roads
Car shuttle train On
On
OFF
On
On
On
Updates (especially of maps) are
published regularly. In some cases,
it is possible that roads alter and that
the mapping is not yet up to date.
ENTERING A DESTINATION (7/7)
Route preferences
The route preferences are restrictions
which affect the route calculation. For
further information, please refer to the
section on “Map”.
“Simulate route”
This function enables the route you will
be taking to be simulated up to destina-
tion. Press “Control” to display the con-
trol bar.
The control bar permits the following
functions:
– fast backward;
– fast forward;
– pause;
– playing speed.
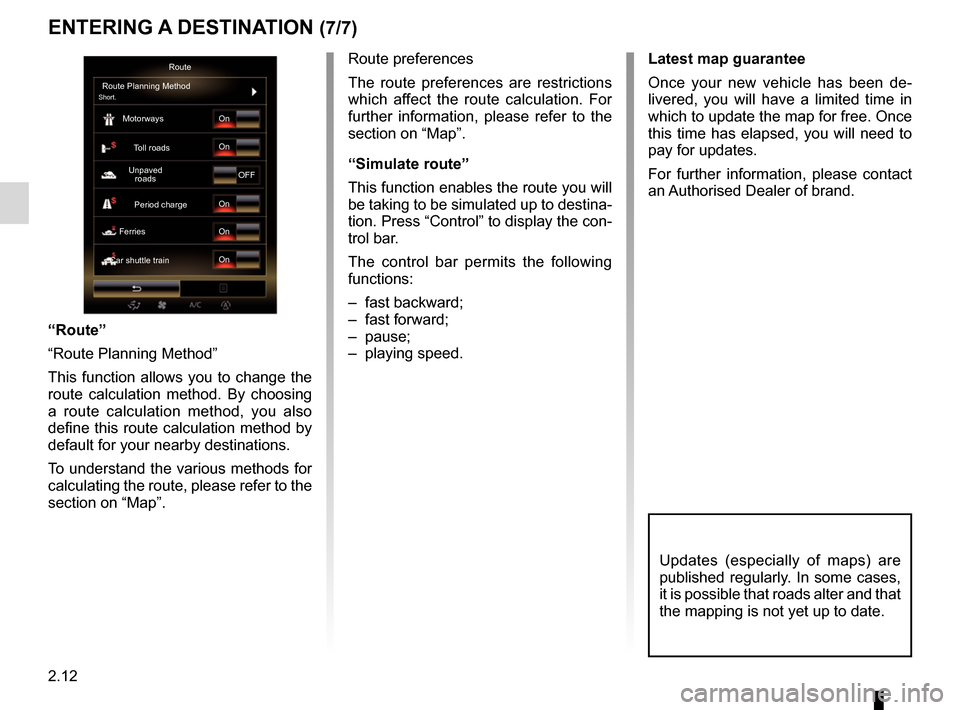
“Route”
“Route Planning Method”
This function allows you to change the
route calculation method. By choosing
a route calculation method, you also
define this route calculation method by
default for your nearby destinations.
To understand the various methods for
calculating the route, please refer to the
section on “Map”.
Page 46 of 130
2.14
TRAFFIC (2/2)
Traffic display
The navigation system indicates traffic
incidents:
– with an alternate color on the map;
– by displaying traffic icons on the map.
A traffic icon is displayed on the naviga-
tion screen to show you whether traf-
fic incidents are announced. When an
incident occurs on your route, an icon
indicates the type of upcoming incident
on your route.
Precautions regarding
navigation
Use of the navigation
system does not in any way
replace the responsibility or vigi-
lance of the driver when driving the
vehicle.
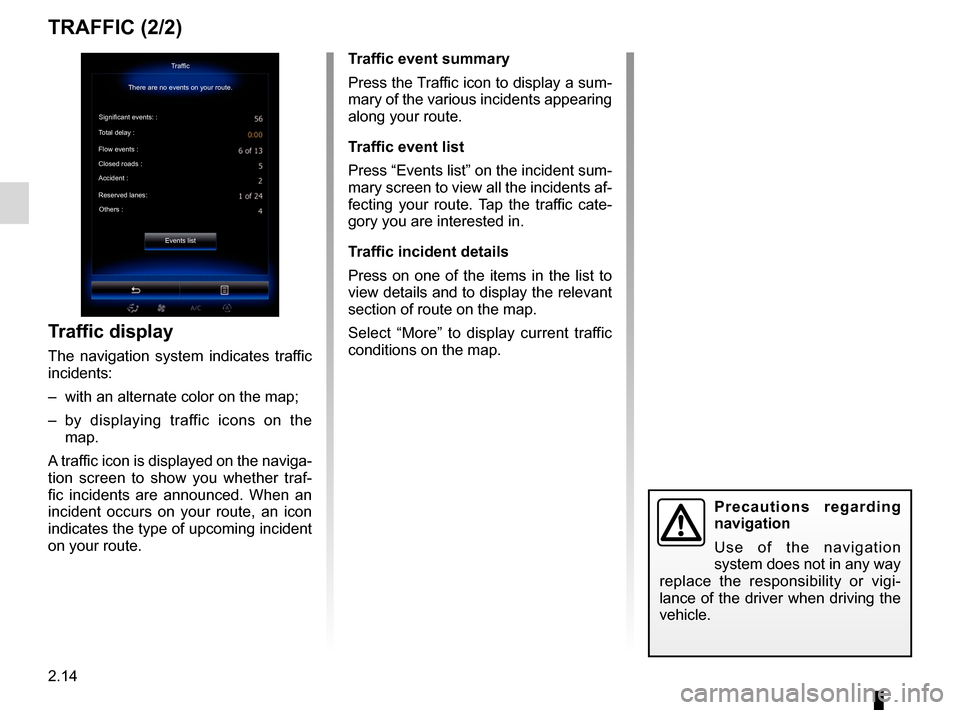
Traffic event summary
Press the Traffic icon to display a sum-
mary of the various incidents appearing
along your route.
Traffic event list
Press “Events list” on the incident sum-
mary screen to view all the incidents af-
fecting your route. Tap the traffic cate-
gory you are interested in.
Traffic incident details
Press on one of the items in the list to
view details and to display the relevant
section of route on the map.
Select “More” to display current traffic
conditions on the map.Traffic
There are no events on your route.
Significant events: :
Total delay :
Flow events :
Closed roads :
Accident :
Reserved lanes: Others :
Events list
Page 48 of 130
2.16
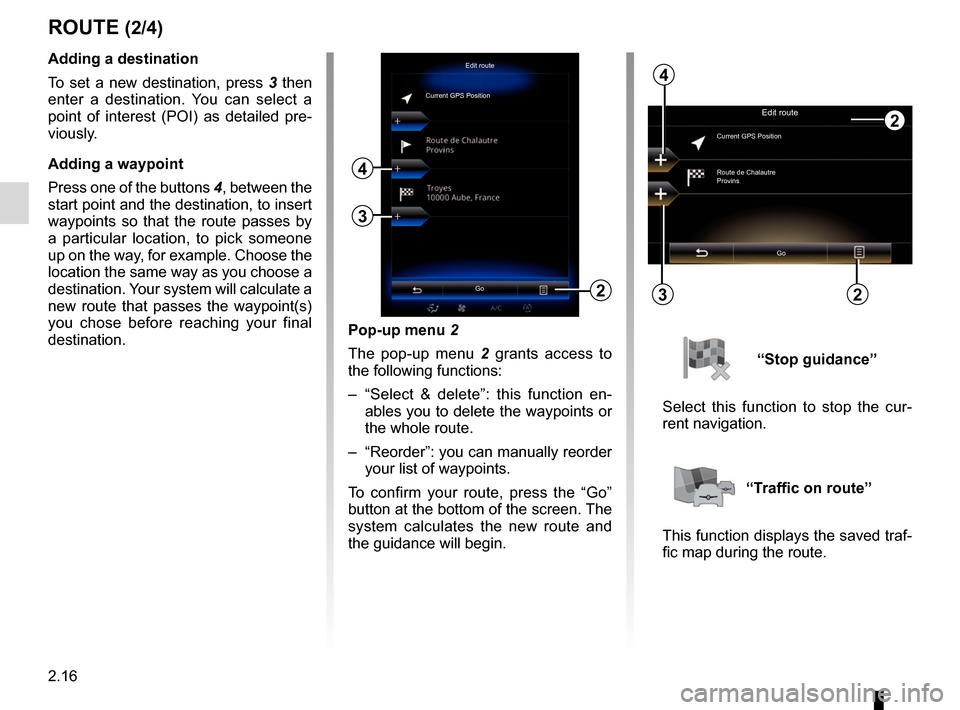
Pop-up menu 2
The pop-up menu 2 grants access to
the following functions:
– “Select & delete”: this function en- ables you to delete the waypoints or
the whole route.
– “Reorder”: you can manually reorder your list of waypoints.
To confirm your route, press the “Go”
button at the bottom of the screen. The
system calculates the new route and
the guidance will begin.
ROUTE (2/4)
2
Edit route
Current GPS PositionAdding a destination
To set a new destination, press 3 then
enter a destination. You can select a
point of interest (POI) as detailed pre-
viously.
Adding a waypoint
Press one of the buttons 4, between the
start point and the destination, to insert
waypoints so that the route passes by
a particular location, to pick someone
up on the way, for example. Choose the
location the same way as you choose a
destination. Your system will calculate a
new route that passes the waypoint(s)
you chose before reaching your final
destination.
3
4
Edit route
Current GPS Position
Route de Chalautre
Provins
Go
3
4
“Stop guidance”
Select this function to stop the cur-
rent navigation.
“Traffic on route”
This function displays the saved traf-
fic map during the route.
Go22
Page 49 of 130
2.17
– “Specific road”: to avoid a road on your route. For example, you can
skip a road where you expect heavy
traffic, but the Traffic system has not
warned you about it.
– “Restore original route”: to cancel detours you set previously.
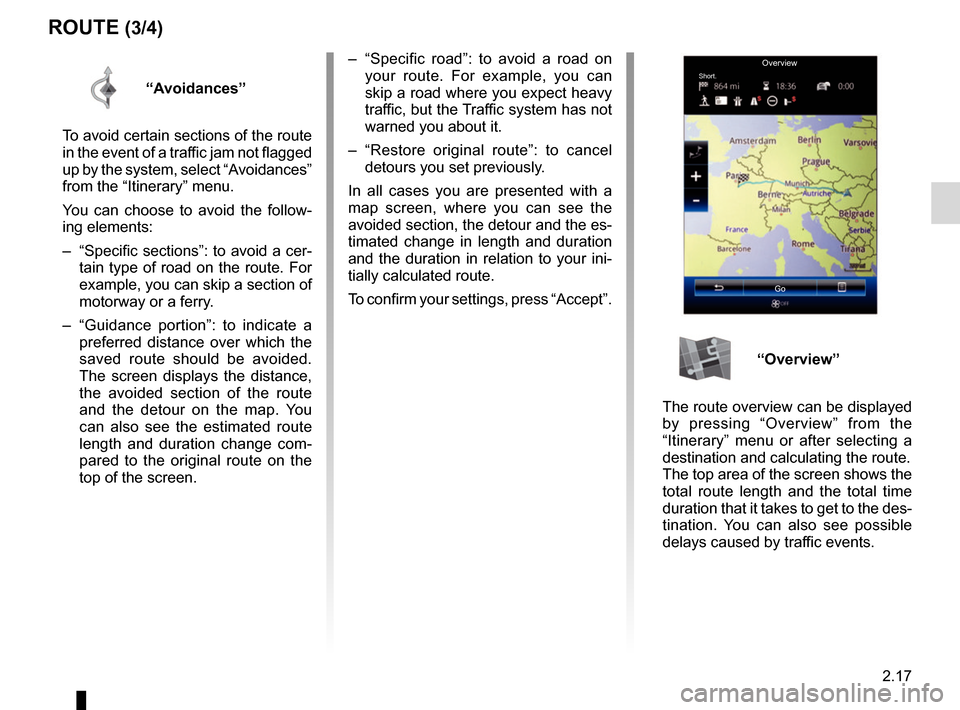
In all cases you are presented with a
map screen, where you can see the
avoided section, the detour and the es-
timated change in length and duration
and the duration in relation to your ini-
tially calculated route.
To confirm your settings, press “Accept”.
ROUTE (3/4)
OverviewShort.
Go
“Avoidances”
To avoid certain sections of the route
in the event of a traffic jam not flagged
up by the system, select “Avoidances”
from the “Itinerary” menu.
You can choose to avoid the follow-
ing elements:
– “Specific sections”: to avoid a cer- tain type of road on the route. For
example, you can skip a section of
motorway or a ferry.
– “Guidance portion”: to indicate a preferred distance over which the
saved route should be avoided.
The screen displays the distance,
the avoided section of the route
and the detour on the map. You
can also see the estimated route
length and duration change com-
pared to the original route on the
top of the screen.
“Overview”
The route overview can be displayed
by pressing “Overview” from the
“Itinerary” menu or after selecting a
destination and calculating the route.
The top area of the screen shows the
total route length and the total time
duration that it takes to get to the des-
tination. You can also see possible
delays caused by traffic events.
Page 52 of 130
2.20
NAVIGATION SETTINGS (2/4)
“Speed warning”
Maps may contain information about
the speed limits of the road segments.
The navigation system is able to warn
you if you exceed the current limit. This
information may not be available for
your region, or may not be fully correct
for all roads on the map.
The following warning types are avail-
able:
– “Speed limit always visible”: acti-vate this function so that the speed
limit for the section of road taken is
always displayed on the navigation
screen.
– “Speed warning”: the current speed limit is displayed in red and flashes
on the map when you exceed it.
– “Overspeed warning sound”: a beep sounds when you exceed the speed
limit.“Safety warnings”
This function enables you to get a beep
and/or visual warning when you ap-
proach sensitive areas such as near
schools, level crossings, hazardous
areas, etc.
You can programme the navigation
system so that it displays these in-
creased vigilance points on the map,
and so that you can be warned by a
beep when you approach these areas.
For some of these areas, there is a
legal or recommended speed limit. The
beep may differ depending on whether
you are driving under or over the speed
limit.
Choose to be warned when approach-
ing these increased vigilance areas or
only when you are exceeding the speed
limit.
Precautions regarding
navigation
Use of the navigation
system does not in any way
replace the responsibility or vigi-
lance of the driver while driving the
vehicle.
In certain countries it is illegal to ac-
tivate the camera warning option
and this could lead to prosecution.
“Warning sign alerts”
Activate this function to be informed
when approaching specific sections of
road (obstacles, tight corners, cross-
ings, etc.) by road sign displays on
the map screen. For each category
of warning sign, set the warning type
(audio and/or visual) and the distance
from the hazard from which you want to
receive a warning.