2017 NISSAN QUEST warning
[x] Cancel search: warningPage 404 of 520
.A sturdy, flat board to be placed under the
jack to give it firm support.
. A shovel to dig the vehicle out of snow-
drifts.
. Extra window washer fluid to refill the
reservoir tank.
DRIVING ON SNOW OR ICE
WARNING
.Wet ice (328F, 0 8C and freezing rain) ,
very cold snow or ice can be slick
and very hard to drive on. The
vehicle will have much less traction
or “grip” under these conditions. Try
to avoid driving on wet ice until the
road is salted or sanded.
. Whatever the condition, drive with
caution. Accelerate and slow down
with care. If accelerating or down-
shifting too fast, the drive wheels
will lose even more traction.
. Allow more stopping distance under
these conditions. Braking should be
started sooner than on dry pave-
ment.
. Allow greater following distances
on slippery roads. .
Watch for slippery spots (glare ice) .
These may appear on an otherwise
clear road in shaded areas. If a
patch of ice is seen ahead, brake
before reaching it. Try not to brake
while on the ice, and avoid any
sudden steering maneuvers.
. Do not use cruise control on slip-
pery roads.
. Snow can trap dangerous exhaust
gases under your vehicle. Keep
snow clear of the exhaust pipe and
from around your vehicle.
ENGINE BLOCK HEATER (if so
equipped)
Engine block heaters are used to assist with
cold temperature starting.
The engine block heater should be used when
the outside temperature is 208F( �í78C) or lower.
To use the engine block heater
1. Turn the engine off.
2. Open the hood and unwrap the engine
block heater cord.
3. Plug the engine block heater cord into a grounded 3-wire, 3-pronged extension cord. 4. Plug the extension cord into a Ground Fault
Interrupt (GFI) protected, grounded 110-
volt AC (VAC) outlet.
5. The engine block heater must be plugged in for at least 2 - 4 hours, depending on
outside temperatures, to properly warm the
engine coolant. Use an appropriate timer to
turn the engine block heater on.
6. Before starting the engine, unplug and properly store the cord to keep it away from
moving parts.
WARNING
.Do not use your engine block heater
with an ungrounded electrical sys-
tem or a 2-pronged adapter. You can
be seriously injured by an electrical
shock if you use an ungrounded
connection.
. Disconnect and properly store the
engine block heater cord before
starting the engine. Damage to the
cord could result in an electrical
shock and can cause serious injury.
. Use a heavy-duty 3-wire, 3-pronged
extension cord rated for at least
10A. Plug the extension cord into a
Starting and driving5-35
Page 406 of 520

6 In case of emergency
Hazard warning flasher switch .............................................. 6-2
Roadside assistance program ............................................... 6-2
Emergency engine shut off ..................................................... 6-3
Flat tire ........................................................................\
................. 6-3Tire Pressure Monitoring System (TPMS) .................... 6-3
Changing a flat tire ............................................................. 6-4 Jump starting ........................................................................\
.. 6-10
Push starting ........................................................................\
... 6-12
If your vehicle overheats ...................................................... 6-12
Towing your vehicle .............................................................. 6-14
Towing recommended by NISSAN ........................... 6-15
Vehicle recovery (freeing a stuck vehicle) ............... 6-15
Page 407 of 520
6-2In case of emergency
SIC2574
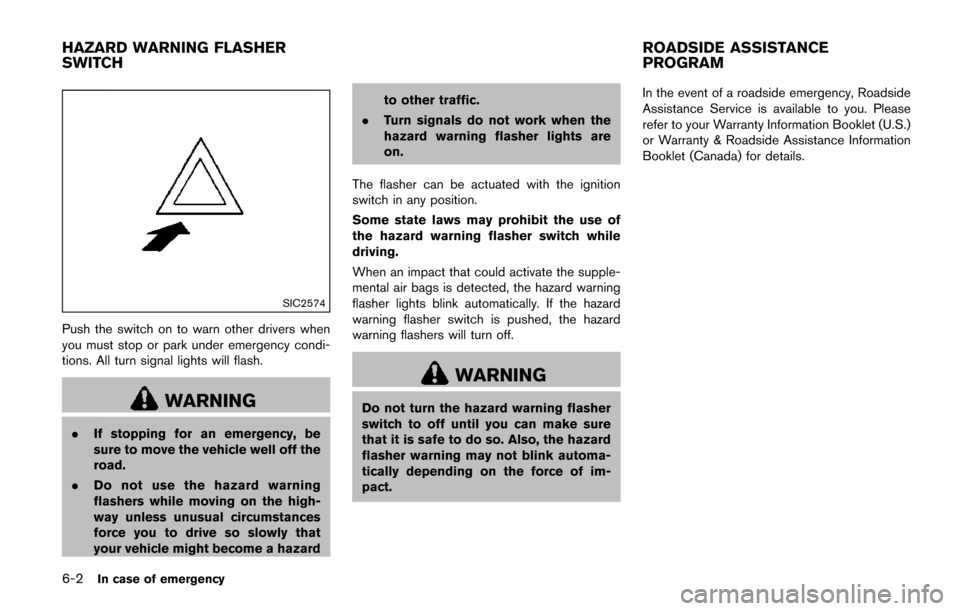
Push the switch on to warn other drivers when
you must stop or park under emergency condi-
tions. All turn signal lights will flash.
WARNING
.If stopping for an emergency, be
sure to move the vehicle well off the
road.
. Do not use the hazard warning
flashers while moving on the high-
way unless unusual circumstances
force you to drive so slowly that
your vehicle might become a hazard to other traffic.
. Turn signals do not work when the
hazard warning flasher lights are
on.
The flasher can be actuated with the ignition
switch in any position.
Some state laws may prohibit the use of
the hazard warning flasher switch while
driving.
When an impact that could activate the supple-
mental air bags is detected, the hazard warning
flasher lights blink automatically. If the hazard
warning flasher switch is pushed, the hazard
warning flashers will turn off.
WARNING
Do not turn the hazard warning flasher
switch to off until you can make sure
that it is safe to do so. Also, the hazard
flasher warning may not blink automa-
tically depending on the force of im-
pact. In the event of a roadside emergency, Roadside
Assistance Service is available to you. Please
refer to your Warranty Information Booklet (U.S.)
or Warranty & Roadside Assistance Information
Booklet (Canada) for details.
HAZARD WARNING FLASHER
SWITCH
ROADSIDE ASSISTANCE
PROGRAM
Page 408 of 520
To shut off the engine in an emergency situation
while driving perform the following procedure:
.Rapidly push the push-button ignition switch
3 consecutive times in less than 1.5
seconds, or
. Push and hold the push-button ignition
switch for more than 2 seconds.TIRE PRESSURE MONITORING SYS-
TEM (TPMS)
This vehicle is equipped with the Tire Pressure
Monitoring System (TPMS) . It monitors tire
pressure of all tires except the spare. When
the low tire pressure warning light is lit and the
CHECK TIRE PRESSURE warning appears on
the vehicle information display, one or more of
your tires is significantly under-inflated. If the
vehicle is being driven with low tire pressure, the
TPMS will activate and warn you of it by the low
tire pressure warning light. This system will
activate only when the vehicle is driven at
speeds above 16 MPH (25 km/h) . For more
details, see “Warning lights, indicator lights and
audible reminders” (P.2-11) and “Tire Pressure
Monitoring System (TPMS)” (P.5-3) .
WARNING
.If the low tire pressure warning light
illuminates while driving, avoid sud-
den steering maneuvers or abrupt
braking, reduce vehicle speed, pull
off the road to a safe location and
stop the vehicle as soon as possi-
ble. Driving with under-inflated tires
may permanently damage the tires
and increase the likelihood of tire failure. Serious vehicle damage
could occur and may lead to an
accident and could result in serious
personal injury. Check the tire pres-
sure for all four tires. Adjust the tire
pressure to the recommended COLD
tire pressure shown on the Tire and
Loading Information label to turn
the low tire pressure warning light
OFF. If the light still illuminates
while driving after adjusting the tire
pressure, a tire may be flat. If you
have a flat tire, replace it with a
spare tire as soon as possible.
. Since the spare tire is not equipped
with the TPMS, when a spare tire is
mounted or a wheel is replaced, the
TPMS will not function and the low
tire pressure warning light will flash
for approximately 1 minute. The
light will remain on after 1 minute.
Have your tires replaced and/or
TPMS system reset as soon as
possible. It is recommended you
visit a NISSAN dealer for these
services.
. Replacing tires with those not ori-
ginally specified by NISSAN could
affect the proper operation of the
In case of emergency6-3
EMERGENCY ENGINE SHUT OFF FLAT TIRE
Page 409 of 520
6-4In case of emergency
TPMS.
. Do not inject any tire liquid or
aerosol tire sealant into the tires,
as this may cause a malfunction of
the tire pressure sensors.
CHANGING A FLAT TIRE
If you have a flat tire, follow the instructions
below.
Stopping the vehicle
1. Safely move the vehicle off the road and
away from traffic.
2. Turn on the hazard warning flashers.
3. Park on a level surface and apply the parking brake. Move the shift lever to the P (Park)
position.
4. Turn off the engine.
5. Raise the hood to warn other traffic, and to signal professional road assistance person-
nel that you need assistance.
6. Have all passengers get out of the vehicle and stand in a safe place, away from traffic
and clear of the vehicle.
WARNING
.Make sure the parking brake is
securely applied and the transmis-
sion is shifted into the P (Park)
position.
. Never change tires when the vehicle
is on a slope, ice or slippery areas.
This is hazardous.
. Never change tires if oncoming
traffic is close to your vehicle. Wait
for professional road assistance.
MCE0001A
Blocking wheels
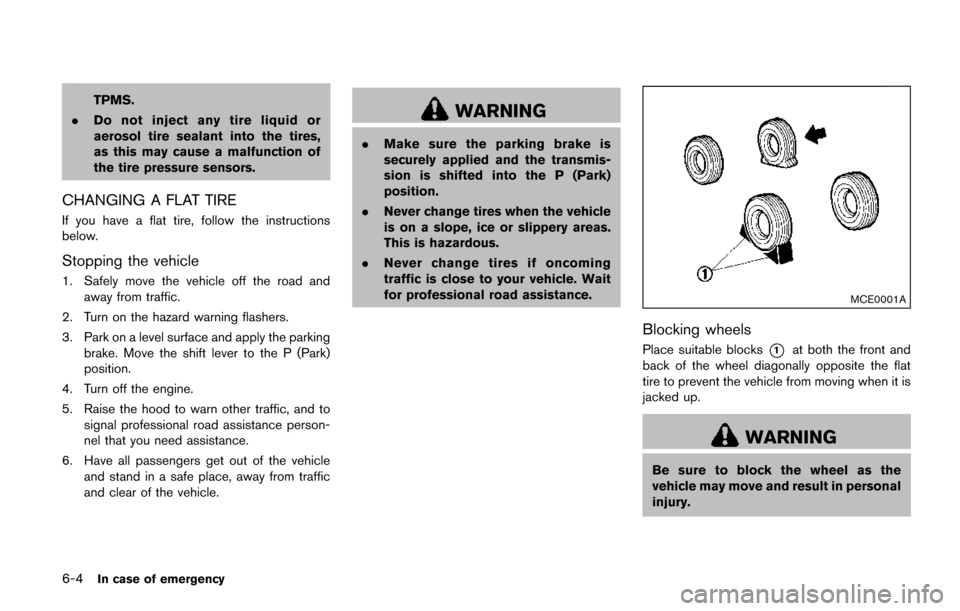
Place suitable blocks*1at both the front and
back of the wheel diagonally opposite the flat
tire to prevent the vehicle from moving when it is
jacked up.
WARNING
Be sure to block the wheel as the
vehicle may move and result in personal
injury.
Page 411 of 520
6-6In case of emergency
JVE0032X
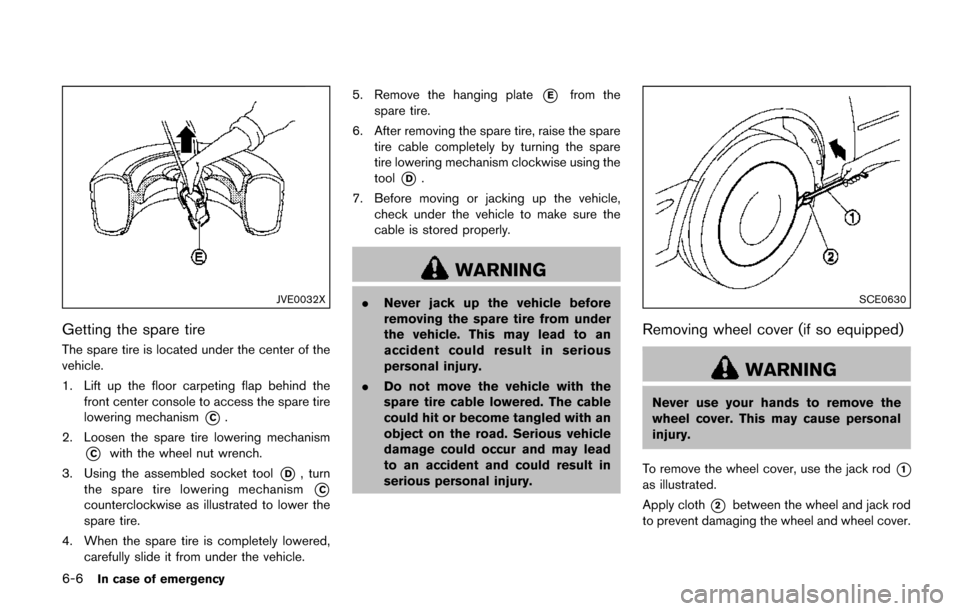
Getting the spare tire
The spare tire is located under the center of the
vehicle.
1. Lift up the floor carpeting flap behind thefront center console to access the spare tire
lowering mechanism
*C.
2. Loosen the spare tire lowering mechanism
*Cwith the wheel nut wrench.
3. Using the assembled socket tool
*D, turn
the spare tire lowering mechanism
*C
counterclockwise as illustrated to lower the
spare tire.
4. When the spare tire is completely lowered, carefully slide it from under the vehicle. 5. Remove the hanging plate
*Efrom the
spare tire.
6. After removing the spare tire, raise the spare tire cable completely by turning the spare
tire lowering mechanism clockwise using the
tool
*D.
7. Before moving or jacking up the vehicle, check under the vehicle to make sure the
cable is stored properly.
WARNING
.Never jack up the vehicle before
removing the spare tire from under
the vehicle. This may lead to an
accident could result in serious
personal injury.
. Do not move the vehicle with the
spare tire cable lowered. The cable
could hit or become tangled with an
object on the road. Serious vehicle
damage could occur and may lead
to an accident and could result in
serious personal injury.SCE0630
Removing wheel cover (if so equipped)
WARNING
Never use your hands to remove the
wheel cover. This may cause personal
injury.
To remove the wheel cover, use the jack rod
*1
as illustrated.
Apply cloth
*2between the wheel and jack rod
to prevent damaging the wheel and wheel cover.
Page 412 of 520
Jacking up the vehicle and removing the
flat tire
WARNING
.Never get under the vehicle while it
is supported only by the jack. If it is
necessary to work under the vehicle,
support it with safety stands.
. Use only the jack provided with your
vehicle to lift the vehicle. Do not use
the jack provided with your vehicle
on other vehicles. The jack is de-
signed for lifting only your vehicle
during a tire change.
. Use the correct jack-up points.
Never use any other part of the
vehicle for jack support.
. Never jack up the vehicle more than
necessary.
. Never use blocks on or under the
jack.
. Do not start or run the engine while
vehicle is on the jack, as it may
cause the vehicle to move.
. Do not allow passengers to stay in
the vehicle while it is on the jack. Carefully read the caution label attached
to the jack body and the following instruc-
tions.
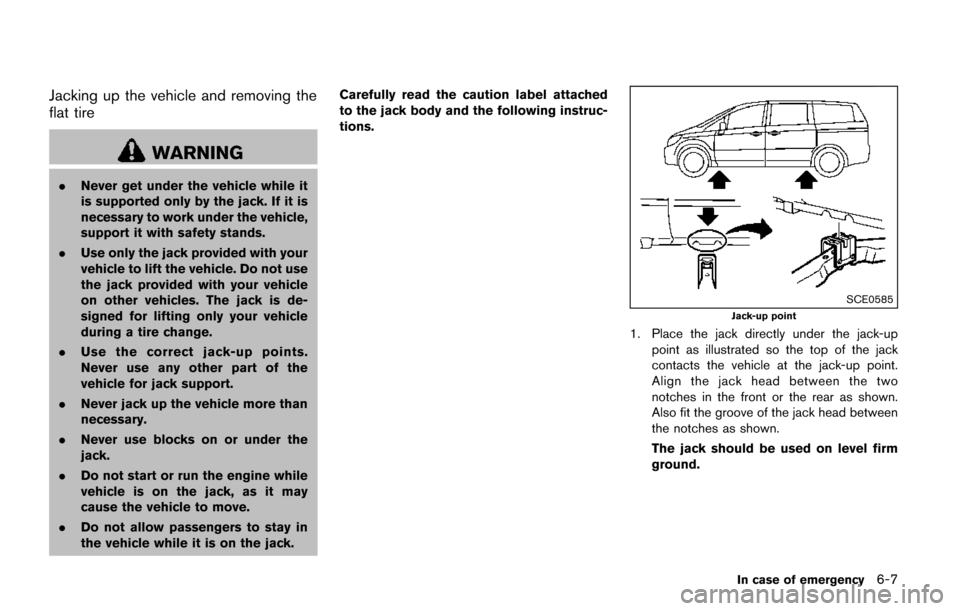
SCE0585
Jack-up point
1. Place the jack directly under the jack-up
point as illustrated so the top of the jack
contacts the vehicle at the jack-up point.
Align the jack head between the two
notches in the front or the rear as shown.
Also fit the groove of the jack head between
the notches as shown.
The jack should be used on level firm
ground.
In case of emergency6-7
Page 414 of 520
4. Lower the vehicle slowly until the tiretouches the ground. Then, with the wheel
nut wrench, tighten the wheel nuts securely
in the sequence illustrated. Lower the
vehicle completely.
5. Securely store the flat tire, jack and tools in the vehicle.
WARNING
.Incorrect wheel nuts or improperly
tightened wheel nuts can cause the
wheel to become loose or come off.
This could cause an accident.
. Do not use oil or grease on the
wheel studs or nuts. This could
cause the nuts to become loose.
. Retighten the wheel nuts when the
vehicle has been driven for 600
miles (1,000 km) (also in cases of a
flat tire, etc.) .
.As soon as possible, tighten the
wheel nuts to the specified torque
with a torque wrench.
Wheel nut tightening torque: 80 ft-lb (108 N·m)
The wheel nuts must be kept tigh- tened to specification at all times. It
is recommended that wheel nuts be
tightened to specifications at each
lubrication interval.
.Adjust tire pressure to the COLD
pressure.
COLD pressure:
After the vehicle has been parked
for three hours or more or driven
less than 1 mile (1.6 km) .
COLD tire pressures are shown on
the Tire and Loading Information
label affixed to the driver side center
pillar.
Stowing the spare tire and the tools
Securely store the spare tire, jack and tools in
their original location.
WARNING
. Always make sure that the spare tire
and jacking equipment are properly
secured after use. Such items can
become dangerous projectiles in an
accident or sudden stop.
. The T-type spare tire and small size
spare tire are designed for emer- gency use. See specific instructions
under the heading
“Wheels and
tires” (P.8-27) .
In case of emergency6-9