2017 NISSAN PATHFINDER ECO mode
[x] Cancel search: ECO modePage 308 of 555
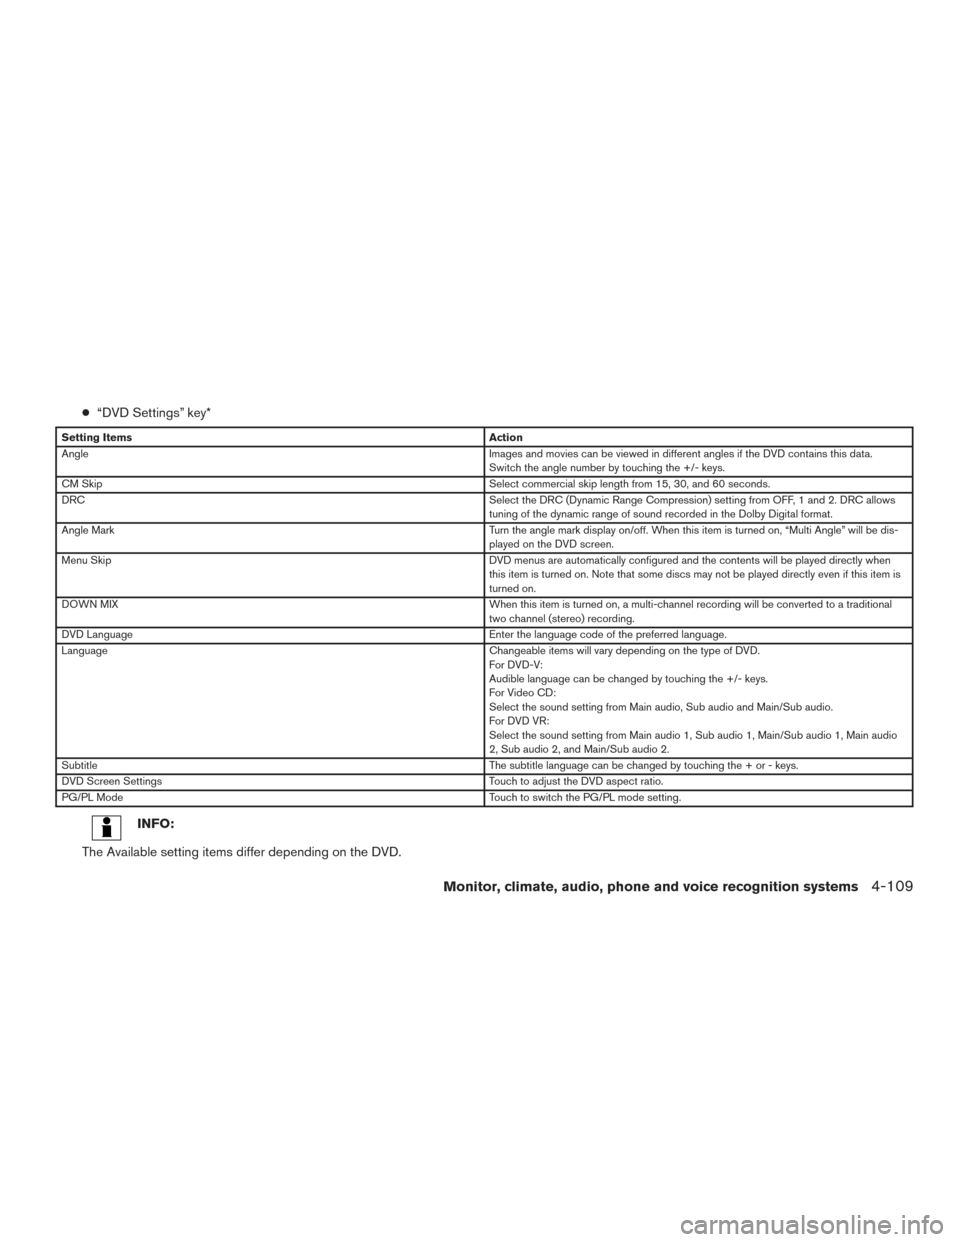
●“DVD Settings” key*
Setting Items Action
Angle Images and movies can be viewed in different angles if the DVD contains this data.
Switch the angle number by touching the +/- keys.
CM Skip Select commercial skip length from 15, 30, and 60 seconds.
DRC Select the DRC (Dynamic Range Compression) setting from OFF, 1 and 2. DRC allows
tuning of the dynamic range of sound recorded in the Dolby Digital format.
Angle Mark Turn the angle mark display on/off. When this item is turned on, “Multi Angle” will be dis-
played on the DVD screen.
Menu Skip DVD menus are automatically configured and the contents will be played directly when
this item is turned on. Note that some discs may not be played directly even if this item is
turned on.
DOWN MIX When this item is turned on, a multi-channel recording will be converted to a traditional
two channel (stereo) recording.
DVD Language Enter the language code of the preferred language.
Language Changeable items will vary depending on the type of DVD.
For DVD-V:
Audible language can be changed by touching the +/- keys.
For Video CD:
Select the sound setting from Main audio, Sub audio and Main/Sub audio.
For DVD VR:
Select the sound setting from Main audio 1, Sub audio 1, Main/Sub audio 1, Main audio
2, Sub audio 2, and Main/Sub audio 2.
Subtitle The subtitle language can be changed by touching the + or - keys.
DVD Screen Settings Touch to adjust the DVD aspect ratio.
PG/PL Mode Touch to switch the PG/PL mode setting.
INFO:
The Available setting items differ depending on the DVD.
Monitor, climate, audio, phone and voice recognition systems4-109
Page 311 of 555
The Gracenote service uses a unique identifier to
track queries for statistical purposes. The pur-
pose of a randomly assigned numeric identifier is
to allow the Gracenote service to count queries
without knowing anything about who you are. For
more information, see the web page for the
Gracenote Privacy Policy for the Gracenote ser-
vice.
The Gracenote Software and each item of
Gracenote Data is licensed to you “AS IS”.
Gracenote makes no representations or warran-
ties, express or implied, regarding the accuracy
of any Gracenote Data from the Gracenote Serv-
ers. Gracenote reserves the right to delete data
from the Gracenote Servers or to change data
categories for any cause that Gracenote seems
sufficient. No warranty is made that the
Gracenote Software or Gracenote Servers are
error-free or that functioning of Gracenote Soft-
ware or Gracenote Servers will be uninterrupted.
Gracenote is not obligated to provide you with
new enhanced or additional data types or cat-
egories that Gracenote may provide in the future
and is free to discontinue its services at any time.GRACENOTE DISCLAIMS ALL WARRANTIES
EXPRESS OR IMPLIED, INCLUDING, BUT NOT
LIMITED TO, IMPLIED WARRANTIES OF MER-
CHANTABILITY, FITNESS FOR A PARTICULAR
PURPOSE, TITLE, AND NON-INFRINGEMENT.
GRACENOTE DOES NOT WARRANT THE RE-
SULTS THAT WILL BE OBTAINED BY YOUR
USE OF THE GRACENOTE SOFTWARE OR
ANY GRACENOTE SERVER. IN NO CASE
WILL GRACENOTE BE LIABLE FOR ANY
CONSEQUENTIAL OR INCIDENTAL DAM-
AGES OR FOR ANY LOST PROFITS OR LOST
REVENUES.
© Gracenote, Inc. 2009
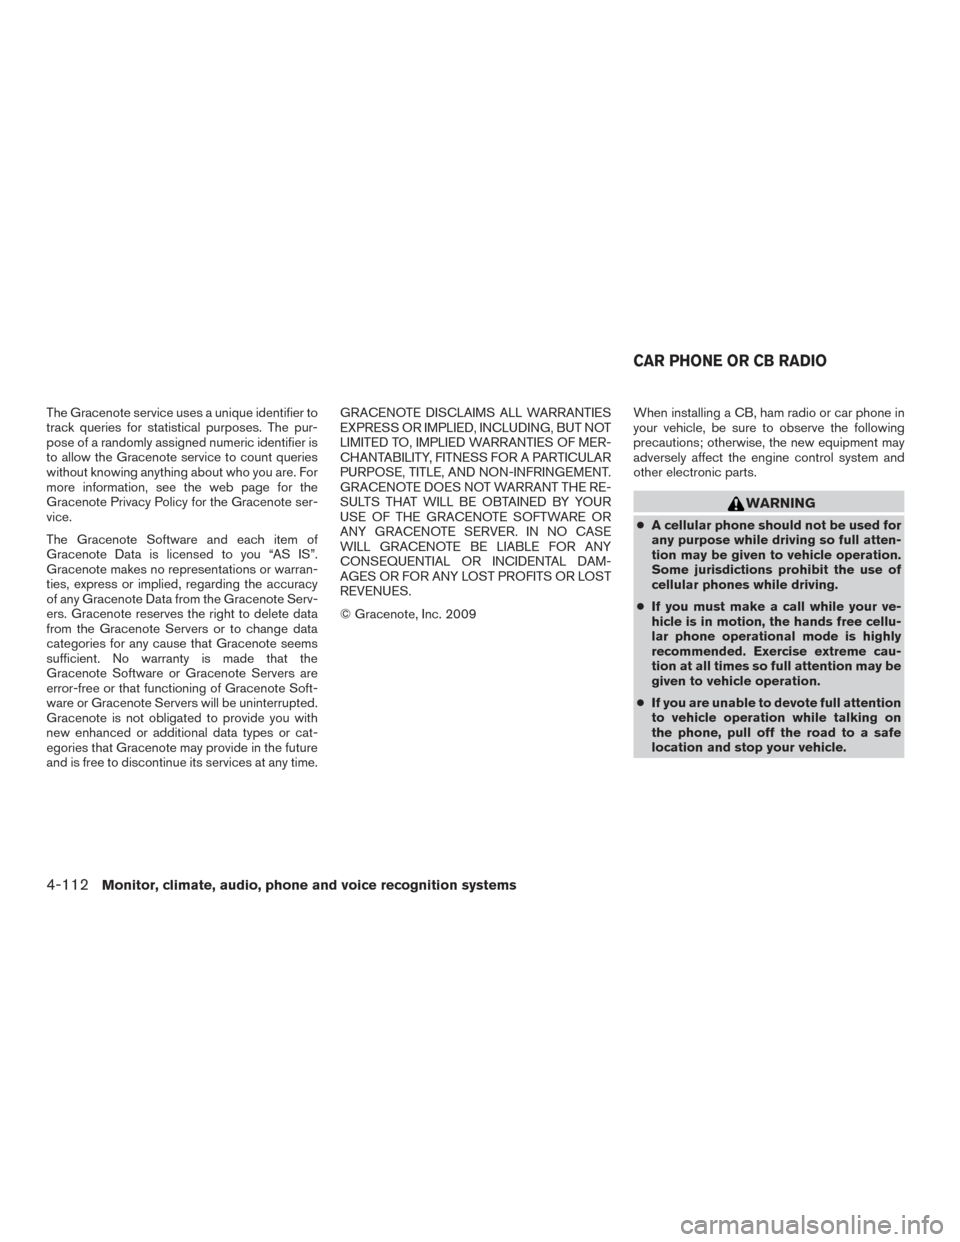
When installing a CB, ham radio or car phone in
your vehicle, be sure to observe the following
precautions; otherwise, the new equipment may
adversely affect the engine control system and
other electronic parts.
WARNING
●
A cellular phone should not be used for
any purpose while driving so full atten-
tion may be given to vehicle operation.
Some jurisdictions prohibit the use of
cellular phones while driving.
● If you must make a call while your ve-
hicle is in motion, the hands free cellu-
lar phone operational mode is highly
recommended. Exercise extreme cau-
tion at all times so full attention may be
given to vehicle operation.
● If you are unable to devote full attention
to vehicle operation while talking on
the phone, pull off the road to a safe
location and stop your vehicle.
CAR PHONE OR CB RADIO
4-112Monitor, climate, audio, phone and voice recognition systems
Page 315 of 555
The Bluetooth® word
mark and logos are
registered trademarks
owned by Bluetooth
SIG, Inc. and any use
of such marks by
DENSO
CORPORATION is
under license. Other
trademarks and trade
names are those of
their respective own-
ers.
PHONE
Connecting Bluetooth® Device
Your vehicle is equipped with a Bluetooth®
Hands-Free Phone System and Bluetooth®
streaming audio device. If you are an owner of a
compatible Bluetooth® enabled cellular phone
or Bluetooth® audio device, you can set up the
wireless connection between your cellular phone
and the in-vehicle phone module, or Bluetooth®
audio and in-vehicle audio module. With
Bluetooth® wireless technology, you can make
or receive a telephone call with your cellularphone in your pocket and listen to music on your
Bluetooth® streaming audio device via the in-
vehicle system.
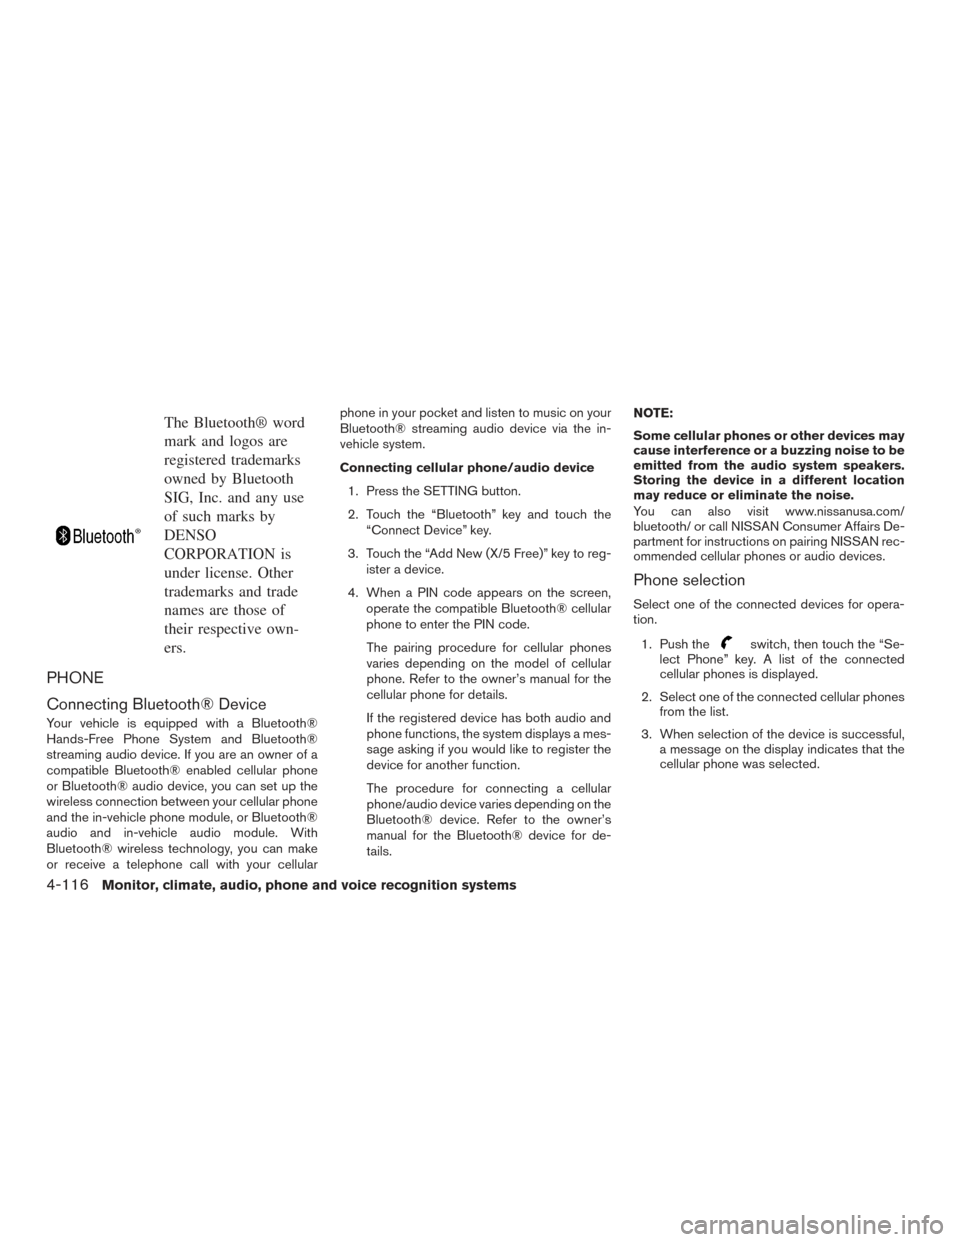
Connecting cellular phone/audio device
1. Press the SETTING button.
2. Touch the “Bluetooth” key and touch the “Connect Device” key.
3. Touch the “Add New (X/5 Free)” key to reg- ister a device.
4. When a PIN code appears on the screen, operate the compatible Bluetooth® cellular
phone to enter the PIN code.
The pairing procedure for cellular phones
varies depending on the model of cellular
phone. Refer to the owner’s manual for the
cellular phone for details.
If the registered device has both audio and
phone functions, the system displays a mes-
sage asking if you would like to register the
device for another function.
The procedure for connecting a cellular
phone/audio device varies depending on the
Bluetooth® device. Refer to the owner’s
manual for the Bluetooth® device for de-
tails. NOTE:
Some cellular phones or other devices may
cause interference or a buzzing noise to be
emitted from the audio system speakers.
Storing the device in a different location
may reduce or eliminate the noise.
You can also visit www.nissanusa.com/
bluetooth/ or call NISSAN Consumer Affairs De-
partment for instructions on pairing NISSAN rec-
ommended cellular phones or audio devices.
Phone selection
Select one of the connected devices for opera-
tion.
1. Push the
switch, then touch the “Se-
lect Phone” key. A list of the connected
cellular phones is displayed.
2. Select one of the connected cellular phones from the list.
3. When selection of the device is successful, a message on the display indicates that the
cellular phone was selected.
4-116Monitor, climate, audio, phone and voice recognition systems
Page 328 of 555
NISSANCONNECTSMAPPS
OVERVIEW
Laws in some jurisdictions may restrict the use of
some of the applications and features, such as
social networking and texting. Check local regu-
lations for any requirements.
NissanConnect
SMApps provide in-vehicle ac-
cess to NissanConnect Vehicle Apps.
Some pre-installed NissanConnect Vehicle Apps
can be used without taking any extra steps.
CAUTION
● While driving, some operations are lim-
ited in order to prevent distracting the
driver. While driving, avoid keeping a
close watch on the display.
● Some application services may be sub-
ject to change or termination without
prior notice.
The system allows you to download new applica-
tions, update downloaded applications and de-
lete downloaded applications in a similar manner
as popular smartphone operating systems.
You will need to connect a compatible smart-
phone to the vehicle in order to update Nissan-
Connect Vehicle Apps. The usage of applications is only guaranteed for
smartphones that have been tested and ap-
proved for use with NissanConnect
SMApps.
Only iPhone® and Android devices are currently
supported. Android smartphones must support
Bluetooth® and SPP (Serial Port Profile) .
USING APPLICATIONS
NOTE:
To use APP functions on the models with-
out a navigation system, the calendar set-
ting is necessary for checking the SSL ex-
piration date. For additional information,
refer to “Clock settings” in this section.
MAIN OPERATION
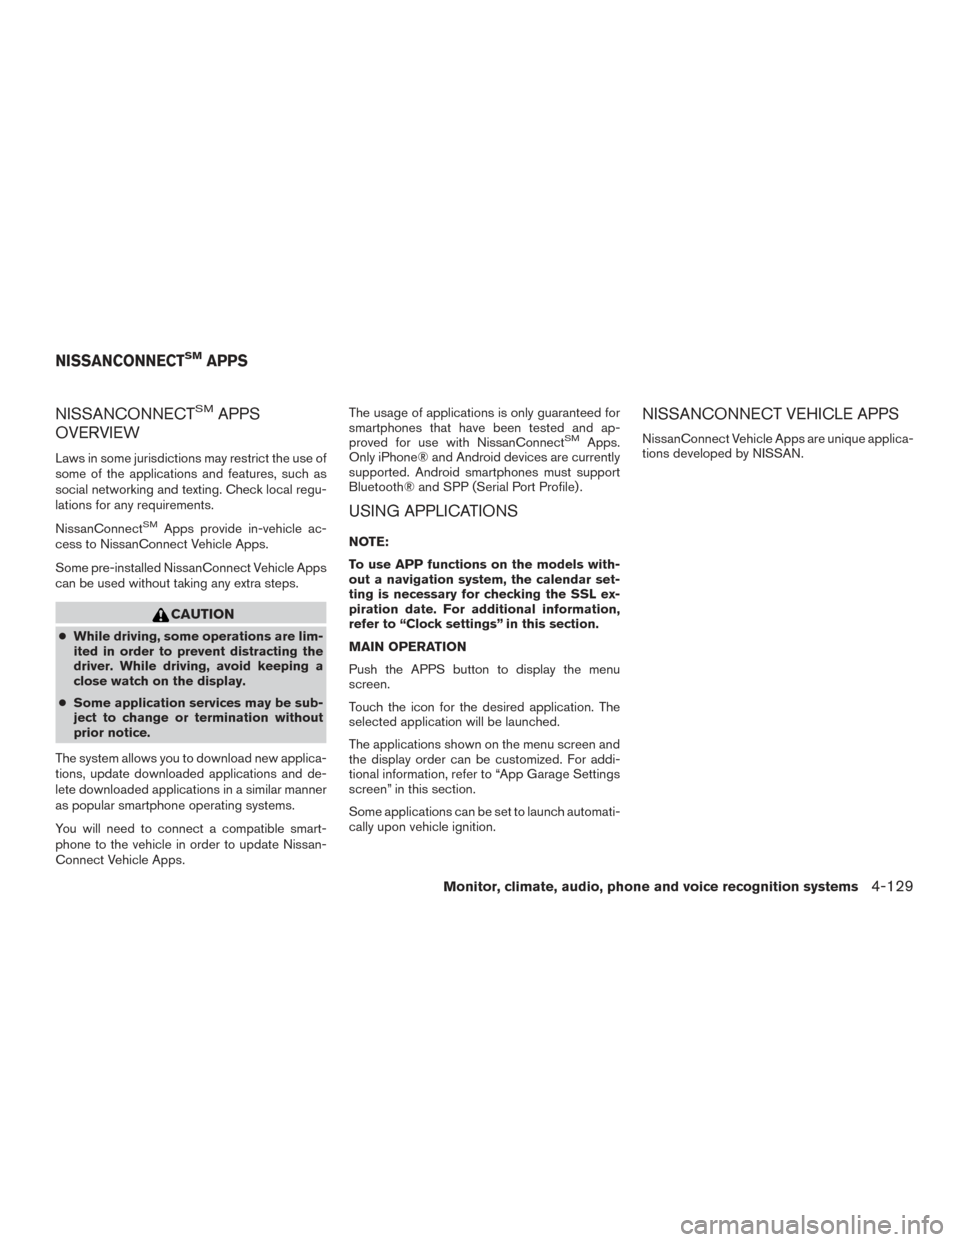
Push the APPS button to display the menu
screen.
Touch the icon for the desired application. The
selected application will be launched.
The applications shown on the menu screen and
the display order can be customized. For addi-
tional information, refer to “App Garage Settings
screen” in this section.
Some applications can be set to launch automati-
cally upon vehicle ignition.
NISSANCONNECT VEHICLE APPS
NissanConnect Vehicle Apps are unique applica-
tions developed by NISSAN.
NISSANCONNECTSMAPPS
Monitor, climate, audio, phone and voice recognition systems4-129
Page 332 of 555
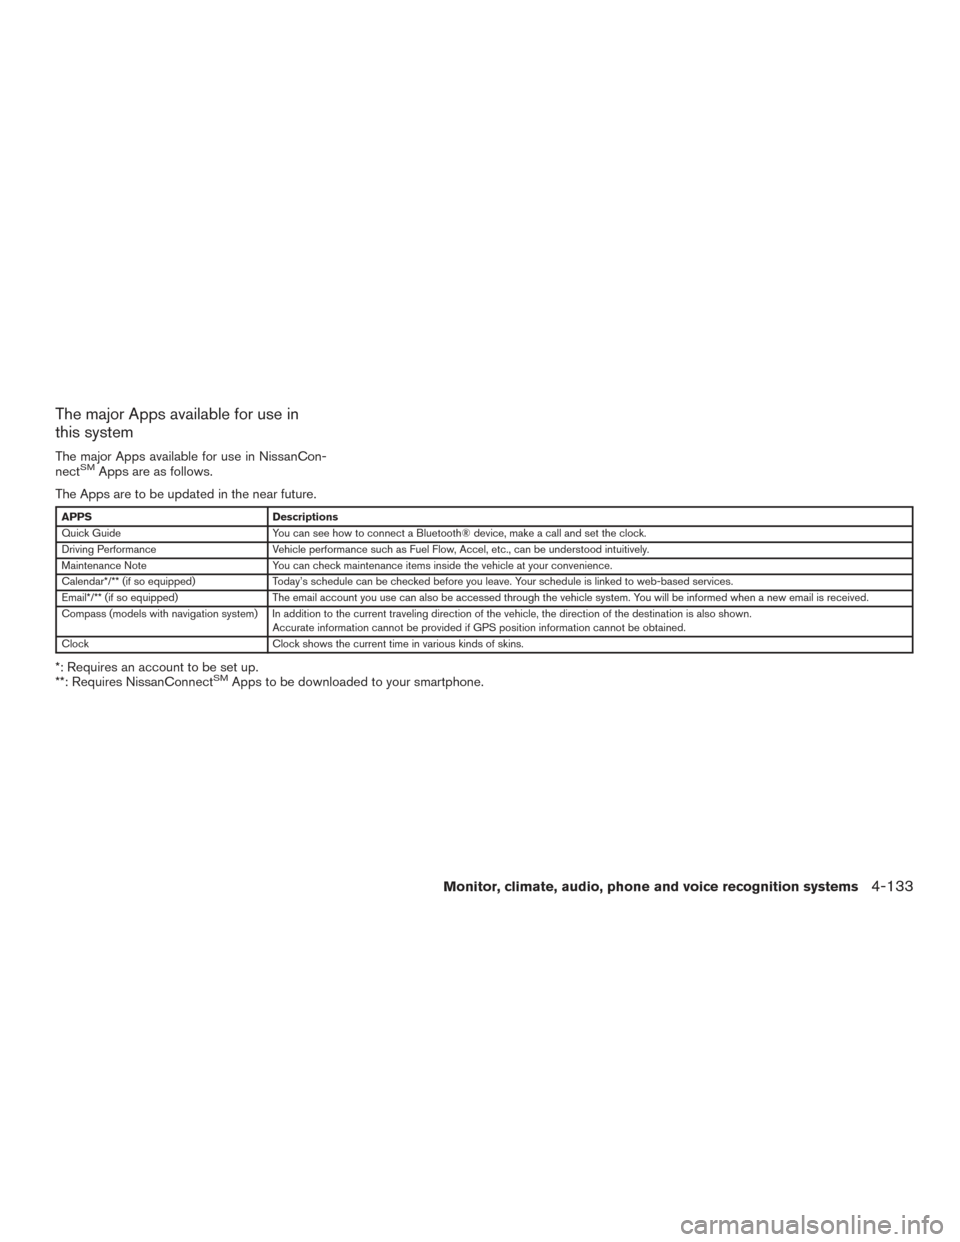
The major Apps available for use in
this system
The major Apps available for use in NissanCon-
nectSMApps are as follows.
The Apps are to be updated in the near future.
APPS Descriptions
Quick Guide You can see how to connect a Bluetooth® device, make a call and set the clock.
Driving Performance Vehicle performance such as Fuel Flow, Accel, etc., can be understood intuitively.
Maintenance Note You can check maintenance items inside the vehicle at your convenience.
Calendar*/** (if so equipped) Today’s schedule can be checked before you leave. Your schedule is linked to web-based services.
Email*/** (if so equipped) The email account you use can also be accessed through the vehicle system. You will be informed when a new email is received.
Compass (models with navigation system) In addition to the current traveling direction of the vehicle, the direction of the destination is also shown .
Accurate information cannot be provided if GPS position information cannot be obtained.
Clock Clock shows the current time in various kinds of skins.
*: Requires an account to be set up.
**: Requires NissanConnectSMApps to be downloaded to your smartphone.
Monitor, climate, audio, phone and voice recognition systems4-133
Page 335 of 555
3. Input your name and PIN code and selectthe “Instant Access” key ON or OFF and
then touch the “Save” key.
INFO:
If the Instant Access mode is set to ON, it is not
necessary to enter a PIN code each time. 4. The stored user name is displayed in the list. Touch the user name.
5. Input PIN code and touch the “OK” key. This will display your mail box screen.
If an account is not yet set up, set up an account
(Google account, etc.) in the Manager Account
screen displayed.
INFO:
● On the receive message screen, touch the
sender name or address to display the
sender detail screen.
● System folders (Inbox, Draft, Send, etc.)
cannot be modified.
USING VOICE RECOGNITION
SYSTEM
Initialization
The Voice Recognition system will activate a few
seconds after the ignition switch is turned on.
Once activation is complete, you can start using
the system by pushing the
switch on the
steering wheel and speaking voice commands. If
the
switch on the steering wheel is pushed
before the activation completes, the display will
show a message to wait until the system is ready.
BEFORE STARTING
To get the best recognition performance from the
Voice Recognition system, observe the following
items.
● The interior of the vehicle should be as quiet
as possible. Close the windows to eliminate
surrounding noises (traffic noise and vibra-
tion sounds, etc.) which may prevent the
system from correctly recognizing the voice
commands.
● Wait until the tone sounds before speaking a
command.
● Speak in a natural conversational voice with-
out pausing between words.
GIVING VOICE COMMANDS
1. Push theswitch located on the steer-
ing wheel.
2. A list of commands appear on the screen, and the system provides a voice menu
prompt.
When this screen is displayed, almost all of
the commands can be recognized. Available
commands for each category can be shown
on the right side of the screen. Highlight a
category listed on the left side of the screen
with the multi-function controller to find your
preferred command.
5GE0002X
VOICE RECOGNITION SYSTEM
4-136Monitor, climate, audio, phone and voice recognition systems
Page 336 of 555
Selecting a category by touching the screen or
pressing the ENTER button will execute the com-
mand. After executing the category command,
only the commands related to the selected cat-
egory can be recognized.3. After the tone sounds and the icon on the screen changes from
to,
speak a command. You can also select a
command by directly touching the screen.
The Voice Recognition system will pause opera-
tion when the multi-function controller is moved.
To resume operation, push the
switch on
the steering wheel.
4. Continue to follow the voice menu prompts and speak after the tone sounds until the
preferred operation is completed.
To cancel the voice command, push and hold
the
switch.
You can interrupt the voice prompt at any time by
pushing the
switch.
Operating tips
● Speak a command after the tone.
● If the command is not accepted, the system
announces, “Please say again”. Repeat the
command in a clear voice. ●
Push the
switch on the steering-
wheel once to return to the previous screen.
● Voice commands spoken from the passen-
ger seat cannot be recognized.
● When the
switch on the steering
wheel is pushed while the air conditioner is
set to the Auto mode, the system controls
the air conditioner fan speed in order to
improve Voice Recognition performance.
When the fan speed is set higher than the
4th speed position, the fan speed is de-
creased to 4th speed. When the air condi-
tioner is set to the manual mode, the fan
speed does not change. The accuracy of
Voice Recognition may be affected depend-
ing on the fan speed and the air direction.
● To skip the voice guidance function and give
the command immediately, push the
switch on the steering wheel to interrupt the
system. Remember to speak after the tone.
● To cancel the command, push and hold
the
switch or theswitch on the
steering-wheel. ●
To adjust the volume of the system feedback,
push the volume switch on the steering
wheel or use the audio system
VOL/ON•OFF button while the system is
making the announcement.
Voice prompt interrupt
Push theswitch on the steering-wheel to
stop the voice prompt and give the command at
once. Remember to wait for the tone before
speaking.
How to see the voice command
screen
1. Push theswitch to display the first
screen of the voice command list.
2. Speak a command or select an item from the voice command list. The second screen is
displayed.
3. Speak a command. The list screen is dis- played.
4. Speak the preferred number from the list to perform operation.
The voice commands can be spoken one at a
time following prompts step by step or the com-
mand can be spoken successively in one step.
Monitor, climate, audio, phone and voice recognition systems4-137
Page 342 of 555
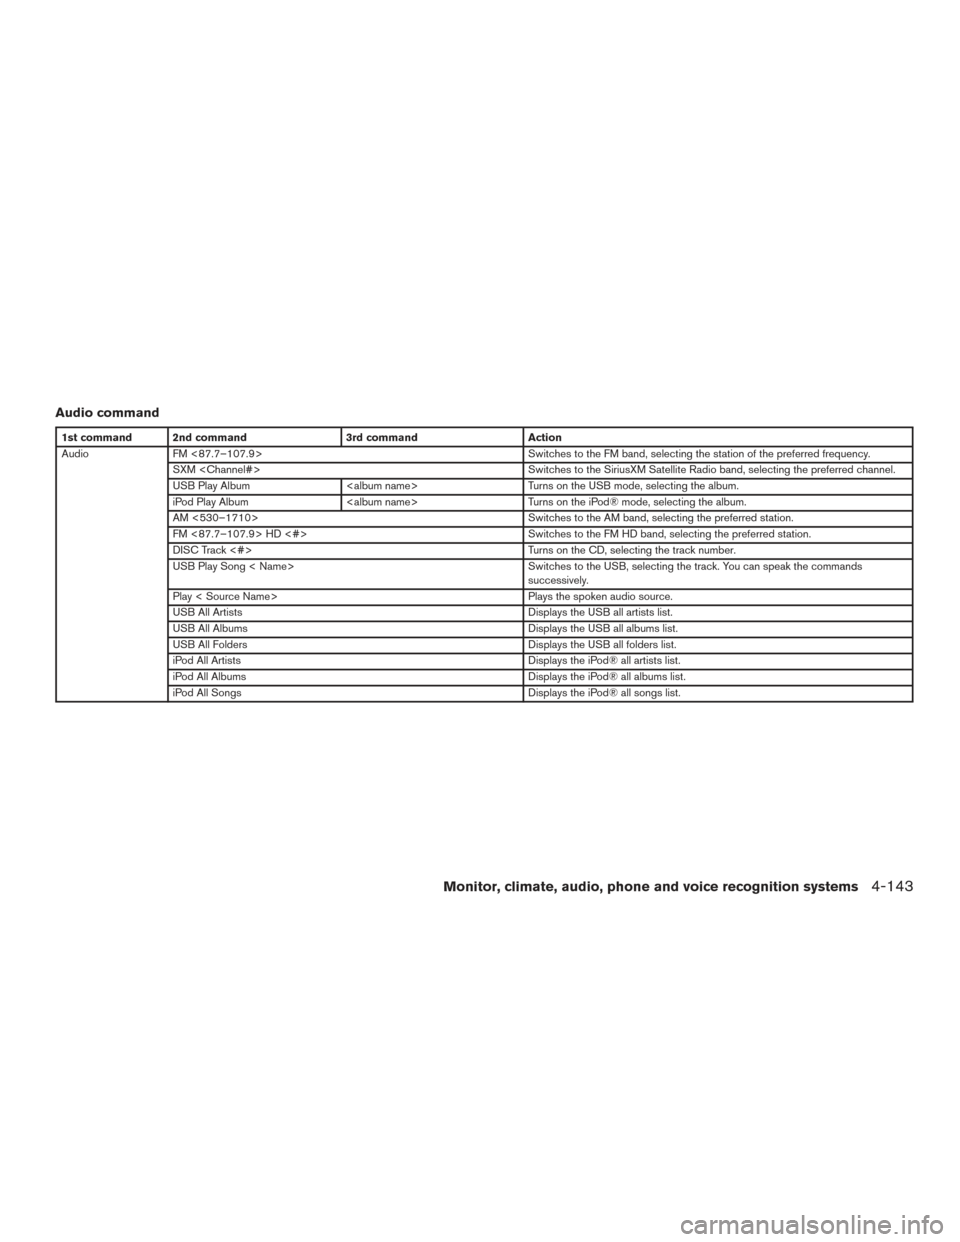
Audio command
1st command 2nd command3rd commandAction
Audio FM <87.7–107.9> Switches to the FM band, selecting the station of the preferred frequency.
SXM
USB Play Album
iPod Play Album
AM <530–1710> Switches to the AM band, selecting the preferred station.
FM <87.7–107.9> HD <#> Switches to the FM HD band, selecting the preferred station.
DISC Track <#> Turns on the CD, selecting the track number.
USB Play Song < Name> Switches to the USB, selecting the track. You can speak the commands
successively.
Play < Source Name> Plays the spoken audio source.
USB All Artists Displays the USB all artists list.
USB All Albums Displays the USB all albums list.
USB All Folders Displays the USB all folders list.
iPod All Artists Displays the iPod® all artists list.
iPod All Albums Displays the iPod® all albums list.
iPod All Songs Displays the iPod® all songs list.
Monitor, climate, audio, phone and voice recognition systems4-143