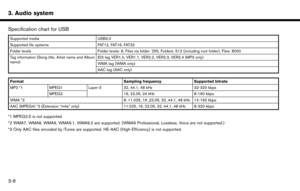
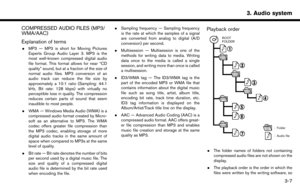
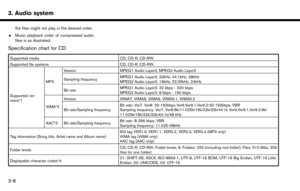
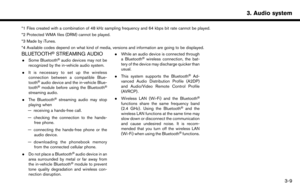
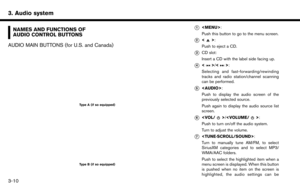
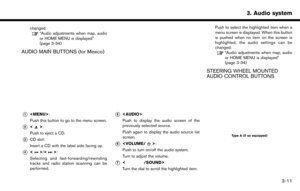
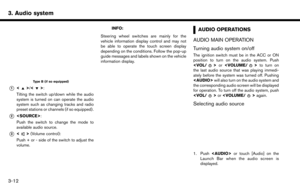
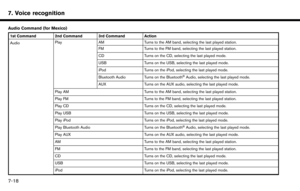
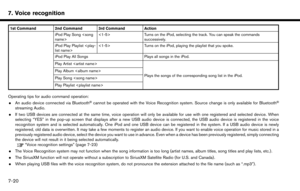
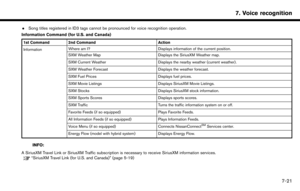
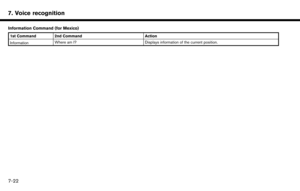
Page 49 of 243
![NISSAN MAXIMA 2017 A36 / 8.G Nissan Connect Navigation Manual Scan tuning:
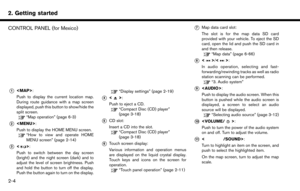
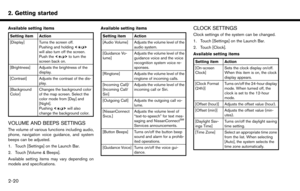
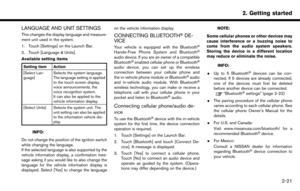
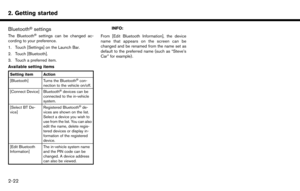
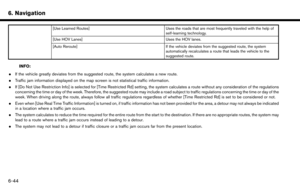
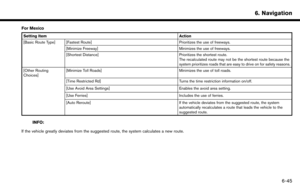
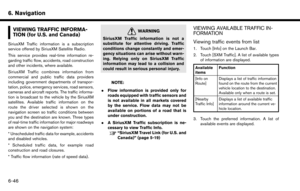
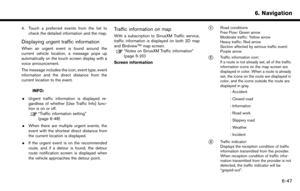
To scan tune the stations/channels, touch [FM
Menu], [AM Menu] or [SXM Menu] on the radio
screen and then touch [SCAN]. The stations/
channels will be tuned from low to high
frequencies a NISSAN MAXIMA 2017 A36 / 8.G Nissan Connect Navigation Manual Scan tuning:
To scan tune the stations/channels, touch [FM
Menu], [AM Menu] or [SXM Menu] on the radio
screen and then touch [SCAN]. The stations/
channels will be tuned from low to high
frequencies a](/manual-img/5/539/w960_539-48.png)
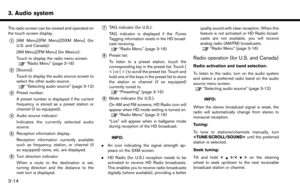
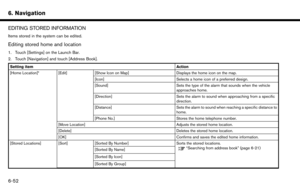
Scan tuning:
To scan tune the stations/channels, touch [FM
Menu], [AM Menu] or [SXM Menu] on the radio
screen and then touch [SCAN]. The stations/
channels will be tuned from low to high
frequencies and stop at each broadcasting
station/channel for several seconds. Touching
[SCAN] again during this period of several
seconds will stop scan tuning and the radio will
remain tuned to that station/channel.
Pushing and holding<
>/<>will also
scan tune the stations/channels.
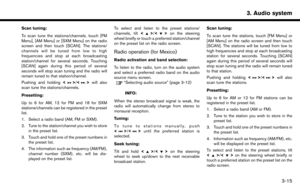
Presetting:
Up to 6 for AM, 12 for FM and 18 for SXM
stations/channels can be registered in the preset
list.
1. Select a radio band (AM, FM or SXM) .
2. Tune to the station/channel you wish to store in the preset list.
3. Touch and hold one of the preset numbers in the preset list.
4. The information such as frequency (AM/FM) , channel number (SXM) , etc. will be dis-
played on the preset list. To select and listen to the preset stations/
channels, tilt
<
>/<> on the steering
wheel briefly or touch a preferred station/channel
on the preset list on the radio screen.
Radio operation (for Mexico)
Radio activation and band selection:
To listen to the radio, turn on the audio system
and select a preferred radio band on the audio
source menu screen.
“Selecting audio source” (page 3-12)
INFO:
When the stereo broadcast signal is weak, the
radio will automatically change from stereo to
monaural reception.
Tuning:
To tune to stations manually, push
<
> /<> until the preferred station is
selected.
Seek tuning:
Tilt and hold <
>/<>on the steering
wheel to seek up/down to the next receivable
broadcast station. Scan tuning:
To scan tune the stations, touch [FM Menu] or
[AM Menu] on the radio screen and then touch
[SCAN]. The stations will be tuned from low to
high frequencies and stop at each broadcasting
station for several seconds. Touching [SCAN]
again during this period of several seconds will
stop scan tuning and the radio will remain tuned
to that station.
Pushing and holding
<
>/<>will also
scan tune the stations.
Presetting:
Up to 6 for AM or 12 for FM stations can be
registered in the preset list.
1. Select a radio band (AM or FM) .
2. Tune to the station you wish to store in the preset list.
3. Touch and hold one of the preset numbers in the preset list.
4. Information such as frequency (AM/FM) , etc. will be displayed on the preset list.
To select and listen to the preset stations, tilt
<
>/<> on the steering wheel briefly or
touch a preferred station on the preset list on the
radio screen.
3. Audio system
3-15
Page 50 of 243
![NISSAN MAXIMA 2017 A36 / 8.G Nissan Connect Navigation Manual 3. Audio system
Radio Menu
Touch [FM Menu], [AM Menu], and [SXM Menu] (for U.S. and Canada) on the FM, AM or SXM (for U.S. and Canada) screen to display the corresponding
screen.
The following items a NISSAN MAXIMA 2017 A36 / 8.G Nissan Connect Navigation Manual 3. Audio system
Radio Menu
Touch [FM Menu], [AM Menu], and [SXM Menu] (for U.S. and Canada) on the FM, AM or SXM (for U.S. and Canada) screen to display the corresponding
screen.
The following items a](/manual-img/5/539/w960_539-49.png)
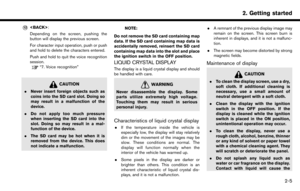
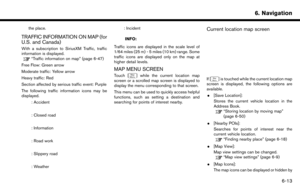
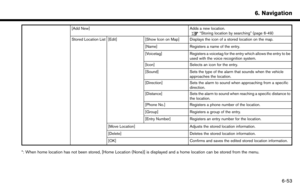
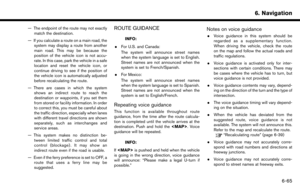
3. Audio system
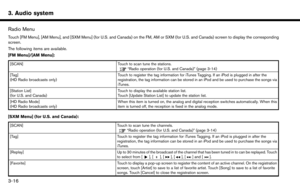
Radio Menu
Touch [FM Menu], [AM Menu], and [SXM Menu] (for U.S. and Canada) on the FM, AM or SXM (for U.S. and Canada) screen to display the corresponding
screen.
The following items are available.
[FM Menu]/[AM Menu]:
[SCAN]Touch to scan tune the stations.“Radio operation (for U.S. and Canada)” (page 3-14)
[Tag]
(HD Radio broadcasts only) Touch to register the tag information for iTunes Tagging. If an iPod is plugged in after the
registration, the tag information can be stored in an iPod and be used to purchase the songs via
iTunes.
[Station List]
(for U.S. and Canada) Touch to display the available station list.
Touch [Update Station List] to update the station list.
[HD Radio Mode]
(HD Radio broadcasts only) When this item is turned on, the analog and digital reception switches automatically. When this
item is turned off, the reception is fixed in the analog mode.
[SXM Menu] (for U.S. and Canada):
[SCAN]
Touch to scan tune the channels.“Radio operation (for U.S. and Canada)” (page 3-14)
[Tag] Touch to register the tag information for iTunes Tagging. If an iPod is plugged in after the registration, the tag information can be stored in an iPod and be used to purchase the songs via
iTunes.
[Replay] Up to 30 minutes of the broadcast of the channel that has been tuned in to can be replayed. Touch to select from [
], [], [], [], [] and [].
[Favorite] Touch to display a pop-up screen to register the content of an active channel. On the registration screen, touch [Artist] to save to a list of favorite artist. Touch [Song] to save to a list of favorite
songs. Touch [Cancel] to close the registration screen.
3-16
Page 51 of 243
![NISSAN MAXIMA 2017 A36 / 8.G Nissan Connect Navigation Manual [Categories/Genres]Touch to display the category/genre list.
[Customize Channel List] Touch to customize the channel list. Only the selected channels will be tuned in to when you seek
or scan the chan NISSAN MAXIMA 2017 A36 / 8.G Nissan Connect Navigation Manual [Categories/Genres]Touch to display the category/genre list.
[Customize Channel List] Touch to customize the channel list. Only the selected channels will be tuned in to when you seek
or scan the chan](/manual-img/5/539/w960_539-50.png)
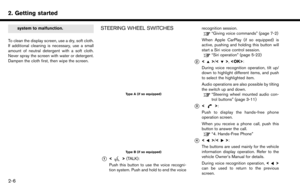
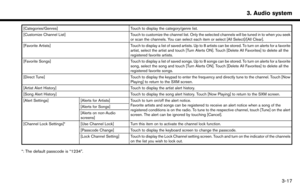
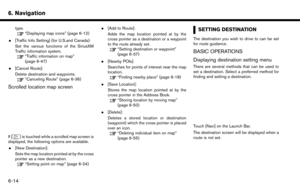
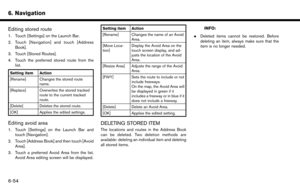
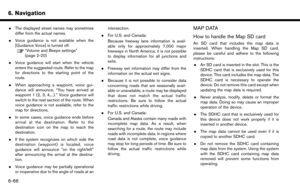
[Categories/Genres]Touch to display the category/genre list.
[Customize Channel List] Touch to customize the channel list. Only the selected channels will be tuned in to when you seek
or scan the channels. You can select each item or select [All Select]/[All Clear].
[Favorite Artists] Touch to display a list of saved artists. Up to 8 artists can be stored. To turn on alerts for a favorite
artist, select the artist and touch [Turn Alerts ON]. Touch [Delete All Favorites] to delete all the
registered favorite artists.
[Favorite Songs] Touch to display a list of saved songs. Up to 8 songs can be stored. To turn on alerts for a favorite
song, select the song and touch [Turn Alerts ON]. Touch [Delete All Favorites] to delete all the
registered favorite songs.
[Direct Tune] Touch to display the keypad to enter the frequency and directly tune to the channel. Touch [Now
Playing] to return to the SXM screen.
[Artist Alert History] Touch to display the artist alert history.
[Song Alert History] Touch to display the song alert history. Touch [Now Playing] to return to the SXM screen.
[Alert Settings] [Alerts for Artists]Touch to turn on/off the alert notice.
Favorite artists and songs can be registered to receive an alert notice when a song of the
registered conditions is on the radio. To tune to the respective channel, touch [Tune] on the alert
screen. The alert can be ignored by touching [Cancel].
[Alerts for Songs]
[Alerts on non-Audio
screens]
[Channel Lock Settings]* [Use Channel Lock] Turn this item on to activate the channel lock function. [Passcode Change] Touch to display the keyboard screen to change the passcode.
[Lock Channel Setting] Touch to display the Lock Channel setting screen. Touch and turn on the indicator of the channelson the list you wish to lock out.
*: The default passcode is “1234”.
3. Audio system
3-17
Page 52 of 243
3. Audio system
INFO:
. SiriusXM services require a subscription
after trial period and are sold separately or
as a package. The satellite service is avail-
able only in the 48 contiguous USA and DC.
SiriusXM satellite service is also available in
Canada; see www.siriusxm.ca.
. It may take some time to receive the
activation signal after the initiation of the
SiriusXM Satellite Radio subscription. After
receiving the activation signal, an available
channel list will automatically be updated in
the radio. Change the position of the ignition
switch from LOCK to ACC to update the
SiriusXM channel list.COMPACT DISC (CD) PLAYER
How to view CD screen
3-18
Page 53 of 243
![NISSAN MAXIMA 2017 A36 / 8.G Nissan Connect Navigation Manual *1[CD Menu]:
Touch to display the CD Menu screen.
“CD Menu” (page 3-20)
*2[Source]:
Touch to switch to the source select screen.
“Selecting audio source” (page 3-12)
*3Track information:
Track NISSAN MAXIMA 2017 A36 / 8.G Nissan Connect Navigation Manual *1[CD Menu]:
Touch to display the CD Menu screen.
“CD Menu” (page 3-20)
*2[Source]:
Touch to switch to the source select screen.
“Selecting audio source” (page 3-12)
*3Track information:
Track](/manual-img/5/539/w960_539-52.png)
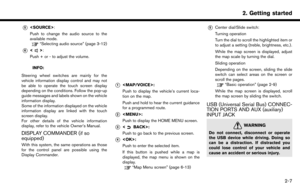
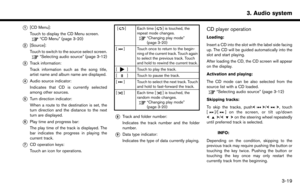
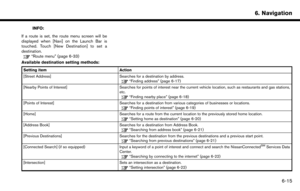
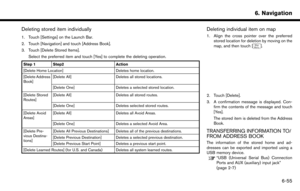
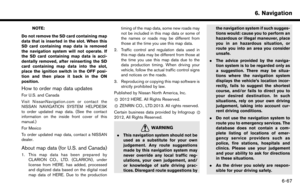
*1[CD Menu]:
Touch to display the CD Menu screen.
“CD Menu” (page 3-20)
*2[Source]:
Touch to switch to the source select screen.
“Selecting audio source” (page 3-12)
*3Track information:
Track information such as the song title,
artist name and album name are displayed.
*4Audio source indicator:
Indicates that CD is currently selected
among other sources.
*5Turn direction indicator:
When a route to the destination is set, the
turn direction and the distance to the next
turn are displayed.
*6Play time and progress bar:
The play time of the track is displayed. The
bar indicates the progress in playing the
current track.
*7CD operation keys:
Touch an icon for operations.
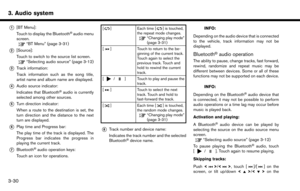
[] Each time [] is touched, the
repeat mode changes.
“Changing play mode”
(page 3-20)
[
] Touch once to return to the begin- ning of the current track. Touch again
to select the previous track. Touch
and hold to rewind the current track.
[
] Touch to play the track.
[
] Touch to pause the track.
[
] Touch to select the next track. Touch and hold to fast-forward the track.
[
] Each time [] is touched, the
random mode changes.
“Changing play mode”
(page 3-20)
*8Track and folder number:
Indicates the track number and the folder
number.
*9Data type indicator:
Indicates the type of data currently playing.
CD player operation
Loading:
Insert a CD into the slot with the label side facing
up. The CD will be guided automatically into the
slot and start playing.
After loading the CD, the CD screen will appear
on the display.
Activation and playing:
The CD mode can be also selected from the
source list with a CD loaded.
“Selecting audio source” (page 3-12)
Skipping tracks:
To skip the tracks, push<
>/<>, touch
[]/[] on the screen, or tilt up/down
<>/<> on the steering wheel repeatedly
until preferred track is selected.
INFO:
Depending on the condition, skipping to the
previous track may require pushing the button or
touching the key twice. Pushing the button or
touching the key once may only restart the
currently track from the beginning.
3. Audio system
3-19
Page 54 of 243
![NISSAN MAXIMA 2017 A36 / 8.G Nissan Connect Navigation Manual 3. Audio system
Changing folders:
To change folders, touch [CD Menu] and touch
[Folder List].
“CD Menu” (page 3-20)
For U.S. and Canada
Turn <TUNE·SCROLL/SOUND> to skip to
different folders. If n NISSAN MAXIMA 2017 A36 / 8.G Nissan Connect Navigation Manual 3. Audio system
Changing folders:
To change folders, touch [CD Menu] and touch
[Folder List].
“CD Menu” (page 3-20)
For U.S. and Canada
Turn <TUNE·SCROLL/SOUND> to skip to
different folders. If n](/manual-img/5/539/w960_539-53.png)
3. Audio system
Changing folders:
To change folders, touch [CD Menu] and touch
[Folder List].
“CD Menu” (page 3-20)
For U.S. and Canada
Turn to skip to
different folders. If no folders are found, tracks
will be skipped.
Fast-forwarding/rewinding:
The following operation methods are available for
rewinding and fast-forwarding the track.
Control panel operation:
. Push and hold <
>/<>.
. Touch and hold [
]/[].
Steering wheel switch operation: . Tilt and hold <
>/<>on the steering
wheel.
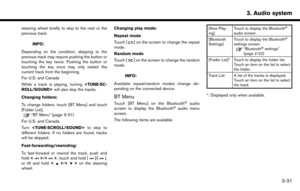
Changing play mode:
Repeat mode
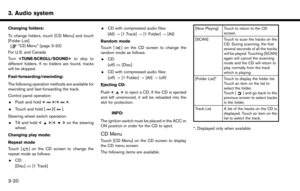
Touch [
] on the CD screen to change the
repeat mode as follows.
. CD:
[Disc] œ[1 Track] .
CD with compressed audio files:
[All] ?[1 Track] ?[1 Folder] ?[All]
Random mode
Touch [
] on the CD screen to change the
random mode as follows.
. CD:
(off) œ[Disc]
. CD with compressed audio files:
(off) ?[1 Folder] ?[All] ?(off)
Ejecting CD:
Push <
>to eject a CD. If the CD is ejected
and left unremoved, it will be reloaded into the
slot for protection.
INFO:
The ignition switch must be placed in the ACC or
ON position in order for the CD to eject.
CD Menu
Touch [CD Menu] on the CD screen to display
the CD menu screen.
The following items are available.
[Now Playing] Touch to return to the CD screen.
[SCAN] Touch to scan the tracks on the CD. During scanning, the first
several seconds of all the tracks
will be played. Touching [SCAN]
again will cancel the scanning
mode and the CD will return to
play normally from the track
which is playing.
[Folder List]* Touch to display the folder list. Touch an item on the list to
select the folder.
Touch [
] and go back to the
previous screen to select tracks
in the folder.
Track List A list of the tracks on the CD is displayed. Touch an item on the
list to select the track.
*: Displayed only when available.
3-20
Page 55 of 243

USB MEMORY DEVICE PLAYER
Connecting USB memory device
WARNING
Do not connect, disconnect or operate
the USB device while driving. Doing so
can be a distraction. If distracted you
could lose control of your vehicle and
cause an accident or serious injury.
CAUTION
.Do not force the USB device into the
USB connection port. Inserting the
USB device tilted or up-side-down
into the port may damage the port.
Make sure that the USB device is
connected correctly into the USB
connection port.
. Do not grab the USB port cover (if so
equipped) when pulling the USB
device out of the port. This could
damage the port and the cover.
. Do not leave the USB cable in a place
where it can be pulled unintention-
ally. Pulling the cable may damage the port.
Refer to your device manufacturer’s owner
information regarding the proper use and care
of the device.
When compatible storage devices are plugged
into the port, compatible audio files on the
storage devices can be played through the
vehicle’s audio system.
For the location of the USB connection port:
“USB (Universal Serial Bus) Connection
Ports and AUX (auxiliary) input jack”
(page 2-7)
INFO:
Only one of the two connected USB devices can
be operated with the voice recognition system.
“Voice recognition settings” (page 7-23)
3. Audio system
3-21
Page 56 of 243
3. Audio system
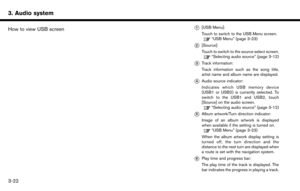
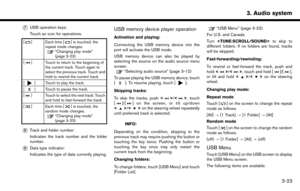
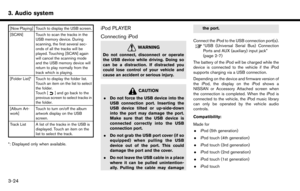
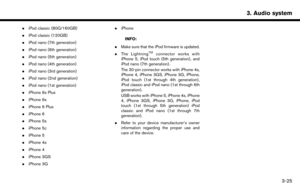
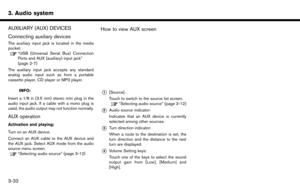
How to view USB screen*1[USB Menu]:
Touch to switch to the USB Menu screen.
“USB Menu” (page 3-23)
*2[Source]:
Touch to switch to the source select screen.
“Selecting audio source” (page 3-12)
*3Track information:
Track information such as the song title,
artist name and album name are displayed.
*4Audio source indicator:
Indicates which USB memory device
(USB1 or USB2) is currently selected. To
switch to the USB1 and USB2, touch
[Source] on the audio screen.
“Selecting audio source” (page 3-12)
*5Album artwork/Turn direction indicator:
Image of an album artwork is displayed
when available if the setting is turned on.
“USB Menu” (page 3-23)
When the album artwork display setting is
turned off, the turn direction and the
distance to the next turn are displayed when
a route is set with the navigation system.
*6Play time and progress bar:
The play time of the track is displayed. The
bar indicates the progress in playing a track.
3-22